How To Clone A Hard Drive: Easy Step-By-Step Guide
Cloning a hard drive copies every file, app, and system setting to another drive exactly.
If you want a smooth upgrade, a fast backup plan, or a way to recover after a drive failure, learning how to clone a hard drive is one of the most useful tech skills you can have. I’ve used disk cloning in real-world setups for SSD upgrades, system migrations, and emergency recovery, and the difference between a clean clone and a messy copy can be huge. This guide walks you through how to clone a hard drive the right way, with simple steps, practical tips, and the mistakes I’ve seen trip people up most often.

What It Means to Clone a Hard Drive
Cloning a hard drive means making an exact copy of one drive onto another. That copy includes the operating system, programs, files, boot records, and often hidden system partitions too.
This is different from just dragging files into a folder. A file copy moves data. A clone creates a drive that can often boot the same way as the original. That is why cloning a hard drive is so popular for SSD upgrades, laptop replacements, and disaster recovery.
In my own work, cloning has saved hours of reinstalling Windows, apps, and settings. Instead of setting up a new machine from scratch, you can often swap the cloned drive in and keep working with almost no downtime.
When You Should Clone a Hard Drive
Cloning a hard drive is a smart move in a few common situations. It is often the fastest path when you want to keep everything exactly as it is.
Some of the most common reasons include:
- Upgrading from an HDD to an SSD for better speed
- Moving to a larger drive because your old one is full
- Replacing a failing drive before it dies
- Making a bootable backup of your current system
- Migrating a computer to new hardware with minimal setup time
I usually recommend cloning when people want continuity. If you do not want to spend a weekend reinstalling software, redoing logins, and chasing old settings, cloning can feel like pressing a copy button on your whole digital life.
What You Need Before You Clone a Hard Drive
Before you start, check a few basics. A smooth clone depends on good prep.
You will need:
- A source drive, which is the drive you want to copy
- A destination drive, which is the new drive that will receive the clone
- Enough space on the destination drive for all used data from the source
- A cloning tool, such as software from your drive maker or a trusted third-party app
- A way to connect the new drive, such as SATA, USB, or an NVMe slot
It also helps to clean up the source drive first. Remove junk files, empty the recycle bin, and uninstall things you no longer use. The smaller and cleaner the source, the faster and easier the clone usually goes.
One lesson I learned the hard way: always double-check which drive is which. I once saw a user nearly overwrite the wrong disk because the labels looked similar. That kind of mistake can be painful, so slow down here.
How to Clone a Hard Drive Step by Step
The exact screens may vary by tool, but the process is usually the same. If you follow these steps carefully, you can clone a hard drive with very little stress.
1. Back up anything important
Even though cloning is meant to be safe, no method is perfect. Back up your most important files first, especially if the source drive is already having problems.
A cloud backup, external drive, or even a quick copy of key folders is enough. Think of this as your safety net before you begin.
2. Install or connect the new drive
If you are cloning to an internal drive, install it in the computer or connect it through the proper port. If you are using an external drive, make sure the cable is secure and the drive is recognized by the system.
If the target is an SSD, check whether it needs to be initialized or left blank. Most cloning tools want a clean destination drive.
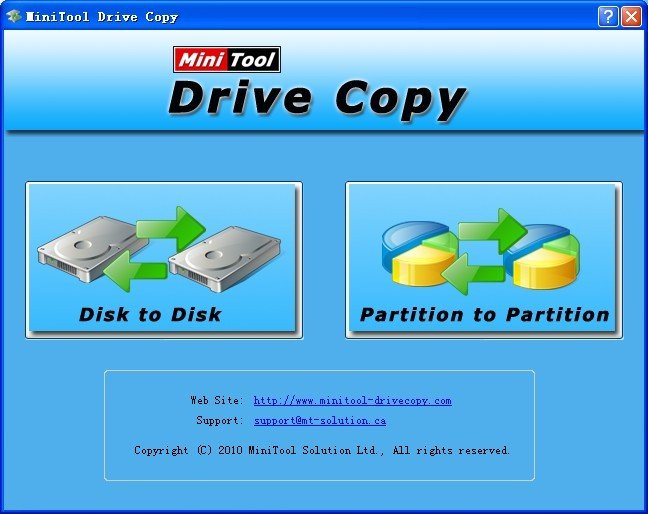
3. Open your cloning software
Many SSD brands offer free cloning tools. There are also general tools that work across different hardware. Pick software that supports your setup, especially if you are moving from MBR to GPT or cloning a larger drive to a smaller SSD.
Look for options like:
- Clone disk
- Migrate OS
- Disk clone
- System clone
4. Select the source and destination drives
This is the most important step. Choose the original drive as the source and the new drive as the destination.
Take your time. Read the drive size, model name, and connection type before clicking continue. If possible, unplug drives you are not using so there is less chance of confusion.
5. Choose the right cloning options
Some tools let you choose between:
- Sector-by-sector clone, which copies everything exactly, including unused sectors
- Smart clone or used-sector clone, which copies only the data in use
- Resize partitions automatically, which helps when the destination drive has a different size
For most people, a smart clone is the better choice. It is faster and uses less space. Sector-by-sector cloning is useful in special cases, but it is usually slower and more demanding.
6. Start the cloning process
Once you confirm the settings, begin the clone. The time it takes depends on how much data is on the drive, the speed of both drives, and whether you are using HDD, SATA SSD, or NVMe SSD.
A full clone can take anywhere from minutes to several hours. During the process, avoid heavy use of the computer if possible. If the drive is failing, try not to stress it more than needed.
7. Verify the clone
After the clone finishes, check that the destination drive contains the right partitions and files. Some tools offer a verification step, which is worth using.
If the new drive is meant to boot the system, test it before erasing or repurposing the old drive. This extra check can save you from a surprise later.
8. Swap the drives or change the boot order
If you cloned to a new internal drive, shut down the computer and replace the old drive if needed. If both drives are still installed, enter BIOS or UEFI and set the cloned drive as the first boot device.
Then restart and see whether the system loads normally. If it does, you are done.
Best Practices for a Clean and Safe Clone
A good clone is not just about clicking the right buttons. Small habits make a big difference.
Use these best practices:
- Update your cloning software before starting
- Check the health of the source drive with a SMART tool
- Keep the laptop or PC plugged in during the clone
- Use a direct connection when possible instead of a flaky USB hub
- Make sure the destination drive is at least as large as the used space on the source drive
- Confirm whether your system boots in BIOS mode or UEFI mode
I also suggest writing down the original partition layout before you begin. That has helped me more than once when I needed to compare the old and new drive after migration. It is like taking a photo of a puzzle before you pack it away.
Common Problems When You Clone a Hard Drive
Even a simple clone can run into trouble. The good news is that most problems are easy to fix if you know what to look for.
Here are some of the most common issues:
- The destination drive is too small for the data being copied
- The cloned drive will not boot because the boot partition was not copied correctly
- The source drive has bad sectors, causing the clone to fail
- The partitions do not fit well on the new SSD
- The computer does not detect the new drive after cloning
If the clone fails because of bad sectors, try a tool that can handle damaged drives. If the system will not boot, check the BIOS boot order first. In some cases, you may need to repair the boot record or rebuild EFI boot files.
This is where patience matters. I have seen people assume the clone “did not work” when the real issue was simply the wrong boot setting.
Cloning to an SSD: What You Should Know
Cloning to an SSD is one of the most common reasons people learn how to clone a hard drive. The process is similar, but SSDs need a little extra care.
A few important SSD tips:
- Make sure the SSD is aligned properly by using a modern cloning tool
- Leave some free space on the SSD for performance
- Do not defragment the SSD after cloning
- Check whether TRIM is enabled in your operating system
- Use the SSD as the boot drive for the biggest speed boost
In real use, moving from an old HDD to an SSD often feels like giving a slow car a new engine. Boot times drop, apps open faster, and the whole system feels lighter.
Cloning vs. Backing Up: What Is the Difference?
People often mix these up, but they serve different goals. A backup is for protecting files. A clone is for replacing a drive or creating a bootable copy.
A backup usually stores files in a compressed or organized way. You restore it later if needed. A clone is a working copy of the whole disk, ready to use if the original fails.
Here is the simple way to think about it:
- Backup means “recover my data”
- Clone means “replace my drive right now”
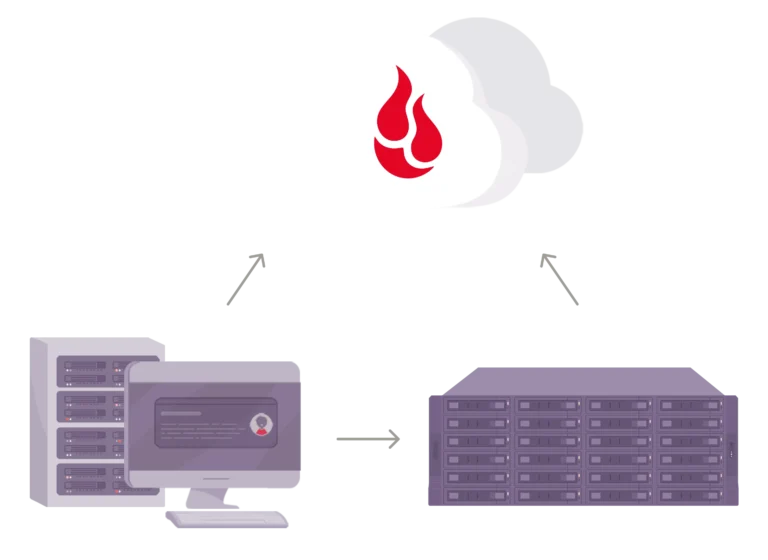
For many users, the best setup is both. Keep regular backups for safety and use cloning when you need a full system move.
Recommended Uses for Drive Cloning Tools
Cloning tools are useful in a lot of everyday tech tasks. They are not just for IT pros.
Common uses include:
- Laptop SSD upgrades
- Desktop storage expansion
- Workstation migrations
- Replacing a drive before warranty ends
- Preparing identical systems for a small office or lab
Some businesses also use cloning to deploy the same setup to multiple computers. That saves time and keeps configurations consistent.
Frequently Asked Questions of How to Clone a Hard Drive
Can I clone a hard drive to a smaller SSD?
Yes, but only if the used data on the source drive fits on the smaller SSD. You may need to shrink partitions or remove extra files first. Many cloning tools can adjust the layout during the process.
Will cloning a hard drive make the new drive bootable?
Usually, yes, if the clone includes the system and boot partitions. If the computer does not boot right away, you may need to change the boot order in BIOS or UEFI. In some cases, a boot repair step is needed.
How long does it take to clone a hard drive?
It depends on how much data you have and how fast the drives are. A small SSD clone may take under an hour, while a large HDD with lots of data can take several hours. Bad sectors or slow USB connections can make it take longer.
Is cloning a hard drive safe?
Yes, cloning is generally safe when you choose the correct source and destination drives. The biggest risk is human error, like selecting the wrong disk. That is why it helps to back up important files first and double-check every selection.
Do I need special software to clone a hard drive?
Yes, cloning usually requires dedicated software because a simple file copy is not enough. Many SSD manufacturers include free tools, and there are also third-party options that work across brands. Choose one that supports your drive type and operating system.
Conclusion
Cloning a hard drive is one of the easiest ways to move a full system, protect your data, or upgrade to a faster drive without starting over. When you prepare carefully, choose the right software, and verify the result, the process is usually smooth and very worth it.
If you are planning an SSD upgrade or replacing a failing disk, now is a great time to act before problems get worse. Review your drive health, pick your cloning tool, and make your move with confidence. If this guide helped, explore more storage tips, share it with someone upgrading a PC, or leave a comment with your own cloning experience.