How To Use A Digital Voice Recorder: Quick Guide
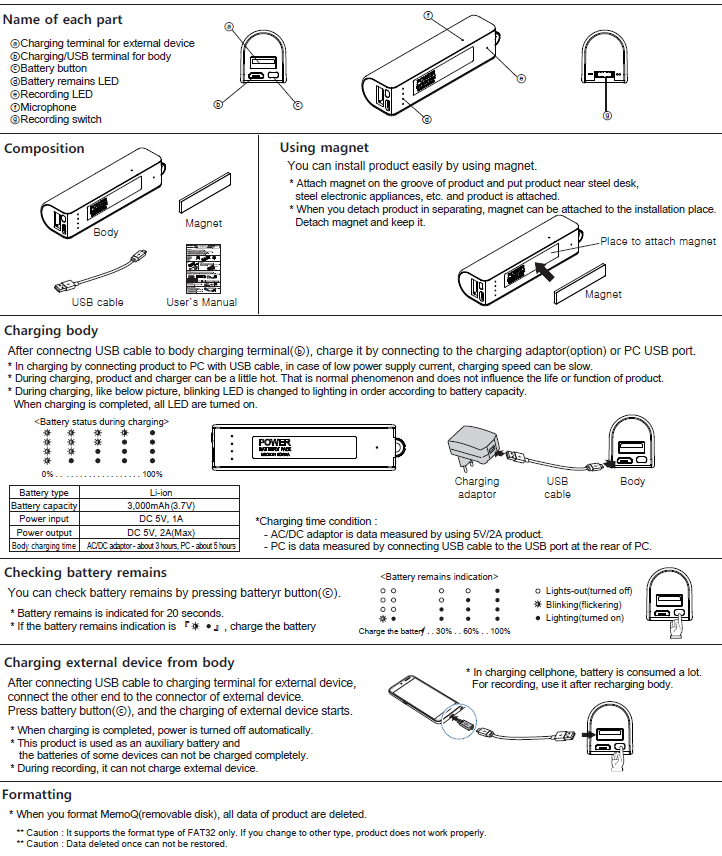
A digital voice recorder lets you capture clear audio fast by recording, pausing, saving, and organizing files easily.
If you want to learn how to use a digital voice recorder well, you are in the right place. I have used these little devices in meetings, interviews, lectures, and quick idea sessions, and the real skill is not just pressing record. It is knowing how to set it up, place it right, and manage the audio so the final file is clean, useful, and easy to find later.

What a Digital Voice Recorder Does
A digital voice recorder is a small device made to capture spoken audio and store it as a digital file. Most models save recordings in formats like MP3 or WAV, which makes them easy to transfer to a computer, phone, or cloud drive.
People use a digital voice recorder for school notes, business meetings, interviews, podcasts, reminders, and live events. In my experience, the biggest advantage is simple: you can focus on the conversation instead of trying to write every word down.
A good recorder is like a pocket notebook for your ears. It listens when you cannot. It remembers details when your brain is full.
How to Use a Digital Voice Recorder Step by Step
Using a digital voice recorder is easier than most people think. The trick is to learn the basic flow once, then repeat it until it feels natural.
Charge the device or insert fresh batteries
A weak battery can ruin a recording at the worst time. Before a meeting or interview, I always check the battery level first.Turn the recorder on
Most devices have a power button or a slide switch. Wait a second for the screen or indicator light to wake up.Check the memory space
If the recorder is full, it may stop recording without warning. I learned this the hard way during an interview, and it is not a mistake you want to repeat.Choose the right recording mode
Many models offer voice, meeting, lecture, or high-quality modes. Use the mode that fits the sound you want to capture.Place the recorder in the best spot
Put it close to the speaker, but not too close to avoid distortion. A table in the center of a small group often works well.Press record
Speak normally once the recording starts. Do not tap the device or shuffle papers near it unless you want extra noise.Pause when needed
Many recorders have a pause feature. Use it during breaks, but remember that some users prefer to stop and start fresh for cleaner file organization.Stop and save the file
Always stop the recording properly before turning the device off. This protects the audio file and keeps it from being lost.Play it back
Check the sound right away if possible. A quick playback can save you from discovering later that the mic was covered or the volume was too low.Transfer and organize your files
Move recordings to your computer or cloud storage and rename them clearly. I like using dates and short labels, such as “Client Call May 12” or “Lecture Notes History.”
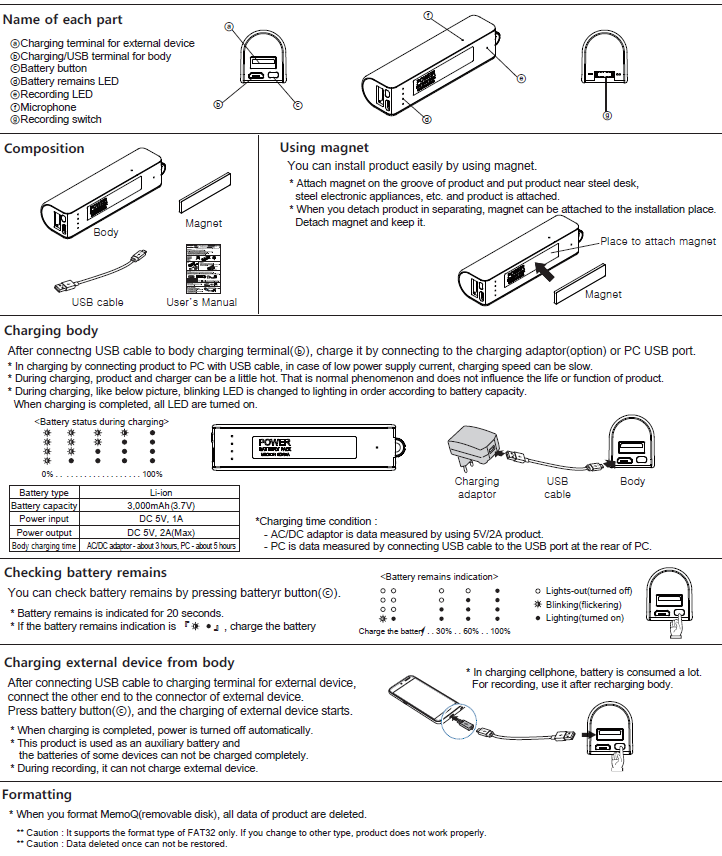
How to Set Up a Digital Voice Recorder for Clear Sound
Good setup matters more than many beginners realize. Even a great digital voice recorder can sound weak if it is used the wrong way.
Start by choosing the right environment. Quiet rooms with less echo are best. Hard walls, open windows, fans, and busy streets can add noise that makes speech harder to hear.
Here are a few setup tips that help a lot:
- Keep the recorder 3 to 6 feet from a single speaker when possible
- Place it on a stable surface to avoid vibration noise
- Aim the microphone toward the sound source
- Avoid covering the mic with a hand, case, or cloth
- Test the sound for 10 to 15 seconds before the real recording starts
For interviews, I like to place the recorder slightly off-center on the table. That helps reduce heavy breathing or popping sounds while still picking up the voice clearly. For lectures, putting the device closer to the speaker usually works better than sitting it in the back of the room.
Best Recording Settings to Use
The best settings depend on what you are recording. A lecture does not need the same setup as a music rehearsal or formal interview.
Common settings you may see include:
- High quality or HQ mode for cleaner speech and more detail
- Long play mode for longer recordings with smaller files
- Voice activation mode to start recording only when sound is detected
- Manual recording mode for more control and fewer missed words
If your recorder has adjustable microphone sensitivity, start with a medium level. Too high, and you may catch too much background noise. Too low, and the speaker may sound distant.
From personal experience, voice activation sounds convenient, but it is not always ideal. It can miss the first word after silence, which is frustrating during interviews or classes. For important recordings, manual mode is usually safer.
How to Get Better Audio Quality
A digital voice recorder is only as good as the sound it captures. The device matters, but your habits matter too.
To improve audio quality:
- Record in a quiet room
- Keep the speaker near the mic
- Ask people to speak one at a time
- Avoid holding the recorder in your hand if you can
- Turn off nearby noise sources like fans or music
- Use external microphones if your recorder supports them
I once recorded a training session in a room with a humming air conditioner. The voice was still usable, but the noise sat in the background the whole time. That taught me a simple lesson: fix the room first, then blame the mic only if you must.
If you need the cleanest possible sound, some recorders support stereo recording or external lapel mics. These are especially useful for interviews, presentations, and content creation.
How to Organize and Manage Your Recordings
A digital voice recorder can become messy fast if you do not stay organized. After a few days, files with names like “REC001” and “REC002” do not mean much.
Use a simple file system:
- Rename files right after saving them
- Add the date and topic
- Create folders by project, class, or client
- Back up important recordings in two places
- Delete test files so they do not clutter the device
A practical system saves time later. If you work with recordings often, this matters as much as the recording itself. I usually keep one folder for active files and one for archived files so nothing gets lost in the shuffle.
Common Mistakes to Avoid
Most problems with a digital voice recorder come from small mistakes. The good news is that they are easy to fix once you know what to watch for.
Avoid these common errors:
- Starting the recording too late
- Forgetting to check battery life
- Leaving too much distance between the mic and speaker
- Recording in a noisy room without testing first
- Forgetting to save the file before turning the device off
- Not checking playback until much later
- Overusing voice activation in important sessions
One of the most common beginner mistakes is assuming the device will “just work” without a test. I always recommend a short test recording, even if the meeting feels routine. That tiny habit can save an entire session.
Benefits of Using a Digital Voice Recorder
There are many reasons people still use a digital voice recorder even in a world full of phones and apps. It is simple, focused, and built for one job.
Main benefits include:
- Better audio focus than many phone microphones
- Long battery life on many models
- Easy file storage and transfer
- Reliable use during classes, meetings, and interviews
- Less distraction than typing on a phone
- Useful playback for review, transcription, and note taking
A digital voice recorder is especially helpful when you need to stay present. Instead of trying to write every detail, you can listen, respond, and record the moment at the same time.
Limitations You Should Know About
Like any tool, a digital voice recorder has limits. Knowing them helps you choose the right device and avoid disappointment.
Here are a few things to keep in mind:
- Built-in microphones can struggle in loud spaces
- Some low-cost models pick up hiss or background noise
- File transfer methods vary by brand
- Battery life and storage space differ widely
- Voice activation can miss words at the start of speech
This is why the best recorder for you depends on your use case. A student, journalist, and musician all need slightly different things. Reading specs before buying can save you a lot of hassle later.

Choosing the Right Digital Voice Recorder
If you are shopping for a recorder, look at features, not just price. The right model depends on how and where you plan to use it.
Important features to compare:
- Microphone quality
- Battery life
- Internal memory and SD card support
- File format options
- USB transfer or wireless transfer
- Noise reduction features
- External microphone input
- Voice activation and playback controls
For everyday use, a simple recorder with strong battery life and clear speech pickup is often enough. For interviews or professional work, look for better mic control, external mic support, and higher quality file formats.
I often tell people to buy for the room they record in, not the dream setup they hope to have later. If your space is noisy, a fancy recorder alone will not solve that problem.
Real-World Uses for a Digital Voice Recorder
A digital voice recorder fits into everyday life in more ways than people expect. It is not just for journalists or students.
Common uses include:
- Recording lectures and class notes
- Capturing meeting minutes
- Saving interview answers
- Drafting podcast ideas
- Recording voice memos
- Logging field notes
- Keeping reminders when driving or walking
I have found it especially useful for voice memos when ideas strike at odd times. A recorder is like a spare memory you can carry in your pocket. It catches the thought before it disappears.
Frequently Asked Questions of How to Use a Digital Voice Recorder
How do I start a recording on a digital voice recorder?
Turn the device on, make sure it has battery and memory, then press the record button. Speak normally once the recording begins and stop it properly when you are done.
Can I use a digital voice recorder for interviews?
Yes, and it is one of the best uses for it. Place the recorder close to the speaker and test the sound first so both voices are clear.
How do I transfer files from a digital voice recorder to my computer?
Most recorders connect by USB and appear like a storage device on your computer. From there, you can copy the files into folders and rename them for easy access.
What is the best way to get clear audio?
Record in a quiet room, keep the microphone close to the speaker, and do a short test before the real session. Small setup changes often make a big difference in sound quality.
Why is my recording hard to hear?
The volume may be low, the mic may be too far away, or the room may have too much background noise. Try moving closer to the speaker and increasing playback volume before assuming the device is faulty.
Conclusion
Learning how to use a digital voice recorder is mostly about building good habits. Once you know how to record, test, save, and organize your files, the device becomes a simple and reliable tool for everyday life.
The best results come from small details: a full battery, the right placement, clean settings, and a quick playback check. If you follow those basics, your recordings will sound clearer and be much easier to use later.
Try these tips the next time you record a meeting, interview, class, or voice memo, and notice how much smoother the process feels. If you found this guide helpful, keep exploring practical audio tips or share your own recorder experience in the comments.

Similar Posts