How To Install A Portable Ssd: Easy Step By Step Guide
Installing a portable SSD is usually as simple as plugging it in, formatting it if needed, and transferring your files.
If you have ever wanted faster file access, safer backups, or a cleaner way to move big videos and photos, learning how to install a portable SSD is a smart next step. I’ve set up plenty of external drives over the years, and the process is usually quick once you know the right order, the common mistakes, and how to match the drive to your device.
What a Portable SSD Is and Why It Matters
A portable SSD is a compact external storage drive that uses flash memory instead of spinning disks. That design makes it faster, quieter, and more durable than many older portable hard drives. It is a great choice for students, creators, gamers, and anyone who needs fast storage on the go.
When people search for how to install a portable SSD, they often mean one of three things: connecting it for the first time, making it work with a computer or console, or setting it up for file transfers and backups. The process is simple, but doing it the right way helps avoid errors, slow speeds, and data loss.
What You Need Before You Install a Portable SSD
Before you install a portable SSD, it helps to check a few basics. I learned this the hard way after once plugging a USB-C drive into a port that only supported slower USB speeds. The drive worked, but it never felt as fast as it should have.
Here is what to gather first:
- A portable SSD
- A compatible cable, usually USB-C to USB-C or USB-C to USB-A
- A device with a free USB port
- Enough free power from the device or hub
- Basic knowledge of whether you need storage for Windows, macOS, PlayStation, Xbox, or another system
Also check the drive’s file system. Some portable SSDs come preformatted for general use, but others may need to be changed before they work well on your device. That step matters because the wrong format can limit file size support or device compatibility.
How to Install a Portable SSD on a Computer
The most common way to install a portable SSD is on a Windows PC or Mac. The physical setup is usually easy, but the software side may take a few extra minutes if the drive is brand new.
Step 1: Connect the Drive
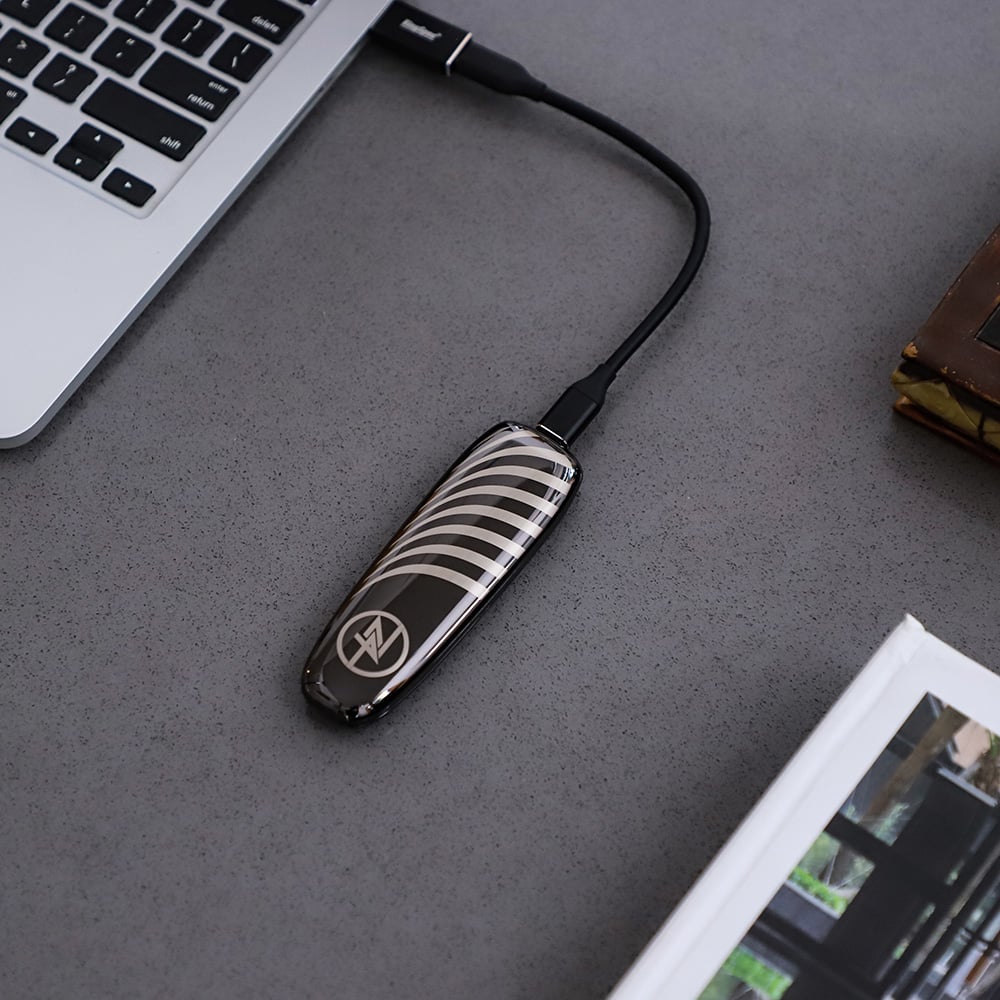
Plug the portable SSD into your computer using the correct cable. If your SSD has a USB-C connector and your laptop has USB-C, use that path first because it usually gives the best speed.
If your laptop only has USB-A ports, use the included adapter or cable. Make sure the connection feels firm. A loose cable can cause random disconnects, which is frustrating when moving large files.
Step 2: Wait for the System to Detect It
Most modern systems detect a portable SSD automatically. You may see a drive letter appear in File Explorer on Windows or on the desktop and Finder on Mac.
If nothing appears right away, do not panic. Try a different port, another cable, or restart the machine. In my experience, cable issues cause more “dead drive” panic than actual drive failure.
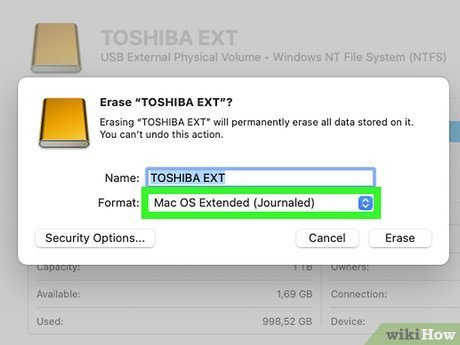
Step 3: Format the Drive if Needed
If the portable SSD is new or not showing the right file system, you may need to format it. This wipes the drive, so only do this if there is no data you need to keep.
Common file systems include:
- exFAT: Best if you want to use the drive on both Windows and Mac
- NTFS: Best for Windows-only use
- APFS: Best for modern Mac-only use
- FAT32: Older format with file size limits, so it is less ideal today
Formatting is often the step that makes the difference between a drive that “works” and one that truly fits your setup. If you plan to move large 4K video files or game backups, exFAT is often the most flexible option.
Step 4: Create a Folder Structure
Once the portable SSD is ready, create folders that match your workflow. Good organization makes the drive much easier to use over time.
A simple structure might look like this:
- Photos
- Videos
- Work Files
- Backups
- Games
- Temporary Transfers
This may sound small, but it saves time later. I always keep a “Backups” folder and a separate “Active Projects” folder so I do not mix finished work with files I still need to edit.
Step 5: Test File Transfers
Move a small test file first. Then try a larger file, such as a video clip or zip archive, to see if the portable SSD is performing well.
If the transfer is unusually slow, the issue could be:
- A low-speed USB port
- A cable that does not support full speeds
- A port shared with other devices
- Background tasks slowing the system down
A quick test now can save a lot of stress later. It is much better to find a speed issue before you rely on the drive for an important deadline.
How to Install a Portable SSD on a Mac
Mac users usually find the process simple, but a few setup details matter. Apple systems are very good at recognizing external storage, yet the file system choice can affect how smoothly the drive works.
If you want cross-platform use, exFAT is often the best choice. If the drive will stay with your Mac only, APFS is a stronger pick for Apple-based workflows.
Follow these steps:
- Connect the portable SSD to your Mac.
- Open Finder and look for the drive under Locations.
- If prompted, choose whether to initialize or format the drive.
- Open Disk Utility if you need to reformat.
- Eject the drive safely before unplugging it.
One lesson I have learned is to always eject first, even if you are in a hurry. Pulling the cable too early can corrupt files, and that risk is not worth the few seconds you save.
How to Install a Portable SSD on Windows
Windows usually recognizes a portable SSD right away, but sometimes the drive needs to be initialized or assigned a letter. This is common with brand-new drives.
To install it on Windows:
- Connect the SSD to a USB port
- Open File Explorer to see if it appears
- If it does not, open Disk Management
- Look for unallocated or offline storage
- Initialize or format the drive if needed
- Assign a drive letter so it shows properly in File Explorer
If you use the SSD for backups, Windows tools like File History or third-party backup apps can point directly to the portable drive. That makes it easy to keep a portable backup copy of your important files.
How to Install a Portable SSD for Gaming Consoles
Portable SSDs are also popular for gaming. Many players use them to store game libraries, screenshots, captures, and media files. Console support depends on the system, storage format, and speed requirements.
For PlayStation or Xbox:
- Check the console’s external storage rules first
- Use a drive with the correct USB standard
- Let the console format the drive if it asks
- Keep the drive connected while using installed games
- Use safe removal rules when moving the drive between systems
One practical tip: if you move a portable SSD between a console and a computer often, keep it in exFAT only if the console supports it for your use case. If not, avoid constant reformatting. That can become a headache very fast.
Common Mistakes to Avoid When Installing a Portable SSD
A portable SSD is easy to install, but small mistakes can create big problems. I have seen people blame the drive when the real issue was a bad cable or the wrong file system.
Watch out for these mistakes:
- Using a cable that only charges and does not transfer data
- Plugging into a slow USB port and expecting full speed
- Forgetting to format a new drive
- Unplugging the drive without ejecting it first
- Using the wrong file system for the device
- Skipping backups before reformatting
These are easy mistakes, but they matter. The drive itself may be fine, yet a small setup error can make it feel broken.
How to Improve Speed and Reliability
If you want the best results after you install a portable SSD, pay attention to speed and reliability. Portable SSDs are fast, but only when the whole chain supports that speed.
Here are simple ways to improve performance:
- Use USB 3.2 or Thunderbolt ports when available
- Keep the original high-quality cable if possible
- Avoid cheap hubs when transferring large files
- Leave some free space on the drive
- Keep firmware updated if the maker offers tools
- Store the drive in a case when traveling
Leaving some free space helps more than people think. SSDs can slow down when they are nearly full, much like a crowded highway during rush hour.
Safety Tips and Data Protection
Installing a portable SSD is only part of the story. Protecting the data on it is just as important. Portable drives are convenient, but they can be lost, stolen, or damaged.
Good safety habits include:
- Keeping a second backup of critical files
- Using encryption if the drive holds private data
- Avoiding extreme heat and moisture
- Never bending or sharply twisting the cable
- Naming the drive clearly so you do not confuse it with other storage
For sensitive work, encryption tools built into Windows, macOS, or the drive’s own software can add a useful layer of protection. That is especially helpful if you carry the drive in a bag, backpack, or laptop sleeve.
When You Need to Reformat a Portable SSD
Sometimes you need to reformat a portable SSD after installation. This may happen if the drive is being moved between devices, used with a console, or repurposed for a new job.
You may need to reformat when:
- The drive is not recognized properly
- You need a different file system
- You want to erase everything before selling the drive
- The storage is corrupted or behaving strangely
Always back up data before formatting. That sounds obvious, but people often skip this step and regret it later. A format is a clean slate, not a repair button for every problem.
Frequently Asked Questions
How do I know if my portable SSD is installed correctly?
You should see the drive in File Explorer on Windows or Finder on Mac. If it opens normally and you can copy files to it, the installation is working.
Do I need software to install a portable SSD?
Usually no. Most portable SSDs work as soon as you connect them, though some brands offer optional tools for encryption, backups, or firmware updates.
Why is my portable SSD not showing up?
The most common reasons are a bad cable, a slow or incompatible port, or a drive that still needs formatting. Try another port first, then check Disk Management on Windows or Disk Utility on Mac.
Can I use one portable SSD on both Mac and Windows?
Yes, but format it as exFAT if you want easy cross-platform use. That format is widely supported and works well for most everyday tasks.
Is a portable SSD better than a portable hard drive?
For speed, durability, and size, yes, a portable SSD is usually better. A hard drive may still make sense if you need very large storage at a lower price, but SSDs are faster and more resistant to shock.
Conclusion
Installing a portable SSD is one of the easiest upgrades you can make, and it pays off fast. Once the drive is connected, formatted correctly, and organized well, you get quicker transfers, smoother backups, and a much simpler way to carry important files.
If you follow the steps above, you will avoid the most common setup mistakes and get better performance from the start. Take a few minutes to choose the right format, test your speeds, and protect your data, and your portable SSD will feel like a tool you can trust every day.
If this guide helped, try the steps on your own drive today, and share your experience or questions in the comments.