Dslr Camera Troubleshooting
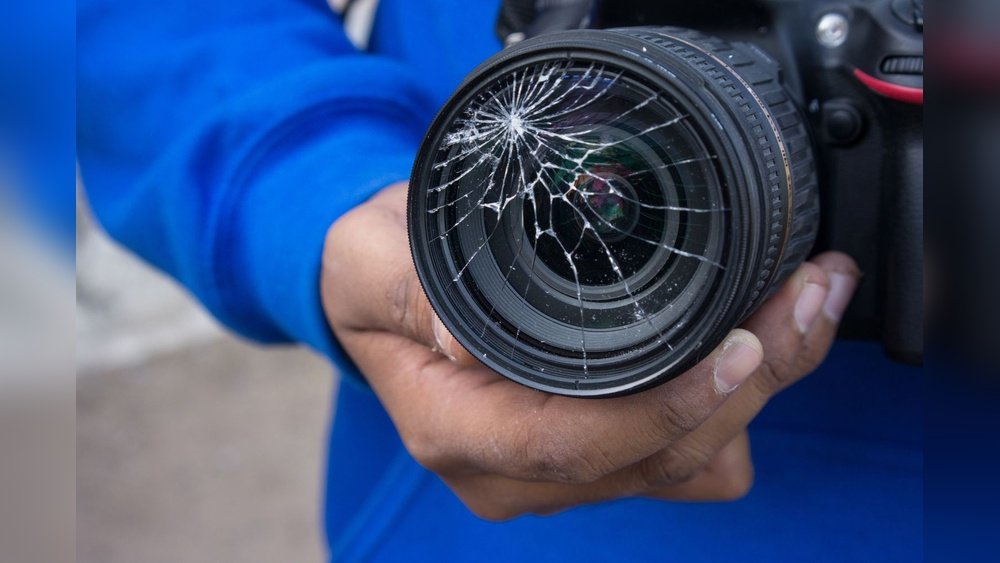
When your DSLR camera fails to perform as expected, it can be a deeply frustrating experience, especially when you’re in the middle of capturing a crucial moment. From unexpected error messages to image quality issues or complete operational failures, these problems can bring your photography to a standstill.
Fortunately, many common DSLR malfunctions are not insurmountable and can often be resolved with a systematic troubleshooting approach. Understanding the potential causes and solutions for these issues can save you time, money, and the heartache of missing out on great shots.
This comprehensive guide will walk you through the most prevalent DSLR camera problems and provide actionable steps to diagnose and fix them. We’ll cover everything from battery and memory card errors to autofocus woes, image artifacts, and connectivity challenges. By systematically addressing each potential issue, you can get your camera back up and running smoothly, ensuring you’re ready for your next photographic adventure.
Key Takeaways
- Battery Issues: Low battery warnings, slow charging, or the camera not turning on are often linked to the battery or its charging system. Always use genuine or reputable third-party batteries and ensure they are fully charged.
- Memory Card Errors: “Card Error,” “No Card,” or corrupted images usually stem from a faulty memory card, improper formatting, or a dirty card slot. Formatting the card in-camera is crucial.
- Autofocus Problems: If your camera struggles to focus, it could be due to incorrect AF settings, a dirty lens or sensor, environmental conditions, or a malfunctioning AF system.
- Image Quality Degradation: Blurry photos, noise, banding, or incorrect colors can be caused by lens issues, sensor dust, incorrect camera settings, or problems with image processing.
- Camera Not Responding: A completely unresponsive camera might require a reset, firmware update, or, in severe cases, professional repair.
- Connectivity Issues: Problems connecting to Wi-Fi, Bluetooth, or a computer can be resolved by checking settings, updating firmware, or trying different cables/connections.
- Lens Malfunctions: If your lens isn’t communicating with the camera, displaying errors, or failing to focus, it might need cleaning, reseating, or repair.
Battery And Power Troubleshooting
The heart of your DSLR’s operation is its power source. When your camera refuses to wake up or behaves erratically, the battery is often the first suspect. Issues ranging from a simple “low battery” warning to a completely dead camera can usually be traced back to the battery itself or the charging process.
Camera Won’t Turn On
This is perhaps the most alarming problem a photographer can face. Several factors can contribute to a DSLR not powering on.
- Check Battery Charge: The most obvious reason is a depleted battery. Ensure the battery is properly inserted into the camera and has been charged for an adequate amount of time. If you are using a charger that came with the camera, confirm it’s functioning correctly. Try charging a different compatible battery if you have one.
- Battery Health: Batteries degrade over time. An old or damaged battery may not hold a charge sufficiently to power the camera. If you’ve had the battery for several years and notice a significant decrease in its runtime, it might be time for a replacement. Look for physical signs of damage like swelling or corrosion.
- Battery Contact Points: Dust, debris, or corrosion on the battery terminals or within the camera’s battery compartment can prevent proper electrical contact. Gently clean both the battery contacts and the internal contacts in the camera using a clean, dry microfiber cloth. For stubborn grime, a cotton swab lightly dampened with isopropyl alcohol can be used, ensuring it dries completely before reinserting the battery.
- Incorrect Battery Insertion: Batteries must be inserted in the correct orientation. Double-check the markings on the battery and the camera to ensure it’s aligned properly. Some cameras have a small latch or lock to secure the battery; ensure this is engaged.
- Faulty Charger: If the battery shows no signs of life after charging, the charger itself might be the issue. Try charging another compatible battery with the same charger, or try charging your battery with a known working charger.
“low Battery” Warning Despite Charging
Sometimes, the camera displays a “low battery” warning even after the battery has been charged. This can be misleading and points to a few potential problems.
- Battery Calibration: Over time, the camera’s internal meter can become desynchronized with the battery’s actual charge level. Most DSLR manufacturers recommend fully charging the battery, using it until the camera shuts off, and then fully recharging it again. This process, known as battery calibration, can sometimes reset the meter and provide more accurate readings.
- Battery Age/Capacity: An aging battery may not be able to reach its full original capacity. Even if it charges, it might not hold enough power to satisfy the camera’s power requirements, leading to premature low battery warnings.
- Third-Party Batteries: While many third-party batteries work well, some may not communicate effectively with the camera’s power management system, leading to inaccurate charge readings. Stick to genuine manufacturer batteries or reputable, specifically tested third-party options.
- Camera Firmware: Occasionally, a firmware bug can cause incorrect battery readings. Check your camera manufacturer’s website for any available firmware updates.
Camera Charges Slowly Or Not At All
Slow charging or a complete failure to charge can be frustrating, especially when you need to get back out shooting.
- Charger and Cable: Ensure you are using the correct charger and cable supplied by the manufacturer or a certified alternative. Damaged cables or incompatible chargers are common culprits. Try a different USB cable if your charger uses one.
- Power Outlet/Source: Test the power outlet or USB port you are using. Try a different outlet or a different USB port on your computer or a wall adapter.
- Battery Temperature: Batteries have optimal temperature ranges for charging. If the battery is excessively hot (e.g., left in direct sunlight) or very cold, the charger may refuse to charge it for safety reasons. Allow the battery to return to room temperature before attempting to charge.
- Battery Lifespan: As batteries age, their ability to accept and hold a charge diminishes. If a battery is several years old, it may simply have reached the end of its usable life.

Credit: blumine.com.br
Memory Card Issues
The memory card is where your digital creations are stored. When it malfunctions, it can lead to data loss, corrupted files, or the camera refusing to save images.
“card Error” Or “no Card” Message
This is a common and often easily resolved issue.
- Reseat the Card: The simplest solution is to turn off your camera, remove the memory card, and then reinsert it firmly. Ensure it clicks into place. Sometimes, a slightly dislodged card is all it takes to cause this error.
- Clean Card Slot and Card: Dust or debris on the memory card’s contacts or inside the camera’s card slot can interfere with the connection. Turn off the camera, remove the card, and gently wipe the gold contacts on the card with a clean, dry microfiber cloth. You can use a can of compressed air to blow out any dust from the camera’s card slot.
- Format the Card (In-Camera): Memory cards need to be formatted to work correctly with a specific camera. Crucially, always format your memory card using the camera itself. Formatting on a computer can sometimes lead to compatibility issues. Warning: Formatting erases all data on the card, so ensure you have backed up any important photos first. Go to your camera’s menu, find the format option, and select it.
- Try a Different Card: The memory card itself might be faulty or corrupted. Test your camera with a different, known-good memory card. If the camera works fine with a new card, then your original card is likely the problem and needs to be replaced.
- Card Compatibility: Ensure the memory card is compatible with your camera model. Check your camera’s manual for supported card types (SD, SDHC, SDXC) and speed classes. Using an unsupported card can lead to errors.
Corrupted Images Or Data Loss
If your images are appearing corrupted, showing bizarre colors, or are missing entirely, the memory card is a prime suspect.
- Avoid Removing Card During Write: Never remove the memory card while the camera is writing data (indicated by an access light on the camera). This is a leading cause of card corruption. Always wait for the light to stop flashing.
- Use High-Quality Cards: Invest in reputable brands of memory cards. Cheap, unbranded cards are more prone to failure and data corruption.
- Regular Formatting: As mentioned, regularly formatting your memory card *in-camera* helps maintain its integrity and prevents file system errors.
- Data Recovery Software: If you’ve lost photos due to corruption, specialized data recovery software (like Recuva or EaseUS Data Recovery Wizard) might be able to retrieve some or all of your lost files. Install this software on your computer and connect the memory card via a card reader.
Slow Write Speeds
If your camera is taking an unusually long time to save photos, especially burst shots or RAW files, it could be due to a slow memory card.
- Check Card Speed Class: Memory cards have speed ratings (e.g., Class 10, U1, U3, V30, V60, V90). Higher numbers indicate faster read/write speeds. For demanding tasks like shooting high-resolution RAW files or 4K video, a faster card is essential. Check your camera manual for recommended card speeds.
- Card Wear: Like batteries, memory cards have a finite lifespan. Their write speeds can degrade over time with heavy use. If a card is old and has been used extensively, it might be time to replace it.
Credit: www.vistaircovision.com
Autofocus (af) System Issues
A reliable autofocus system is critical for sharp images. When your camera struggles to lock focus, it can be a source of significant frustration.
Camera Fails To Focus
If your camera’s AF system consistently hunts (searches back and forth) or fails to acquire focus, consider these points.
- AF Mode and Area Selection: Ensure your camera is set to an appropriate autofocus mode (e.g., Single-shot AF for stationary subjects, Continuous AF for moving subjects) and that the AF area mode is suitable for your shot. If you have a single AF point selected, ensure it’s placed on a contrasty part of your subject.
- Low Light Conditions: Autofocus systems rely on contrast to work. In very dim lighting or when focusing on low-contrast subjects (like a plain wall or a cloudy sky), the AF system may struggle. In such cases, switch to manual focus or use a focus assist beam if your camera has one.
- Subject Contrast and Texture: The AF system needs something to lock onto. If your subject lacks distinct edges or texture, or is a very uniform color, the AF system may have difficulty. Try focusing on a different part of the subject that has more contrast.
- Minimum Focus Distance: Every lens has a minimum focusing distance. If you are too close to your subject, the lens will not be able to achieve focus. Refer to your lens specifications for its minimum focus distance.
- Dirty Lens or Sensor: Smudges on the front or rear elements of your lens, or dust on the camera’s sensor, can interfere with the AF system’s ability to read the image correctly. Clean your lens elements and consider a sensor cleaning if dust is suspected.
- Environmental Factors: Extreme heat or cold can sometimes affect the performance of AF motors.
Backfocus Or Frontfocus Issues
This is when the camera focuses correctly, but the plane of sharpest focus is slightly behind (backfocus) or in front of (frontfocus) your intended subject. This is often a lens-specific calibration issue.
- AF Microadjustment (Fine-tuning): Many higher-end DSLRs offer an “AF Microadjustment” or “AF Fine-tune” feature. This allows you to calibrate the AF system for specific lenses, compensating for minor front or backfocus. You’ll need a focusing chart or a similar test setup to perform this calibration accurately. Consult your camera manual for instructions.
- Lens Performance: This issue is more common with prime lenses or lenses with wide maximum apertures. If the problem occurs with only one specific lens across different lighting conditions and subjects, it’s likely an issue with that lens’s calibration.
- Camera Body Issue: If the front/backfocus problem occurs with *all* your lenses, the issue might be with the camera body’s AF sensor. This would likely require professional service.
Af System Is Noisy Or Slow
Some AF noise is normal, especially with older lens designs. However, excessive noise or significantly slower focusing than usual can indicate a problem.
- Lens Motor: Different lenses have different AF motor technologies (e.g., ultrasonic motors are generally quieter and faster than older gear-based motors). If a specific lens is unusually noisy or slow, it might be experiencing wear or damage to its internal motor.
- Camera Body AF Sensor: If the noise or slowness occurs with multiple lenses, the camera body’s AF sensor module might be experiencing issues.

Credit: foxmeadowhoa.com
Image Quality Problems
Even with perfect focus and exposure, your images might suffer from various quality issues.
Blurry Images (not Due To Focus)
If your photos are consistently blurry, and you’ve ruled out AF issues, consider these:
- Camera Shake: This is caused by slight movements of the camera during the exposure. It’s more common with longer focal lengths and slower shutter speeds.
- Use a Faster Shutter Speed: A general rule of thumb is to use a shutter speed at least as fast as the reciprocal of your focal length (e.g., 1/50s for a 50mm lens). Increase this further if you have shaky hands.
- Image Stabilization (IS/VR): If your lens or camera body has image stabilization, ensure it’s turned on.
- Use a Tripod: For critical sharpness, especially in low light or with slow shutter speeds, a tripod is essential.
- Lens Issues:
- Dirty Lens Elements: Smudges on the front or rear lens elements can soften images. Clean them carefully.
- Lens Knocked Out of Alignment: If a lens has been dropped or subjected to impact, its internal elements might be slightly misaligned, leading to softness even when focused correctly.
- Incorrect Aperture: Shooting with a very wide aperture (e.g., f/1.4) results in a shallow depth of field, meaning only a very narrow plane is in focus. Ensure your aperture setting matches the desired depth of field. Conversely, shooting at extremely small apertures (e.g., f/22) can lead to diffraction, which softens the image.
Sensor Dust Spots
Visible dark spots or smudges that appear in the same location on every photo, especially noticeable at smaller apertures (f/11 and above) against a bright, uniform background (like a sky or a wall), are usually caused by dust on the camera’s image sensor.
- In-Camera Sensor Cleaning: Many DSLRs have an automatic sensor cleaning function that vibrates the sensor to dislodge dust. Run this function.
- Blower Brush: A specialized rocket blower (a manual air blower with a brush tip) can be effective for dislodging loose dust. With the camera turned off and the battery removed, hold the camera with the lens mount facing down and puff air into the sensor chamber.
- Sensor Cleaning Kit: For stubborn dust, a wet cleaning kit (using specialized swabs and cleaning fluid) can be used. Warning: Sensor cleaning is delicate. If you are not comfortable performing it, seek professional cleaning services. Many camera stores offer this.
Image Noise (graininess)
Digital noise appears as speckles or graininess in your images, particularly in shadow areas or at high ISO settings.
- High ISO Settings: Noise is directly related to ISO sensitivity. The higher the ISO, the more noise you will see. Shoot at the lowest ISO possible for the lighting conditions.
- Underexposure: Images that are significantly underexposed and then brightened in post-processing will exhibit more noise than properly exposed images. Aim for correct exposure in-camera.
- Long Exposures: Very long exposures, even at low ISOs, can generate heat noise. Many cameras have a “Long Exposure Noise Reduction” feature that takes a second “dark frame” exposure to subtract noise. This doubles the exposure time.
- In-Camera Noise Reduction: DSLRs often have settings for High ISO Noise Reduction and Long Exposure Noise Reduction. Experiment with these settings, but be aware that aggressive noise reduction can sometimes lead to a loss of fine detail.
Banding And Posterization
These artifacts appear as distinct steps or bands of color instead of smooth gradations, often seen in skies or smooth gradients.
- Bit Depth: This issue is more common when saving images in lower bit-depth formats (like 8-bit JPEGs) and pushing them significantly in post-processing. Shooting in RAW format captures more color information (typically 12-14 bit), providing more latitude for editing without introducing banding.
- Color Space: Ensure you are working in an appropriate color space (e.g., Adobe RGB or sRGB for web/print, ProPhoto RGB for extensive editing).
Camera Not Responding Or Freezing
When your DSLR becomes completely unresponsive, buttons don’t work, the screen is frozen, or it won’t power on or off properly, it’s time for a more drastic troubleshooting approach.
Camera Freezes Or Becomes Unresponsive
- Remove Battery: The most immediate step is to remove the camera battery for 30 seconds to a minute. This acts as a hard reset, clearing temporary memory glitches. Reinsert the battery and try powering on again.
- Remove Memory Card: Sometimes, a faulty memory card can cause the camera to freeze. Remove the memory card and try powering on the camera without it. If it powers up, the card is likely the culprit.
- Check Lens Communication: Ensure the lens is properly attached and communicating with the camera body. Sometimes, a lens communication error can cause the camera to hang. Remove and reattach the lens.
Camera Won’t Turn Off
If the camera freezes and won’t power down normally, remove the battery as described above.
Camera Displays Random Errors
If you see unusual or cryptic error messages that aren’t covered by specific issues (like “Err” followed by a number), try these steps:
- Consult the Manual: Your camera’s user manual is the best resource for understanding specific error codes. Look up the error code in the index or troubleshooting section.
- Firmware Update: Outdated firmware can sometimes cause unexpected bugs and errors. Visit your camera manufacturer’s official website, find your camera model, and check for the latest firmware version. Follow the instructions carefully to update your camera’s firmware. Warning: Do not turn off the camera or remove the battery during a firmware update, as this can permanently damage the camera.
- Reset Camera Settings: Most DSLRs have an option to reset all settings to their factory defaults. This can resolve issues caused by incorrect or conflicting custom settings. Find this option in the camera’s menu system. Note that this will erase any custom profiles or personalized settings you’ve made.
Camera Requires Professional Service
If none of the above steps resolve the issue, and especially if the camera exhibits physical damage or repeated, unresolvable errors, it’s likely time to contact the manufacturer’s customer support or a qualified camera repair technician.
Lens Troubleshooting
Lenses are complex optical instruments, and issues with them can manifest in various ways, often affecting autofocus or image quality.
Lens Not Communicating With Camera
You might see an “F-code error” or a message indicating the lens is not recognized.
- Check Lens Mount Contacts: Both the lens mount on the camera body and the rear mount of the lens have electronic contacts that facilitate communication. Ensure these are clean and free of debris. Gently wipe them with a clean microfiber cloth.
- Reseat the Lens: Remove the lens from the camera body and then reattach it, ensuring it clicks securely into place. Make sure the alignment indicator matches correctly.
- Try Another Lens/Body: If possible, test the suspect lens on a different compatible camera body, or try a different lens on your camera body. This helps determine if the problem lies with the lens or the camera.
- Aperture Control: If the camera displays an aperture of “00” or cannot control the aperture, it strongly suggests a communication breakdown between the lens and the camera body, often due to dirty contacts or a faulty lens.
Manual Focus Ring Issues
The manual focus ring on a lens can become stiff, loose, or unresponsive.
- Stiffness/Looseness: This can be due to wear and tear, or internal lubrication drying out. Minor stiffness might improve with use, but significant looseness or grinding can indicate internal damage requiring repair.
- Non-Linear Focusing: Some modern lenses have “focus-by-wire” systems where turning the focus ring sends an electronic signal to a motor. If this system fails, manual focus may not work at all or may be erratic.
Zoom Ring Issues
Similar to manual focus rings, zoom rings can also develop problems.
- Stiff Zooming: Can be caused by dirt ingress or lubricant issues.
- Zoom Creep: If the zoom ring becomes loose, the lens can extend unintentionally due to gravity, especially when pointed downwards. This is common in older or heavily used zoom lenses. Some lenses have a “zoom lock” switch to prevent this.
Connectivity And Software Issues
Modern DSLRs often come with Wi-Fi, Bluetooth, or USB connectivity for transferring images or remote control. Problems in these areas can be resolved by checking settings and software.
Wi-fi/bluetooth Connection Problems
- Check Camera Settings: Ensure Wi-Fi or Bluetooth is enabled on your camera and that you’ve correctly selected the network (SSID) and entered the password if applicable.
- Check Mobile Device Settings: Ensure Wi-Fi/Bluetooth is enabled on your smartphone or tablet and that you’ve downloaded and installed the correct companion app from the manufacturer.
- Proximity: Wi-Fi and Bluetooth connections have limited range. Ensure your camera and mobile device are close to each other.
- Restart Devices: Turn off Wi-Fi/Bluetooth on both the camera and your mobile device, then turn them back on. Also, try restarting both devices.
- Re-pair Devices: Delete the existing connection profile from both your camera and your mobile device, and then go through the pairing process again.
- Firmware Updates: As with camera functions, firmware updates for your camera can often resolve connectivity bugs.
Usb Transfer Issues
- Use the Right Cable: Always use a high-quality USB cable, preferably the one supplied with your camera or a reputable alternative. Damaged or low-quality cables are a frequent cause of transfer failures.
- Different USB Port: Try connecting to a different USB port on your computer. Some ports might provide more power or have better data integrity.
- Install Drivers: Your computer may require specific drivers for your DSLR model to be recognized. These are usually found on the manufacturer’s website.
- Camera Mode: Ensure your camera is set to the correct USB connection mode (e.g., “Mass Storage,” “PTP,” or “Computer”). Consult your camera manual.
- Card Reader: For faster and more reliable transfers, using an external USB card reader is often preferable to connecting the camera directly via USB.
General Maintenance And Prevention
Proactive maintenance can prevent many common troubleshooting scenarios.
Cleaning Your Gear
- Body: Wipe down the camera body regularly with a dry microfiber cloth. For stubborn marks, use a cloth slightly dampened with water or a dedicated camera body cleaner.
- Lens: Use a lens brush to remove loose dust before wiping. Use a microfiber lens cloth and lens cleaning fluid for smudges. Always clean from the center outwards.
- Viewfinder: Keep the viewfinder eyepiece clean.
Firmware Updates
Periodically check your camera manufacturer’s website for firmware updates. These often include bug fixes, performance improvements, and new features.
Battery Care
- Store batteries in a cool, dry place.
- Avoid extreme temperatures.
- Don’t leave batteries fully discharged for extended periods.
- Use genuine or reputable third-party batteries.
Memory Card Care
- Format cards in-camera regularly.
- Avoid removing cards during write operations.
- Store cards in protective cases.
- Replace old or heavily used cards.
Frequently Asked Questions
Why Does My Camera Say “err” And Stop Working?
This is a generic error message that can indicate a wide range of issues, from a communication problem with the lens or memory card to a more serious internal malfunction. The first steps are to remove and reinsert the lens and memory card, then try powering the camera off and on.
Consult your camera’s manual for specific error codes if they are displayed. If the problem persists, a firmware update or professional service may be required.
How Do I Clean Dust Off My Dslr’s Sensor?
Sensor cleaning requires care. You can try using an in-camera cleaning function or a manual blower. For stubborn dust, a specialized wet cleaning kit with swabs and fluid can be used, but this carries a risk. If you’re uncomfortable doing it yourself, professional sensor cleaning services are available at most camera stores.
Always ensure the camera is off and the battery is removed before attempting any manual cleaning.
My Photos Are Coming Out Blurry, But My Focus Seems Okay. What Could Be Wrong?
If autofocus is confirmed to be working, blurry images can often be attributed to camera shake, especially at slower shutter speeds or longer focal lengths. Using a faster shutter speed, activating image stabilization (IS/VR), or shooting with a tripod can resolve this. Also, check for smudges on your lens elements, as these can soften image sharpness.
Can I Use Third-party Batteries And Memory Cards, Or Should I Stick To The Manufacturer’s Brand?
While third-party batteries and memory cards can be significantly cheaper, they can sometimes cause compatibility or performance issues. Genuine manufacturer batteries are designed to communicate perfectly with your camera’s power system. For memory cards, opt for reputable brands (like SanDisk, Lexar, or Kingston) and ensure they meet your camera’s speed and type requirements (SDHC/SDXC, UHS-I/UHS-II).
Using unbranded or counterfeit cards is highly discouraged.
My Camera’s Autofocus Is Hunting Excessively. What Can I Do?
Excessive AF hunting usually occurs in low light, on low-contrast subjects, or when the camera is too close to the subject (exceeding the lens’s minimum focus distance). Try focusing on a subject with more contrast, ensure adequate lighting, or switch to manual focus.
If the problem persists in good conditions with all lenses, check your camera’s AF settings, ensure the lens contacts are clean, or consider using the AF Microadjustment feature if available.
When your DSLR camera encounters issues, it’s easy to feel overwhelmed. However, by approaching troubleshooting systematically, you can often identify and resolve the problem yourself. From ensuring your battery is charged and your memory card is properly formatted to cleaning your lens and updating firmware, many common glitches are preventable or fixable with basic maintenance and a methodical approach.
Remember to consult your camera’s manual for specific error codes and procedures. If problems persist or involve complex internal components, don’t hesitate to seek professional assistance from a qualified technician to keep your gear in optimal condition for capturing those perfect shots.

Similar Posts

































[…] guide on common focus issues can help you understand what to […]