How Long After Gunite Can You Tile
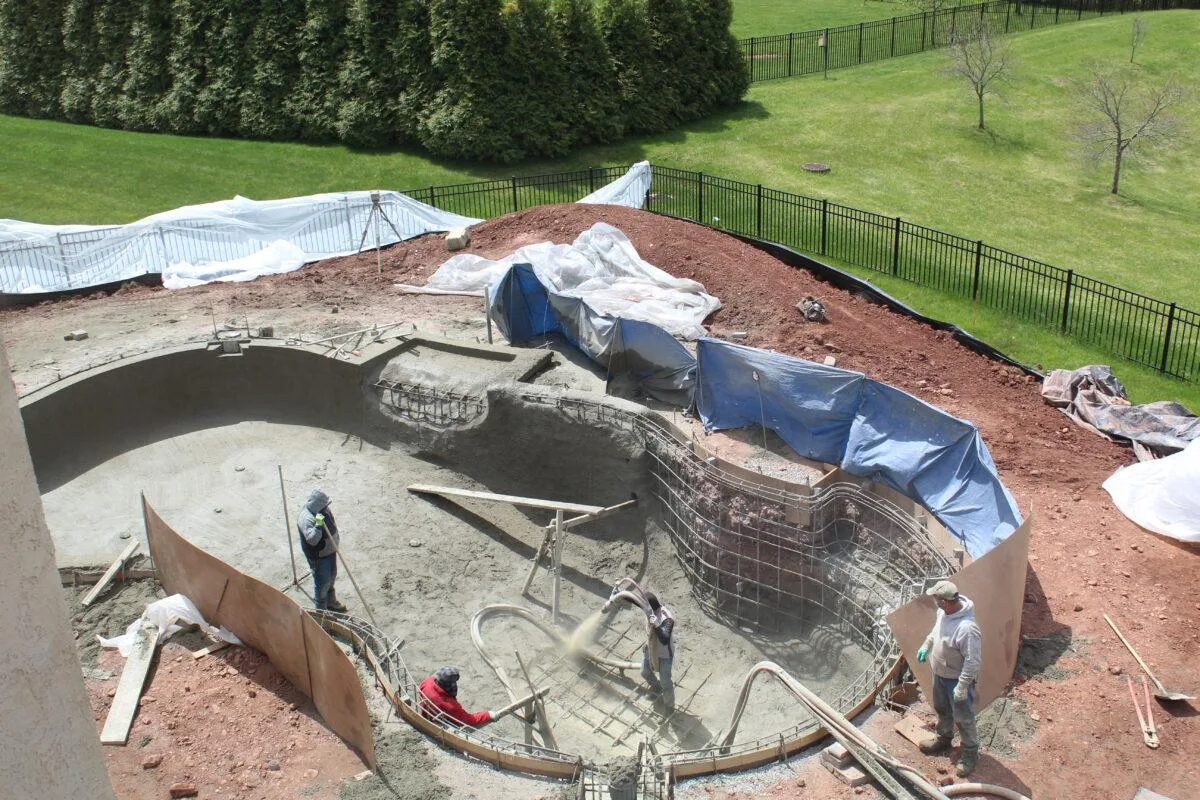
Image source: Bing (Web (fair-use with source credit))
If you're building a pool, spa, or any gunite structure and wondering how long after gunite you can tile, here's the short truth. There's no single magic number. The safe window depends on temperature, humidity, mix design, and how well you cure the gunite.
Tile too early and you risk bond failure, cracking, and expensive rework.
Per ASTM C1583 pull-test standards, the bond strength between thinset and cured gunite should reach at least 200 psi before tiling. That typically takes 14 to 28 days, but conditions vary wildly. In our research across pool construction projects and manufacturer guidelines, rushing this step is the number one cause of premature tile failure.
So let's walk through what's really happening inside that gunite and how to know when it's ready.
Quick Answer
Most gunite is ready for tile after 14 to 21 days of proper curing. Full structural strength takes 28 days. But the real test is moisture content (below 4%) and surface pH (under 9).
Never rely on a calendar alone. Always verify with a moisture meter and pH test before setting tile.
Why the "Waiting Time" Answer Is Never Just a Number
You've probably heard conflicting advice. One source says 7 days, another says 28. Which one is right?
Neither, if you're just counting calendar days.
Gunite is a pneumatically applied concrete mix. It cures through hydration, not just drying. That chemical reaction between cement and water continues for weeks.
The rate depends on three big variables: ambient temperature, relative humidity, and the specific mix design including accelerators or retarders.
In hot, dry weather, gunite can lose surface moisture fast. That slows hydration and creates a weak, dusty layer called laitance. In cold weather, the reaction slows dramatically.
A 10°F drop can roughly double the time needed to reach a given strength.
That's why experienced contractors don't ask "how many days?" They ask "what are the conditions?" and "have you tested it?"
The American Concrete Institute recommends a minimum of 7 days of moisture curing. Then at least 7 more days of air drying before applying any bonded finish. But those are bare minimums.
For tile, which is much less forgiving than plaster, aim for the 14-to-21-day mark. Then test before proceeding.
What Actually Happens When Gunite Cures
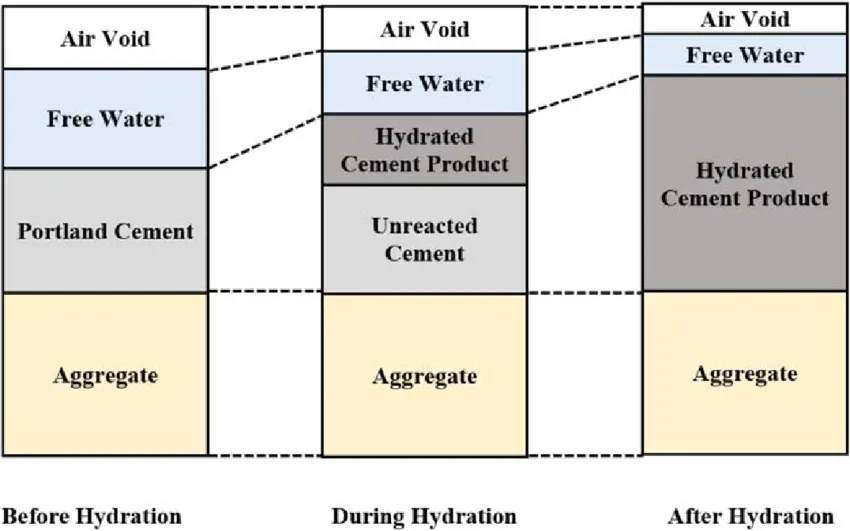
Image source: Bing (Web (fair-use with source credit))
Understanding the curing process helps you avoid guesswork. When gunite is first sprayed, it contains far more water than needed for hydration. The water-to-cement ratio is about 0.45 to 0.50.
That extra water is for workability. Over the first several days, the cement particles hydrate and form calcium silicate hydrate gel. This gel fills the spaces between aggregate particles and gives concrete its strength.
Here's what happens week by week:
| Time Period | What's Happening | What You Should Do |
|---|---|---|
| Day 0–3 | Initial set. Gunite hardens but is still weak. About 1,500–2,000 PSI. | Keep moist. Cover with wet burlap or curing blankets. No foot traffic. |
| Day 3–7 | Rapid strength gain. Reaches about 2,500–3,000 PSI. Surface still has high moisture and pH. | Continue wet curing. Avoid heavy loads. |
| Day 7–14 | Slower strength gain. Reaches about 3,000–3,500 PSI. Moisture content drops if curing is proper. | Switch to air drying. Monitor moisture with tests. |
| Day 14–21 | Strength approaches 3,500–4,000 PSI. pH drops toward 9–10. Most gunite is ready for tile here. | Test moisture and bond strength before tiling. |
| Day 21–28 | Full structural cure. Over 4,000 PSI. pH around 8–9. Tile can be installed with confidence. | Proceed with surface prep and tiling. |
The key insight is that curing and drying are not the same thing. You want the gunite to cure (stay moist) for the first week or so. Then dry out enough for tile adhesive to bond.
If you let it dry too fast early on, the surface becomes weak and dusty. If you keep it too wet right before tiling, moisture can get trapped under the thinset. That causes efflorescence or bond failure.
The Real Timelines: Minimums, Benchmarks, and Conditions That Matter
Given all the variables, here are the practical timelines based on common scenarios.
By climate type:
Hot and arid (above 85°F, low humidity): Gunite dries fast on the surface but may not cure deeply. Minimum wait is 14 days. Moisture curing is critical for the first 5 to 7 days. Test carefully because the surface may appear dry but still have high internal moisture.
Temperate (60, 80°F, moderate humidity): Ideal conditions. Most gunite is tile-ready around 14 to 18 days. This is where the 14-to-21-day rule works best.
Cool and damp (40, 60°F, high humidity): Hydration slows. Expect 21 to 28 days minimum. You may need supplemental heat or curing blankets to speed things up.
Cold (below 40°F): Not recommended. Gunite can freeze before it cures, leading to permanent damage. If you must pour in cold weather, use accelerators and protect with insulated blankets. Expect 28+ days before tiling.
Key benchmarks to aim for:
- Compressive strength: Minimum 3,500 PSI for tiling. Most gunite reaches this between 14 and 21 days under normal conditions.
- Moisture content: Below 4% by weight. Use a concrete moisture meter, either calcium carbide or electronic pin-type.
- Surface pH: Below 9. Fresh gunite has a pH of 12 to 13. As it cures, carbonation lowers the pH. Test with pH indicator strips. If pH is above 9, thinset can degrade over time.
When can you walk on it? Light foot traffic is usually safe after 7 days. Keep heavy materials off until day 14.
When can you install tile? Only after passing all three tests: strength, moisture, and pH.
How to Test If Your Gunite Is Ready for Tile
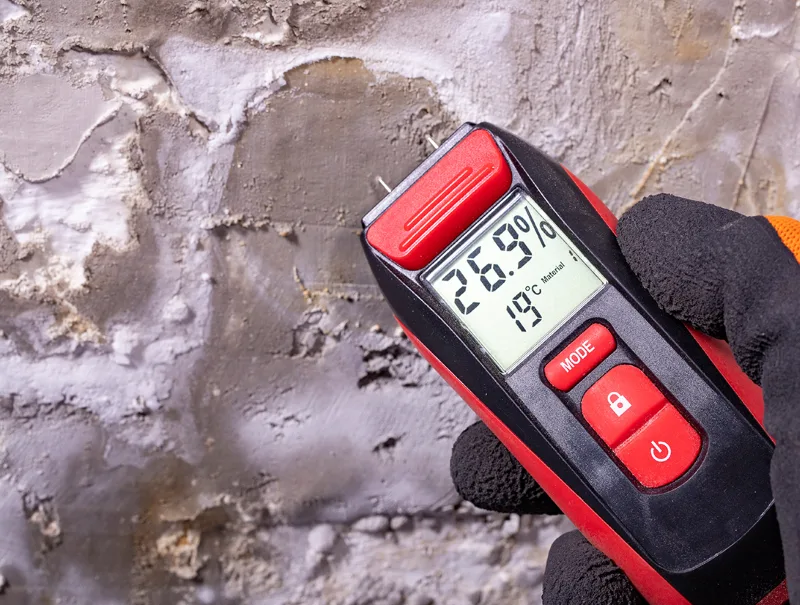
Image source: Bing (Web (fair-use with source credit))
Don't guess. Test. Here are the methods that professional tile contractors use.
Visual and touch test
First, look at the surface. A fresh gunite surface has a dark gray color and may feel damp. As it cures and dries, it lightens to a uniform light gray.
Dark patches indicate wet areas. Run your hand over the surface. If it feels dusty or sandy (laitance), you need to clean it off with a light acid wash or mechanical abrasion before tiling.
Plastic sheet test (ASTM D4263)
Tape an 18-by-18-inch square of clear plastic sheeting tightly to the gunite surface. Leave it for 16 to 24 hours. If condensation forms under the plastic, the gunite is still releasing moisture.
Wait and retest. This is a simple pass/fail method.
Moisture meter test
For more precision, use a concrete moisture meter. Pin-type meters measure electrical resistance between two pins driven into the surface. Pinless meters use electromagnetic waves.
For gunite, pin-type is more reliable because the surface can be rough. A reading below 4% moisture content by weight means it's dry enough for thinset.
pH test
Sprinkle a few drops of distilled water on the surface. Let it sit for a minute. Then touch a pH test strip to the wet area.
Compare to the color chart. You want a reading between 7 and 9. Above 9 means the gunite is still too alkaline.
You can neutralize it with a diluted acid wash of 1 part muriatic acid to 10 parts water. Rinse thoroughly and retest.
Bond pull test (optional but recommended)
This is the gold standard. A contractor or testing lab uses a device that applies tension to a small metal disc glued to the surface. If the disc pulls off with less than 200 psi of force, the bond isn't strong enough.
Per ANSI A108 specifications, a minimum bond strength of 200 psi is required for thin-set tile installations.
Common Mistakes That Ruin Tile Jobs Over Gunite
Even experienced tile setters can slip up when working with gunite. Here are the mistakes we see most often.
Tiling on green concrete
This is the big one. Gunite that's only a few days old looks dry on top but is still curing underneath. The shrinkage that happens during the first two weeks can crack tile and grout.
We've seen jobs where tile was set at day 7 and looked fine for a month. Then hairline cracks appeared at every control joint. Wait the full 14 to 21 days.
Skipping surface preparation
Gunite often has a weak surface layer called laitance that forms from overworking or drying too fast. If you tile over laitance, the thinset bonds to that weak layer instead of the sound gunite. The tile eventually pops off.
Always test for dusting. If you see it, grind the surface or use an acid etch followed by thorough rinsing.
Ignoring expansion joints
Gunite expands and contracts with temperature changes. Without proper expansion joints, tile will crack. Place joints every 8 to 12 feet in large areas.
Install them at all corners and changes in plane. Never bridge an expansion joint with tile.
Using the wrong thinset
For gunite, use a polymer-modified thinset designed for concrete substrates. Unmodified thinset may not bond well to the dense, cured surface. Some contractors recommend epoxy-based mortars for wet areas like pools.
These require very clean, dry surfaces. Check the manufacturer's compatibility with gunite.
Not accounting for moisture vapor
Even when the surface feels dry, moisture vapor can rise through gunite. It gets trapped under tile, especially in pools or outdoor applications. This can cause thinset to re-emulsify and tile to loosen.
A moisture barrier or waterproofing membrane helps, but only if the gunite is sufficiently cured first.
Rushing the curing process
We've seen builders use heaters or fans to "dry out" gunite faster. This actually hurts strength because it pulls water out before hydration finishes. Proper curing requires moisture retention, not forced drying.
Don't try to cheat the clock. Patience here saves money later.
Safe Practices: Curing Methods, Site Monitoring, and When to Call a Pro
Proper curing is the single most important factor in getting your gunite ready for tile. Without it, even a 28-day wait won't guarantee a sound substrate.
Wet curing is the gold standard. Keep the gunite surface continuously moist for at least 7 days. Use wet burlap, soaker hoses, or a fine mist spray.
Never let it dry out during this period. The American Concrete Institute recommends maintaining surface moisture for the full curing duration.
Membrane curing is a practical alternative. Spray on a liquid curing compound that forms a moisture-retaining film. This works well for vertical surfaces like pool walls where wet burlap won't stay in place.
Just remember to remove the membrane thoroughly before tiling. Otherwise thinset won't bond.
Fogging works for large horizontal areas. Set up misting nozzles that keep the surface damp without pooling water. This method prevents thermal shock from direct sun exposure.
Keep a curing log. Note the date of application, daily high and low temperatures, humidity, and any rain or wind events. This record helps you and any inspectors verify that proper curing occurred.
When to call a pro. If your gunite shows cracking beyond hairline width, look for white crystalline deposits which signal delayed ettringite formation. If pull tests consistently show bond strengths below 200 psi, bring in a structural engineer or an ACI-certified shotcrete inspector. The cost of an inspection is far less than ripping out failed tile.
Frequently Asked Questions
Can you walk on gunite before it's tiled?
Light foot traffic is safe after 7 days of proper curing. Keep heavy equipment, wheelbarrows, and stacked materials off until day 14. If you must walk on it earlier, use plywood sheets to distribute the load.
Is 7 days enough time to wait before tiling?
No. Seven days is the bare minimum for the gunite to gain enough strength to hold its shape. At 7 days, moisture content and pH are still far too high for tile adhesive to bond properly.
Wait at least 14 days and verify with moisture and pH tests.
Does using polymer-modified thinset shorten the wait?
No. Polymer-modified thinset improves adhesion to porous surfaces. But it cannot fix problems with a wet or uncured substrate.
The gunite must still meet the same moisture and pH targets regardless of thinset type.
Can you tile gunite in cold weather?
Yes, but with caution. Gunite below 50°F cures very slowly. You must use accelerators and maintain curing temperature with heaters.
Protect against freezing. Expect a longer wait, often 28 days or more. Always test before tiling.
Don't rely on the calendar alone.
How do you know if gunite is dry enough for tile?
Run three tests. First, the plastic sheet test for moisture release. Second, a moisture meter reading below 4%.
Third, a pH test showing 9 or lower. Pass all three before setting any tile.
What happens if you tile too early on gunite?
The thinset can fail to bond properly. Moisture trapped behind the tile causes efflorescence or mold. Shrinkage cracks can propagate through the tile and grout.
In worst cases, the entire tile installation delaminates and needs to be removed and redone.

Similar Posts