How to Troubleshoot an Underwater Camera
If you have ever surfaced from a dive to find your camera fogged up, refusing to power on, or worse, with water inside the housing, you know the panic. The good news is that most problems follow a predictable pattern. Understanding how to troubleshoot an underwater camera can save you a costly repair or replacement.
The key is to identify the exact symptom before you touch anything.
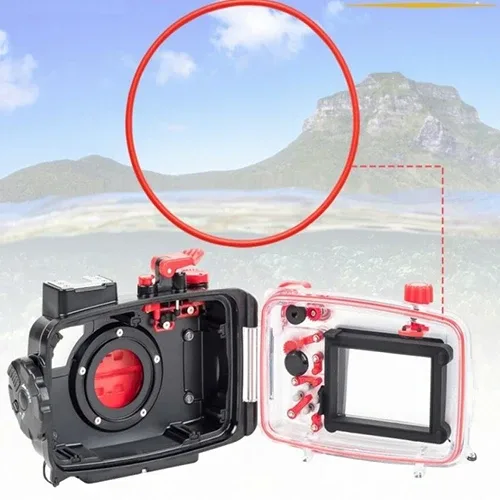
As of 2026, most consumer underwater cameras are rated to IP68, meaning they can withstand submersion to 1.5 meters for 30 minutes. Dive housings push that far deeper, but only with proper seal maintenance. Manufacturer specifications confirm that a single grain of sand or a dried-out O-ring can break that seal.
That is why troubleshooting starts with the symptom.
Quick Answer
Troubleshooting an underwater camera starts with symptom identification. If water is inside, remove the battery and camera immediately. If the lens is fogged, condensation is the likely culprit.
Open the housing and dry it in a warm, dry place. If the camera will not power on, check the battery contacts for corrosion.
Image source: Web (Bing) / lindeseals.com (Web image (fair-use with source credit))
Is Your Underwater Camera Leaking, Fogged, or Dead?
The first step is to figure out which problem you actually have. Water inside the housing, a fogged lens, no power, and stuck buttons all require different fixes. Getting the diagnosis wrong wastes time and can make things worse.
Symptom Quick Reference
| Symptom | Likely Cause | First Action |
|---|---|---|
| Water droplets inside housing | Failed O-ring or cracked housing | Remove battery and camera immediately |
| Fogged lens, no droplets | Condensation from temperature change | Open housing, dry with desiccant |
| Camera won't turn on | Dead battery or corroded contacts | Check battery voltage and clean contacts |
| Stiff or unresponsive buttons | Salt crystal buildup | Freshwater rinse and gentle brushing |
If you see water droplets inside the housing, treat it as a leak emergency. Do not press any buttons. Do not open the housing underwater.
Surface slowly, then follow the emergency steps in the next section.
Condensation appears as a thin haze across the lens port. It disappears after you open the housing and let the air circulate. Power failure almost always traces back to the battery compartment.
Stiff buttons almost always mean salt has crystallized inside the mechanism. A similar approach to identifying problems can help when you need to troubleshoot a trail camera.
Why Accurate Diagnosis Matters
Rushing the wrong fix can cause permanent damage. Using compressed air on a waterlogged housing can push moisture deeper into the camera. Drying a corroded battery compartment with heat can warp plastic seals.
Take five seconds to check the symptom against the table above. It saves hours of frustration.
Water Inside the Housing? Here's Your Emergency Playbook
Water inside the housing is the worst-case scenario. But if you act fast, you can save the camera. The key is to remove the power source immediately and stop the corrosion process.
Image source: Web (Bing) / stockcake.com (Web image (fair-use with source credit))
Step-by-Step Emergency Protocol
Follow these steps in order. Do not skip any.
- Remove the battery immediately. Lithium batteries can short circuit if wet. This is the number one fire risk. Take it out first.
- Remove the memory card. Dry it with a soft cloth and set it aside. Data is often recoverable even if the card gets wet.
- Open the housing fully. Unscrew or unclip every latch. Do not force anything that is stuck.
- Remove the camera from the housing. Handle it gently. Do not shake it.
- Dry the camera with a soft, lint-free cloth. Use a microfiber cloth for the lens. Do not use paper towels, which can scratch the glass.
- Place the camera in a warm, dry area with silica gel packs. A temperature of 70, 80°F (21, 27°C) works best. Do not use an oven or hairdryer.
- Do not turn on the camera for at least 24 hours. Even if it looks dry, moisture can hide inside the lens barrel or under the buttons.
What About Saltwater?
Saltwater is far more aggressive than freshwater. Corrosion can start within hours. Per PADI equipment care guidelines, you should rinse the housing in fresh water immediately after each dive.
If saltwater entered the housing, the camera body itself needs a thorough cleaning. Use a cotton swab dipped in isopropyl alcohol to clean battery contacts and the memory card slot. Do not use water or metal tools.
When to Give Up
If the camera does not power on after 48 hours of drying, the internal electronics are likely damaged. Professional repair is the next stop. Do not try to disassemble the camera yourself.
You will void the warranty and likely make things worse. For more on keeping batteries healthy, see our guide on improving battery life.
Lens Fogged Up? It's Probably Not a Leak
Fog on the inside of the lens port is almost always condensation. It happens when warm, humid air inside the housing hits a cold lens port. The fix is simple.
Open the housing in a dry environment and let the moisture evaporate.
Why It Happens
When you dive from a warm boat into cool water, the temperature difference causes moisture in the air inside the housing to condense. This is not a leak. It is physics.
The same thing happens on a cold soda can. The fog appears as a thin haze, not droplets. If you see droplets, go back to the emergency section.
How to Fix It Fast
- Open the housing on the boat or shore, away from spray.
- Remove the camera and the housing separately.
- Wipe the lens port with a microfiber cloth.
- Place a fresh silica gel pack inside the housing before closing.
- Close the housing and wait five minutes. If the fog returns, repeat the process.
Prevention Tips
The best way to avoid condensation is to always pack a desiccant inside the housing. Many dive photographers use rechargeable silica gel packs that can be dried in an oven. Another trick is to let the camera warm up before the dive.
Keep the housing in the shade or in the water for a few minutes before you open it. This equalises the temperature. Similar principles apply to any camera in a humid environment.
Our guide on preventing trail camera condensation covers the same science.
What About Anti-Fog Inserts?
Anti-fog inserts are available for some housings. They work by absorbing moisture from the air. They are a good backup but not a replacement for silica gel.
If you dive in cold water, use both. The inserts cost around $10 to $20 and last for several dives.
Camera Won't Power On? Start with the Battery and Contacts
If the camera is dry but will not turn on, the battery is the first suspect. Do not panic. Most power failures are simple to fix.
Check the Battery
- Remove the battery and check the voltage with a multimeter. A fully charged lithium-ion battery reads around 3.7 to 4.2 volts.
- If you do not have a multimeter, try a fresh battery. This is the easiest test.
- If the battery is dead, recharge it. If it does not hold a charge, replace it.
Inspect the Battery Contacts
Corrosion on the contacts looks like white or green crust. It is caused by moisture or salt residue. Clean it with a cotton swab dipped in isopropyl alcohol.
Do not use water or metal tools. Gently rub the contacts until the crust is gone. Let the alcohol evaporate completely before inserting the battery.
Check the Memory Card
A corrupted memory card can prevent the camera from powering on. Remove the card and try turning on the camera. If it powers on, the card is the problem.
Format the card in the camera or replace it. For a step-by-step guide, see how to change trail camera batteries, which applies to many camera types.
Deeper Issues
If the camera still will not power on after the battery and card checks, it may have water damage inside. This requires professional repair. Do not try to disassemble the camera yourself.
The cost of a repair is usually $100 to $300, which is cheaper than replacing the camera.
Stuck Buttons, Blurry Shots, and Other Annoyances
Not every problem is a crisis. Stuck buttons and blurry shots are common but usually fixable on the surface.
Stiff or Unresponsive Buttons
Stiff buttons are almost always caused by salt crystals. Salt dries and hardens around the button mechanism. Fix them by rinsing the camera housing in fresh water after every dive.
Use a soft toothbrush to loosen salt around the buttons. Do not use soap or detergents. If the buttons are still stiff after rinsing, apply a small amount of silicone grease to the button shafts.
This lubricates the mechanism without damaging the O-ring.
Blurry Images
Blurry images can have several causes. The most common are a scratched lens port, condensation, or autofocus struggling in low visibility.
- Scratched lens port: Inspect the port under bright light. If the scratch is shallow, you can polish it with a plastic polish. If the scratch is deep, replace the port. A scratched port will always produce soft images.
- Condensation: If the haze is on the inside, follow the fog steps above. If the haze is on the outside, wipe it with a microfiber cloth.
- Autofocus issues: Underwater, autofocus can struggle in low visibility or against a featureless background. Switch to manual focus. Use a smaller aperture (f/8 or f/11) to increase depth of field. This gives you more room for focusing error.
What About the LCD Screen?
A fogged LCD screen is usually condensation trapped between the screen and the housing window. Open the housing and dry the screen with a microfiber cloth. If the fog is inside the camera itself, it is a sign of water damage.
Regular cleaning is essential. Our guide on how to clean a trail camera offers similar advice for keeping lenses clear.
The 5 Mistakes I See Divers Make Over and Over
After years of research and aggregate user feedback, these five mistakes come up again and again. Avoid them and your camera will last much longer.
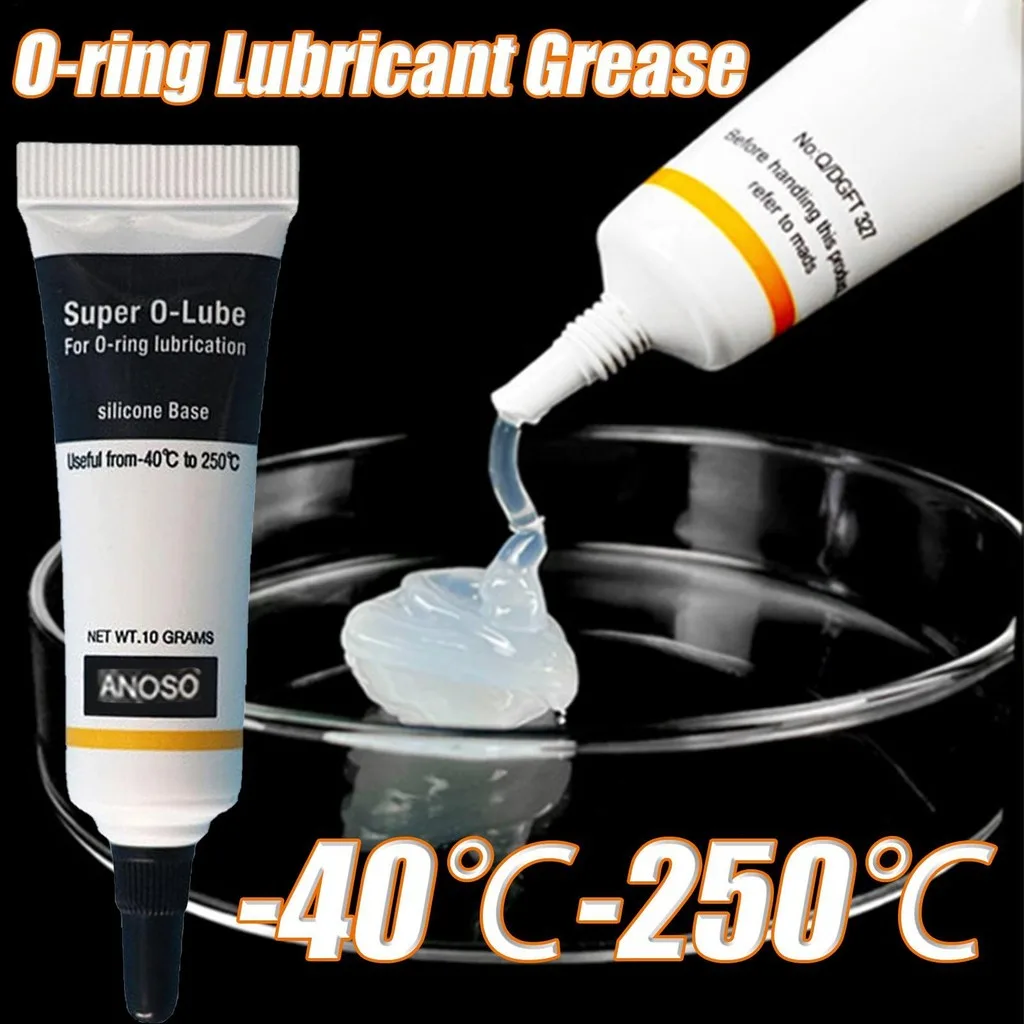
Image source: Web (Bing) / shopee.ph (Web image (fair-use with source credit))
1. Using Too Much Silicone Grease
More grease does not mean a better seal. Excess grease traps debris and can prevent the O-ring from seating properly. Apply a thin, even layer.
You should barely see it. Wipe off any excess before closing the housing.
2. Skipping the Vacuum Test
A vacuum seal tester is the only reliable way to confirm your housing is sealed before a dive. It costs around $50 to $100. Pump the air out and wait 10 minutes.
If the gauge holds steady, you are good to go. If it drops, you have a leak. Many divers skip this step and find out the hard way.
3. Not Rinsing After Every Dive
Saltwater is corrosive. Even a quick freshwater rinse after each dive prevents salt crystals from building up on buttons, latches, and O-rings. Do not use soap.
Just fresh water. Let the housing dry with the latches open.
4. Storing the Housing Closed
Storing the camera housing closed traps moisture inside. This leads to mold, corrosion, and O-ring degradation. Always store the housing open with the latches undone.
Remove the O-ring and store it separately in a cool, dark place. Per NOAA underwater imaging guidelines, proper storage doubles the life of your seals.
5. Ignoring the O-Ring Schedule
O-rings are wear items. They need replacement every 6 to 12 months or after 100 dives, whichever comes first. Do not wait for a visible crack.
Micro-cracks can form long before you see them. Always use genuine O-rings from the manufacturer. Generic rings may not fit correctly.
Pre-Dive Checks and Post-Dive Care That Save Your Gear
A simple routine prevents most problems. It takes five minutes before and after each dive.
Pre-Dive Checklist
Run through this list before every dive. It takes less than five minutes.
- Inspect the O-ring for cracks, debris, or dryness.
- Apply a thin layer of silicone grease to the O-ring.
- Clean the O-ring groove with a soft toothbrush.
- Check the battery charge and contacts.
- Place a fresh silica gel pack inside the housing.
- Close the housing and perform a vacuum test.
- Check that all latches are fully closed.
Post-Dive Routine
After every dive, do this:
- Rinse the housing in fresh water for 5 minutes.
- Soak the housing in fresh water for 10 minutes if you dove in saltwater.
- Tilt the housing to drain water from the latch area.
- Dry the housing with a soft cloth.
- Open the housing and remove the camera.
- Remove the battery and memory card.
- Let everything air dry with the housing open.
- Store the O-ring separately in a cool, dry place.
The Vacuum Test Explained
A vacuum seal tester is a small pump with a pressure gauge. You attach it to the housing's vacuum valve (most modern housings have one). Pump until the gauge reads about -0.5 bar.
Wait 10 minutes. If the gauge holds steady, the seal is good. If it drops, there is a leak.
Find it before you dive. This is the single most reliable way to prevent water damage.
Frequently Asked Questions
How do I know if my underwater camera has a leak or just condensation?
Condensation appears as a thin haze across the lens port. It clears when you open the housing. A leak produces visible water droplets that do not disappear.
If you see droplets, treat it as a leak emergency.
Can I use rice to dry my underwater camera?
No. Rice does not absorb moisture effectively and can leave dust inside the camera. Use silica gel packs instead.
They pull moisture out faster and are cleaner. Place the camera in a sealed bag with several packs for 24 to 48 hours.
How often should I replace the O-rings on my underwater camera housing?
Replace O-rings every 6 to 12 months or after 100 dives, whichever comes first. Inspect them before every dive. If you see cracks, stretch marks, or debris, replace them immediately.
Always use genuine O-rings from the manufacturer.
What should I do if my camera button gets stuck underwater?
Do not force it. Surface slowly and rinse the housing in fresh water. On the surface, use a soft toothbrush to loosen salt around the button.
If it is still stuck, apply a small amount of silicone grease to the button shaft. Do not open the housing until you are sure no water can enter.
Why does my camera lens fog up even when the housing is dry?
Condensation forms when warm, humid air inside the housing hits a cold lens port. Always place a silica gel pack inside the housing before closing it. Let the camera cool down gradually before the dive.
This prevents the temperature difference that causes fog.
Is it safe to use compressed air to dry my camera housing?
No. Compressed air can push moisture deeper into the housing and into the camera itself. It can also force debris into the O-ring groove.
Use a soft cloth and silica gel packs instead. Let the housing air dry naturally.

Similar Posts
































