How To Fix A Leaky Single Handle Shower Faucet
That drip drip drip from your shower faucet is more than annoying. It wastes water, drives up your bill, and keeps you awake at night. If you have a single handle shower faucet that won't stop leaking, you are probably wondering how to fix a leaky single handle shower faucet without calling a plumber and spending hundreds of dollars.
The good news is you can fix this yourself in about an hour with a few basic tools.
That steady drip is not just a nuisance. According to the EPA, a single leaky faucet dripping at one drop per second wastes more than 3,000 gallons of water per year. That is enough water to take 180 showers.
Most of the time, the fix comes down to one small part inside the handle. Let us walk through exactly what you need to do.
Quick Answer
Shut off the water supply to the shower. Remove the handle and escutcheon plate. Pull out the old cartridge.
Install a new matching cartridge. Reassemble the faucet. Turn the water back on.
Test for leaks. The whole job takes 30 to 90 minutes. You need a screwdriver, pliers, and a replacement cartridge that matches your faucet brand.
Wait, Before You Yank That Handle Off…
This fix is simpler than you think. But you need to do one thing before you touch anything. You need to know what brand of faucet you have.
Moen, Delta, Kohler, and Pfister all use different cartridges. They are not interchangeable. Installing the wrong one will not stop the leak.
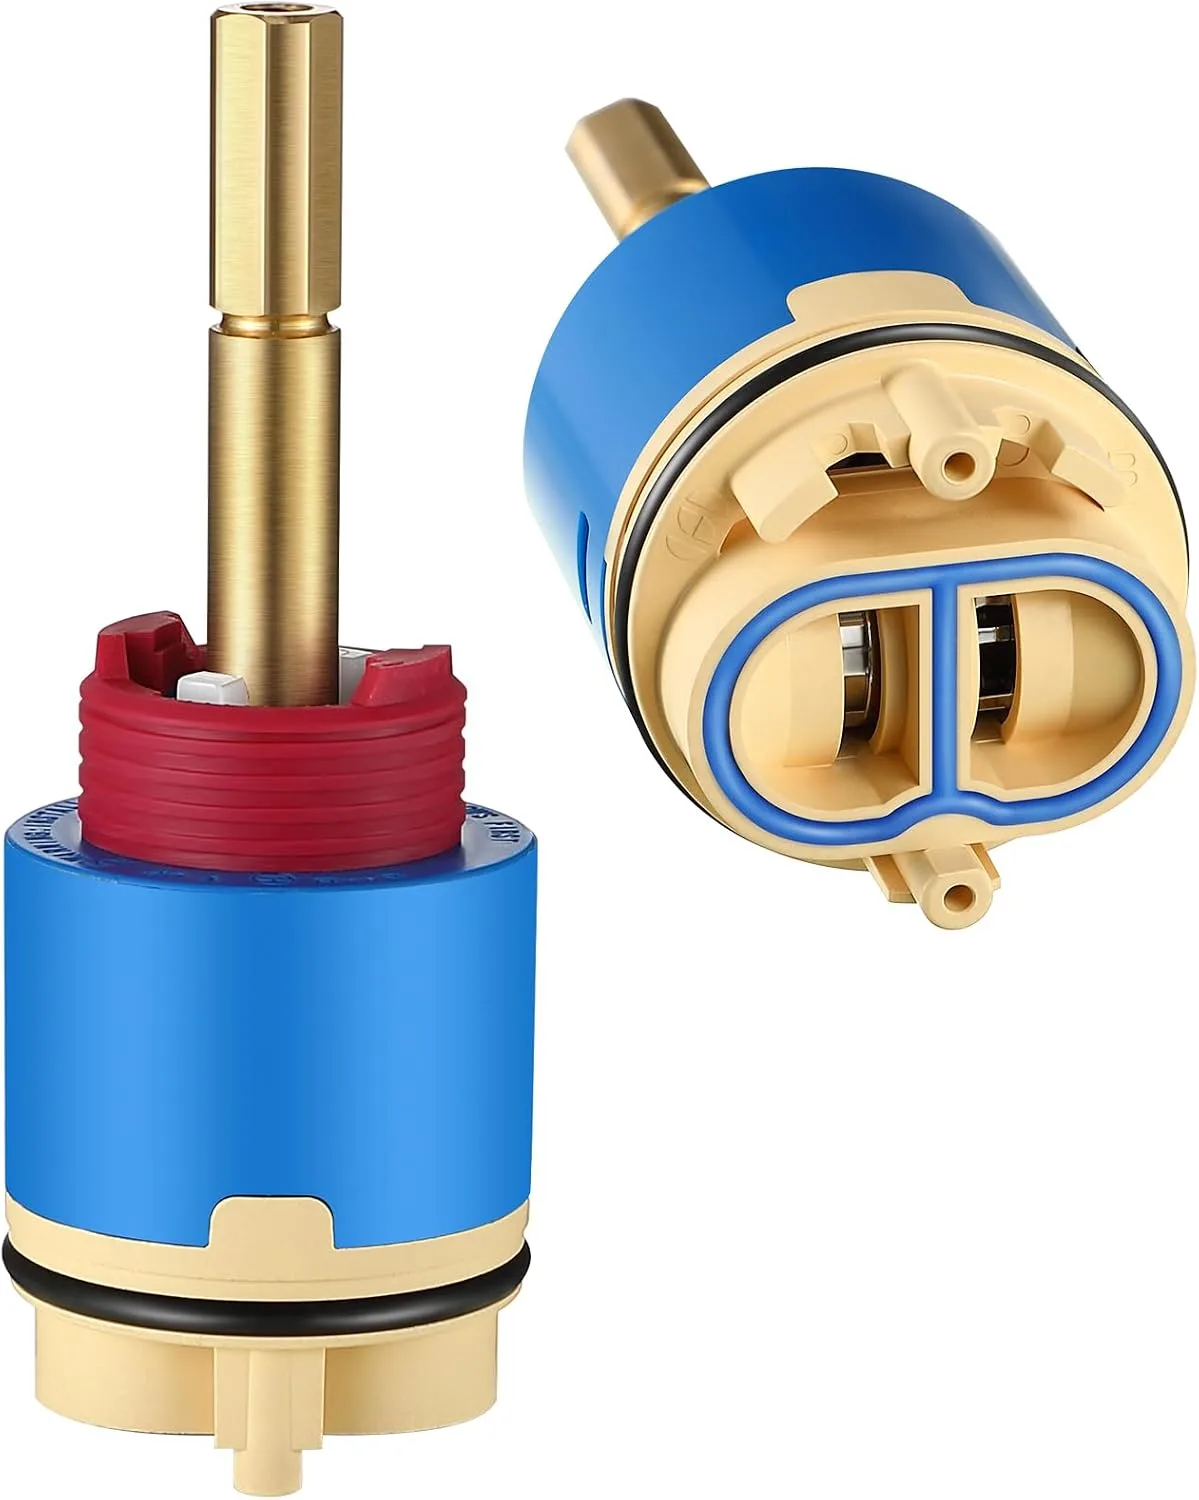
Image source: Bing (Web (fair-use with source credit))
What a leak actually tells you about the problem
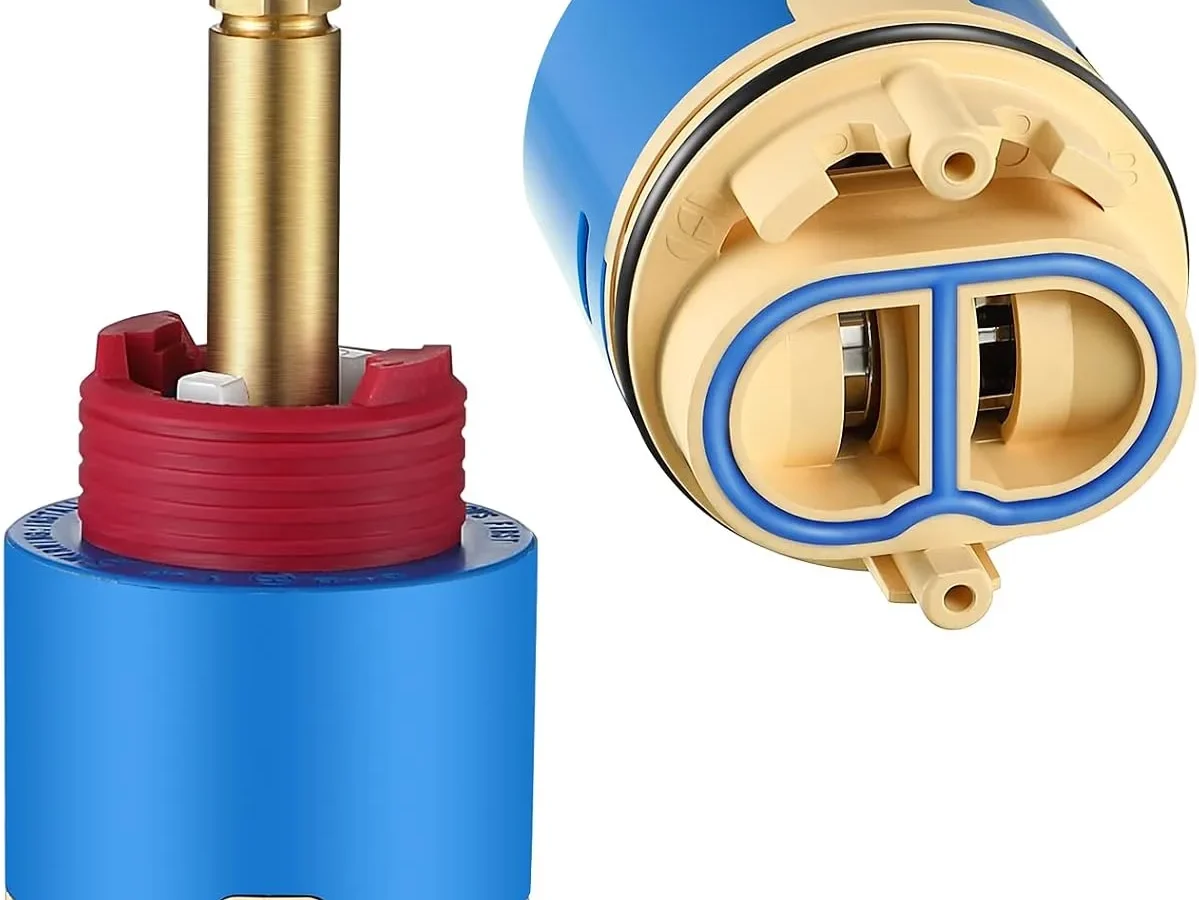
Every leak points to the same culprit. The cartridge inside the valve body has worn out. The rubber seals and O-rings have failed.
Hard water deposits have built up and prevent the cartridge from sealing properly. In some cases, the pressure-balancing spool inside the cartridge has failed. That causes temperature fluctuations.
The one thing you must do before touching anything
Turn off the water supply. This is non-negotiable. Find the main water shutoff valve for your home.
If you have shower-specific shutoff valves behind an access panel, use those. Turn on the shower handle briefly to confirm no water comes out. If you skip this step, you will get a face full of water when you remove the cartridge.
First, What You're Actually Looking At
A single handle shower faucet has a simple design. The handle connects to a cartridge stem. The cartridge slides into the valve body.
The valve body is the brass fixture behind the wall. The escutcheon plate covers the hole in the tile or surround.
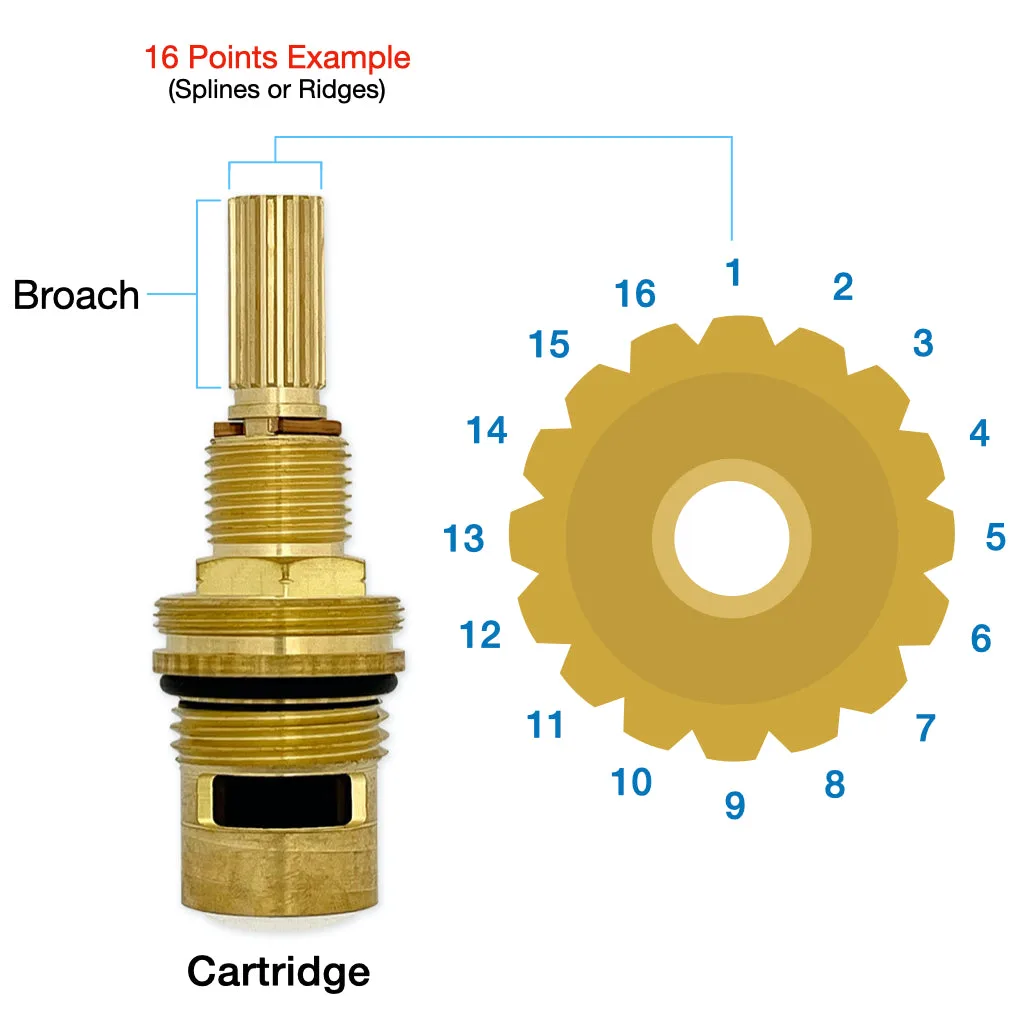
Image source: Bing (Web (fair-use with source credit))
The anatomy of a single handle cartridge faucet
The cartridge is the heart of the system. It contains the hot and cold water inlets. It has a stem that connects to the handle.
It has O-rings that seal against the valve body. It has a retaining clip that holds it in place. When you turn the handle, the cartridge opens and closes the water ports.
Why the cartridge is almost always the culprit
Manufacturer specifications indicate that the cartridge is the most common failure point. The O-rings dry out and crack. The seals wear down from constant use.
Hard water minerals build up and prevent smooth movement. The cartridge is a wear item. It is designed to be replaced every few years.
How to identify your brand without taking anything apart
Look at the handle shape and the logo on the trim. Moen uses a round or lever handle with a distinct look. Delta uses a lever that points straight down when off.
Kohler has a slimmer handle design. Pfister handles have a unique shape. If you cannot see a logo, look at the spline count on the stem after you remove the handle.
The visual clues that tell you which cartridge you need
The spline count is the number of teeth on the cartridge stem. Moen cartridges have 8, 14, or 18 splines. Delta cartridges have 12 or 14 splines.
Kohler cartridges have a different spline pattern. Pfister cartridges have their own design. Count the splines.
Write down the number. Take a photo of the old cartridge. That helps you match it exactly.
The Step-by-Step (With the Visual Cues That Actually Matter)
Follow these steps in order. Do not skip any step. Each one matters.
The images in this section show you exactly what to look for.
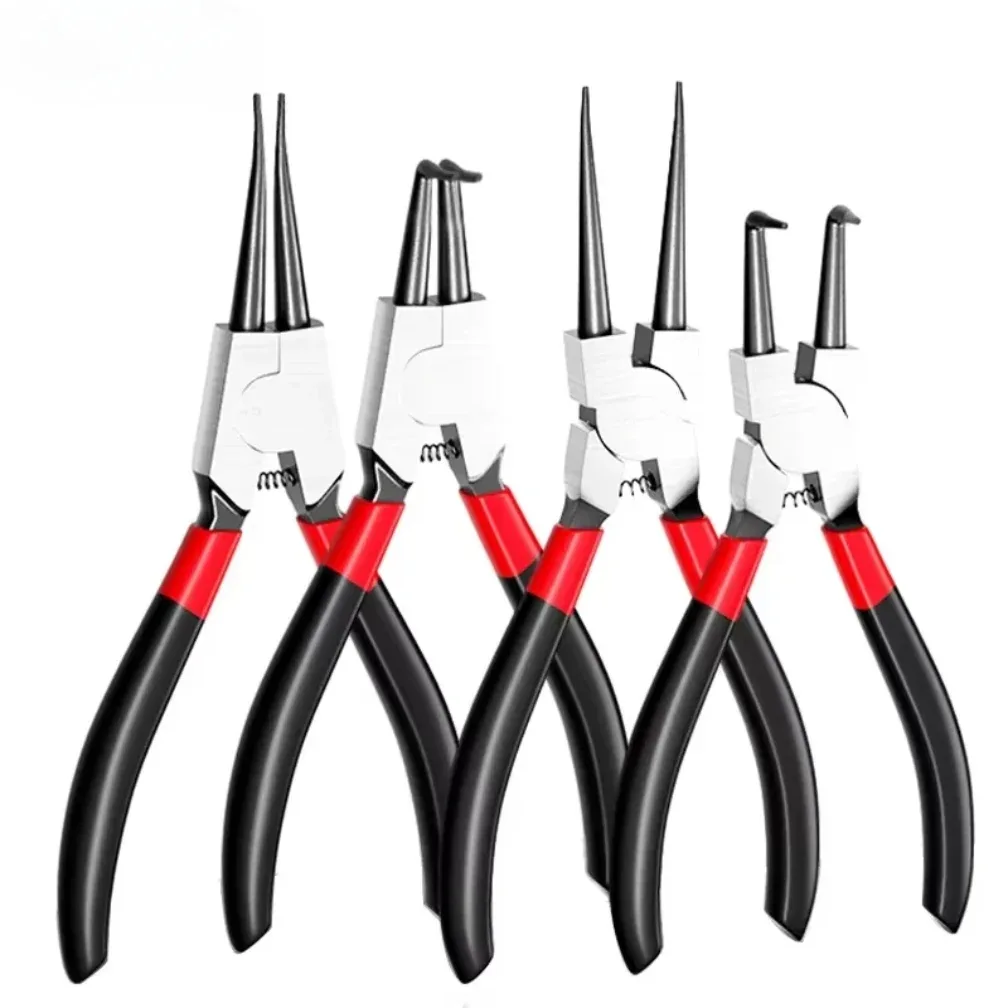
Image source: Bing (Web (fair-use with source credit))
Shutoff: where to find it and how to double-check
Find the main water shutoff valve. It is usually in the basement, crawl space, or utility room. Turn it clockwise to close it.
If you have shower shutoff valves, close those too. Open the shower handle to relieve pressure. No water should come out.
If it does, the shutoff valve is not fully closed.
Handle removal: spotting the set screw and its hiding spots
Look for a small set screw. It is usually on the underside of the handle. It might be behind a plastic cap.
Pop the cap off with a small flathead screwdriver. Use a hex key or Phillips screwdriver to remove the set screw. Pull the handle straight off.
If it is stuck, rock it gently back and forth.
Escutcheon plate: prying vs. unscrewing
Some escutcheon plates unscrew. Others snap into place. Check for a small notch or gap.
Use a flathead screwdriver to pry it off gently. Do not scratch the wall. If the plate is stuck, use a putty knife to protect the tile.
The retaining clip: what it looks like and how it comes out
The retaining clip is a small metal or plastic piece. It holds the cartridge in the valve body. Use needle-nose pliers to grip the clip.
Pull it straight out. Do not twist it. If it is stuck, spray it with penetrating oil.
Wait a few minutes. Then try again.
Cartridge extraction: the right tool, the right angle
Use a cartridge puller tool. It fits over the stem and grips the cartridge. Rock the puller back and forth gently.
Apply steady pressure. Do not yank hard. If the cartridge is stuck, spray it with penetrating oil.
Let it sit for 10 minutes. Try again. If it still will not budge, call a plumber.
Cleaning the valve body: what to look for before installing
Look inside the valve body. Remove any debris, scale, or old grease. Use a small brush or a cloth.
Do not scratch the brass. Check for corrosion. If you see corrosion, you may need to replace the entire valve body.
That is a job for a professional.
Installing the new cartridge: alignment, seating, and the feel of a proper fit
Lubricate the new O-rings with silicone grease. Do not use petroleum jelly. It ruins the rubber.
Slide the new cartridge into the valve body. Align the splines with the stem. Push it all the way in.
You should feel it seat firmly. The retaining clip should snap into the groove.
Reassembly: clip, plate, handle, and the final test
Reinstall the retaining clip. Make sure it is fully seated. Replace the escutcheon plate.
Slide the handle back on. Tighten the set screw. Turn the water supply back on.
Check for leaks. If you see drips, tighten the escutcheon plate slightly. If the leak persists, you may need to adjust the cartridge alignment.
5 Mistakes That Turn a 30-Minute Fix Into a Weekend Project
These mistakes are common. Avoid them. They cost time and frustration.
Forgetting the water is on
This is the biggest mistake. If you remove the cartridge with the water on, you get a geyser. Water sprays everywhere.
It can damage your bathroom. Always double-check that the water is off.
Using the wrong cartridge because you didn't check the spline count
Buying the wrong cartridge wastes time and money. Count the splines on the old cartridge. Take a photo.
Compare it to the replacement. If it does not match, return it. Do not try to force a different cartridge into the valve body.
Breaking the retaining clip because you pulled instead of pried
The retaining clip is delicate. Pull it straight out. Do not twist or pry.
If it breaks, you need a new clip. Some cartridges come with a new clip. If yours does not, buy one separately.
Overtightening the handle and stripping the set screw
The set screw is small and easy to strip. Tighten it until it is snug. Do not force it.
If you strip the screw, you need a new handle. Use a hex key that fits perfectly.
Skipping the silicone grease and causing a new leak
Silicone grease lubricates the O-rings. It helps them seal. Without it, the O-rings dry out and crack.
You get a new leak. Apply a thin layer to every O-ring before installation.
When to Just Call a Plumber
Some situations are beyond DIY. Know when to stop. Pushing through can cause more damage.
The cartridge is seized and won't budge
If the cartridge is stuck after using penetrating oil and a puller tool, stop. Forcing it can break the valve body. A plumber has specialized tools to remove seized cartridges.
You see corrosion inside the valve body
Corrosion means the valve body is damaged. Replacing the cartridge will not fix it. The valve body needs to be replaced.
That requires cutting into the wall. That is a professional job.
The problem keeps coming back after replacement
If you replace the cartridge and the leak returns within a few months, something else is wrong. It could be the valve body. It could be a pressure issue.
A plumber can diagnose the real problem.
What it costs either way
A DIY repair costs $10 to $50 for the cartridge and a few dollars for grease. A plumber charges $150 to $300 for a service call. If you need a new valve body, the cost jumps to $500 to $1,000.
For most people, the DIY route is worth it. But if you are unsure, call a professional.
Frequently Asked Questions
Can I fix a leak without replacing the cartridge?
Sometimes. If the leak comes from the handle, tighten the escutcheon plate. If the drip comes from the spout, the cartridge is usually worn.
You can try cleaning the old cartridge. Remove it and soak it in white vinegar for 30 minutes. Scrub off the scale.
Reinstall it. This buys you a few months. Replacement is the permanent fix.
How do I know which cartridge my shower faucet uses?
Look at the brand name on the trim plate. Remove the handle and count the splines on the stem. Take a photo of the old cartridge.
Compare it to manufacturer guides. Moen cartridges have 8, 14, or 18 splines. Delta cartridges have 12 or 14.
Kohler and Pfister have their own patterns. Write down the numbers before you shop.
What if the handle is stuck and won't come off?
Spray the set screw area with penetrating oil. Wait five minutes. Try rocking the handle gently.
Do not pull hard. If the set screw is stripped, use a screw extractor kit. If the handle is corroded to the stem, call a plumber.
Forcing it can break the valve body behind the wall.
Is it safe to use a universal cartridge puller?
Universal pullers work for most brands. They grip the cartridge stem and let you rock it out. They are safe when used correctly.
The risk is low. Just make sure the puller fits your spline pattern. If it does not fit, do not force it.
Use a brand-specific puller instead.
How often should I replace the cartridge?
Every three to five years for most homes. If you have hard water, replace it every two years. The O-rings dry out and crack over time.
The internal seals wear down. A slow drip is a sign the cartridge needs replacing. Do not wait until the leak gets worse.
Why is my shower still leaking after I replaced the cartridge?
Check the retaining clip. It must be fully seated in the groove. Check the O-rings.
They need silicone grease. Check the valve body for corrosion. If the metal is pitted, the cartridge cannot seal.
Check the pressure-balancing spool. It might be stuck. If all else fails, call a plumber.

Similar Posts