How To Remove A Single Handle Kitchen Faucet With Sprayer
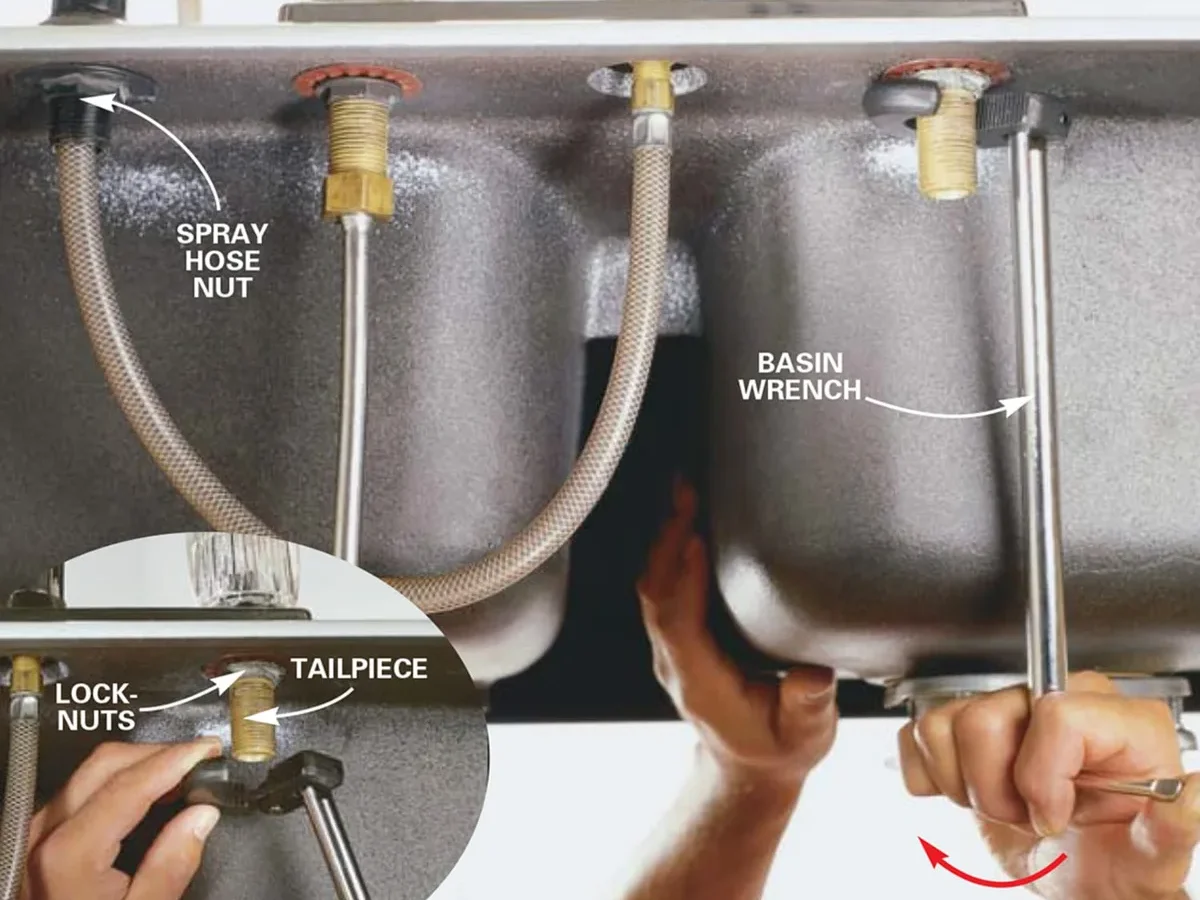
To remove a single handle kitchen faucet with sprayer, you need to shut off the water, disconnect the supply lines, remove the handle, and unscrew the mounting nut from below. It's a straightforward job that usually takes 30 to 60 minutes. The hardest part is working blind under the sink with limited clearance.
We'll walk through the whole process with clear visual cues so you don't end up twisting the wrong thing.
Aggregate reviews from homeowners and manufacturer installation guides confirm that most DIY failures happen because people skip the shut-off step or mistake the supply line nut for the mounting nut. As of 2026, the majority of single-handle pull-down faucets from major brands use a 1-1/2-inch hex mounting nut underneath. The sprayer hose connects via a quick-release tab.
Knowing what you're looking at before you start makes all the difference.
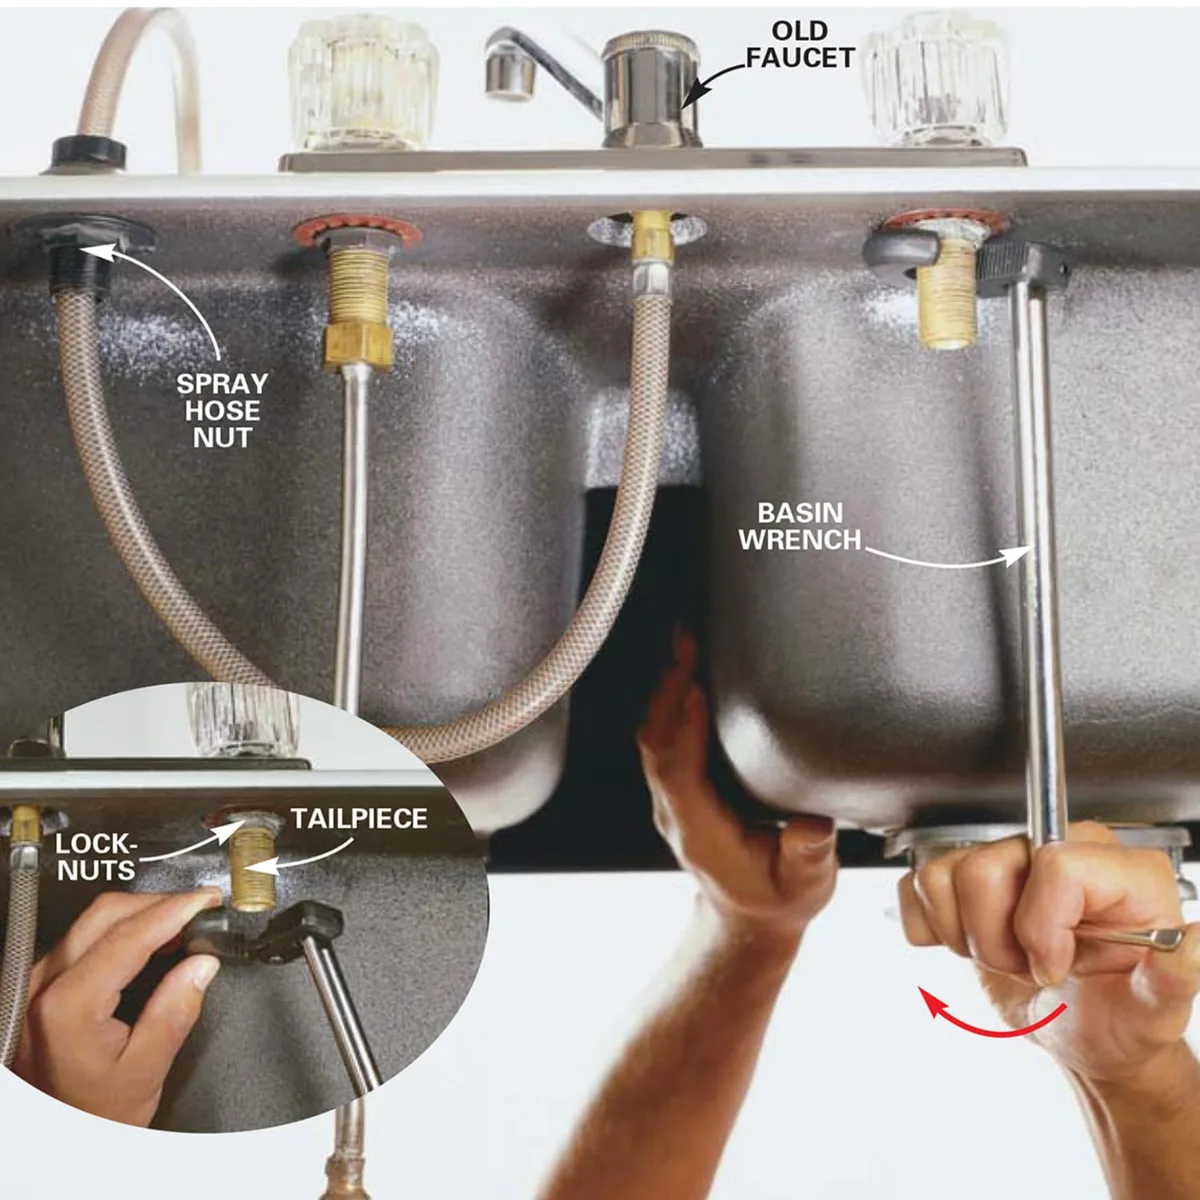
Image source: Bing (Web (fair-use with source credit))
Quick Answer
Shut off the water under the sink. Open the faucet to drain it. Remove the handle cap and loosen the set screw.
Disconnect the sprayer hose. Unscrew the mounting nut from below. Pull the faucet up through the deck.
Before You Touch Anything: Safety, Water Shut-Off & Prep
Why is turning off the water non-negotiable?
You must shut off the water supply before you disconnect anything. Skip this step and you'll get a face full of line pressure. Locate the two angle stop valves under the sink.
Turn them clockwise until they stop. Open the faucet handle to confirm the water is off. Per the Uniform Plumbing Code, this shut-off step is required before any fixture disconnection work.
How do you drain the line without making a mess?
After shutting off the valves, open the faucet handle and let residual water drain into the sink. Then disconnect the supply lines from the angle stops using an adjustable wrench. Expect about a cup of water per line to spill.
Have a bucket and a towel ready. Depress the sprayer button to drain that line too.
What protective gear and workspace setup do you need?
Grab a flashlight or a work light. Under-sink cabinets are dark. Wear safety glasses to avoid splashes from old pipe sediment.
Clear out the cabinet completely. Pull out the trash can, cleaning supplies, and any stored items. Lay down a towel under the connections.
This gives you room to work and makes it easy to spot dropped screws.
| Prep Step | Why It Matters |
|---|---|
| Shut off angle stops | Prevents accidental flooding |
| Open faucet to drain | Removes pressure and residual water |
| Disconnect supply lines | Frees the faucet body from the plumbing |
| Clear cabinet space | Lets you reach the mounting nut without obstruction |
| Set a towel and bucket | Catches spills and holds small parts |
The Visual Anatomy of a Single-Handle Kitchen Faucet with Sprayer
What are you actually looking at under the sink?
Under the sink you'll find four key parts. The faucet shank is the threaded metal tube that goes through the deck. The mounting nut is a large hexagonal nut that screws onto the shank from below.
The supply lines are flexible braided hoses that connect to the angle stops. The sprayer hose is a thinner flexible line that runs from the faucet body to the sprayer head. If you have a side sprayer, there will be a second small hole in the deck with its own hose.
How do you tell a pull-down sprayer from a side sprayer?
A pull-down sprayer has the sprayer head at the end of the faucet spout itself. The hose runs inside the spout and down through the faucet shank. A side sprayer is a separate unit mounted in its own hole beside the faucet.
Under the sink, a pull-down sprayer hose connects directly to the faucet body near the base of the shank. A side sprayer hose connects to a separate tee fitting or the faucet diverter valve.
What are quick-connect clips and C-clips?
Many modern faucets use a quick-connect fitting on the sprayer hose. Look for a white or grey plastic collar with a small tab. Pressing that tab releases the hose.
Older faucets may use a C-clip, a small metal ring that pops out with a flathead screwdriver. Some use a simple threaded brass nut. Knowing which fastener you have saves you from snapping a plastic tab that shouldn't be pried.
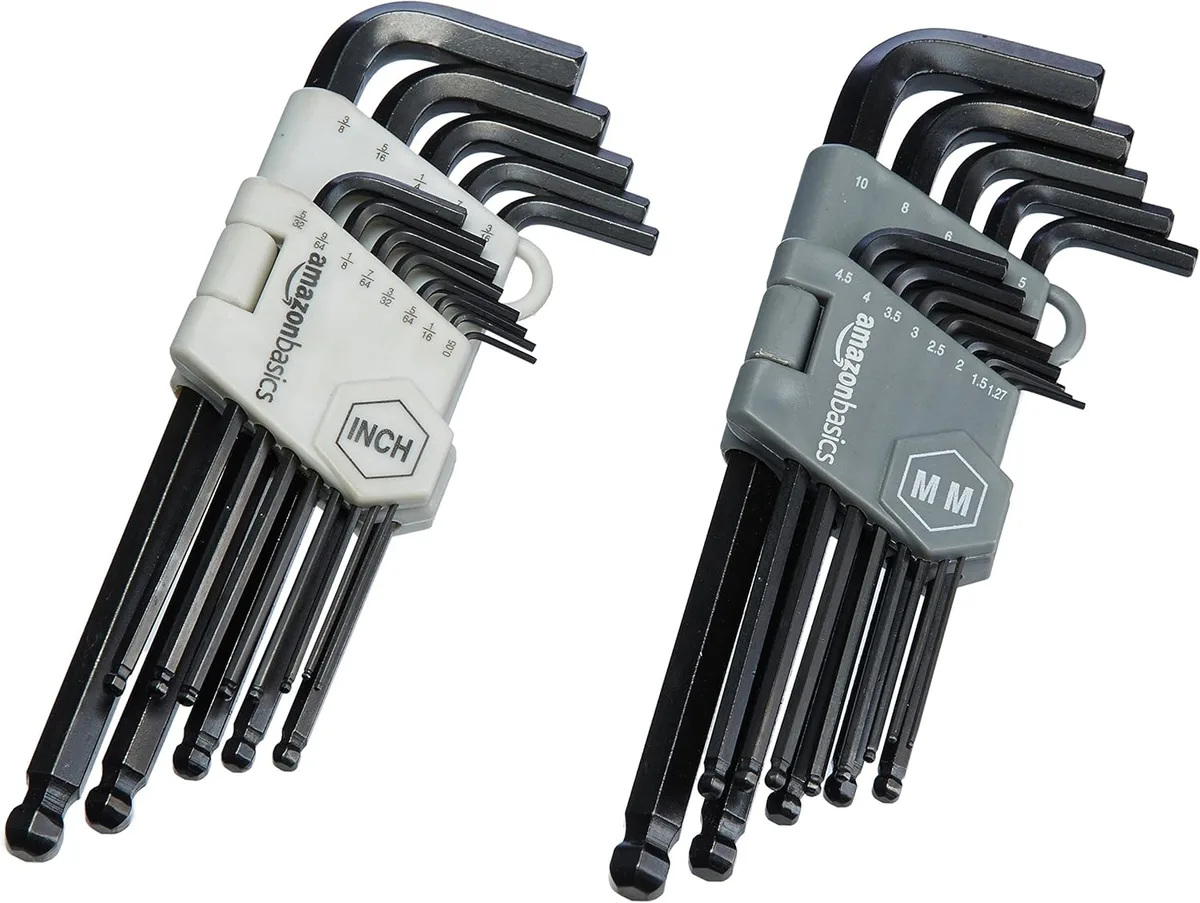
Image source: Bing (Web (fair-use with source credit))
Tools You'll Actually Need (and What Each Looks Like)
Which wrench works best for the mounting nut?
The mounting nut under the sink sits in a tight, dark space. A basin wrench is purpose-built for this job. It reaches the nut from the side and turns it by spinning a handle.
If you don't have one, a deep socket (1-1/2 inch) on a ratchet extension works if you have enough clearance. An adjustable wrench or channel-lock pliers can work too, but they're harder to fit around other pipes.
What hex key sizes do you need?
The set screw that holds the handle in place is hidden under a small cap on top of the handle. Common hex key sizes are 3/32 inch, 1/8 inch, and 9/64 inch. Get a set of metric and SAE keys to cover all bases.
Some manufacturers use a Phillips or Torx screw instead. Check the top of the handle. If you see a small round or rectangular cap, that's where the set screw lives.
What else should you have on hand?
| Tool | Purpose |
|---|---|
| Flathead screwdriver | Pry off handle cap and pop C-clips |
| Adjustable wrench | Disconnect supply lines |
| Hex key set | Loosen handle set screw |
| Basin wrench or deep socket | Unscrew mounting nut |
| Flashlight or work light | Illuminate under-sink area |
| Bucket and towel | Catch spills and hold small parts |
| Penetrating oil | Free a rusted mounting nut |
Step-by-Step Removal Process (With Visual Cues at Every Step)
Step 1: Remove the handle
Look at the top of the handle for a small cap. It might be round, rectangular, or a flat plug. Pry it off gently with a flathead screwdriver or your fingernail.
Underneath you'll see a set screw. Insert the correct hex key and turn counterclockwise until the screw is loose. Lift the handle straight up off the splines.
If it sticks, rock it gently side to side. Don't force it. The splines are soft and can strip.
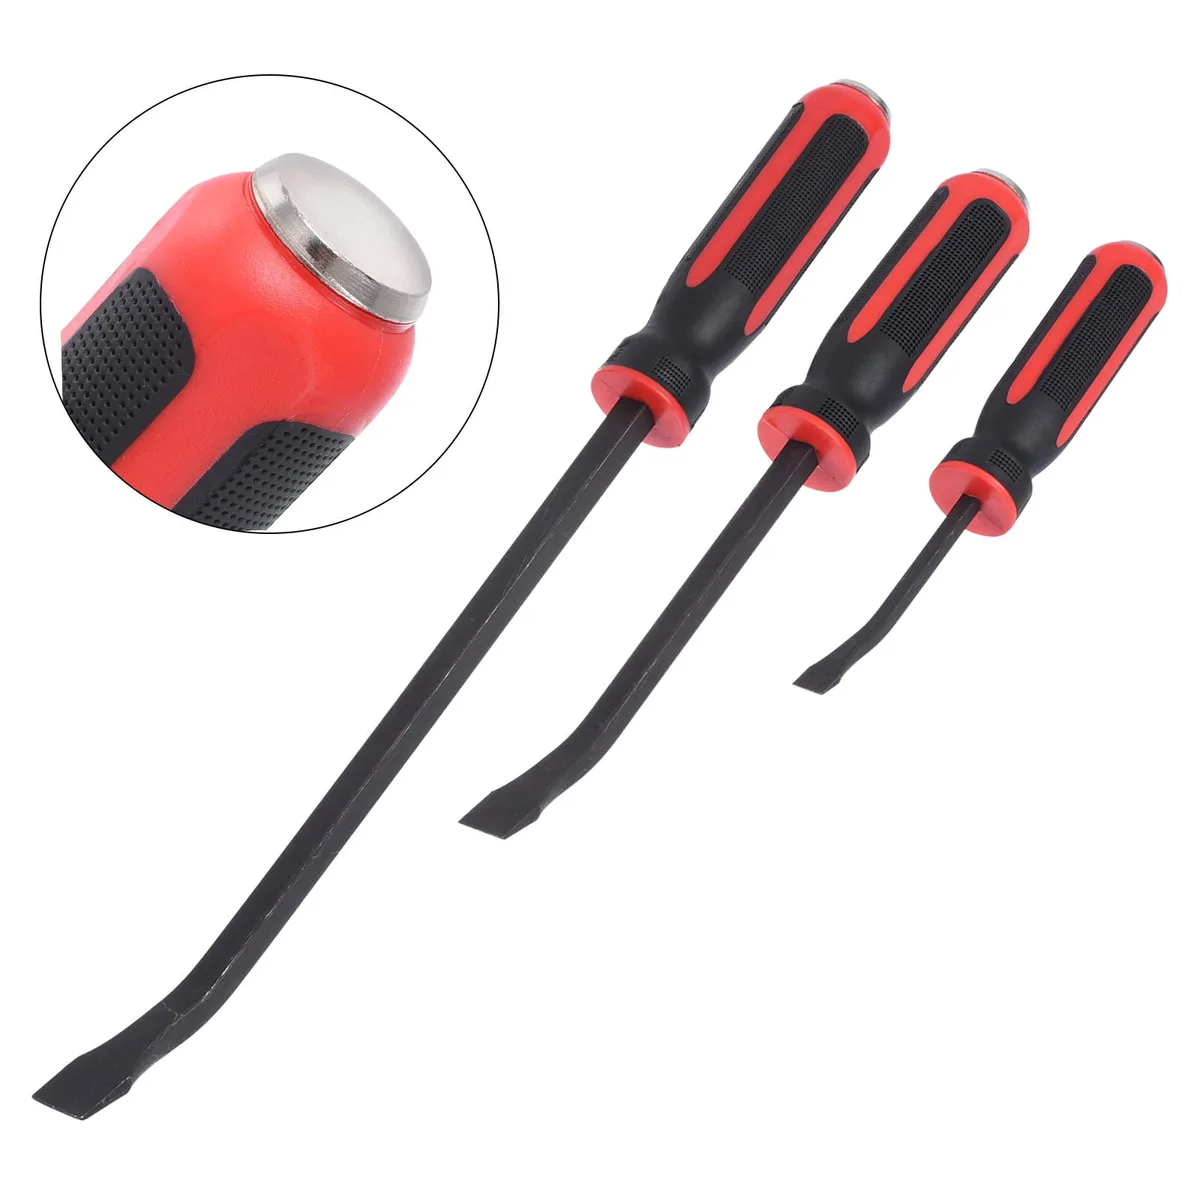
Image source: Bing (Web (fair-use with source credit))
Step 2: Disconnect the sprayer hose
Reach under the sink and find where the sprayer hose connects to the faucet body. For a pull-down sprayer, look for a plastic quick-connect collar. Press the tab or push the collar inward and pull the hose free.
For a side sprayer, you'll see a threaded brass nut. Unscrew it with an adjustable wrench. Have a towel ready because a little water will dribble out.
Step 3: Unscrew the mounting nut
The mounting nut is the large hex nut on the faucet shank. It's usually 1-1/2 inch across. Use your basin wrench or deep socket to turn it counterclockwise.
If it's plastic, be careful not to crack it by applying too much torque. If it's brass and rusted, spray penetrating oil and wait five minutes. Then try again.
Once it's loose, spin it off by hand.
Step 4: Pull the faucet body up through the deck
With the mounting nut removed, go back above the sink. Grasp the faucet body and pull upward. It should slide out of the deck hole cleanly.
If it sticks, check that the sprayer hose isn't still attached. It might be tangled around the garbage disposal. Also look for leftover putty or caulk holding it down.
A utility knife can cut that seal.
Step 5: Remove the sprayer head and hose from the second hole
If you have a separate side sprayer, go back under the sink. Loosen the retaining nut that holds the sprayer body in its hole. Pull the sprayer head up from above.
Feed the hose through the hole. You now have your old faucet and sprayer fully removed.
Common Visual Mistakes That Trip Up DIYers
What mistake do people make with the supply line nut?
The supply line nut and the mounting nut can look almost identical from below. Many DIYers spend ten minutes trying to unscrew the wrong one. The supply line nut is smaller, about 3/4 inch, and connects a flexible hose.
The mounting nut is larger, 1-1/2 inch, and sits directly on the faucet shank. Quick rule: if it attaches to a hose, it's a supply nut. If it attaches to the round metal shank, it's the mounting nut.
What about the hose weight?
The sprayer hose often has a sliding metal or plastic weight that helps the hose retract. That weight can swing freely and hit the cabinet door. If you pull the hose out too far without removing the weight first, it can get stuck against a fitting.
Always push the weight off the end of the hose before you disconnect the sprayer.
How do you avoid breaking the handle cap?
Faucet handle caps are held in by friction or a small O-ring. If you pry with a flathead in the wrong spot, you'll snap the plastic tab. Look for a small notch or seam.
That's where the prying tool goes. If you don't see one, wrap the screwdriver tip with tape. Gently work around the edge.
Where is the hidden set screw?
Some faucets hide the set screw on the side or even the back of the handle. If the cap doesn't come off, remove the handle's decorative ring by unscrewing it. You might find the set screw there.
Also check if the handle has a small button that indicates a push-release mechanism rather than a screw.
Troubleshooting: When the Nut Won't Budge or the Hose Is Stuck
What if the mounting nut is rusted or seized?
Spray penetrating oil directly onto the nut threads. Let it soak for five to ten minutes. Tap the nut gently with a hammer to break the corrosion bond.
Try turning it with the basin wrench again. If it still won't move, apply heat with a hair dryer. Don't use a torch near plastic or wood.
Once the nut creaks loose, work it back and forth a quarter turn at a time.
How do you free a sprayer hose tangled around the garbage disposal?
The hose often loops around the disposal's drainpipe. It can get pinched between the disposal and the cabinet wall. Reach under and trace the hose with your hand.
Don't yank it. Untangle it by feeding slack from the sprayer head side. If it's stuck on a sharp edge, use a flathead screwdriver to gently pry it free.
Never cut the hose unless you plan to replace it.
What if the quick-connect clip won't release?
Some push-fit connectors have a dual-tab system. You must press both tabs simultaneously. If only one is visible, check the opposite side for a hidden tab.
Use a small screwdriver to depress it while pulling the hose. If the clip is broken, cut the hose near the fitting. Replace the connector later.
The shank spins when you try to unscrew the mounting nut
This happens when the faucet body isn't held in place from above. Have someone push down on the faucet spout from the top while you turn the nut below. If you're alone, grip the faucet body with a rag and twist it slightly as you unscrew.
The friction usually breaks the seal. Old putty or caulk around the deck can also cause spinning. Cut it with a utility knife.
Frequently Asked Questions
Do I need to remove the sprayer first or the faucet first?
Always disconnect the sprayer hose before you unscrew the mounting nut. If you remove the nut first, the faucet body will still be tethered by the sprayer hose. You'll have to reach back under to disconnect it anyway.
The nut will already be off, making it harder to hold the faucet steady.
Can I reuse the old supply lines on a new faucet?
You can, but it's not recommended. Supply lines compress and age over time. Reusing them risks leaks at the connection point.
Most new faucets come with fresh supply lines. If yours don't, buy universal 3/8-inch compression lines. They cost about eight dollars and save you a potential flood later.
How do I know if my mounting nut is brass or plastic without pulling everything apart?
Shine a flashlight on it from below. Brass has a yellowish metallic sheen. Plastic is black, white, or dark grey and looks matte.
You can also touch it. Brass feels cold and hard. Plastic feels slightly warmer.
If it's plastic, be extra gentle with the wrench to avoid cracking it.
What if I have a granite countertop? Do I need special tools?
Granite is much thicker than laminate or stainless steel. The faucet shank may not protrude far enough below for a standard basin wrench to grip. You might need a deep socket on an extension or a special extra-long basin wrench.
Granite also requires silicone caulk instead of plumber's putty. Do not use putty. It can stain the stone.
Is it normal for water to keep dripping after I shut off the angle stops?
Yes. The supply lines between the angle stops and the faucet hold residual water. That's why you open the faucet handle after shutting off the valves.
It drains that section. If water continues to drip after that, your angle stops may not be sealing fully. Old stop valves sometimes need a quarter-turn back to seat properly.
If they still drip, consider replacing them.

Similar Posts