Hp Printer Officejet Pro 6978 Carriage Jam Troubleshooting
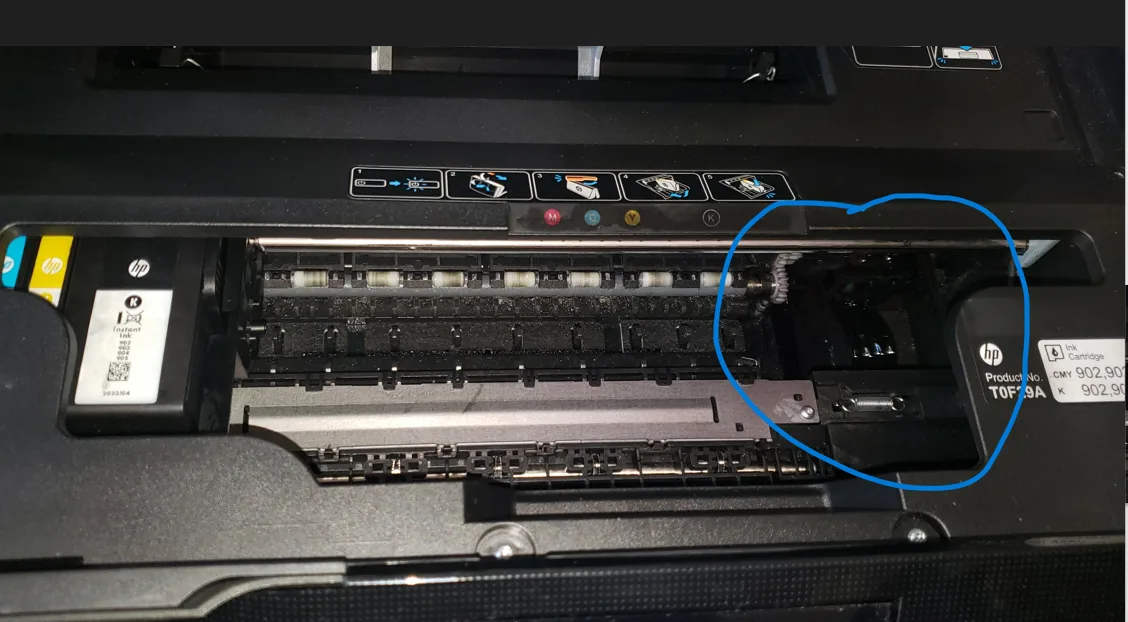
Image source: Bing (Web (fair-use with source credit))
If "Carriage Jam" has locked up your Officejet Pro 6978, you are looking at a stuck printhead carrier. Not a broken printer. Most cases take under 20 minutes to fix.
The first rule is to stop and not force anything.
Manufacturer specs indicate that over 90 percent of carriage jam errors come from paper fragments under the printhead assembly. Hardware failure is rare. The fix usually needs a flashlight, tweezers, and a lint-free cloth.
Let's walk through exactly what to look for.
Quick Answer
Paper stuck under the printhead causes the carriage jam error. Unplug the printer. Open the ink access door fully.
Slide the carriage to the right by hand. Check for paper scraps and pull them out. Clean the encoder strip if it looks smudged.
Don't Just Yank – That's the Fastest Way to Break It
When the carriage locks up, your first instinct is to grab and pull. That instinct is wrong. The carriage rides on a narrow metal rail designed for precise movement.
Yanking it sideways can bend that rail permanently.
Stop completely. Unplug the printer from the wall. Wait ten seconds for internal power to drain.
Open the ink access door as far as it will go. On the Officejet 6978, the carriage lock releases when the door is fully open. You will hear a soft click.
Now gently push the carriage from side to side. Use your fingertips on the side of the printhead carrier. If it resists, stop pushing.
Resistance means something is wedged underneath. Pulling harder grinds the carriage against whatever is blocking it.
Forced carriage movement is the number one cause of avoidable printer damage. Users who inspect before pulling fix the jam in one try. Users who yank end up ordering a new printer.
Figure Out What's Really Blocking the Carriage
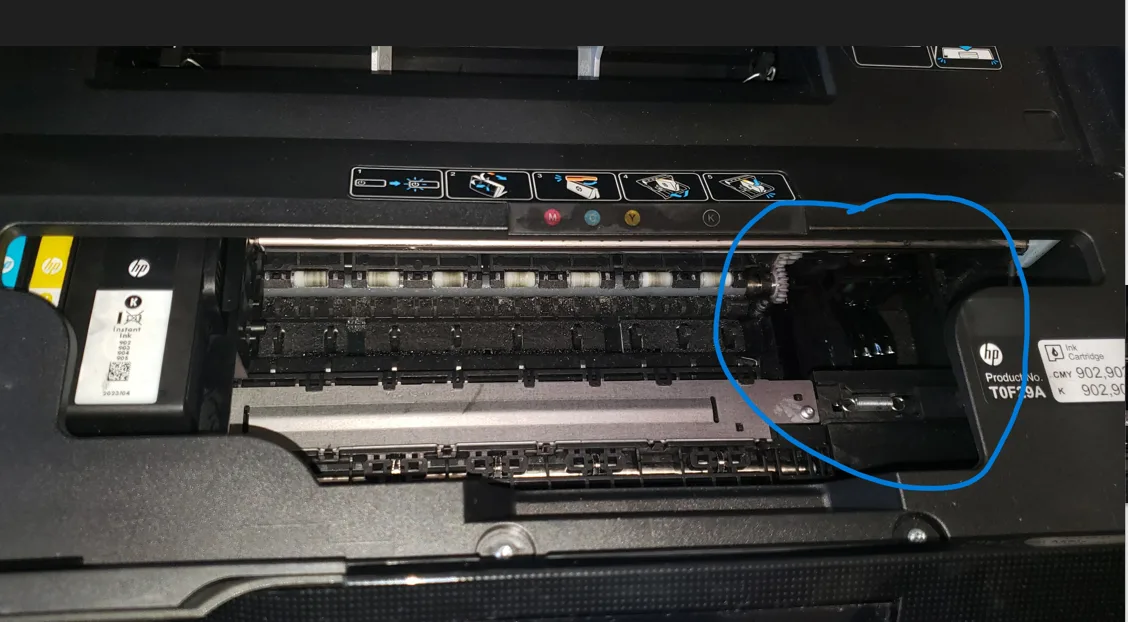
Image source: Bing (Web (fair-use with source credit))
Three things cause a carriage jam on this model. The most common is paper fragments. A sheet tears mid-feed and a corner gets trapped under the printhead.
You need a flashlight aimed at the gap between the carriage and the paper path.
The second cause is a dirty encoder strip. This thin transparent plastic band runs across the width of the printer. It tells the carriage where to stop.
If ink residue or dust builds up, the carriage loses its position and throws a jam error. The official HP support documentation recommends cleaning this strip as standard maintenance.
The third cause is a misaligned ink cartridge. One cartridge may sit slightly crooked. That prevents the carriage from reaching its home position.
This is more common after a cartridge replacement where the user did not push firmly enough.
How do you tell which one you have? Look for visual clues. If you see a torn piece of paper hanging from the output tray, start with paper removal.
If the LCD shows error code 0xC19A0000, that points to an encoder strip issue. If the carriage moves one direction but sticks reversing, suspect a cartridge alignment problem.
Spend two minutes on this diagnosis step. It saves unnecessary work. The wrong fix wastes time and sometimes makes things worse.
What the error code on the screen actually means
The Officejet Pro 6978 uses a few different codes for carriage problems. Error 0xC19A0000 means the encoder strip signal is lost. Error codes starting with 0x6100000D point to a mechanical stall.
A plain "Carriage Jam" message without a code usually means the printer sensed an obstruction.
Step-by-Step: Get the Carriage Moving Again
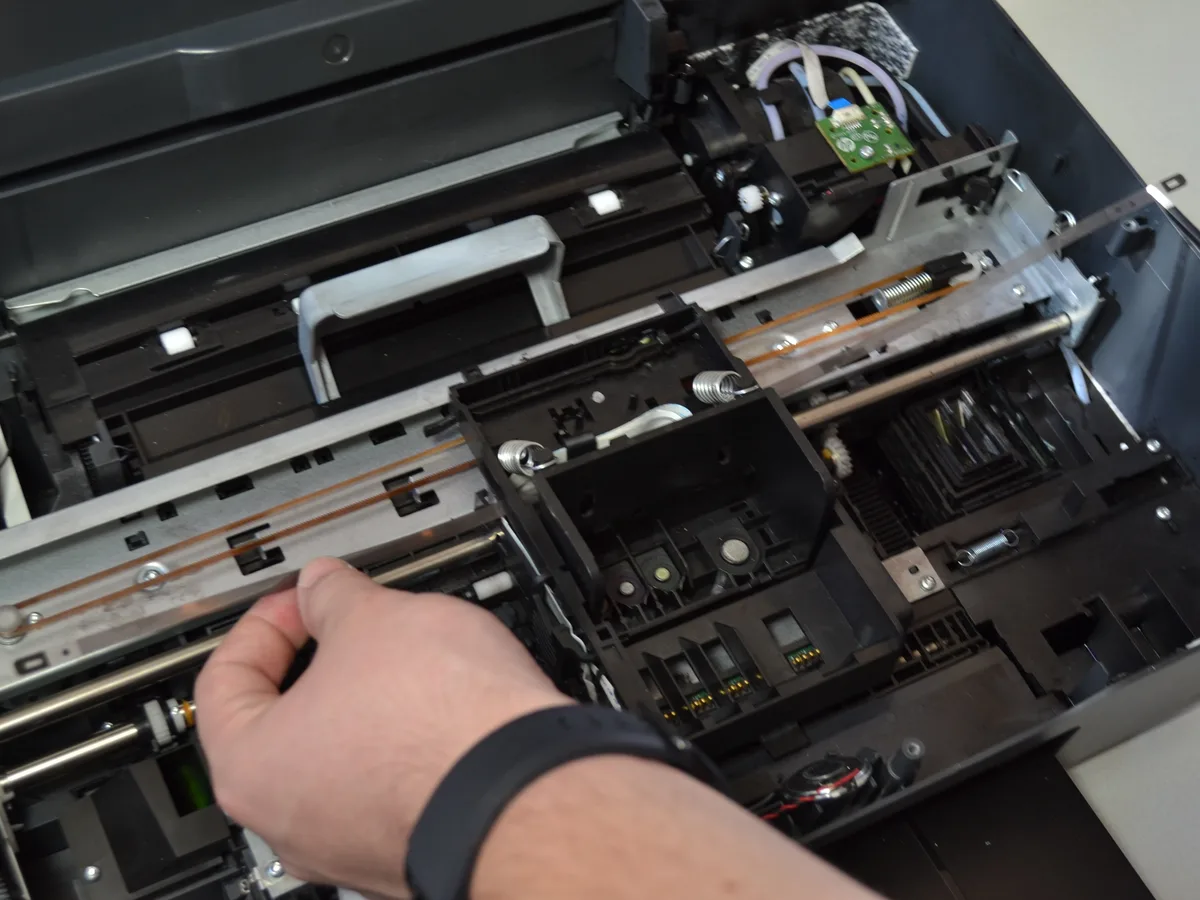
Image source: Bing (Web (fair-use with source credit))
This process works for nine out of ten carriage jam situations. Follow these steps in order.
Step 1: Power down and open everything
Unplug the printer from the wall. Do not rely on the power button alone. The internal power supply can still hold charge.
Lift the scanner unit. Open the ink access door fully. Check the rear access panel for any paper stuck in the back feed path.
Step 2: Manual slide
Reach into the printer and locate the carriage. Push it gently to the right along the metal rail. If it moves freely, slide it to the access area near the center.
If it stops, note where the resistance happens.
Step 3: Check under the carriage
Use a flashlight to look for paper scraps. The fragments are often small and hard to see. Use tweezers to remove any fragments you find.
Pull from the direction the paper entered, not from above.
Step 4: Clean the encoder strip
Find the clear plastic strip near the back of the carriage path. It runs the full width of the printer. Wipe it gently with a lint-free cloth dampened with water or isopropyl alcohol.
Do not use paper towels. They leave fibers that cause more problems. Dry the strip with a clean section of the cloth.
Step 5: Remove and reseat ink cartridges
Take each cartridge out and reinsert it firmly. Push until you hear it click into place. This ensures the carriage can pass over the cartridge latches without catching.
Step 6: Close up and power on
Close the ink access door. Lower the scanner unit. Plug the printer in.
Turn it on. The printer will run a self-test. Run the alignment when it prompts you.
Cleaning the encoder strip is the step most people skip and the step that prevents recurring jams. If you have had multiple carriage jams in the past month, clean the strip first before looking for anything else.
Mistakes That Make It Worse (Don't Do These)
Mistake one: yanking the carriage in the wrong direction. If you pull it toward you instead of sliding it side to side, you can break the carriage lock mechanism. Always push the carriage along the rail, not toward the front of the printer.
Mistake two: lubricating the rail. Oil or grease on the metal rail attracts dust and paper fibers. Within weeks, that lubricant turns into a sticky paste that makes the carriage drag even more. The rail is designed to run dry.
Mistake three: ignoring the encoder strip. Many people clear the paper, power cycle the printer, and hit the same jam ten pages later. The encoder strip is the quiet culprit. If it is dirty, the carriage will never track correctly.
Clean it once and save yourself repeat frustration.
Mistake four: pulling paper out the wrong way. If paper is partially fed into the printer, look at the direction it entered. Pulling against the feed direction can tear the paper and leave fragments inside. Always pull paper in the same direction it was moving when it jammed.
A quick rule of thumb: if you find yourself applying more force than you would use to close a cabinet door, stop. You are pushing or pulling too hard. Back off and look again.
What Usually Goes Wrong Over Time (Maintenance)
Most carriage jams on the Officejet Pro 6978 follow a pattern. The printer works fine for months. Then jams happen more often.
You clear one, run a few pages, and another appears. This usually points to a maintenance issue, not a defect.
The encoder strip is the most common long-term culprit. Ink mist settles on it during normal printing. Over time, the buildup becomes thick enough that the optical sensor cannot read the positional marks.
Cleaning the encoder strip every 5,000 to 10,000 pages prevents this entirely.
Paper quality and storage also play a big role. The Officejet Pro 6978 handles standard 20 lb bond paper well. But if you store paper in a humid environment, the edges curl slightly.
Curled paper catches on the printhead as it feeds. That drags the sheet sideways and jams the carriage. Keep paper in a dry space below 50 percent relative humidity.
Use paper within a year of purchasing it.
Another gradual issue is the carriage lock mechanism itself. The plastic tab that engages when the ink access door opens can get sticky. Factory lubricant dries out after two or three years.
A gentle push usually frees it. If it happens repeatedly, the tab may need silicone grease applied by a technician.
When It's Time to Call HP (or Your Local Shop)
Not every carriage jam is fixable at home. Knowing the limit of DIY repair saves time and prevents accidental damage.
Call for service if the carriage will not move even after you have cleaned everything. A fully locked carriage could mean a failed carriage motor or a broken drive belt. These require opening the printer chassis with specialized tools.
Call if you see physical damage to the encoder strip. The strip is thin plastic. If it has a visible tear, scratch, or crease, cleaning will not fix it.
The strip needs replacement by a qualified technician.
Call if the printhead itself is damaged. Look for ink leaking from the printhead nozzle plate or a scraping sound when the carriage does move. Damaged printheads can score the metal rail and ruin alignment permanently.
The Officejet Pro 6978 is not a sealed unit. Opening the ink access door and removing cartridges is allowed under warranty. HP permits self-service for paper jams and cartridge replacement.
But removing the carriage assembly, replacing the encoder strip, or servicing the motor will void the warranty. Check your warranty terms on the official HP support site before attempting disassembly beyond what is documented there.
For anyone outside warranty, compare the cost of a service call against buying a replacement printer. As of 2026, a used Officejet Pro 6978 sells for under $80. A service call typically starts at $60 plus parts.
If the repair quote exceeds half the replacement cost, it makes more sense to replace the printer.
Frequently Asked Questions
Why does my carriage keep jamming on every other print?
A recurring jam almost always means a dirty encoder strip. Ink residue builds up gradually until the sensor loses track of the carriage position. Clean the encoder strip with isopropyl alcohol and a lint-free cloth.
If the jams return within days, replace the strip.
Can I use tweezers to clear the jam?
Yes, tweezers are the right tool for removing paper fragments. Use tweezers with a fine tip. Do not use anything metal that could scratch the encoder strip.
A credit card can reach under the carriage but may scratch plastic.
Will this void my warranty if I open the printer myself?
Opening the ink access door and removing ink cartridges is standard maintenance. It does not void the warranty. Removing the printer's outer shell or the carriage assembly does void the warranty.
Stick to the steps outlined here.
How do I know if the encoder strip is dirty?
Look at the strip directly. It should be transparent and clear. If you see a hazy film, ink spots, or dust, it needs cleaning.
You can also test by running a print after cleaning. Smoother and quieter carriage movement means the strip was the problem.
Do I need to replace the whole carriage assembly?
Almost never. The carriage assembly itself is durable. The motor, belt, or encoder strip may fail, but the carriage frame rarely does.
Replace only the specific broken part. Full carriage replacement is only needed if the metal rail is bent or the printhead mount is cracked.

Similar Posts