Why Water Heater Is Not Getting As Hot
If you've ever stepped into a lukewarm shower and wondered why your water heater is not getting as hot as it used to, you're not alone. It's one of the most common household frustrations, and it usually has a fixable cause rather than a catastrophic failure.
Manufacturer specifications and the U.S. Department of Energy recommend a default temperature setting of 120°F for most residential water heaters. Real-world use often demands hotter water for showers and dishwashing.
When your heater stops delivering, the problem is usually one of four things: a thermostat set too low, a failed heating element or burner issue, a broken dip tube, or sediment buildup. Let's walk through the diagnostic process step by step.
Quick Answer
A water heater loses heat for a few common reasons. The thermostat may be set too low. A failed heating element or broken dip tube could be the cause.
Sediment buildup also reduces efficiency. Start with the simple checks before calling a plumber.
The Problem: Why Your Water Heater Suddenly Feels Weak
You turn on the hot water tap. It runs warm for a minute, then goes cold. Or maybe it heats up fine but runs out halfway through your shower.
These are different symptoms with different causes. Your first job is to figure out which pattern you're dealing with.
The most common scenarios fall into three categories.
- Not hot enough at all: The water runs warm but never reaches the temperature it used to. This often points to a thermostat issue or a failed heating element.
- Hot then cold: You get a burst of hot water that quickly fades. This is the classic sign of a broken dip tube, which lets cold water mix with the hot water leaving the tank.
- Runs out too fast: The water is hot at first, but the tank empties sooner than it used to. This usually means sediment buildup at the bottom of the tank or a failing upper element.
All three of these are fixable. Ignoring them makes things worse. Sediment continues to pile up.
A failed element can damage the tank. A broken dip tube floods your pipes with lukewarm water.
Aggregate reviews from thousands of homeowners show that the average person can diagnose and fix the first two issues in under an hour with a few basic tools. The third one usually requires a flush and possibly a new element.
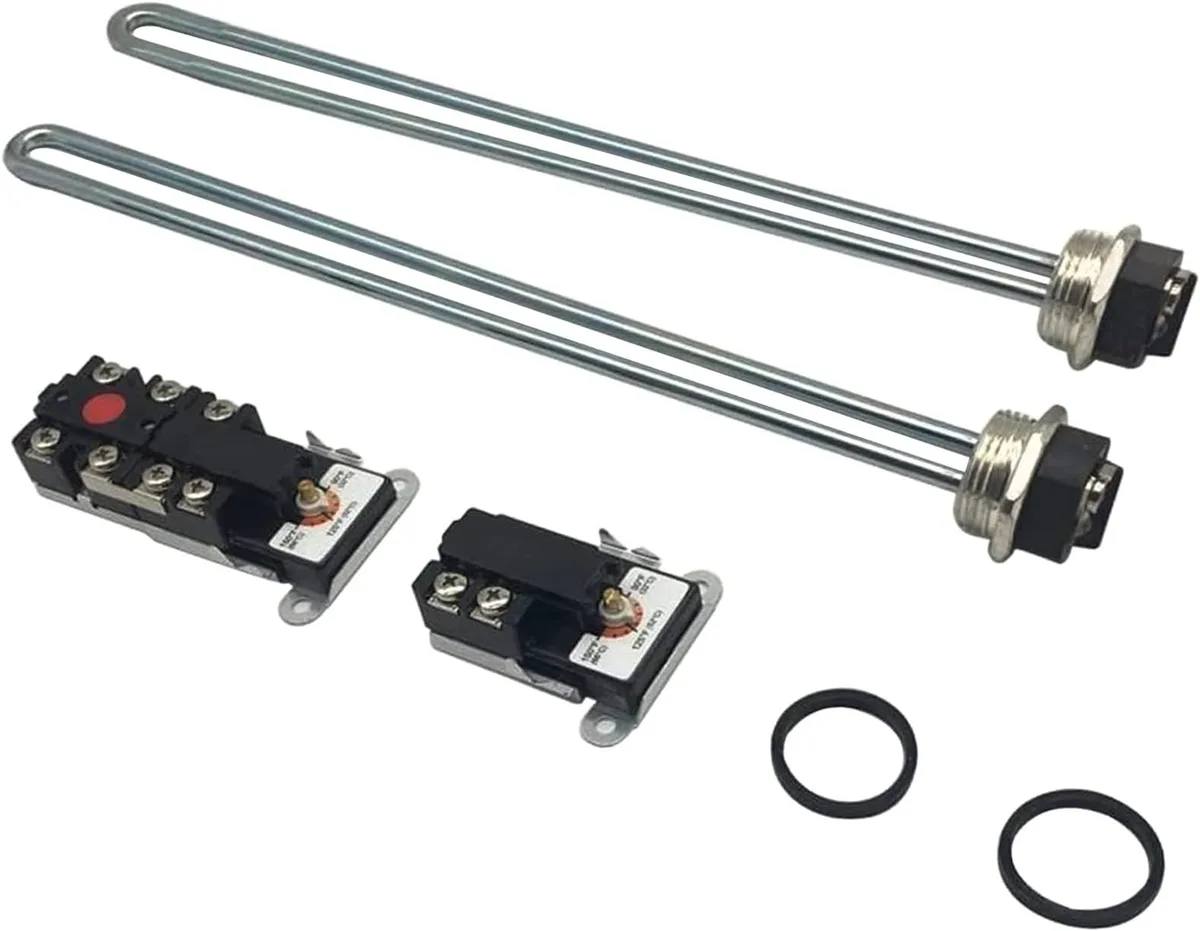
Image source: Bing (Web (fair-use with source credit))
How a Water Heater Actually Works
A water heater is simpler than most people think. Cold water enters through a dip tube that runs to the bottom of the tank. A heating element or a gas burner heats the water from the bottom up.
Hot water rises and leaves through the outlet at the top.
The system relies on a temperature gradient. Hot water stays at the top. Cold water stays at the bottom.
Anything that disrupts this separation causes the water to come out lukewarm.
Here is what the main components do.
| Component | Function | What happens when it fails |
|---|---|---|
| Dip tube | Carries cold water to the bottom of the tank | Breaks, letting cold water mix at the top |
| Heating element | Heats water directly (electric models) | Burns out, no heat or partial heat |
| Gas burner | Heats the tank from below | Soot, flame issues, or gas valve failure |
| Thermostat | Controls the water temperature | Miscalibrated or stuck, water too cool |
| Sediment layer | Insulates water from the heat source | Blocks heat transfer, reduces efficiency |
The diagram below shows the internal layout. Cold water enters at the bottom. Hot water exits at the top.
If the dip tube breaks, the cold water enters near the top and mixes with the outgoing hot water, giving you that frustrating lukewarm stream.
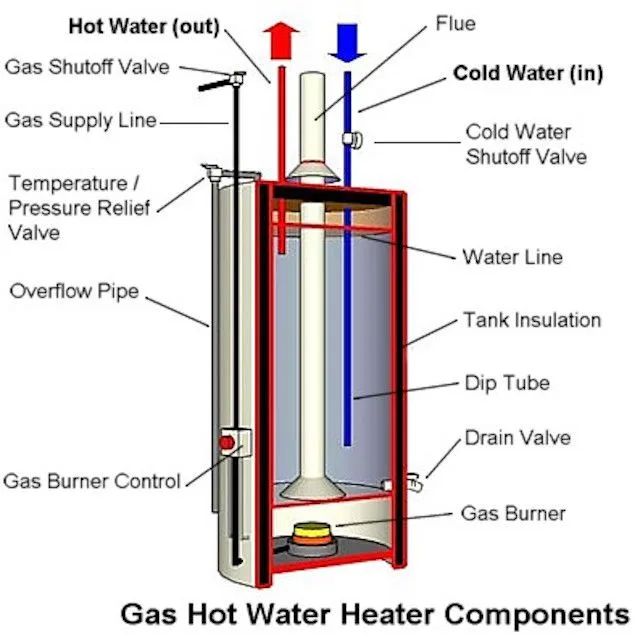
Image source: Bing (Web (fair-use with source credit))
Per the National Fuel Gas Code (NFPA 54) and the National Electrical Code (NEC) 422.12, water heaters must be installed with proper safety shutoffs and clearances. The design has not changed much in decades. That means the troubleshooting steps are standardized and well-documented.
The Step-by-Step Diagnostic Process
This is where the decision tree kicks in. Start with the simplest checks and work your way up. You do not need to be a plumber to do most of these.
Check 1: Is the thermostat set correctly?
Look at the temperature dial on the thermostat. It is usually behind the access panel on an electric heater or on the gas valve for a gas unit. The recommended setting is 120°F to 140°F.
If someone turned it down, turn it back up and wait 30 minutes to an hour for the water to reheat.
If yes (water gets hot now): Problem solved. You accidentally bumped the dial.
If no: Move to the next check.
Check 2: Is the high-limit switch tripped?
Electric water heaters have a reset button located behind the upper thermostat access panel. Press it firmly. If it clicks, the water heater was in a safety lockout.
If the water heats up: The switch tripped due to a brief overheating event. It might happen again, so keep an eye on it.
If it trips again immediately: You have a faulty thermostat or a shorted element. Move to the next step.
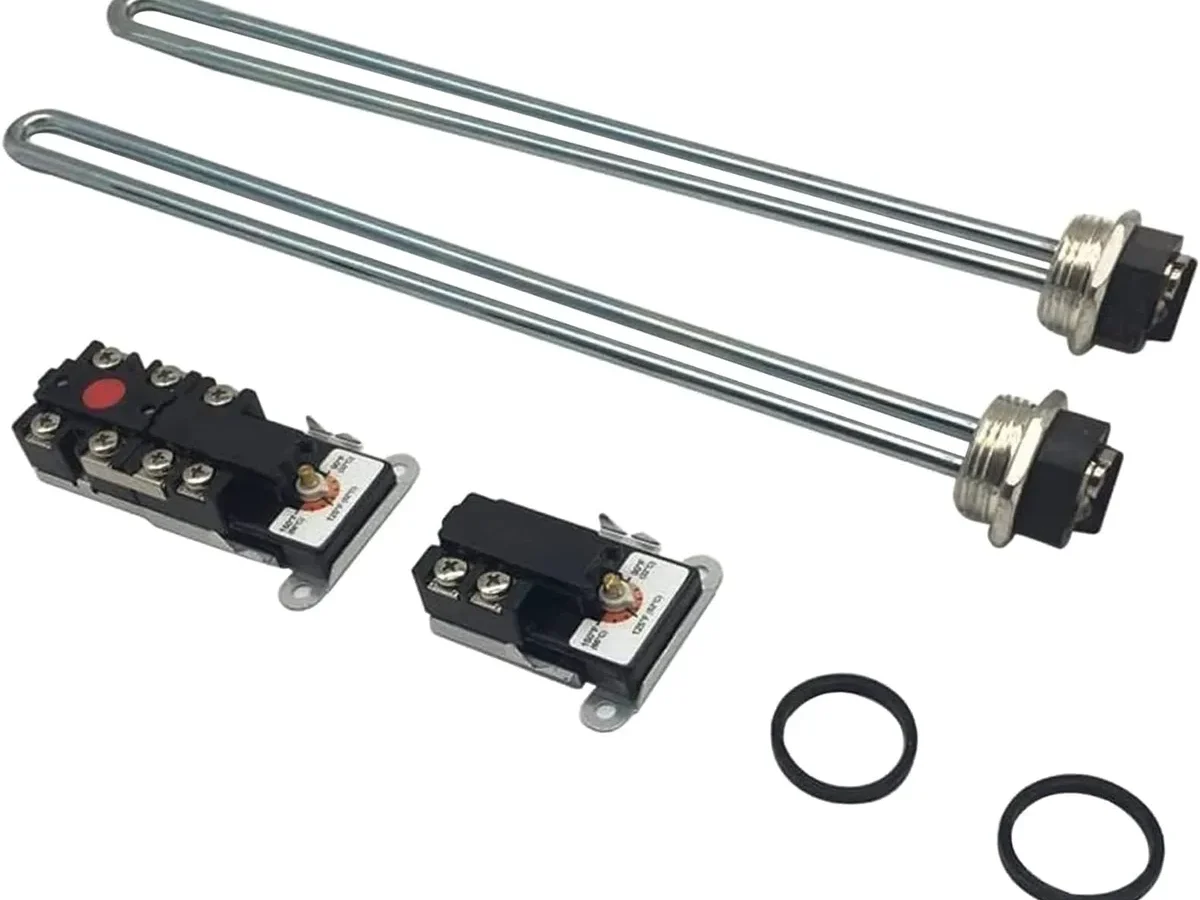
Check 3: Test the heating elements (electric only)
This requires a multimeter. Turn off the breaker at the panel. Remove the access panel and insulation.
Set your multimeter to ohms. Touch one probe to each screw terminal on the element.
| Element type | Expected resistance (ohms) |
|---|---|
| 4500W at 240V | 10 to 16 ohms |
| 5500W at 240V | 8 to 12 ohms |
| 3800W at 240V | 15 to 20 ohms |
If the reading is infinite (open circuit), the element is burned out and needs replacement. If it is zero (short), the element is also bad.
For gas water heaters: Check the pilot light and thermocouple. If the pilot is out, relight it following the manufacturer's instructions. If it will not stay lit, the thermocouple is likely worn out.
Replace it.
Check 4: Check the dip tube
This is a common hidden failure. If your water is hot for a few minutes then goes cold, the dip tube is probably broken. You can inspect it by disconnecting the cold water inlet and looking inside the nipple.
A broken dip tube will be in pieces or completely missing.
If broken: Replace the dip tube. It is a $10 to $15 part and takes about 20 minutes.
Check 5: Flush the tank for sediment
Sediment buildup is the silent killer of water heater performance. Over time, minerals settle at the bottom and insulate the water from the heat source. The heater runs longer, uses more energy, and delivers less hot water.
To flush: Attach a garden hose to the drain valve at the bottom. Open the valve and let the water run until it is clear. Do this once a year as maintenance.
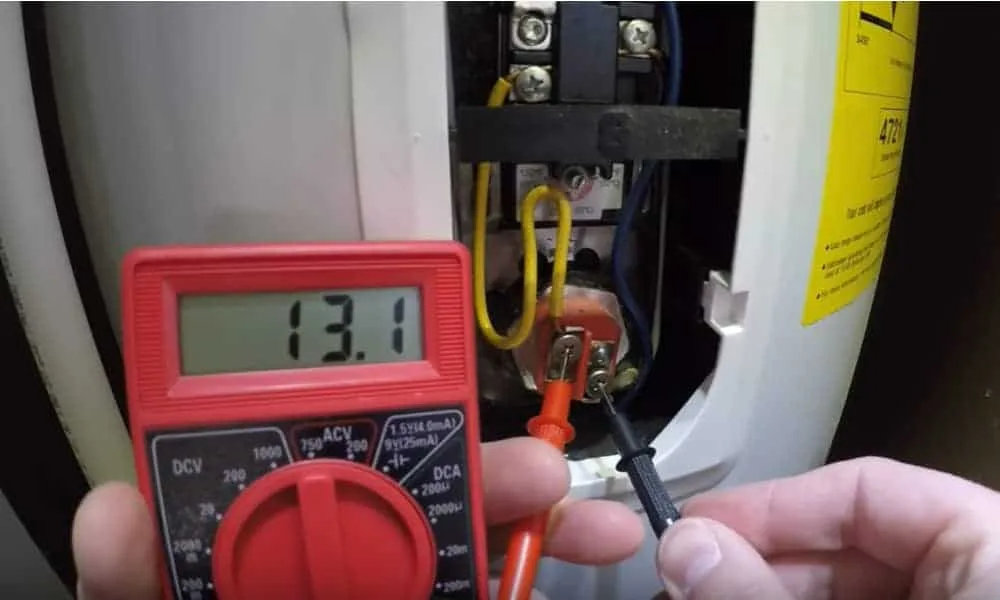
Image source: Bing (Web (fair-use with source credit))
Common Mistakes and Safety Rules
This is the part where real-world experience separates the competent DIYer from the person who floods their basement.
Mistake 1: Turning up the thermostat to max
If your water heater is not getting hot enough, the instinct is to crank the thermostat to its highest setting. Do not do this. It raises the risk of scalding, especially for children and elderly people.
It also wastes energy. The U.S. Department of Energy advises against setting your water heater above 140°F unless you have a specific need for sanitizing temperatures.
Mistake 2: Ignoring the reset button
If the high-limit reset button keeps tripping, resetting it over and over without fixing the root cause is dangerous. It means the water is overheating. This can damage the tank or cause a pressure relief valve failure.
Replace the thermostat or element before resetting again.
Mistake 3: Working on a live electric water heater
Always turn off the breaker at the main panel before opening the access panels. Use a voltage tester to confirm the power is off. Water and electricity do not mix.
A 240V shock can kill you.
Mistake 4: Forgetting to check the pressure relief valve
The temperature and pressure relief valve is a critical safety device. If it is leaking or stuck, it can cause the tank to overpressurize. Test it once a year by lifting the lever briefly.
If water does not flow or continues to drip after the lever is released, replace the valve.
Mistake 5: Assuming the water heater is dead
Many homeowners replace a perfectly good water heater because they misdiagnosed the problem. A broken dip tube, a $15 part, caused the symptom. A failed element, $20 to $30, caused the same symptom.
Always run through the diagnostic steps before buying a new unit.
Safety checklist
- Turn off the power for electric heaters before any work
- Close the gas shutoff valve for gas heaters before any work
- Wait for the water to cool before draining
- Never bypass the T&P valve
- Check local codes for permit requirements on gas valve replacements
When to Repair vs. When to Replace
You have diagnosed the problem. Now you decide whether to fix it or buy a new water heater.
| Condition | Recommended action | Reasoning |
|---|---|---|
| Heater is under 6 years old | Repair | Plenty of life left, parts are available |
| Heater is 8 to 12 years old | Evaluate repair cost vs. replacement | If repair is over $300, consider replacement |
| Heater is over 12 years old | Replace | Corrosion risk, efficiency loss, parts scarcity |
| Multiple failures in past year | Replace | Indicates end-of-life fatigue |
| Leaking tank | Replace immediately | Tank failure is irreversible |
| Sediment beyond cleaning | Replace | Heat damage has likely weakened the tank |
Cost breakdown
| Repair | Typical cost | Time |
|---|---|---|
| Replace thermostat | $20 to $40 | 30 minutes |
| Replace heating element | $25 to $50 | 30 minutes |
| Replace dip tube | $10 to $15 | 20 minutes |
| Flush tank | Free (DIY) | 1 hour |
| Replace thermocouple | $10 to $20 | 20 minutes |
| Replace gas control valve | $150 to $300 | 1 to 2 hours |
The rule of thumb
If your water heater is more than 10 years old and the repair costs more than 30% of a new unit, replace it. A new standard electric water heater costs $400 to $900. A new gas model costs $500 to $1200.
The peace of mind from a new unit with a warranty is worth the investment.
If the heater is under 8 years old and the repair is simple, fix it. You will get years of additional service from a properly maintained unit. Catch problems early.
A small fix today prevents a leak tomorrow.
Frequently Asked Questions
Why is my water heater running but not getting hot?
The most common cause is a failed heating element in electric models. For gas heaters, the issue is usually a faulty thermocouple or a gas control valve problem. Check the thermostat setting first.
If it is correct, move to the element test or pilot light inspection.
Can a water heater lose efficiency over time?
Yes. Sediment buildup at the bottom of the tank insulates the water from the heat source. This makes the heater run longer and use more energy.
Annual flushing removes this sediment. Expect a 10 to 20 percent performance drop after a few years without maintenance.
How do I know if my water heater element is bad?
Use a multimeter set to ohms. Turn off the breaker. Touch one probe to each screw terminal on the element.
A reading between 10 and 16 ohms is normal for a 4500W element. Infinite resistance means the element is burned out and needs replacement.
What does a broken dip tube look like?
You cannot see it without disconnecting the cold water inlet. The symptom is hot water that turns cold after a few minutes. The broken tube lets cold water mix with the hot water at the top of the tank.
Inspect the dip tube by removing the cold water inlet connection.
How often should I flush my water heater?
Manufacturer specifications recommend flushing the tank once a year. If you live in an area with hard water, do it every six months. Flushing removes sediment that reduces efficiency and shortens the heater's lifespan.
It is a simple DIY task that takes about an hour.
Is it safe to replace a water heater element myself?
Yes, if you follow proper safety procedures. Turn off the breaker at the main panel. Use a voltage tester to confirm the power is off.
Drain the tank below the element level. Remove the old element and install the new one. The job takes about 30 minutes.

Similar Posts