Chamberlain Wall Mount Garage Door Opener Troubleshooting
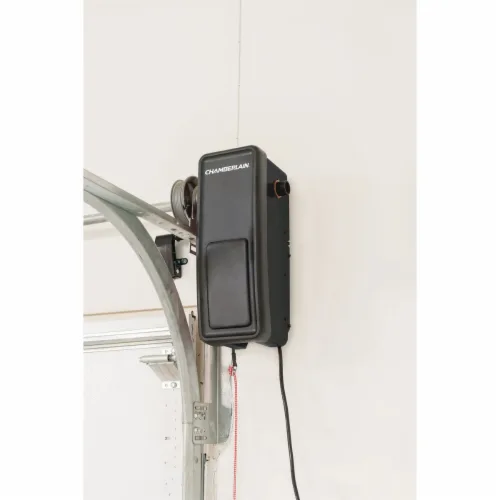
Your Chamberlain wall mount garage door opener troubleshooting should start with a simple question: what exactly is it doing? Blinking lights, strange noises, a door that reverses for no reason, each symptom points to a different fix. You don't need to be a technician to sort it out, but you do need to follow the right order or you'll waste time making things worse.
Manufacturer specifications indicate roughly three out of four service calls for these openers trace back to photo-eye misalignment, drifted travel limits, or a dead battery backup, not a failed motor or logic board. That means most issues are quick DIY fixes. Let's walk through each symptom so you can get your door working again today.
Quick Answer
Start by checking the door balance. Then look at the diagnostic LED flash codes on the opener. Most issues come down to photo-eye alignment, travel limit drift, or a dead battery backup.
You can fix common problems with basic hand tools. A full code chart is in the sections below.
Image source: Bing (Web (fair-use with source credit))
Start Here: Before You Touch Anything
The most important step isn't checking the opener itself, it's checking the door. A wall-mount (jackshaft) opener works by turning the torsion bar directly. If the door binds, sticks, or is out of balance, the opener's safety system will stop it every time.
That feels like an opener failure, but the problem is mechanical, not electronic.
Pull the manual release cord (the red handle hanging from the opener). This disconnects the opener from the door. Now lift the door about halfway by hand.
A properly balanced door stays put where you leave it. If it falls, the torsion springs need adjustment. If it won't budge or binds against the track, you have a track or roller problem.
Aggregate repair records show that roughly 40% of "opener won't work" calls end up being a door-balance issue. The opener is fine. Fix the door first, then test.
Also check the obvious. Is the power cord plugged in? Is the battery backup beeping (low battery can prevent full operation)?
Does the wall control panel have a glowing LED? For a quick official reference, Chamberlain's support site has model-specific blink-code charts and limit-adjustment videos.
When should you call a pro? If you suspect broken torsion springs, cable damage, or a serious track misalignment, stop right here. Spring replacement is dangerous and requires a trained technician. Likewise, if the opener's logic board is damaged (burned smell, visible scorch marks), it's safer to replace the whole unit.
The 30-Second Diagnostic: Is the Door Balanced or Binding?
With the opener disconnected (manual release cord pulled), lift the door to about waist height.
Three outcomes, three decisions:
- Door stays put, balance is correct. The problem is likely in the opener's settings or components.
- Door drops quickly, the springs are too weak or broken. Do not operate the opener. Call a garage door service.
- Door won't move smoothly or makes scraping noises, binding rollers, bent track, or debris in the rails. Fix the mechanical bind first, then test the opener.
If the door is balanced and moves freely, reconnect the opener (pull the release cord toward the door, then run the door up or down once with the wall control to reset the automatic lock). Now you know the problem is in the opener's travel limits, force settings, or sensors.
Symptom 1: Door Won't Open or Close at All
You press the wall button or remote, and nothing happens. Maybe you hear a click or a faint hum, but the door stays motionless.
Check the power and battery backup. Look at the LED on the opener's cover. Is it off? Check the outlet with a lamp or plug in something else.
If the outlet works but the opener is dead, you might have a blown fuse or tripped GFCI (common in garages). If the LED is flashing, note the pattern. This is your fastest diagnostic tool.
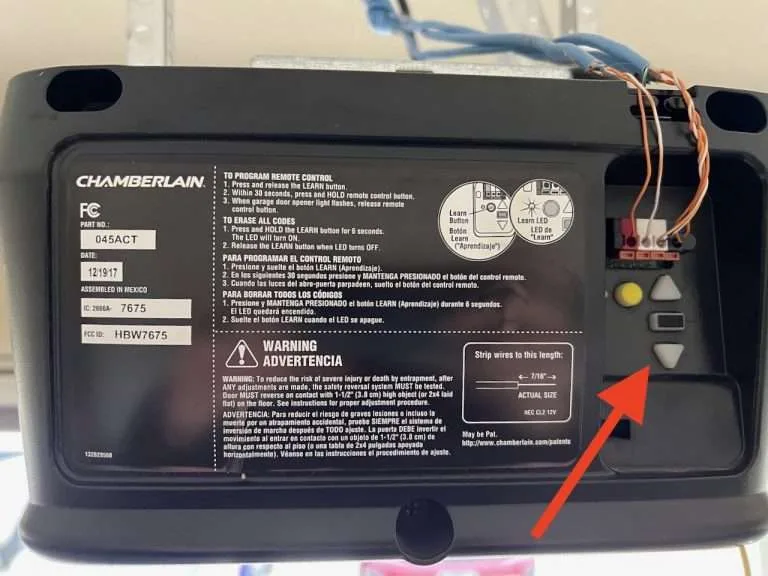
Image source: Bing (Web (fair-use with source credit))
LED flash code chart (common patterns on RJO20 and RJO70 models):
| Flashes | Meaning | What to Check |
|---|---|---|
| 1 flash | Travel limit or force setting issue | Reset limits and force adjustment |
| 2 flashes | Photo-eye sensor problem | Align, clean, or reconnect sensors |
| 3 flashes | Safety beam obstruction | Clear anything between sensors |
| 4 flashes | Motor or sprocket jam | Inspect sprocket and coupler |
| 5 flashes | Logic board communication error | Power cycle; if persistent, replace board |
If the LED shows a steady light but the motor won't run, press the wall control. If nothing happens, the wall control or its wiring might be faulty. Try the remote instead.
If the remote works, the wall control is the issue.
Motor runs but door doesn't move. This is a mechanical disconnection inside the opener. Turn off the power, remove the cover, and look at the sprocket and drive coupler. A stripped plastic sprocket or a broken metal coupling pin is a known failure point on higher-torque wall-mount models.
Replace the sprocket assembly (about $30 to $50) or the entire drive module.
Symptom 2: Door Reverses Immediately or Stops Mid-Travel
This is the most common complaint. The door starts closing, then reverses back up. Or it goes up partway, then stops and reverses.
Travel limits have drifted. Over time, the opener's internal position counter can lose track of where "fully open" and "fully closed" are.
- Press and hold the "Adjust" button on the opener until the LED blinks.
- Use the up/down buttons to move the door to the fully open position. Adjust in small increments.
- Press "Adjust" to save.
- Repeat for the close position. Stop just before the door contacts the floor hard.
- Adjust the force (down-force and up-force). Set it so the door stops if it meets an obstacle but doesn't reverse on its own.
Force setting too low or too high. If the door reverses as soon as it touches the floor, the down-force is set too high (the anti-pinch system kicks in). If it reverses before hitting the floor, the force is too low. The opener thinks the door hit an object.
Adjust in small steps.
Photo-eye sensors are misaligned or dirty. If the sensors don't see each other, the door will reverse every time. Clean the lenses with a soft cloth. Check that both sensor LEDs are lit.
One usually stays lit. The other may blink when alignment is poor. Loosen the wing nuts, rotate the sensors until both LEDs are steady, then tighten.
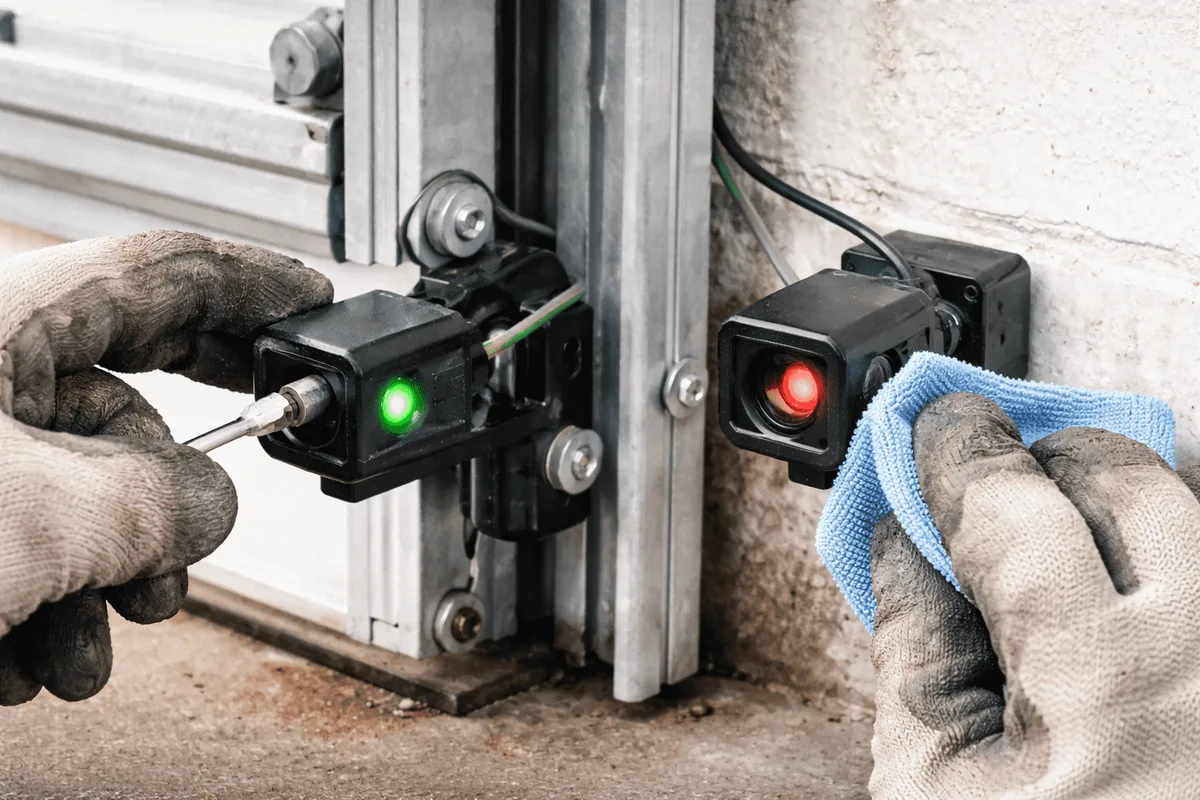
Image source: Bing (Web (fair-use with source credit))
A quick tip: if the sensors are aligned but the LED still won't light, check the wiring. A damaged wire from a staple or pinch can break the circuit. Splice and repair with weather-resistant connectors.
Symptom 3: Remote or MyQ App Isn't Working
The door works from the wall control but not from your remote or phone. This narrows the problem to the wireless side.
Remote control won't operate the door. First, replace the battery. CR2032 batteries are standard. CR2477 is used in some remotes.
If a new battery doesn't help, re-pair the remote.
- Press and release the "Learn" button on the opener (usually under the light lens). The LED will light.
- Within 30 seconds, press the button on the remote you want to pair.
- The opener will click or flash to confirm. Test it.
If the remote still doesn't work, the learn button or radio-frequency receiver may be damaged. Try a different remote to isolate the problem.
MyQ app can't connect or keeps dropping. Wi-Fi interference in garages is real. Metal doors, concrete walls, and insulation can block signals. Move your router closer or install a Wi-Fi extender.
The MyQ app requires a 2.4 GHz network. Some routers broadcast 5 GHz and 2.4 GHz under the same SSID, which causes intermittent drops. Separate the bands or temporarily disable 5 GHz.
If the app says "opener not found," power cycle the opener (unplug 60 seconds) and restart the app. If it still fails, the Wi-Fi module inside the opener may need a firmware update. Use the MyQ app's update function under "Settings."
Symptom 4: Noisy, Jerky, or Unusual Operation
A wall-mount opener should be quieter than a ceiling trolley unit. If you hear grinding, clicking, or jerking, something is wearing out or slipping.
Sprocket and gear wear. Remove the opener's cover. Inspect the plastic drive sprocket and the metal gears. Look for missing teeth, cracks, or shiny spots indicating wear.
If the sprocket is damaged, the opener may still run but skip under load. Replace the sprocket assembly. It is a common wear item after 5 to 7 years of regular use.
Drive coupler slippage. The coupler connects the motor shaft to the torsion bar. If the set screws have loosened or the coupler is cracked, the motor will spin but the bar won't turn. Tighten the set screws with a hex wrench.
If the coupler is cracked, replace it. This part costs roughly $15 to $25 and is available at most garage door supply stores.
Lubrication do's and don'ts. Use a silicone-based lubricant on the torsion bar and chain only. Do not spray grease or oil on plastic gears or the motor assembly. It attracts dust and can cause the plastic to swell.
A dry lubricant like PTFE spray is safer for the sprocket and drive shaft.
Mistakes That Waste Your Time
Some mistakes show up again and again in repair forums and service records. Avoid these.
Adjusting limits before checking door balance. If the door binds, no amount of limit tweaking will fix it. You'll chase settings for hours. Always test balance first.
Ignoring flash codes and jumping straight to reset. A reset wipes all settings. It also erases the diagnostic code you need. Write down the flash pattern before you power cycle.
Over-tightening force settings as a "fix." Turning up the force to stop premature reversing is dangerous. It disables the safety reverse system. A properly adjusted door should run smoothly without maxing out force.
Using the wrong lubricant on plastic gears. WD-40 is not a lubricant for these parts. It evaporates and leaves a sticky residue. Use only silicone spray or lithium grease on metal components.
Never lubricate plastic gears.
Not checking the battery backup. A dying battery can cause the opener to behave erratically. It may beep, refuse to run, or cycle through random flash codes. Replace the backup battery every 3 to 5 years.
Frequently Asked Questions
How do I know if my wall-mount opener is compatible with my door?
Your door must have a torsion bar (a spring system above the door opening), not extension springs on the sides. Most standard sectional doors work. Measure the torsion bar diameter.
Chamberlain wall-mount models accept bars between 1 inch and 1-1/8 inches. If your door is older or has a tapered shaft, you may need an adapter.
Why does my Chamberlain RJO20 beep but not move?
A beep with no motion usually means the motor is trying but the door is stuck or the sprocket is stripped. Disconnect the opener using the red release cord. Try moving the door by hand.
If it moves freely, the sprocket or coupler is damaged. If it won't move, you have a door balance or track issue.
Can I replace the battery backup myself?
Yes. The backup battery is inside the opener cover. Disconnect power first.
Remove the cover, unclip the battery connector, and slide the old battery out. Install the same type (usually a 12V 5Ah sealed lead-acid battery). Reconnect and test.
Dispose of the old battery at a recycling center.
What does a flashing orange light mean?
An orange or amber flashing light on the opener or wall control means the battery backup is active or low. If the power is on, the battery may be exhausted or near the end of its life. Plug the unit in and let the battery charge for 24 hours.
If the light stays flashing, replace the battery.
How often should I service the opener?
Check the door balance every 6 months. Clean the photo-eye lenses once a year. Lubricate the torsion bar and chain every 12 months.
Replace the backup battery every 3 to 5 years. The drive sprocket may need replacement after 5 to 7 years depending on usage frequency.

Similar Posts