How To Calibrate A Vr Headset: Quick Setup Guide
Calibrating a VR headset means adjusting fit, tracking, IPD, play space, and sensors for clear, stable, comfortable immersion.
If you want your VR sessions to feel sharp instead of shaky, this is the part that matters most. I have spent a lot of time testing different headsets, and the same pattern shows up again and again: most “VR problems” are really calibration problems. Once you know how to calibrate a VR headset the right way, you can reduce blur, motion drift, eye strain, and those little annoyances that break the magic.
What VR Headset Calibration Really Means
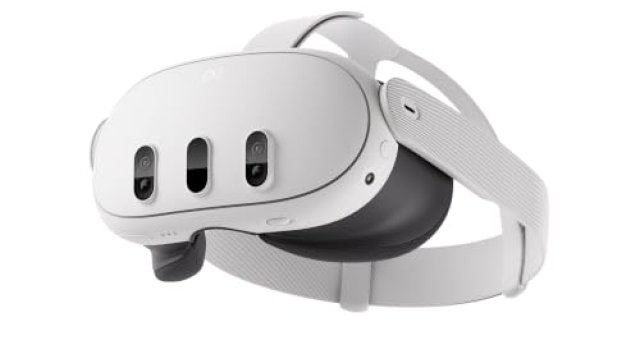
When people ask how to calibrate a VR headset, they often mean more than one thing. Calibration can include lens spacing, room setup, controller pairing, tracking setup, and display alignment. Think of it like tuning a bike before a long ride. If one part is off, the whole experience feels clunky.
A well calibrated headset should feel natural. Your view should be clear. Your hands should line up with your real movement. And your play space should keep you safe while you move around.
In my experience, the biggest mistake is assuming the headset is ready right out of the box. Most units are close, but close is not enough for long sessions. Even a small fit issue can make VR feel tiring fast.

Why Proper Calibration Matters
Knowing how to calibrate a VR headset is about comfort as much as performance. A headset that is not tuned well can cause blur, eye strain, poor tracking, or a sense that the world is “sliding” around you. That can ruin games, fitness apps, and productivity use alike.
Good calibration helps with:
- Sharper visuals, because the lenses line up better with your eyes
- Better tracking, because the system understands your position more accurately
- Less discomfort, because your posture and headset fit improve
- Fewer errors, because controllers and boundaries stay aligned
- Longer play sessions, because your body does not fight the headset
Researchers and headset makers often stress that comfort and tracking accuracy matter as much as raw resolution. That matches what I have seen in real use. A great panel still looks bad if the headset sits wrong on your face.
Step 1: Set Up Your Play Space First
Before you touch any advanced settings, clear your area. Calibration starts with the room, not the headset. If your play space is messy, the tracking system has a harder job.
Do this first:
- Remove chairs, cords, pets, and glass items from the area
- Make sure the floor is dry and even
- Leave enough space for both seated and standing use
- Check that lighting is balanced, not too dark and not too bright
- Close blinds if sunlight causes glare on sensors or cameras
For inside out tracking headsets, lighting matters a lot. For base station systems, camera placement and sensor visibility matter more. Either way, a clean space makes every other step easier.
I learned this the hard way while testing a room scale setup in a bright living room. The headset kept losing track near a window because the light kept changing. Once I moved the setup and simplified the lighting, the problem almost disappeared.
Step 2: Fit the Headset Correctly
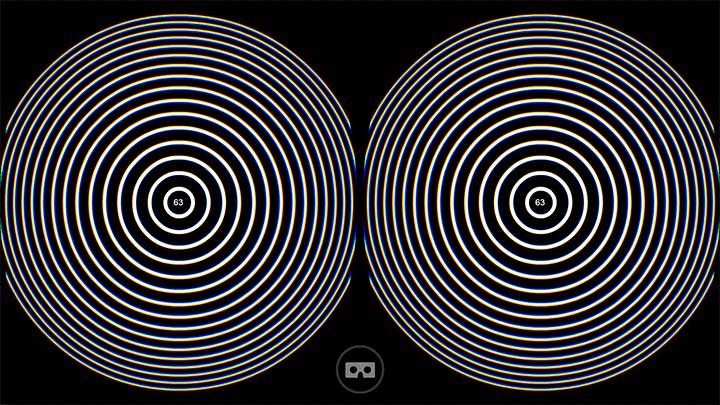
A huge part of how to calibrate a VR headset is just wearing it the right way. If the headset sits too high, too low, too tight, or too loose, the image will look worse than it should. Fit affects both comfort and clarity.
Use this simple approach:
- Put the headset on while it is powered on.
- Center the display on your face.
- Tighten the strap until it feels secure, not squeezed.
- Adjust the top strap so the weight rests more evenly.
- Move the headset slightly up or down until the image looks clearest.
If your headset has a dial, use it slowly. Small changes can make a big difference. The goal is not just comfort. The goal is to keep the lenses in the sweet spot of your eyes.
A lot of people wear the headset too low on the nose. That can blur the image and create pressure. If you feel like the picture never fully sharpens, fit is often the reason.
Step 3: Adjust IPD for Clearer Vision
IPD means interpupillary distance. It is the distance between your pupils. If this setting is off, the image can feel strained or slightly doubled. This is one of the most important parts of how to calibrate a VR headset.
Here is how to handle it:
- Check whether your headset has a physical IPD slider or a software setting
- Measure your IPD if needed, using an eye doctor’s record or a measurement tool
- Move the setting slowly until text and UI elements look crisp
- Test it in a calm scene, not during fast motion
- Recheck it if the image feels off after a long session
Some headsets use fixed lens positions, while others offer wider adjustment. If your headset has a narrow range and your eyes fall outside it, you may still get decent results, but not perfect ones. That is a hardware limit, not user error.
I always tell friends to test IPD in a menu screen with small text. That is usually more revealing than a game scene full of motion. Your eyes will tell you when the setting is right.
Step 4: Run the Built-In Tracking Setup
Most headsets include a setup flow for tracking. Do not skip it. If you want to know how to calibrate a VR headset properly, this step is where the system learns your room and your movement pattern.
Follow the on-screen steps carefully:
- Stand or sit in the center of your play area
- Look around as instructed so the system can map the room
- Hold controllers still when prompted
- Re-center if the system offers that option
- Save the setup before starting a game
Inside out tracking headsets use cameras on the headset itself. They need visible walls, furniture edges, or other visual anchors. Base station systems use external sensors and need those sensors placed well. Each type has its own strengths, but both need correct setup.
If tracking feels jumpy later, redo the room setup before blaming the hardware. In many cases, that fixes the issue faster than any other change.
Step 5: Define Your Guardian or Boundary Area
Safety is part of calibration too. A boundary system, sometimes called a guardian, chaperone, or safety boundary, tells you where not to walk. It protects you from walls, furniture, and awkward collisions.
Set it up like this:
- Choose a space with enough room to move your arms
- Trace the boundary carefully and keep it accurate
- Leave a safe buffer near furniture and walls
- Use seated mode if your play area is small
- Update the boundary if you move furniture later
Do not treat the boundary like a formality. I have seen people ignore it and then wonder why they keep getting warning flashes in the middle of a match. A well drawn boundary makes the entire experience feel more relaxed.
Step 6: Check Display Settings and Refresh Rate
Once the physical setup is right, move to the display. Good visual calibration helps reduce blur, flicker, and eye fatigue. This is another key part of how to calibrate a VR headset for daily use.
Review these settings:
- Refresh rate, which can affect smoothness
- Brightness, which affects comfort in dark scenes
- Render scale, which can improve clarity on stronger systems
- Comfort options, such as vignetting or motion smoothing
- Color and contrast, if your headset supports them
Higher refresh rates often feel smoother, but they can also use more system power. If your PC or console struggles, too high a setting may hurt performance. Balanced settings usually work better than maxed-out settings.
From testing many headsets, I have found that a stable frame rate matters more than chasing the highest numbers. A headset that runs smoothly at a slightly lower setting often feels better than one that stutters at a higher one.
Step 7: Recenter Your View When Needed
Sometimes the headset is not badly calibrated overall. It just needs a quick recenter. This resets your forward view so that “straight ahead” matches where you are actually looking.
Use recentering when:
- The world feels rotated
- Your character faces the wrong direction
- You switched from standing to sitting
- You moved the play space or turned around too much
- A game seems misaligned after putting the headset back on
Recenter functions are small but powerful. They save time and stop you from overthinking a simple issue. If the view is only slightly off, this is usually the fastest fix.
Step 8: Test in a Real App, Not Just in Settings
A headset can look fine in the menu and still feel wrong in a game. That is why I always recommend testing calibration in a real app. This is the only way to know whether the adjustments actually work in motion.
Try:
- A calm home environment scene
- A text-heavy menu
- A game with hand tracking or controller pointers
- A slow movement app or training demo
- A short session lasting at least 10 to 15 minutes
Pay attention to:
- Blur at the edges
- Eye strain
- Motion drift
- Controller mismatch
- Headache or neck pressure
This step often reveals small issues you would not notice during setup. Think of it like test driving a car after tuning the mirrors. The real proof comes on the road, not in the garage.

Common Calibration Problems and How to Fix Them
Even when you know how to calibrate a VR headset, problems can still pop up. The good news is that most issues have simple causes.
Here are the most common ones:
- Blurry image: Adjust IPD, clean lenses, and refit the headset
- Tracking loss: Improve lighting, redraw boundaries, or redo room setup
- Hand drift: Re-pair controllers, replace batteries, or check for sensor blockage
- Head pressure: Loosen the straps and shift weight to the top band
- Eye fatigue: Lower brightness, check IPD, and take more breaks
Also remember that lenses are delicate. Clean them with a microfiber cloth only. I have seen people use rough fabric and leave fine scratches that never fully go away. That is a painful mistake because it is so easy to avoid.
Best Practices for Ongoing Calibration
Calibration is not always a one-time task. Rooms change. Lighting changes. You may even change how you sit or stand. If you want reliable results, make calibration part of your routine.
Good habits include:
- Checking fit before every long session
- Re-running room setup after moving furniture
- Cleaning lenses regularly
- Updating headset firmware and app software
- Rechecking IPD if the headset feels different than usual
A VR headset can drift in comfort even if the technical settings stay the same. Straps loosen. Foam compresses. Your body gets tired. A quick check before play often prevents a bad session later.
From my own experience, the best users are not the ones who spend the most time tweaking. They are the ones who build a simple routine and stick to it. That is how you keep VR feeling fresh instead of frustrating.
When You Should Recalibrate
You do not need to recalibrate every day, but you should do it when something changes. If the headset suddenly feels wrong, trust that feeling. Your eyes and body often notice problems before the settings do.
Recalibrate when:
- The headset starts to blur more than usual
- Tracking becomes unstable
- You switch rooms
- Another person uses the headset
- You update system software
- You notice new discomfort after a session
This kind of maintenance is normal. Even professional simulation systems get checked and tuned often. VR is no different. A few minutes of setup can save you from a lot of friction.
Benefits of Learning How to Calibrate a VR Headset
Once you understand how to calibrate a VR headset, the payoff is immediate. The headset feels better, the visuals improve, and the whole experience becomes easier to enjoy.
Main benefits include:
- Better clarity and sharper text
- More stable tracking
- Less nausea and eye strain
- Improved comfort during long sessions
- More accurate controller movement
- Safer room scale play
I think of calibration as the difference between wearing the right size shoes and wearing shoes that are just close enough. Both may work for a few minutes, but only one feels right over time.
FAQ
How often should I calibrate my VR headset?
You should recalibrate whenever the fit, room, or tracking feels off. For most people, that means a full setup only once in a while, with small checks before longer sessions.
Why does my VR headset look blurry even after setup?
Blurry visuals often come from poor fit, incorrect IPD, or dirty lenses. It can also happen if the headset is sitting too high or too low on your face.
Do I need to calibrate if I only play seated games?
Yes, but the process is usually simpler. Even seated play benefits from correct IPD, headset fit, and a quick recenter so the view feels natural.
What is the most important part of calibrating a VR headset?
In my experience, fit and IPD matter most for comfort and clarity. Tracking setup comes next because it affects how well the headset follows your movement.
Can poor lighting affect VR calibration?
Yes, especially for inside out tracking systems that depend on cameras. Good, even lighting helps the headset detect the room more accurately and reduces tracking issues.
Conclusion
Learning how to calibrate a VR headset is one of the easiest ways to make VR feel better right away. When the fit, tracking, IPD, and play space all work together, everything becomes sharper, smoother, and more comfortable.
The best approach is simple: start with the room, fit the headset well, tune the IPD, run tracking setup, and test in a real app. If something feels off later, do not ignore it. Small fixes often make the biggest difference.
Take a few minutes to calibrate your headset before your next session, and you will likely notice the change immediately. If you found this guide helpful, explore more VR setup tips, subscribe for future articles, or leave a comment with your own calibration trick.

Similar Posts