How To Hide Washer And Dryer In Kitchen
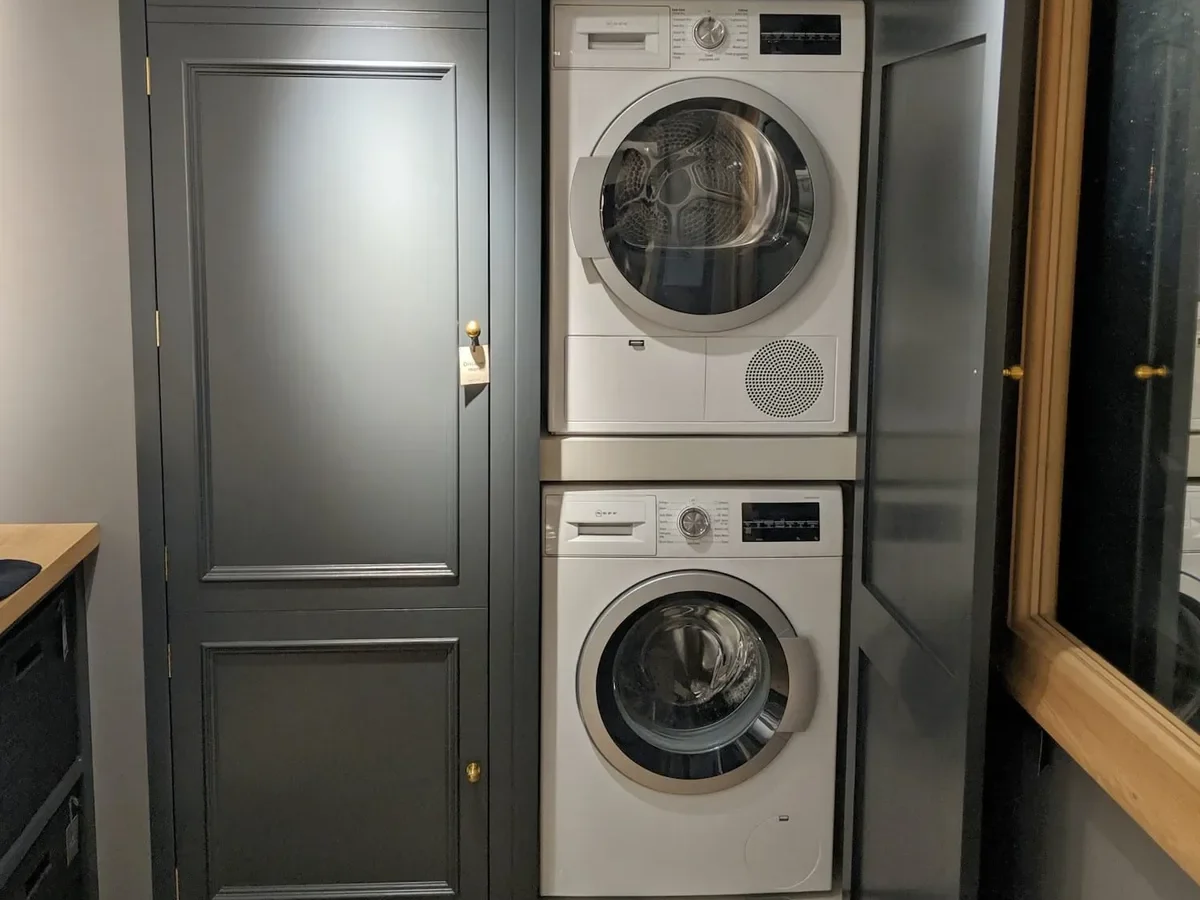
You walk into your kitchen and see it: a bulky white washer and dryer shoved into the corner, clashing with every warm wood tone and soft finish you worked hard to pick. It's an eyesore in a room that's supposed to be the heart of the home. Wondering how to hide washer and dryer in kitchen without sacrificing function or style?
You are not alone. More homeowners are skipping the separate laundry room and integrating these machines into the kitchen, where they can be tucked away and nearly invisible.
Standard kitchen counter depth sits at 24 inches, while most full-size washers run 27 to 28 inches deep. That mismatch alone is where most hiding plans fail. You need the right cabinet, the right venting, and the right layout before you even buy the appliances.
Let's walk through the factors that make or break this project.
Quick Answer
Hide your washer and dryer in a kitchen cabinet or pantry. Measure your space first. Choose a stackable or side-by-side setup.
Consider venting requirements. Build or buy a cabinet that fits the appliances and allows airflow.
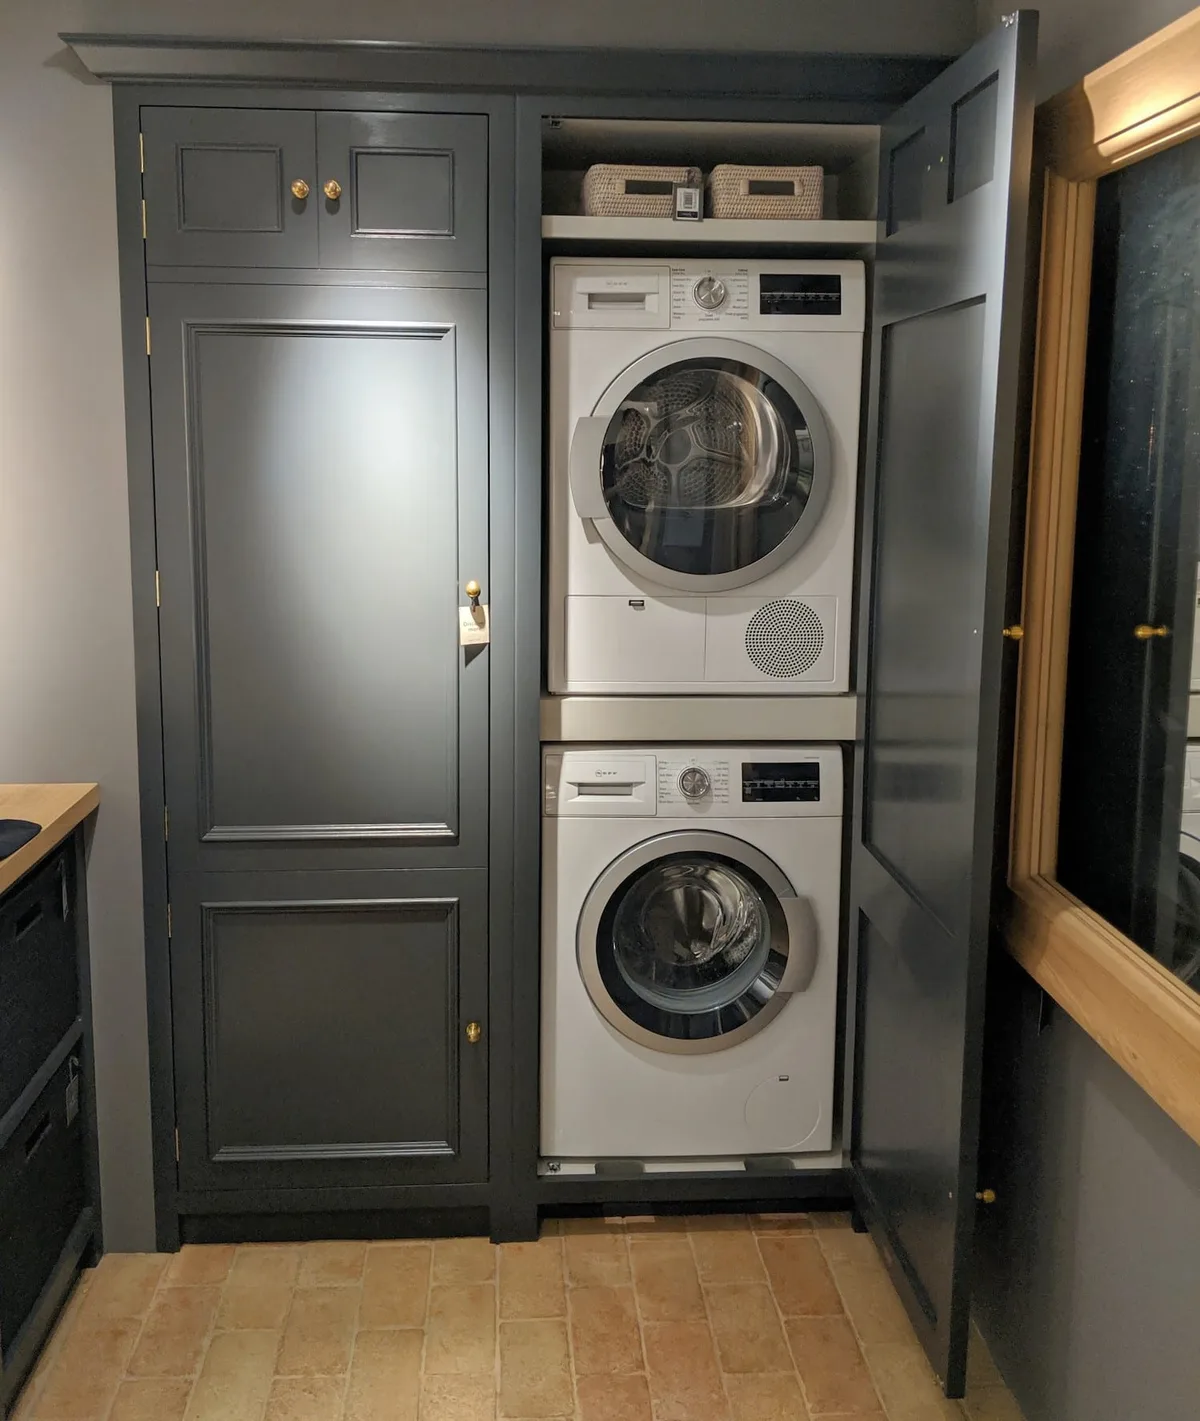
Image source: Bing (Web (fair-use with source credit))
Why Hiding Laundry in the Kitchen Is Tricky (And How to Get It Right)
The problem is rarely about finding a cabinet that fits. It's about making that cabinet work with the machine's needs. A washer needs water supply lines, a drain hose, and a level floor.
A dryer needs either an external vent or a ventless system that handles moisture inside the unit. Enclose both in a tight cabinet, and you risk blocking airflow, trapping heat, and creating a fire hazard.
Manufacturer specifications indicate that most vented dryers need at least 4 to 6 inches of clearance behind the unit for the exhaust duct. If you skip that clearance, the dryer overheats, the lint trap clogs faster, and the machine's thermal fuse can blow. The same goes for vibration.
A washer spinning at 1,200 RPM shakes a poorly built cabinet. If the cabinet is not reinforced, the whole unit can shake itself loose over time.
The right approach is to plan backwards. Decide on your hiding method first, then choose the appliances that fit it. If you want a floor-to-ceiling pantry cabinet with a door, you need a stackable washer and dryer set.
If you want under-counter integration, you need a compact, front-load washer (usually 24 inches wide) and a matching dryer. The layout determines the options, not the other way around.
Know Your Limits: Space, Venting, and Power
Before you start shopping for cabinets or appliances, you need to know three things: the exact dimensions of your available space, the type of dryer venting you can support, and the electrical and plumbing access you have.
Available Space
Measure the width, depth, and height of the area where the machines will go. Include the floor-to-ceiling height if you're stacking. Standard kitchen counter depth is 24 inches.
Most full-size washers are 27 inches deep. That means a front-load washer will stick out 2 to 3 inches past the counter edge. If you want a flush fit, you need a compact washer (24 inches deep) or a shallower unit.
Stackable washers and dryers typically need a height of 70 to 75 inches. That's tall enough to fit inside a standard 84-inch pantry cabinet.
Venting Type
If you have a vented dryer, you need an external exhaust duct that runs to the outside of the house. That duct cannot be longer than 25 feet in most codes, and it must be straight or have gentle bends. If you cannot run a vent to the exterior, you need a ventless dryer (condenser or heat pump).
These units do not need an external duct. They capture moisture in a water tank or drain it directly. For a kitchen enclosure, ventless is often the safer choice because it eliminates the need to cut into the cabinet for ductwork.
Electrical and Plumbing
A standard washer needs a 120V outlet on a dedicated circuit. A gas dryer needs a gas line and a 120V outlet. An electric dryer needs a 240V outlet.
Check your kitchen's existing outlets. You may need to run new wiring. Water supply lines (hot and cold) and a drain line must be within 4 to 6 feet of the washer.
If you are installing the washer under a counter, the drain hose must rise to a height of 30 to 36 inches before dropping into the drain. That is a standard requirement for proper drainage and to prevent siphoning.
Stack or Side-by-Side? The First Big Decision
Once you know your space, the first major decision is layout. You have two options: stack the dryer on top of the washer, or place them side-by-side. Each has its own set of conditions.
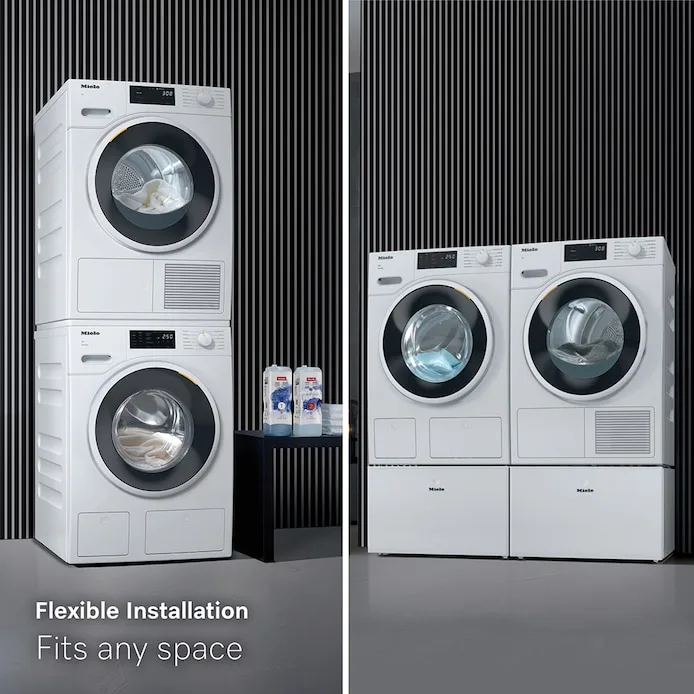
Image source: Bing (Web (fair-use with source credit))
Stacking
Stacking is the best option when you have limited floor space. A stacked washer and dryer takes up about 27 inches of width and 70 to 75 inches of height. That fits inside a standard pantry cabinet or a tall cabinet next to the refrigerator.
The downside is that you need a stackable washer and dryer set. Not all front-load washers are stackable. Check the manufacturer's specifications.
Most stackable kits include a bracket that secures the dryer to the washer. That bracket is required for safety. If you skip it, the dryer can tip forward during use.
Side-by-Side
Side-by-side placement works best when you have a wider base cabinet, typically 54 to 60 inches wide. You can install both machines under a single countertop, with a cabinet door in front of each. The advantage is that you can access the controls easily without bending.
The downside is that you lose counter space. You also need to ensure the machines are level side-to-side, or the vibration can cause the cabinet to rock.
If you have a narrow space (under 36 inches), stacking is your only viable option. If you have a wide space (over 48 inches), side-by-side is easier to install and maintain. If you are between 36 and 48 inches, you can stack or use a compact side-by-side set (24-inch wide units).
Vented, Ventless, or Heat Pump? How to Choose Your Dryer Type
The dryer type is the most critical decision for hiding it in a kitchen. The choice determines whether you need to cut holes in your cabinet, whether you can place the unit in a sealed space, and how much maintenance you will need.
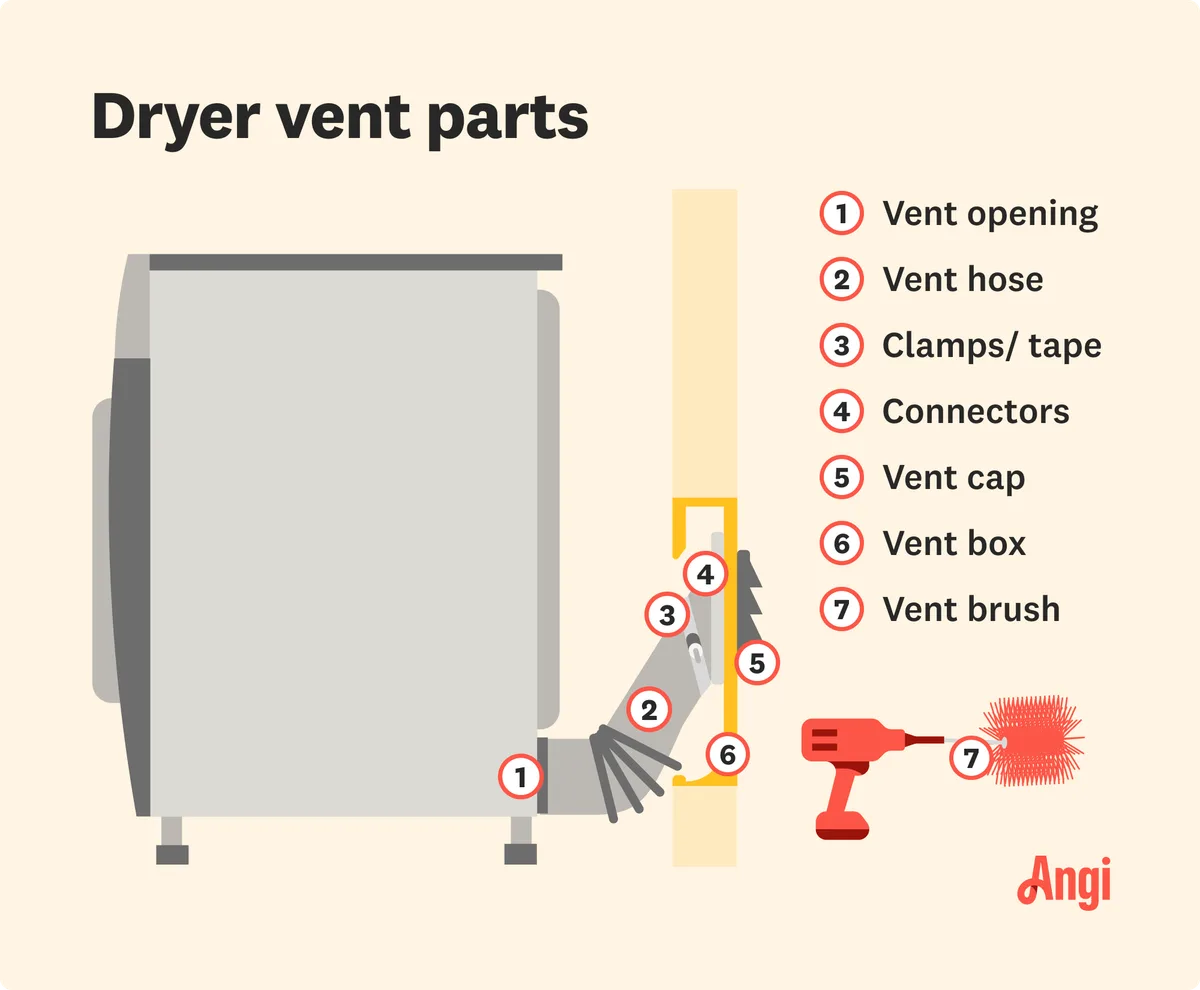
Image source: Bing (Web (fair-use with source credit))
Vented Dryers
A vented dryer pulls in air from the room, heats it, passes it through the drum, and exhausts the hot, moist air outside. This is the most common type. It is also the most demanding for an enclosed cabinet.
You need a vent duct that runs from the dryer to the exterior. The duct must be metal (not plastic) and must be as short and straight as possible. Per the National Fire Protection Association, lint buildup in dryer vents is a leading cause of household fires.
In a kitchen cabinet, the duct is harder to access for cleaning. If you choose a vented dryer, you must include a removable panel or pull-out shelf so you can reach the vent connection.
Condenser Dryers (Ventless)
A condenser dryer does not need an external vent. It uses a heat exchanger to cool the moist air and condense the water into a tank or a drain hose. This type is ideal for a kitchen cabinet because you can place it in a sealed enclosure.
The downside is that the lint filter and condenser need regular cleaning (every 1 to 2 months). Some models have a self-cleaning condenser, but not all. If you choose a condenser dryer, make sure the cabinet has a small gap at the bottom for the air intake.
Most models pull air in from the front or bottom and exhaust it upward.
Heat Pump Dryers
A heat pump dryer is a type of ventless dryer that uses a sealed refrigerant loop to recycle heat. It is the most energy-efficient option, using about 40 to 50 percent less energy than a conventional vented dryer. It also runs at a lower temperature, which is gentler on clothes.
The catch is that heat pump dryers are more expensive (typically $200 to $500 more than a standard vented dryer) and take longer to dry a load (about 60 to 90 minutes versus 45 to 60 minutes for a vented dryer). For a kitchen cabinet, a heat pump dryer is the safest choice because it produces no hot exhaust and requires no external duct.
If you have an exterior wall behind the cabinet, you can use a vented dryer. If you do not have exterior access, choose a ventless dryer. If you want the lowest energy cost and the gentlest drying, choose a heat pump dryer.
Cabinet Options: Custom, Prefab, or Pantry Conversion
Once you have your appliances and layout, the next step is choosing the cabinet. You have three main routes: a custom-built cabinet, a prefab laundry cabinet, or converting an existing pantry.
Custom Cabinetry
A custom cabinet is built to your exact appliance dimensions. This is the best option if you have non-standard space or if you want the cabinet to match your existing kitchen cabinetry perfectly. The downside is cost.
Custom work runs $500 to $2,000 depending on materials, hardware, and labor. You also need to wait for the cabinet to be built (usually 2 to 4 weeks). A custom cabinet includes ventilation slots, a reinforced floor, and a removable toe kick for access to the water and drain lines.
Prefab Laundry Cabinets
Prefab laundry cabinets are pre-assembled units designed specifically for washer and dryer enclosures. They come in standard widths (24, 27, 30 inches) and heights (72 to 84 inches). They are available at home improvement stores and cost $200 to $800.
The advantage is that they are ready to install immediately. The disadvantage is that they may not match your existing kitchen cabinets perfectly. You can often paint or stain them to match, but the door style and hardware may differ.
Prefab cabinets typically include a pre-cut hole for the vent duct and a shelf for stacking.
Pantry Conversion
If you have an existing pantry cabinet that is at least 27 inches wide and 70 inches tall, you can convert it into a laundry cabinet. This is the cheapest option (under $200 if you do the work yourself). You need to remove the interior shelves, install a reinforced floor or platform, add ventilation grilles, and run the water and drain lines.
The challenge is that the pantry cabinet may not be deep enough. Standard pantry cabinets are 12 to 14 inches deep. You need at least 24 inches of depth for a front-load washer.
If the pantry is too shallow, you cannot use it.
| Option | Cost | Installation Difficulty | Best For |
|---|---|---|---|
| Custom | $500–$2,000 | High (needs contractor) | Matching existing cabinetry, non-standard sizes |
| Prefab | $200–$800 | Medium (DIY possible) | Standard sizes, quick installation |
| Pantry conversion | Under $200 | Medium (DIY) | Existing deep pantry, budget build |
If you want a seamless look, go custom. If you want a quick solution, go prefab. If you already have a deep pantry and a tight budget, convert it.
The Step-by-Step Process: From Measurements to Finished Cabinet
This is where the planning turns into action. Follow the steps in order. Skip one and you will need to tear out the cabinet later.
Step 1: Confirm Your Final Measurements
Measure the space again with the appliances on site. A washer that is 27 inches wide on paper might be 27.2 inches with the door hinge. Check the manufacturer's installation sheet for the exact rough opening dimensions.
Write down the width, depth, and height. Add 1 inch of clearance on each side for vibration and airflow.
Step 2: Prepare the Floor and Walls
The floor must be level. Use a 4-foot level. If it is off by more than 1/8 inch, use a self-leveling compound.
Install a plywood subfloor if you are placing the machines on a concrete slab. This prevents moisture wicking. For stacked units, add an anti-tip bracket that secures the dryer to the wall behind the cabinet.
Step 3: Run Water and Drain Lines
Install the water supply lines (hot and cold) and the drain line before the cabinet goes in. Use braided stainless steel hoses. They resist bursting.
Route the drain line to a standpipe or sink drain. The drain hose must loop up to 30 to 36 inches above the floor. This is called a high loop.
It prevents dirty water from siphoning back into the washer.
Step 4: Install the Cabinet and Appliances
Place the cabinet base. Secure it to the wall studs. Install the countertop if you have one.
Slide the washer into position. Level it using the adjustable feet. Place the dryer on top (for stacked) or beside it.
Connect the vent duct (if vented) or the drain hose (for ventless). Open the cabinet doors and check clearance on all sides.
Step 5: Add Ventilation and Access Panels
Cut ventilation grilles into the cabinet base and top if the manufacturer requires airflow. Install a removable toe kick panel or a pull-out shelf so you can reach the water shut-off valves and the drain line. Test the ventilation by running the dryer on a heat cycle.
Check that air exits the grilles freely.
What Could Go Wrong: Vibration, Moisture, and Airflow Mistakes
Most failed installations come from three issues. Vibration shakes the cabinet loose. Moisture rots the wood from the inside.
Blocked airflow causes the dryer to overheat.
Vibration Transfer
A washer spinning at high speed generates significant force. If the cabinet floor is not reinforced, the vibration travels through the countertop and adjacent cabinets. You hear it.
You feel it in the dishes. Use anti-vibration pads under the washer feet. Some models come with them.
If not, buy a set. They cost $20 to $50 and reduce noise by about 40 percent. Also isolate the cabinet base with rubber pads between the floor and the cabinet frame.
Moisture Damage
Ventless dryers release warm, humid air into the room. If the cabinet is not sealed properly, that moisture condenses on the walls and the inside of the cabinet doors. Over months, the wood swells and the paint peels.
Use a moisture barrier inside the cabinet. A simple solution is to line the interior with PVC sheet or fiberglass-reinforced panel. Leave a 1/2 inch gap at the bottom of the door for air circulation.
If you live in a humid climate, install a small exhaust fan in the cabinet that activates when the dryer runs.
Blocked Airflow
This is the most dangerous mistake. A blocked vent or a tightly sealed cabinet causes the dryer to overheat. The thermal fuse can blow.
In extreme cases, lint can ignite. According to the National Fire Protection Association, failure to clean dryer vents is a leading cause of home fires. For a hidden installation, set a reminder to clean the lint trap after every load and inspect the vent duct every three months.
If you use a ventless dryer, clean the condenser coil every two months. The manufacturer's manual will tell you the exact interval.
Frequently Asked Questions
Can I hide a top-load washer in a kitchen cabinet?
No. Top-load washers need the lid to open fully, typically requiring 18 inches of clearance above the unit. A cabinet would block the lid.
Stick with front-load washers only for a hidden installation.
Do I need a permit to install a washer and dryer in my kitchen?
In most areas, yes. Moving water lines or adding a new 240V outlet requires a permit. Check with your local building department.
Failing to get a permit can cause issues when you sell the house.
How much does it cost to hide a washer and dryer in a kitchen?
Total cost ranges from $600 to $3,000. That includes the cabinet ($200 to $2,000), installation materials ($100 to $300), and labor ($200 to $600). Not including the appliances themselves.
Can I use a standard kitchen cabinet as a laundry cabinet?
Only if it is deep enough. Most kitchen base cabinets are 24 inches deep. That works for compact washers.
Full-size washers (27 inches deep) will stick out. You need a deeper cabinet or a shallower appliance.
What is the best dryer type for a kitchen enclosure?
A heat pump dryer. It needs no external vent, runs at lower temperatures, and produces less heat inside the cabinet. It is more expensive but safer for an enclosed space.
How do I prevent mold inside the laundry cabinet?
Keep the cabinet door open for 30 minutes after each cycle. Use a moisture-absorbing product like silica gel packs or a small dehumidifier. Clean the lint filter and condenser regularly.
If you see condensation on the walls, improve ventilation immediately.

Similar Posts