How To Make Concrete Kitchen Countertops
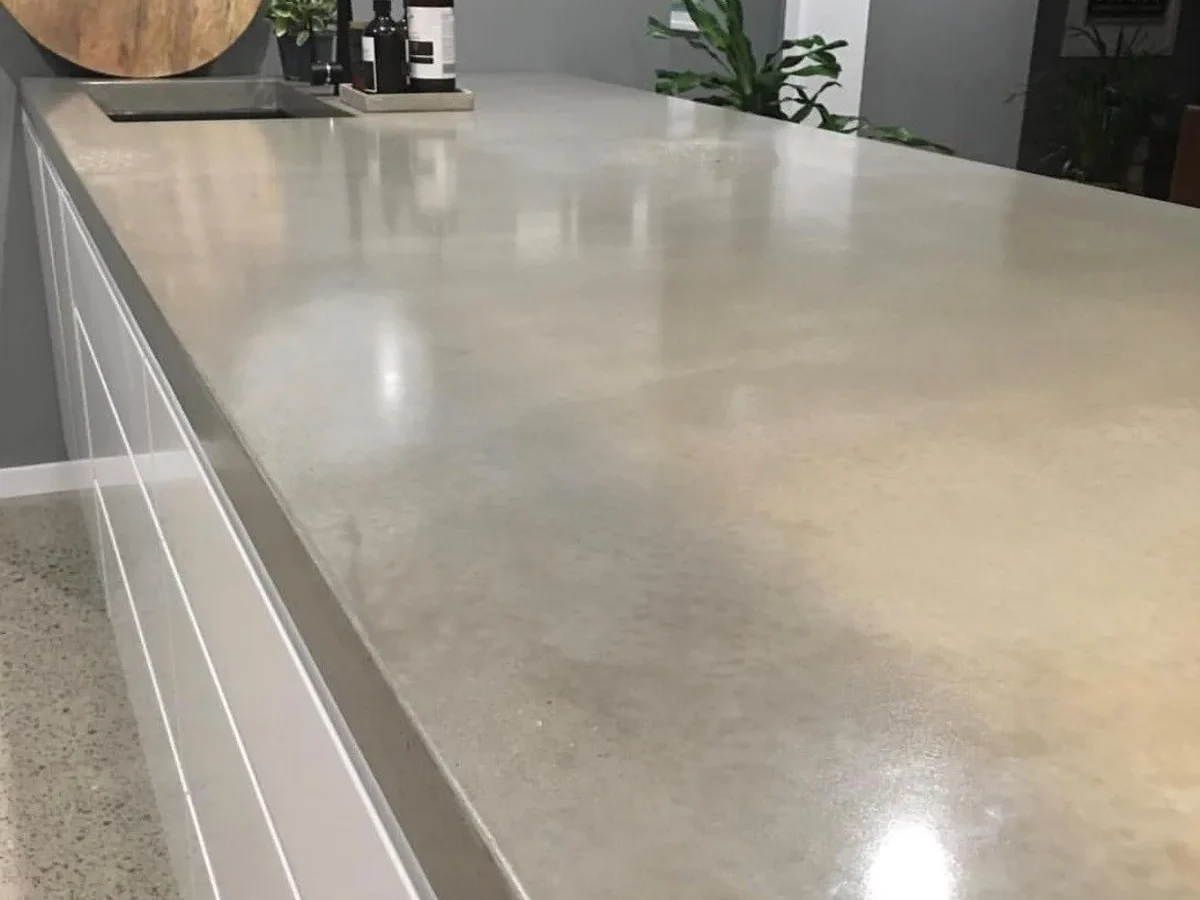
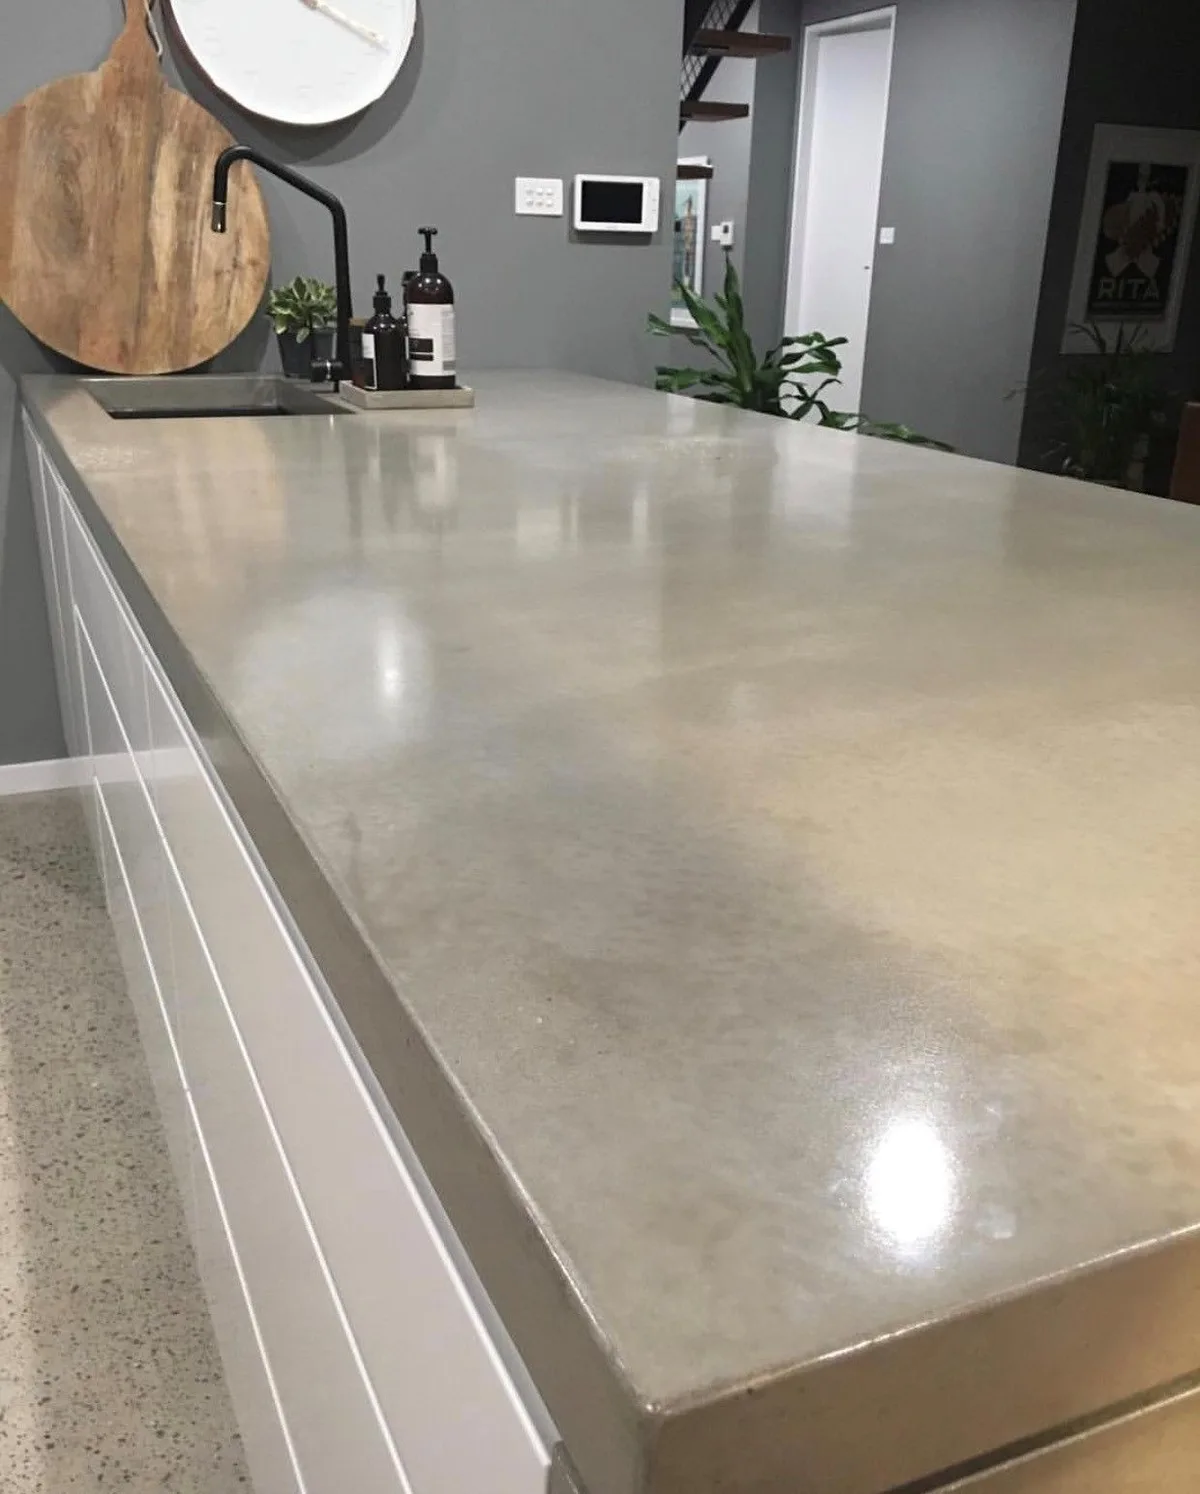
Image source: Bing (Web (fair-use with source credit))
How To Make Concrete Kitchen Countertops
Knowing how to make concrete kitchen countertops starts with accepting one hard truth: this is a project that punishes shortcuts. People don't fail because they mixed the wrong bag. They fail because the form leaked, the water ratio was too high, or the slab dried too fast.
Those three causes show up again and again across contractor forums and manufacturer defect reports. Get them right, and you get a countertop that looks like it cost three times more.
Industry specs from the Portland Cement Association put a strong countertop mix at a water-cement ratio of 0.35 to 0.45. That translates to a stiff, low-slump concrete that hits around 4,000 to 6,000 psi after 28 days. As of 2026, the most reliable DIY route is precast: you pour into a melamine form, cure the slab, then lift it onto your cabinets.
Quick Answer
Making concrete kitchen countertops takes about two weeks from start to finish. Build a melamine form sealed with silicone caulk. Mix bagged countertop cement with a water-cement ratio of 0.40.
Pour in layers, vibrate out air bubbles, and screed the surface flat. Wet-cure for 7 days in plastic sheeting. Polish with diamond pads from 50 to 3000 grit.
Apply densifier and food-safe sealer. Install on reinforced cabinets with construction adhesive.
Before You Start: Is This Actually Right for Your Kitchen?
Concrete countertops are beautiful, heat-resistant, and fully customizable. They are also heavy, porous, and demanding. If you want zero maintenance, granite or quartz is the honest answer.
If you do not mind reapplying sealer every one to three years, concrete can be the most rewarding surface in your kitchen.
Here is the quick reality check:
- Cost: $10 to $20 per square foot DIY, $65 to $135 per square foot professionally installed
- Weight: 18 to 25 pounds per square foot at 1.5-inch thickness
- Curing: 7 days before handling, 28 days for full strength
- Best for: unique colors, custom edges, integrated sinks, modern or farmhouse styles
If you are building new cabinets, add extra support for the load. If you are retrofitting old ones, reinforce the base frame. Standard builder-grade cabinets can sag under a heavy slab, especially over spans like a dishwasher opening.
What You'll Need: Tools and Materials Checklist
You do not need a full workshop, but the right list keeps the job from stalling. Put this together before you start mixing.
| Materials | Tools |
|---|---|
| Melamine-coated MDF form boards | Circular saw and straightedge |
| Release agent (non-staining) | Cordless drill and screws |
| Bagged countertop mix or custom mix | Paddle mixer drill |
| Polypropylene microfibers or welded wire | Screed, float, steel trowel |
| Densifier and food-safe sealer | Rubber mallet or concrete vibrator |
| Diamond polishing pads (50 to 3000 grit) | Angle grinder with variable speed |
| Silicone caulk | Respirator, safety glasses, gloves |
Bagged countertop mix is the easiest starting point. It already includes admixtures to reduce shrinkage. For stronger, thinner slabs, look into GFRC (glass fiber reinforced concrete).
It costs more but handles overhangs better and makes the slab lighter.
Step 1: Build Your Form
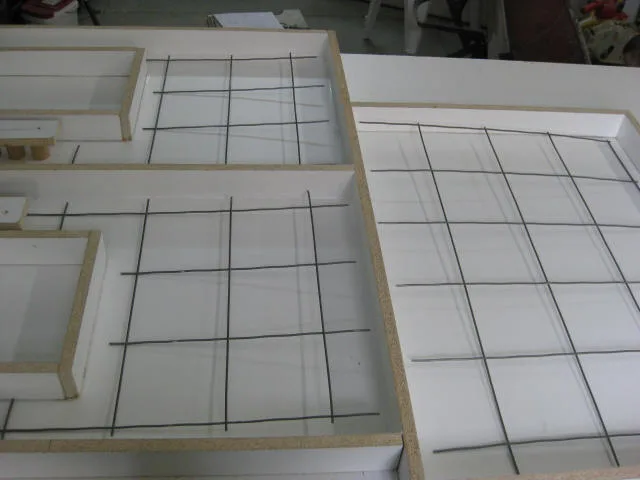
Image source: Bing (Web (fair-use with source credit))
Your form is a mold. It has to be square, sealed, and smooth. Melamine-coated MDF is the standard because concrete will not stick to it easily.
You also apply release agent before pouring so the slab comes free without a fight.
- Cut the melamine to your final countertop size. Include side strips for thickness, usually 1.5 to 2 inches.
- Assemble the form with screws, not nails. Nails can shift and leak.
- Run a bead of silicone caulk along every inside seam. Smooth it with your finger.
- Decide your edge profile now. A square edge is easiest. Bullnose requires a form insert or routing later.
If light shows through any seam, concrete will find it. Before pouring, wipe all interior surfaces with a non-staining release agent. Do not forget the top edges of the side strips.
They become the edge of your countertop.
Step 2: Mix, Pour, and Vibrate
Your concrete should be stiff but workable. Grab a handful and squeeze it. It should hold a ball without oozing water.
If it slumps flat, you added too much water, and too much water always costs you strength.
Place the concrete in layers. Add a 2-inch layer, consolidate it, then add the next. A concrete vibrator is ideal, but a rubber mallet tapped around the form edges works for smaller pours.
Watch the surface closely. When air bubbles stop rising, the concrete is fully compacted.
If you use rebar or welded wire mesh, set it in the middle of the slab, not on the bottom. It needs about 3/4-inch clearance from the top edge to resist cracking. Grinding and polishing concrete creates respirable silica dust.
OSHA regulates exposure on job sites. Follow the same rules as a DIYer: wet-grind, ventilate the space, and wear an N95 or better respirator.
Step 3: Finish, Cure, and Strip
Once the form is full, smooth the top with a screed board. Move it back and forth in a sawing motion, pulling the excess concrete toward you. Let it stiffen for 30 to 60 minutes, depending on room temperature.
When the surface is firm to the touch, float it lightly to close the texture.
Cover the form with plastic sheeting or wet burlap immediately. Strip the form after 24 to 72 hours, then continue wet-curing the slab for a full 7 days. Full strength takes 28 days, but you can install it after a week.
Watch for these common visual issues:
- Crazing: fine, random surface cracks from drying too fast
- Warping: the slab curls because one side cured faster than the other
- Pinholes: small air pockets left on the surface, filled later with slurry
- Efflorescence: a white powdery deposit from moisture moving through the concrete
None of these mean total failure. Pinholes and crazing are fixable at the polishing stage. Warping is the one to take seriously, so never rush the cure.
The slab needs even moisture on every side to stay flat.
Step 4: Polish and Seal
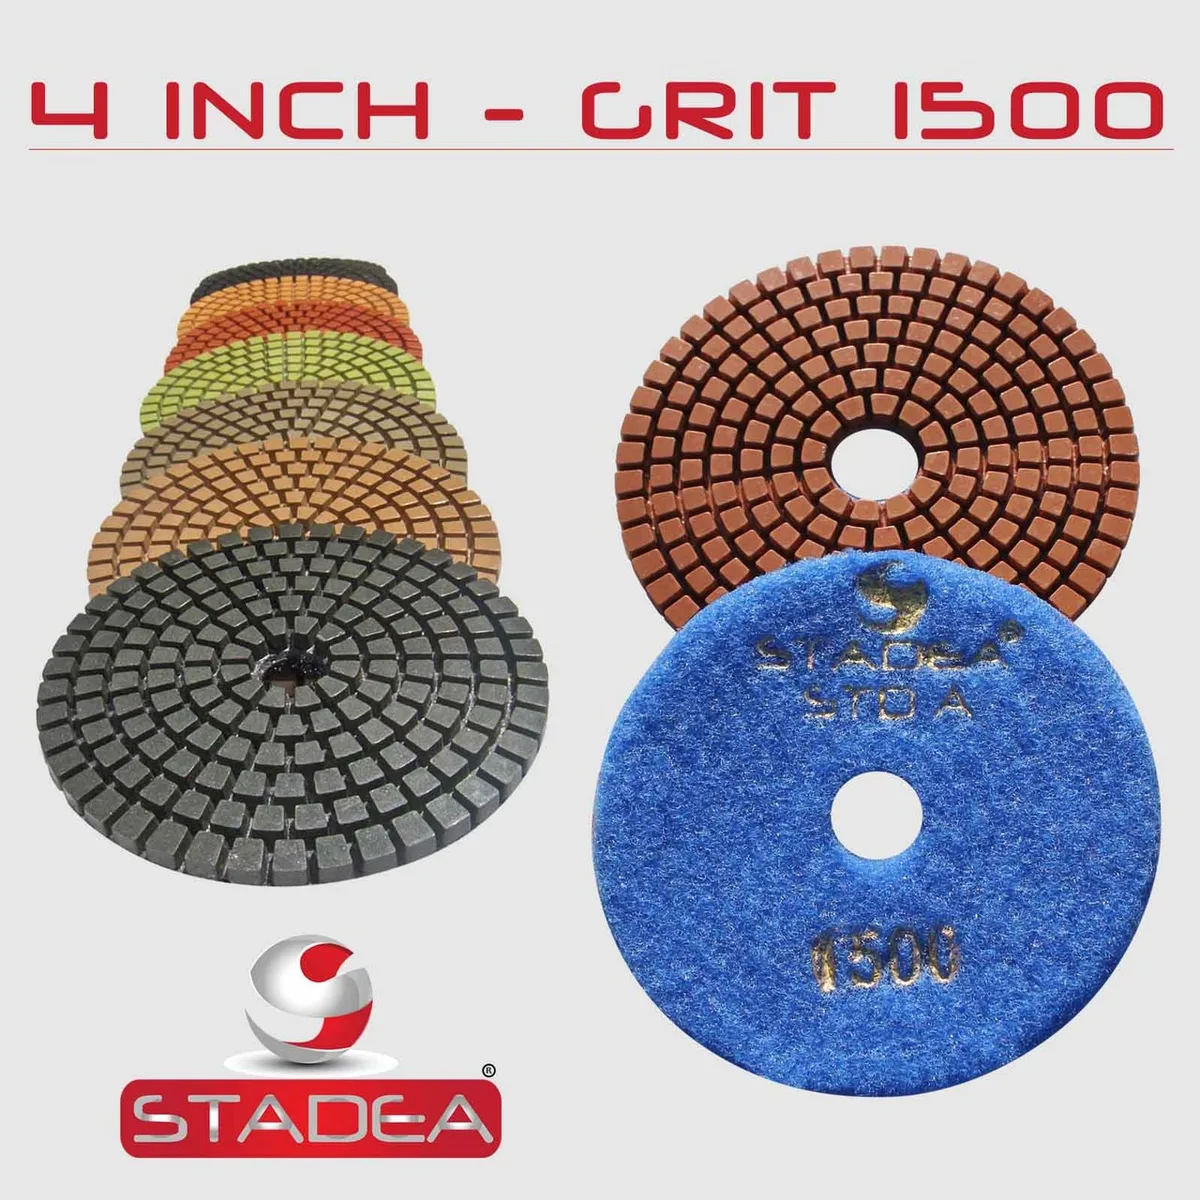
Image source: Bing (Web (fair-use with source credit))
After the 7-day cure, your slab will look rough and dusty. That is normal. The transformation happens during polishing.
Start with 50-grit diamond pads on a variable-speed angle grinder. Work wet, not dry, to control silica dust. Keep a spray bottle handy and mist the surface as you go.
Move through the grits in order: 50, 100, 200, 400, 800, 1500, 3000. Each grit removes the scratches from the last one. The jump from 400 to 800 is where the concrete starts to shine.
Between grits, fill any pinholes with a thin slurry of cement and water. Spread it across the surface with a spreader. Let it dry, then continue polishing.
Repeat until the face is smooth.
Once the surface is polished, apply a concrete densifier. It hardens the top layer and reduces porosity. Follow the manufacturer's drying time, then apply a food-safe sealer.
Wipe off excess before it cures or you will get a hazy film.
Step 5: Install and Protect Your New Countertop
This is a two-person job. A 10-foot slab weighs over 200 pounds, and concrete does not flex. One wrong twist and you have a crack.
Set the slab on padded sawhorses next to your cabinets. Run a bead of construction adhesive along the top of each cabinet. Lift the slab into place and lower it gently.
Do not drop it.
Check for level. Add plastic shims under the slab if needed. Screw through the cabinet corner brackets into the underside of the concrete.
The slab should not wiggle at all.
If you have multiple slabs, seal the seam with a color-matched caulk or epoxy. Backer rod fills the gap first, then sealant on top. Smooth it with a wet finger and tape off the edges.
For the first month, be gentle. Avoid acidic spills like lemon juice, vinegar, and tomato sauce. Concrete is highly alkaline, and acids can etch the polish.
A spill cleaned up fast is fine. A spill that sits overnight leaves a mark.
Troubleshooting Common Concrete Countertop Problems
Cracks, pinholes, and discoloration happen. They are not signs that you failed. They are signs that concrete is a natural material with its own behavior.
Pinholes come from air trapped during mixing. You can minimize them by vibrating the wet concrete and tapping the form edges with a rubber mallet. If you still see them after stripping, fill them with a cement slurry during polishing.
Two or three passes usually does it.
Crazing looks scary but is mostly cosmetic. It appears when the surface dries faster than the interior. To prevent it, start wet-curing immediately after floating.
Cover the slab with plastic sheeting within 30 minutes of finishing.
Efflorescence shows up as white patches. It comes from moisture traveling through the concrete and depositing mineral salts on the surface. Wipe it off with a mild acid solution.
A good sealer application prevents it from coming back.
Costs and Time Investment: What to Expect
DIY concrete countertops cost $10 to $20 per square foot in materials. That includes the bagged mix, melamine boards, release agent, reinforcement, diamond pads, densifier, and sealer. You might already own some of the tools.
Professional installation runs $65 to $135 per square foot. The jump covers skilled labor, commercial-grade materials, and a warranty.
The time breakdown for a typical 30-square-foot kitchen island looks like this:
| Stage | Time |
|---|---|
| Form building | 4 to 6 hours |
| Mixing and pouring | 2 to 3 hours |
| In-form cure | 24 to 72 hours |
| Wet cure after stripping | 7 days |
| Polishing and sealing | 6 to 8 hours |
| Installation | 2 to 4 hours |
Total active work is roughly two weekends. The cure is the long wait.
Maintenance and Long-Term Care
Good maintenance starts with the right sealer. Look for a solvent-based, food-safe acrylic or polyurethane sealer. Apply three thin coats, letting each dry fully before the next.
Clean the surface with a mild pH-neutral soap. Avoid vinegar, lemon, bleach, or ammonia. Those acids attack the sealer and etch the concrete.
A soft sponge or microfiber cloth works best.
Reapply sealer when water stops beading on the surface. In an average kitchen, that is every one to three years. In a busy kitchen with daily cooking, it might be closer to one year.
Concrete does scratch over time. A dull spot can be restored by local re-polishing with a 1000-grit diamond pad and fresh sealer. Do not use a stand mixer or heavy appliance directly on the concrete without a protective pad.
When to Call a Professional
If your countertop has a long unsupported overhang (more than 12 inches at 2-inch thickness or 6 inches at 1.5-inch thickness), you need an engineered solution. A professional can add fiber reinforcement or a steel support plate inside the slab.
If you want a seamless integrated sink, the formwork is precise. One leak during the pour ruins the slab. Many first-timers prefer to cast a solid slab and cut the sink hole later with a diamond blade.
If the countertop is larger than 10 square feet in one piece, the weight and handling become risky. A crack during installation ends the project. Professionals know how to lift and set heavy slabs without loading the corners.
Here is a simple test. If you read this guide and felt confident about every step, DIY it. If any step made you hesitate, get a quote from a local concrete countertop fabricator.
The cost might be worth the peace of mind.
Frequently Asked Questions
Why is my concrete cracking? Is it normal?
Hairline cracks called crazing are normal. They happen when the surface dries faster than the interior. Structural cracks near sink cutouts or sharp corners are not normal.
They come from poor reinforcement or too much water in the mix. Round the corners on cutouts for the next pour.
How long will it last before it needs re-sealing?
Every one to three years, depending on use. A busy kitchen with lots of cooking wears the sealer faster. Test by sprinkling a few drops of water on the surface.
If it beads up, the sealer is working. If it soaks in, it is time to reapply.
Can I put a hot pan directly on concrete?
Yes, concrete handles heat well. You can set a hot pan on it without damage. That is a real advantage over quartz and solid-surface materials.
Just avoid thermal shock from extreme temperature swings.
Should I cast the sink into the concrete or cut it later?
For first-time builders, cut the hole after the slab cures. Casting a sink into the form adds complexity. You need a sink mold and careful reinforcement around the drain hole.
One mistake means starting over.
Is concrete really food-safe?
Yes, with the right sealer. Look for products labeled food-safe or FDA-compliant for indirect food contact. The sealer creates a non-porous barrier.
Without it, concrete can harbor bacteria in its pores. That is why sealing is not optional.
Can I repair a chip or crack later?
Small chips and hairline cracks are repairable. Fill the chip with a color-matched epoxy or concrete patch. Sand it smooth with a polishing pad.
A crack that runs all the way through the slab is harder. You might need to cut the slab at the crack and create a seam. In a worst case, recast that section.
Repairs are never invisible.

Similar Posts