American Standard Flush Valve Troubleshooting
You hear it. That faint hiss from the bathroom. Or maybe the full-on ghost flush where your toilet runs for ten seconds, stops, then runs again an hour later.
If you've tried jiggling the handle and nothing changed, you're probably staring at an American Standard flush valve troubleshooting situation. The good news is most of these fixes take under 30 minutes and cost less than a takeout lunch.
A single running toilet can waste up to 200 gallons of water per day. That's not just annoying. It's a leak in your wallet.
As of 2026, American Standard remains one of the most widely installed toilet brands in North American homes. Knowing how to handle these repairs yourself is a genuinely useful skill. Let's walk through what's actually going on inside that tank.
Quick Answer
Most American Standard flush valve problems come from a worn flapper. Turn off the water supply. Flush the tank to empty it.
Check the flapper for cracks or warping. Replace it if damaged. Adjust the chain if it's the wrong length.
Clean the valve seat if there's mineral buildup. Test the flush. If the toilet still runs, the flush valve body may need replacing.
That fix is still under 25 dollars and takes about an hour.
Why Accuracy Matters Here (and What's at Stake)
A misdiagnosed flush valve problem can turn a 10 dollar fix into a 500 dollar floor replacement. That's the reality of what happens when a small leak goes unnoticed at the tank-to-bowl gasket and slowly rots the subfloor underneath your toilet.
The real risks you're managing here:
- Water damage. A leak at the base of the tank can travel along the floor and into the ceiling below. Even a slow drip does real structural damage over months.
- Mold growth. Persistent moisture inside the tank or on the bathroom floor creates the exact conditions mold needs. Remediation is far more expensive than the repair.
- Higher water bills. A silent running toilet can waste 200 to 300 gallons a day. That's like flushing a bathtub down the drain every 24 hours.
- Wasted time. Installing the wrong replacement part means you do the whole job twice. American Standard uses specific flapper designs that universal kits sometimes don't match well.
Most troubleshooting guides assume your toilet is a generic one-size-fits-all setup. American Standard toilets have specific flush valve designs, particularly the 400A and 400AF series, that behave differently than a Fluidmaster or Korky valve. Getting the right diagnosis the first time saves you the headache of a second trip to the hardware store.
If you catch the problem early, you're looking at a 5 to 20 dollar fix and 30 minutes of work. Ignore it, and that same leak becomes a plumber visit plus potential floor repair. The math is clear.
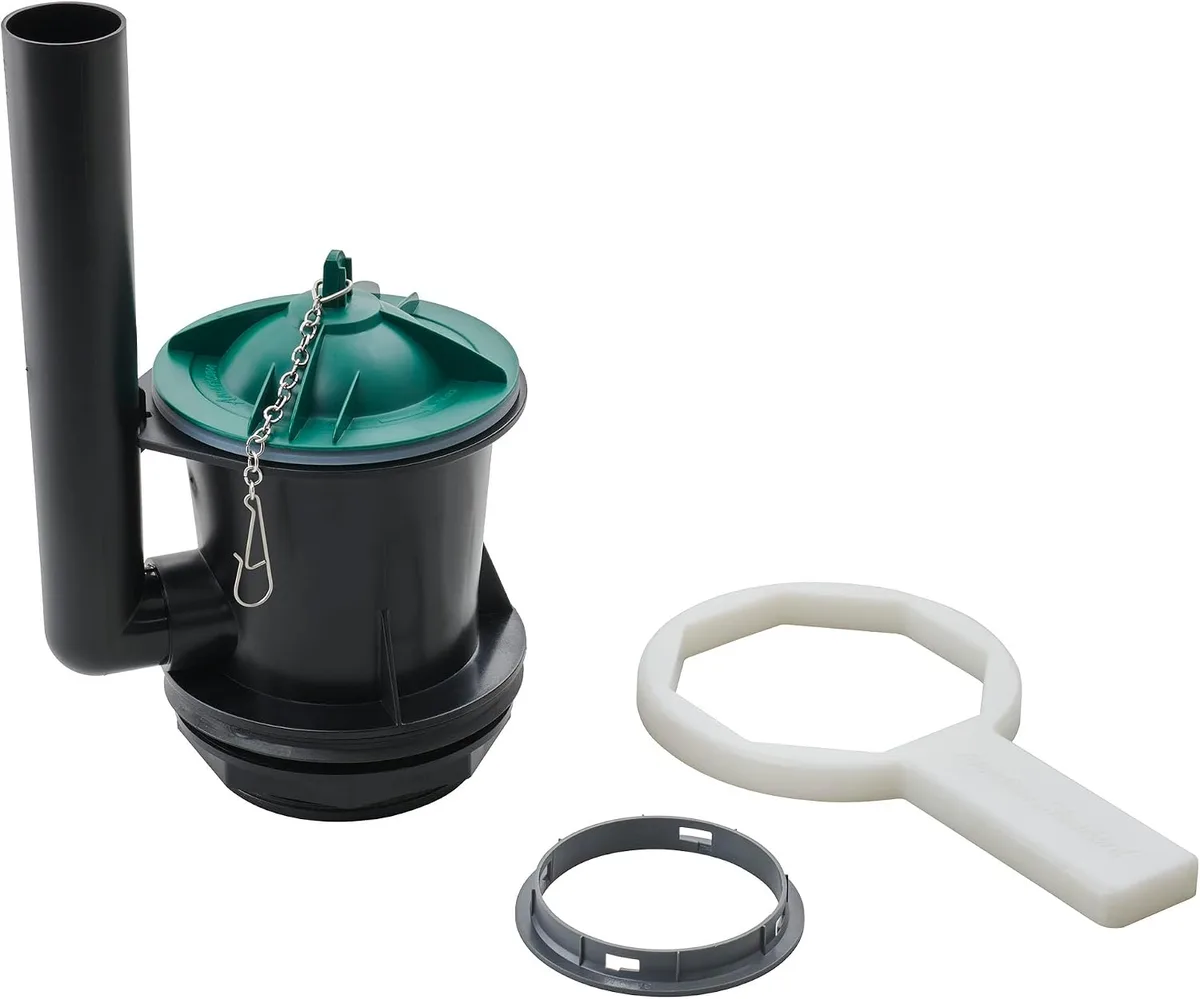
Image source: Bing (Web (fair-use with source credit))
The Anatomy of an American Standard Flush Valve
Pop the tank lid off and set it somewhere safe. Porcelain chips easily. A chipped lid means a whole new lid assembly or a different looking toilet.
The main parts inside your tank:
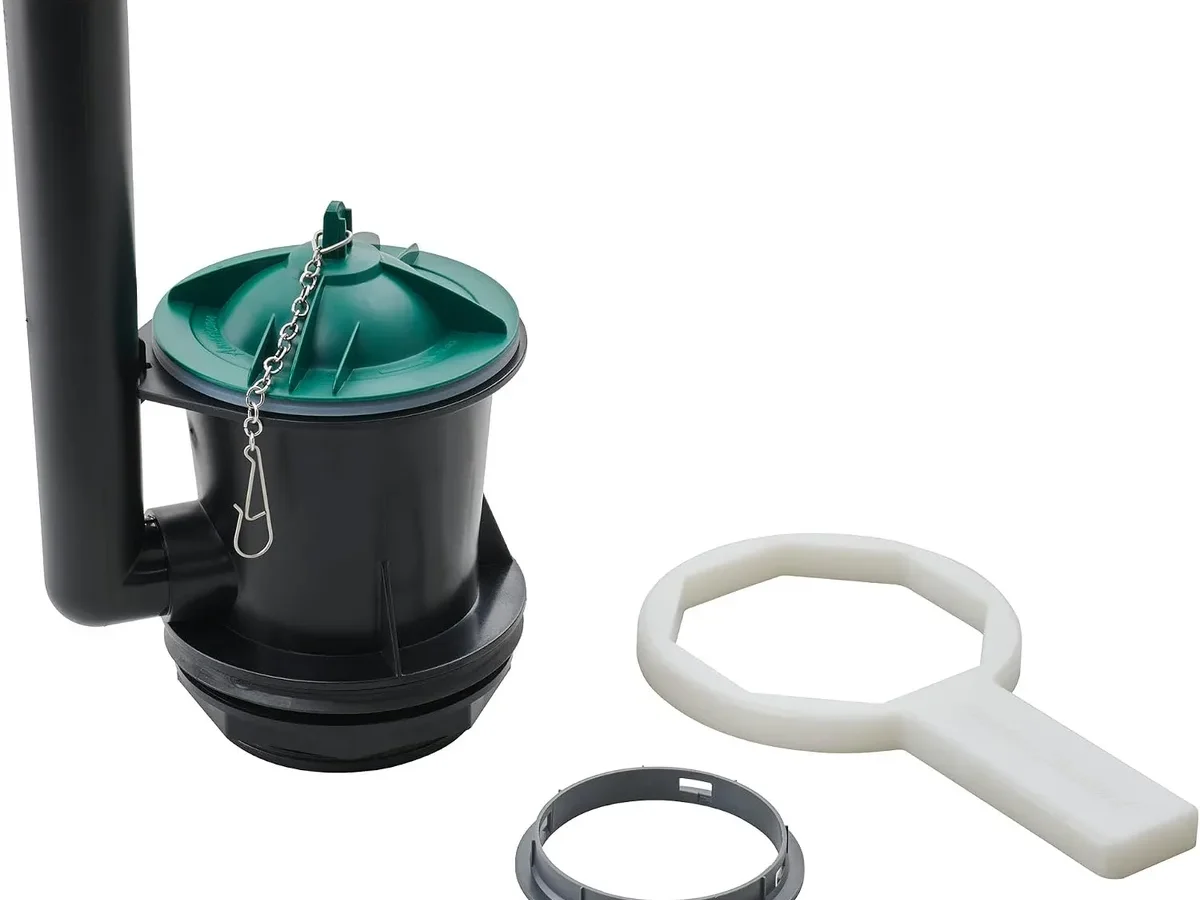
- Flush valve. This is the big plastic assembly in the center of the tank. It releases water from the tank into the bowl when you flush. It includes the overflow tube, the valve seat at the bottom, and the flapper that seals against that seat.
- Flapper. The rubber or silicone disc that covers the flush valve opening. When you press the handle, the chain lifts the flapper. Water rushes into the bowl. The flapper drops back down to seal the tank for refilling. This is the number one failure point in any toilet.
- Overflow tube. The tall tube inside the flush valve assembly. It prevents the tank from overflowing if the fill valve sticks. A small amount of water trickles into this tube during refill to keep the bowl seal fresh.
- Fill valve. The separate assembly usually on the left side of the tank. It controls when and how fast the tank refills. Many people confuse fill valve issues with flush valve issues. They're different components with different jobs.
- Trip lever and chain. The handle you push connects to a lever inside the tank. That lever pulls a chain or lift wire connected to the flapper. If the chain is too long, too short, or tangled, the flapper won't seal or lift correctly.
- Tank-to-bowl gasket. The large foam or rubber gasket that seals where the flush valve meets the bowl underneath the tank. A leak here usually means puddles on the floor around the base of the toilet.
How they work together:
When you press the flush handle, the trip lever lifts the chain. The chain pulls the flapper off the valve seat. Water flows from the tank into the bowl through the flush valve opening.
Gravity and the siphon effect in the bowl pull waste down the drain. Once the tank is nearly empty, the flapper drops back onto the seat. The fill valve opens and refills the tank.
The float rises. When it hits the correct level, the fill valve shuts off. That whole cycle takes about 30 to 45 seconds in a properly working toilet.
If any single part in that sequence fails, you get symptoms like a running toilet, weak flush, or a leak at the base. Understanding the sequence helps you narrow down exactly where the breakdown is happening.
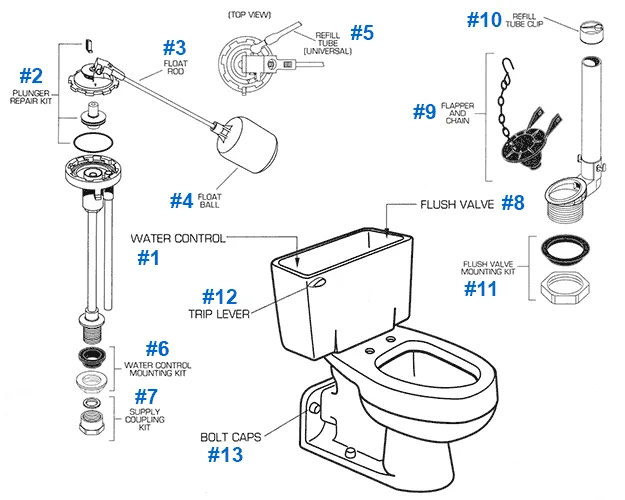
Image source: Bing (Web (fair-use with source credit))
Step 1: Diagnose the Symptom (Decision Tree)
Not every flush valve problem looks the same. The symptom you're seeing tells you exactly which part to fix. This decision tree walks you through the most common scenarios based on what your toilet is actually doing.
Symptom A: Toilet runs continuously
If the toilet hisses or cycles on and off every few minutes, water is escaping from the tank into the bowl. The fill valve keeps running because the water level never reaches the shutoff point.
- Most likely cause: The flapper isn't sealing against the valve seat. Rubber flappers degrade over time, especially in hard water areas. They get soft, warped, or develop a crust of mineral deposits that prevents a watertight seal.
- Quick test: Add a few drops of food coloring to the tank water. Wait 15 minutes without flushing. If colored water appears in the bowl, the flapper is leaking. Replace it.
- Secondary possibility: The chain is too short. If the chain has no slack, it holds the flapper slightly open even when the handle is released. The flapper needs about a quarter inch of slack to seat properly.
Symptom B: Toilet won't flush or flushes weakly
You push the handle. Nothing happens. Or the water barely swirls before stopping.
- Most likely cause: A clogged flush valve or blocked rim jets. Mineral buildup inside the flush valve or along the rim of the bowl restricts water flow.
- Quick check: Remove the flapper and look at the valve seat. If you see white or brown crusty buildup, that's your culprit. Clean it with white vinegar and a scrub brush.
- Secondary possibility: The chain broke or came disconnected. Lift the lid and check if the chain is still attached to both the trip lever and the flapper. If it snapped, you need a new chain assembly for about 3 dollars.
Symptom C: Water pooling around the base of the toilet
This one scares people, and for good reason. Water on the floor means a leak somewhere.
- Most likely cause: The tank-to-bowl gasket has failed. This is the large gasket between the flush valve and the bowl. It's a common failure point on toilets that are 10 years or older. The gasket dries out, cracks, and loses its seal.
- Quick test: Dry the floor completely. Flush the toilet and watch where the water appears. If it comes from the base of the toilet where it meets the floor, it's the wax ring or the tank-to-bowl gasket. If it comes from the tank bolts, tighten them gently a quarter turn.
- Warning: Don't overtighten tank bolts. Porcelain cracks easily. A cracked tank means a full replacement.
Symptom D: Toilet flushes twice or ghost flushes
The toilet flushes on its own in the middle of the night. Or it flushes twice when you only press the handle once.
- Most likely cause: The flapper is lifting on its own. This happens when the overflow tube is set too high. Water trickles into the tube and lifts the flapper slightly. It can also happen if the flapper is too light or the wrong shape for your American Standard model.
- Quick fix: Lower the water level in the tank by adjusting the fill valve float. The water line should sit about a half inch below the top of the overflow tube.
- Secondary fix: Switch to a weighted flapper that stays seated under water pressure.
Step 2: The Most Common Fix — Flapper Replacement
If you diagnosed a flapper issue in Step 1, this is your fix. Even if you're not sure, replacing the flapper is the cheapest and fastest way to eliminate the most common cause of running toilets.
What you need:
- A replacement flapper. For American Standard toilets, look for one listed for the 400A or 400AF series, or a universal flapper with an adjustable length. Cost is between 5 and 10 dollars.
- A clean rag or paper towel.
- White vinegar if you have hard water buildup.
The process:
- Turn off the water supply. The shutoff valve is usually on the wall behind the toilet. Turn it clockwise until it stops. Don't force it if it's stiff. They can seize up in older homes.
- Flush the toilet to empty the tank. Hold the handle down to get as much water out as possible. Use a rag to soak up the remaining water at the bottom of the tank.
- Unhook the old flapper. The flapper attaches to the overflow tube with two pegs or a collar. Slide it off. Disconnect the chain from the trip lever.
- Inspect the valve seat. Run your finger around the opening where the flapper seals. If you feel roughness or see crusty buildup, clean it with vinegar and a scrub pad. Don't use abrasive cleaners that could scratch the plastic.
- Install the new flapper. Slide the new flapper onto the overflow tube pegs or collar according to the package instructions. Connect the chain to the trip lever. Leave about a quarter inch of slack in the chain when the flapper is seated.
- Turn the water back on. Let the tank refill. Flush and watch the flapper rise and fall. It should lift cleanly and drop back into place without sticking.
- Check for leaks. Add food coloring to the tank and wait 15 minutes. No color in the bowl means the seal is good.
What the professionals know:
Most universal flappers work fine. But American Standard has a specific flapper design called the tower flapper on some models. If your toilet has a tall cylindrical flapper instead of the flat disc style, you need the exact replacement from an American Standard parts kit.
Universal flat flappers won't seal properly on these models. You'll be back at the hardware store within a week.
If your toilet was manufactured before 2005, there's a good chance it uses a 2-inch flush valve. Newer high-efficiency models sometimes use a 3-inch valve. The flapper size needs to match the valve opening.
Measure the diameter before you buy.
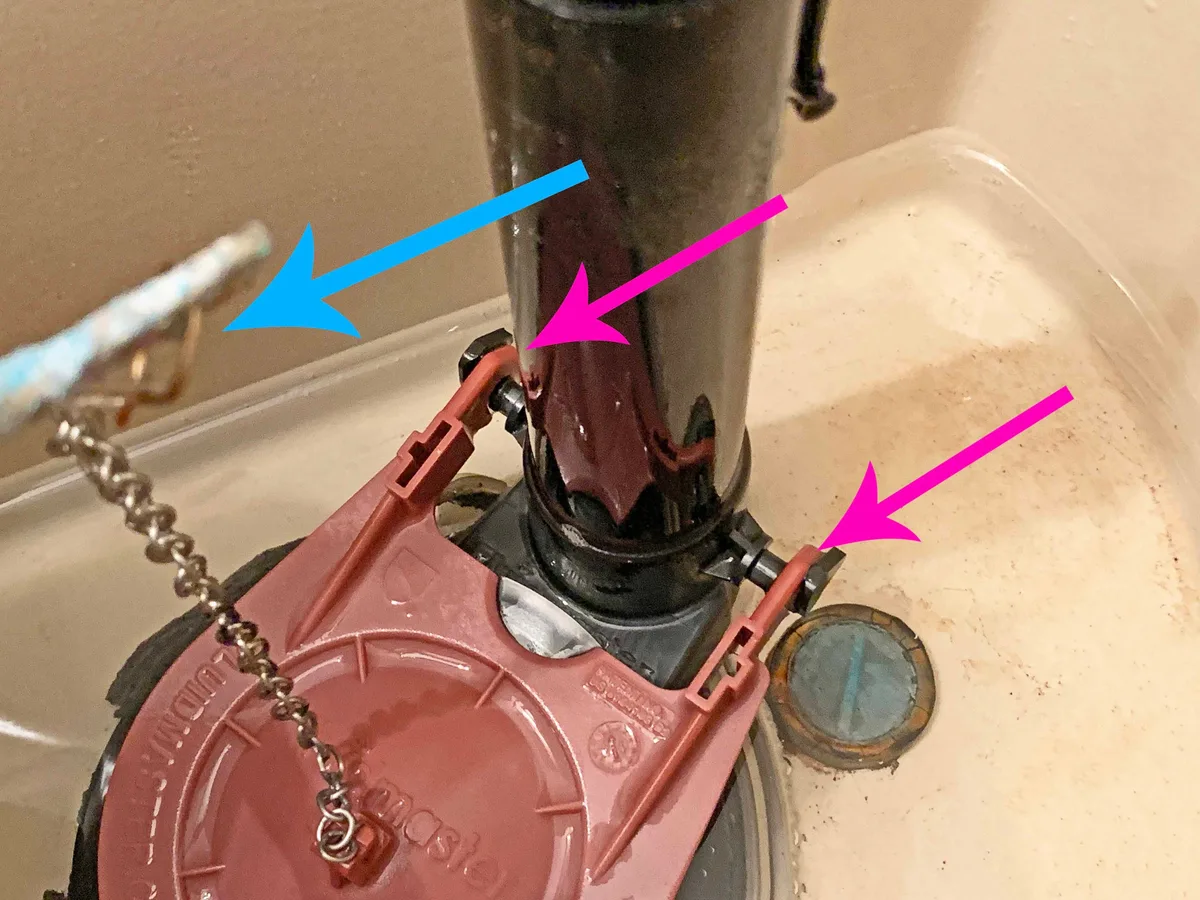
Image source: Bing (Web (fair-use with source credit))
Step 3: When the Flapper Isn't the Problem
You replaced the flapper. The toilet still runs. Now what?
This is where most DIYers give up and call a plumber. But there are a few more things to check that are still well within your skill range.
The valve seat needs cleaning
Sometimes the problem isn't the flapper itself but the surface it seals against. Mineral deposits from hard water can build up on the flush valve seat. Even a brand new flapper can't seal against a rough or crusty surface.
- Fix: Turn off the water. Empty the tank. Scrub the valve seat with a mixture of white vinegar and baking soda. Use fine grit sandpaper or a valve seat polishing tool if the buildup is stubborn. Be gentle. You're not trying to reshape the plastic. Just remove the crust.
The chain is adjusted wrong
Too much slack and the flapper doesn't lift fully during a flush. Too little slack and the flapper stays cracked open. Both cause problems.
- Ideal chain length: The chain should have about a half inch of slack when the flapper is resting on the seat. That's roughly the length of the last link hanging loose. Test it by pressing the handle. It should lift the flapper cleanly without any delay.
The flush valve body is cracked
This is less common but it happens, especially on toilets more than 15 years old. The plastic flush valve body can develop hairline cracks from age or from overtightening the tank bolts during a previous repair.
- Diagnosis: Look for water weeping from the base of the flush valve where it meets the tank. If you see moisture or a slow drip coming from the plastic body itself, not from the gasket, the valve is compromised. You can't repair a cracked flush valve. You have to replace the entire assembly.
The tank-to-bowl gasket has failed
If water is leaking from the base of the toilet onto the floor, not from the tank itself, the gasket between the tank and the bowl is the likely culprit. The gasket is the large foam or rubber ring that seals the connection between the two parts.
- Fix: Unbolt the tank from the bowl. Lift it off. Replace the gasket. Reseat the tank. It's more involved than a flapper swap but still doable in about an hour. Tighten the tank bolts to spec: snug plus a quarter turn. Too tight and you crack the porcelain. Too loose and it still leaks.
These are the three biggest reasons a flapper replacement doesn't fix the problem. If you've checked all three and the toilet is still acting up, you've moved beyond simple troubleshooting into full replacement territory.
Mistakes That'll Cost You Time and Money
Some mistakes are easy to make. They're also easy to avoid if you know what to watch for.
Using the wrong replacement parts
Not all flappers fit all toilets. American Standard uses a specific flapper design with a different mounting system than other brands. A universal flapper might work.
It might also leave you with a toilet that still runs. Check the model number of your flush valve before you buy anything.
Overtightening bolts
This is the most expensive mistake you can make. Porcelain is brittle. Cranking down on tank bolts or toilet bolts will crack the tank or the bowl.
Tighten until snug. Then stop. If it leaks, replace the gasket.
Don't just tighten harder.
Ignoring hard water buildup
If you live in an area with hard water, mineral deposits will eventually clog your flush valve and rim jets. A flapper replacement won't fix a crusted valve seat. Clean the seat thoroughly before installing a new flapper.
Otherwise, you're wasting your time.
Skipping the food coloring test
You can't always see a slow leak. The flapper might look fine but still let water trickle past. The food coloring test takes 15 minutes and costs nothing.
Do it. It confirms whether the seal is actually holding.
Forgetting to shut off the water
It's obvious. But when you're in a hurry, it's easy to skip. You open the tank and get a face full of cold water.
Always shut off the supply valve first. Always.
When to Call a Plumber (and When to Keep Going)
Most flush valve problems are DIY-friendly. But some situations genuinely require a professional.
Call a plumber when:
- The toilet is more than 20 years old and the flush valve is cracked. Replacing the entire toilet might be cheaper and more reliable than sourcing old parts.
- You've replaced the flapper, cleaned the seat, adjusted the chain, and the toilet still runs. There may be a deeper issue with the bowl or the drain line.
- Water is leaking from the base of the toilet and you suspect the wax ring has failed. This is not a flush valve issue. It's a toilet removal and reseating job that requires the right tools and technique.
- You cracked the tank or bowl while tightening bolts. A cracked porcelain fixture cannot be repaired. It must be replaced.
Keep going when:
- The toilet is less than 15 years old and parts are readily available.
- You're comfortable turning off the water and removing the tank lid.
- The problem is clearly a running toilet with no visible cracks or structural damage.
- You have 30 minutes and a 10 dollar bill in your pocket.
Frequently Asked Questions
How do I know if my American Standard flush valve is bad?
If the toilet runs continuously, flushes weakly, or leaks at the base, the flush valve is the likely cause. Test the flapper with food coloring. Replace it if dye appears in the bowl.
If the plastic body is cracked, the entire valve needs replacing.
What size flush valve does American Standard use?
Most American Standard residential toilets use a 2-inch flush valve. Some newer high-efficiency models use a 3-inch valve. Measure the diameter of the valve opening to confirm.
The size determines which replacement parts you need.
Why does my American Standard toilet keep running after I replace the flapper?
The valve seat may have mineral buildup that prevents a seal. Clean it with vinegar and a scrub pad. The chain might be too tight, holding the flapper open.
Adjust it to have a quarter inch of slack. If neither works, the flush valve body may be cracked.
How much does it cost to replace an American Standard flush valve?
A replacement flapper costs 5 to 10 dollars. A full flush valve kit costs 15 to 25 dollars. Both are DIY-friendly.
Total repair time is 30 to 60 minutes. A plumber would charge 150 to 300 dollars for the same work.
Can I use a universal flapper on my American Standard toilet?
Sometimes. Universal flappers work on many models, but American Standard uses a specific mounting system on some toilets. Check whether your toilet uses a tower-style flapper.
If it does, buy the exact American Standard replacement part. Universal flappers won't seal correctly on those models.
How often should I replace the flapper in my American Standard toilet?
Every 3 to 5 years. Rubber degrades over time, especially in hard water. If you notice the toilet running more often or the flapper looks warped or soft, replace it proactively.
It's cheap insurance against a wasted water bill and potential floor damage.

Similar Posts