Samsung Fridge Error Code 41
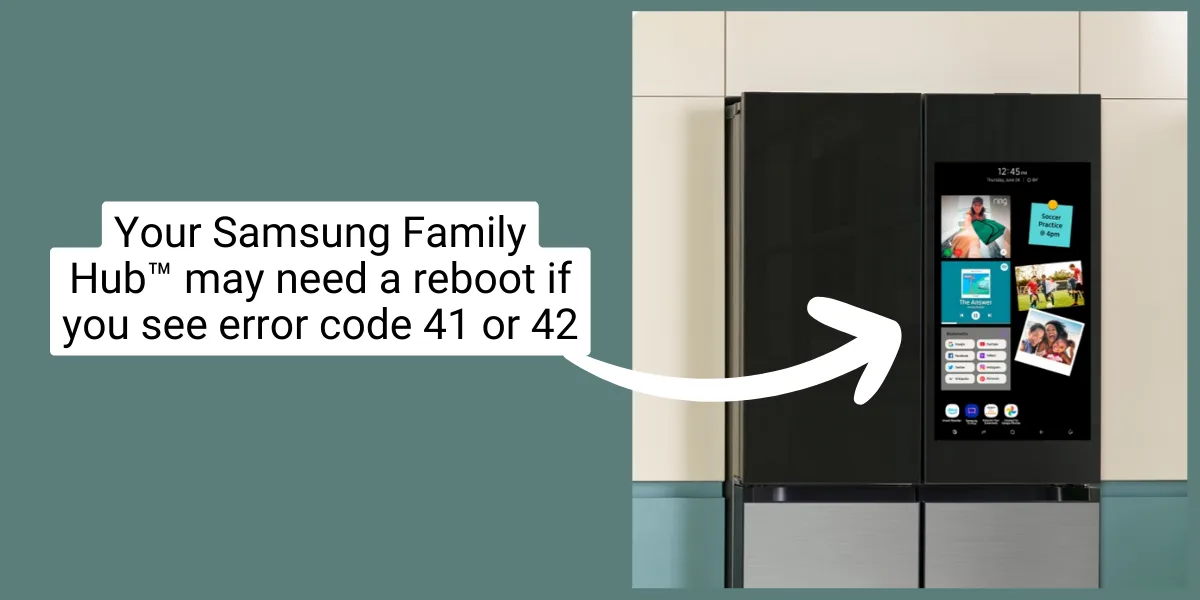
Your Samsung fridge is flashing error code 41 on the display panel. You don't know what it means, but you know it can't be good. Maybe the ice maker stopped working.
Maybe water is pooling under the crisper drawers. Maybe your freezer is slowly turning everything into soft mush.
Error code 41 is Samsung's way of telling you the defrost system has failed. The fridge runs a defrost cycle every 6 to 10 hours of compressor runtime. When that cycle doesn't complete, the control board throws this code.
The good news? About half the time, the fix costs nothing and takes under an hour.
Quick Answer
Error code 41 means the defrost sensor didn't detect a temperature rise during the defrost cycle. The system gives up after 90 minutes. The sensor, heater, or thermostat probably failed.
A frozen drain line also triggers this code. Unplug the fridge and check the evaporator coils first.
Image source: Bing (Web (fair-use with source credit))
What Error Code 41 Actually Means (And What It Doesn't)
Error code 41 does not mean your fridge is broken beyond repair. It does not mean you need a new control board. It does not mean you should call a technician before doing your own checks.
Here is what the code actually represents. The defrost system has three main jobs. First, it heats the evaporator coils to melt frost that builds up during normal operation.
Second, a sensor monitors the coil temperature to know when the ice is gone. Third, a safety thermostat cuts power if the heater gets too hot. When any part of that system fails, the control board logs error 41.
The defrost cycle works like this:
- The compressor runs for 6 to 10 hours straight
- The control board sends power to the defrost heater
- The heater warms the evaporator coils to about 40 to 50 degrees Fahrenheit
- The defrost sensor reads the rising temperature
- Once the sensor hits around 50 degrees, the board ends the cycle
- The compressor turns back on and normal cooling resumes
When the sensor never sees that temperature rise, the board keeps waiting. After about 90 minutes it gives up and displays error 41. Your fridge keeps trying to cool, but frost builds up on the coils.
Eventually air stops flowing and both compartments warm up.
Three root causes account for roughly 90 percent of all code 41 cases:
| Root Cause | Frequency | Average Fix Cost |
|---|---|---|
| Frozen drain line | 45-50% | $0 (DIY) |
| Failed defrost sensor | 25-30% | $15-30 (part) |
| Open defrost heater | 10-15% | $20-40 (part) |
The remaining 10 percent includes failed thermostats, bad control boards, and wiring issues.
The First Decision: Is It a Sensor Problem or a Drain Problem?
This is the fork in the road that saves you the most time and money. Before you order any parts or unscrew anything, gather two pieces of information. First, check if water has leaked from the bottom of your fridge.
Second, look at the ice buildup pattern on the freezer back wall.
Ask yourself these questions:
- Is there water pooled under the vegetable drawers?
- Does the freezer fan make a humming or rattling sound?
- Did the ice maker stop producing ice recently?
- Is the freezer door hard to close because ice is pushing things forward?
If you answered yes to two or more of these, start with the drain line. A frozen drain is the most common cause and the easiest to confirm.
Here is the logic behind the decision.
The evaporator coils sit behind the back panel in the freezer compartment. During the defrost cycle, ice melts and drains through a small tube into the drain pan under the fridge. That tube is about half an inch wide.
When it freezes shut, water backs up into the freezer. It pools and refreezes, creating a thick block of ice around the bottom of the coils. The defrost sensor sits embedded in those coils.
If a block of ice surrounds the sensor, it never warms up enough to signal the board that defrosting is done.
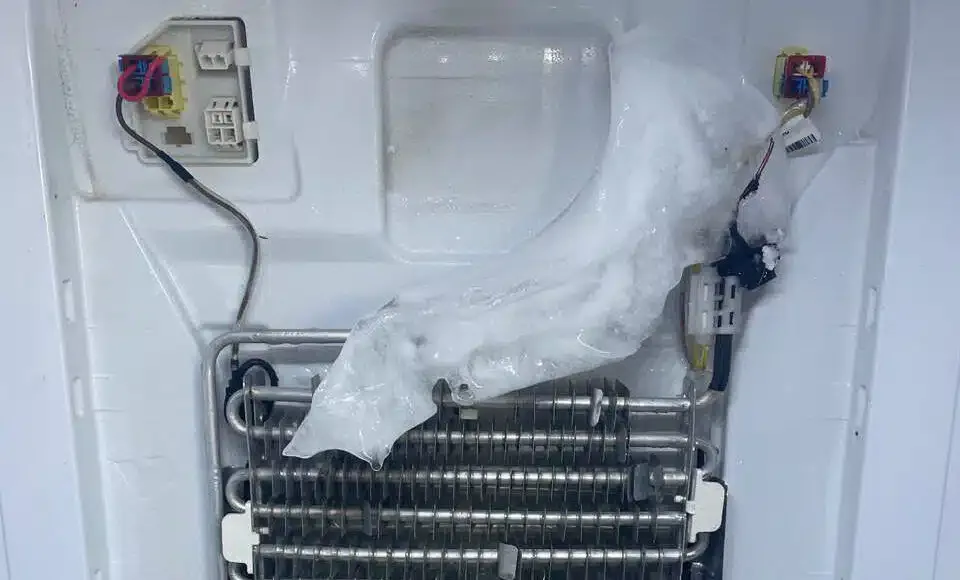
Image source: Bing (Web (fair-use with source credit))
The no water scenario: If you have no water leakage and the freezer looks relatively frost-free, the problem is likely a failed component. The defrost sensor is the first suspect because it fails more often than the heater.
One more clue worth noting. Some Samsung models show the error code for a few seconds at startup and then go back to normal temperature display. If your error code is intermittent, that points strongly to a failing sensor rather than a frozen drain.
Sensors drift in resistance as they age, sometimes reading correctly and sometimes not. A frozen drain gives a solid, persistent code.
How to Diagnose Without a Multimeter (Visual Check First)
You can narrow down the cause with nothing but your hands and eyes. This saves time and prevents unnecessary part replacement. The check takes about 15 minutes.
What you need:
- A Phillips head screwdriver
- A flathead screwdriver (for prying plastic clips)
- A towel or rag
- A flashlight
Step 1: Unplug the fridge. This is non-negotiable. The defrost heater runs on 120 volts AC. Capacitors in the control board can hold a charge for several minutes after unplugging.
Wait at least five minutes before touching any components.
Step 2: Empty the freezer. Remove food baskets, shelves, and the ice maker bin. Store perishables in a cooler with ice packs. You have about two to three hours before food safety becomes a concern.
Step 3: Remove the back panel. In most Samsung models, the evaporator cover is held by four to six screws at the back of the freezer compartment. Some models also have a plastic trim piece that snaps off. Use the flathead screwdriver to gently pry any clips.
Step 4: Look at the evaporator coils. This tells you almost everything.
- Clean coils with no frost: Your defrost system is working. The problem may be a wiring issue or an intermittent board fault.
- Light frost coating (less than 1/8 inch): Normal. Some frost always forms during the cooling cycle. It should melt during the next defrost.
- Thick ice block at the bottom (1 to 2 inches): Classic frozen drain. The drain tube is blocked and water has backed up.
- Uniform ice across all coils (1/4 to 1/2 inch): The defrost cycle is not running at all. Suspect the sensor, heater, or thermostat.
- Ice only on the top half of coils: The heater may be partially working or the sensor is reading incorrectly.
Step 5: Check the drain hole. If you see ice at the bottom of the evaporator, look for a small hole or tube near the bottom of the coil assembly. In most Samsung designs, it is a white plastic funnel with a rubber grommet. If that area is completely iced over, your drain is blocked.
Step 6: Inspect the defrost heater. The heater is a glass tube or wire element that sits horizontally across the bottom of the evaporator. Look for cracks, breaks, or burn marks. If the glass tube is cracked or the wire is visibly snapped, the heater is bad.
This visual inspection rules out about 60 percent of causes without touching a multimeter. If you found thick ice at the bottom, skip ahead to the frozen drain fix section. If the coils look clean or have uniform frost, proceed to testing the components.
Step-by-Step: Testing the Defrost Sensor, Heater, and Thermostat
This section requires a digital multimeter. If you don't own one, they cost about $15 to $25 at any hardware store. It is a worthwhile investment for fridge repair.
Set your multimeter to resistance mode (ohms symbol Ω). If your meter has a range setting, start at 200k ohms.
Testing the defrost sensor (thermistor): The sensor is a small plastic or metal probe that clips into the evaporator fins. It usually has a two-pin connector. Disconnect it from the wiring harness before testing.
Touch one probe to each of the two pins. The reading depends on the temperature of the sensor. At room temperature (about 72 degrees Fahrenheit), you should see between 9,000 and 11,000 ohms (9 to 11kΩ).
At freezing temperatures, the reading should increase. At 32 degrees Fahrenheit, expect around 16,000 to 17,000 ohms.
- No reading (OL or open line): The sensor is dead. Replace it.
- Short circuit (0 or very close to 0): The sensor is shorted. Replace it.
- Reading outside expected range (below 5kΩ or above 25kΩ): The sensor has drifted. Replace it.
- Reading in the expected range: The sensor is likely good. Move on to the heater.
Testing the defrost heater: The heater has two wires leading to a connector. Disconnect it. Touch one probe to each wire terminal.
The heater is a simple resistive element. You should see a low resistance reading between 30 and 100 ohms.
- Open line (OL): The heater element is broken. Replace it.
- Very high reading (above 500Ω): The heater has high resistance and may be partially failing. Replace it as a precaution.
- Reading between 30 and 100Ω: The heater is good. Move on to the thermostat.
Testing the defrost thermostat: The thermostat is a small disc-shaped component clipped to a refrigerant line near the top of the evaporator. It has two wires. Disconnect and test.
At room temperature, the thermostat should show continuity (very low resistance, close to 0 ohms). That means the switch is closed. When the thermostat heats up to about 165 degrees Fahrenheit, it opens and the reading goes to OL.
For practical testing, if it reads anything above 5 ohms at room temperature, replace it.
Document your results. If all three components test within spec, the problem may be on the control board. That is a less common but possible scenario we cover later.
The Frozen Drain Fix That Solves Half of All Code 41 Cases
If you found a thick ice block at the bottom of the evaporator, you have a frozen drain line. This is the most common cause of error code 41 and the easiest to fix.
Do not use a sharp object to clear the drain. Many people grab a wire hanger or an ice pick and poke at the drain hole. This can puncture the drain tube. If the tube is damaged, water will leak into the fridge base and ruin the insulation.
Replacement requires disassembling the entire fridge cabinet.
Here is the safe method.
First, unplug the fridge if you haven't already. Let the ice thaw naturally for a few hours. Point a fan at the open freezer compartment to speed things up.
Place towels at the bottom of the freezer to catch melting water.
Once the ice block has softened, locate the drain hole. It sits at the bottom center of the evaporator assembly. Pour warm water down the drain using a turkey baster or a squeeze bottle.
Do not use boiling water. Hot tap water is fine. The water melts the ice plug in the drain tube.
Wait for the water to drain into the pan at the bottom of the fridge. You can hear it drip. If the water pools at the bottom of the freezer, the drain is still blocked.
Repeat the warm water pour two or three times.
Once the drain flows freely, clean the drain tube to prevent future blockages. Mix a solution of equal parts warm water and white vinegar. Pour a cup through the drain.
Vinegar kills mold and bacteria that cause slime buildup. That slime traps water and leads to freezing.
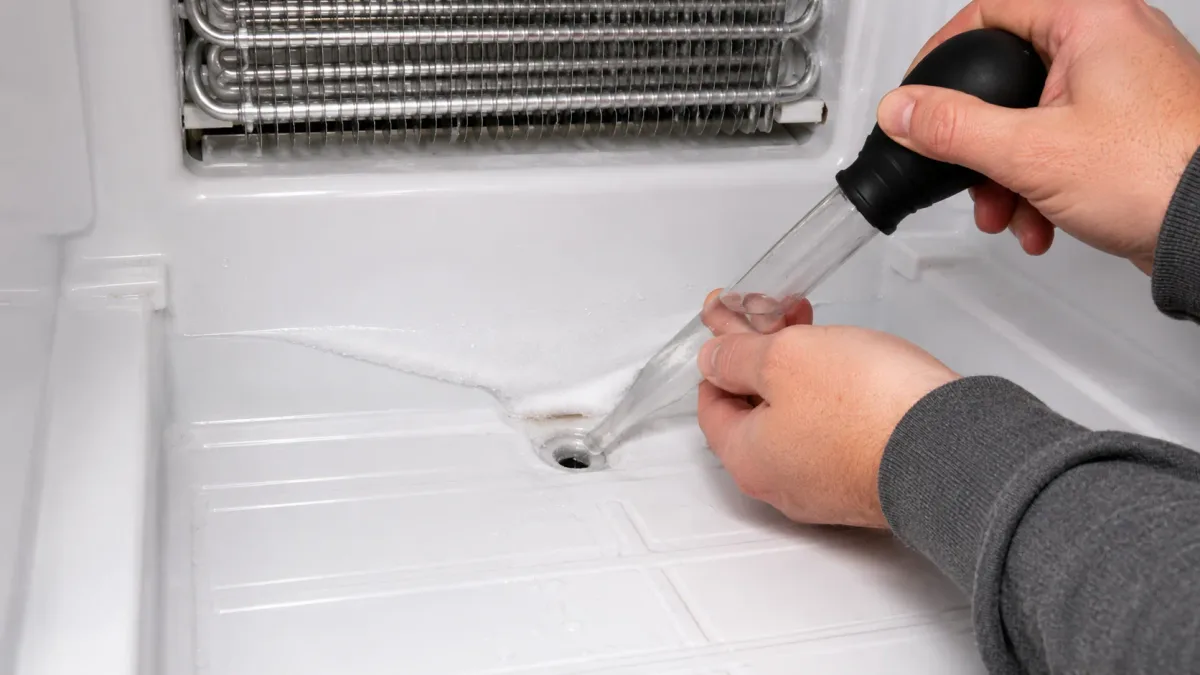
Image source: Bing (Web (fair-use with source credit))
Preventive tip: Check the drain tube every six months. Pour a cup of warm water through it as maintenance. If you live in a humid climate, do this every three months.
A clean drain rarely freezes.
After clearing the drain, reassemble the freezer back panel. Plug the fridge back in. The error code should clear within one or two cooling cycles.
If the code returns, the drain may have frozen again. In that case, check the drain tube insulation. Some Samsung models have insufficient insulation around the tube where it passes through the freezer wall.
Adding foam pipe insulation can help.
When the Problem Is the Main Control Board (And When It's Not)
The main control board is the last thing you should replace. It is expensive. It is hard to access.
And it is rarely the actual problem.
When to suspect the control board:
- You tested the sensor, heater, and thermostat. All three passed.
- You cleared the drain line and confirmed it flows freely.
- The error code persists after a full 24-hour test cycle.
- You have confirmed 120 volts AC at the wall outlet.
How to test the control board:
You need to check for voltage at the defrost heater connector during the defrost cycle. This requires the fridge to be running and the back panel removed. Use extreme caution.
The board has live 120 volt AC power.
Set your multimeter to AC voltage mode (V~). Place one probe on each of the two heater connector pins on the board. You need to catch the board during a defrost cycle.
You can force the fridge into defrost mode on some Samsung models by pressing a specific button combination on the display panel.
Check your service manual for the exact combination for your model. A common method is pressing the Power Cool and Freezer buttons simultaneously for eight seconds. The display should show "dF" for defrost.
If you measure 120 volts AC at the heater connector during defrost mode, the board is sending power correctly. The problem is elsewhere. If you measure 0 volts, the board is not sending power.
That means the board has failed.
Control board replacement: This is a job for an experienced DIYer or a technician. The board costs between $80 and $150 for most Samsung models. You need to disconnect the wiring harnesses, remove mounting screws, and transfer the board.
Take photos of the wiring before you disconnect anything.
Mistakes That Cost You Money or Make Things Worse
Mistake 1: Replacing parts without testing. Throwing a new sensor or heater at the problem is wasteful. Parts cost money. Returns are a hassle.
Test first, buy second.
Mistake 2: Using a wire hanger on the drain tube. The drain tube is soft plastic. A wire hanger can puncture it. A punctured drain means a full fridge disassembly to replace.
Use warm water instead.
Mistake 3: Ignoring the error code. Error code 41 will not fix itself. The longer you wait, the more frost builds up. Eventually the fan stops spinning.
The freezer warms up. Food spoils. Address it within a day or two.
Mistake 4: Forgetting to unplug. The defrost heater runs on 120 volts. Touching a live terminal can give you a serious shock. Unplug the fridge and wait five minutes.
Mistake 5: Ordering the wrong part. Samsung uses different sensors for different model families. Look up your exact model number, which is on a sticker inside the fresh food compartment on the left wall. Order the part that matches your model.
Mistake 6: Overlooking the simple fix. Before you open the freezer, check if the fridge is level. If the fridge is tilted backward, water can't drain properly. Adjust the front leveling legs so the fridge is slightly tilted forward.
This helps drainage.
Mistake 7: Reassembling too quickly. After clearing a frozen drain, run the fridge for 24 hours before reassembling the back panel. This lets you confirm the drain stays clear. If the error code returns, you can access the drain without removing the panel again.
Frequently Asked Questions
Can I reset error code 41 without fixing anything?
Unplugging the fridge for 10 minutes clears the code from the display. But the code will return within a few hours if the underlying problem is not fixed. The reset is only useful as a diagnostic test, not a repair.
How much does it cost to fix error code 41 professionally?
A service call typically runs $150 to $250 just for the visit. Parts are extra. A sensor replacement might total $200 to $300.
A heater replacement runs $250 to $400. The DIY cost for either part is $15 to $40.
Will error code 41 damage my food?
Yes, if left for more than 24 to 48 hours. The frost buildup blocks airflow. The freezer temperature rises above zero degrees Fahrenheit.
The fresh food compartment follows soon after. Perishables can spoil.
How long does the defrost cycle take on a Samsung fridge?
The defrost cycle lasts about 20 to 40 minutes. The control board waits up to 90 minutes for the sensor to report a temperature rise. If the sensor never warms up, the board logs the error.
Does error code 41 mean I need a new fridge?
Almost never. Error code 41 is one of the most fixable codes on a Samsung fridge. The vast majority of cases are resolved with a simple drain clearing or a cheap part replacement.
Only consider replacement if the compressor has also failed.
Can a power outage cause error code 41?
No. A power outage may reset the display, but it does not cause the underlying defrost failure. If the error appears after a power outage, the problem existed before the outage.
The outage simply revealed it.

Similar Posts
































