Ge Refrigerator Water Valve Troubleshooting
You reach for a glass, press the paddle, and nothing happens. Or maybe you get a sad trickle that takes forever. If you're dealing with GE refrigerator water valve troubleshooting, you already know the frustration.
That valve is usually the first suspect, but it fails in different ways, and each one needs a different fix.
Manufacturer specifications indicate these valves operate at 120V AC with a flow rate between 0.25 and 0.5 gallons per minute. Understanding which failure mode you're looking at saves hours of guesswork and prevents buying parts you don't need. Let's walk through the symptoms one at a time.
Quick Answer
Check the water filter first. If that's not the issue, listen for sound at the valve. A buzzing valve means power is reaching it but something is blocked.
Silence means no power is getting through. A constant drip means the valve is stuck open. Each symptom points to a different fix.
How the Water Valve Works (In 30 Seconds)
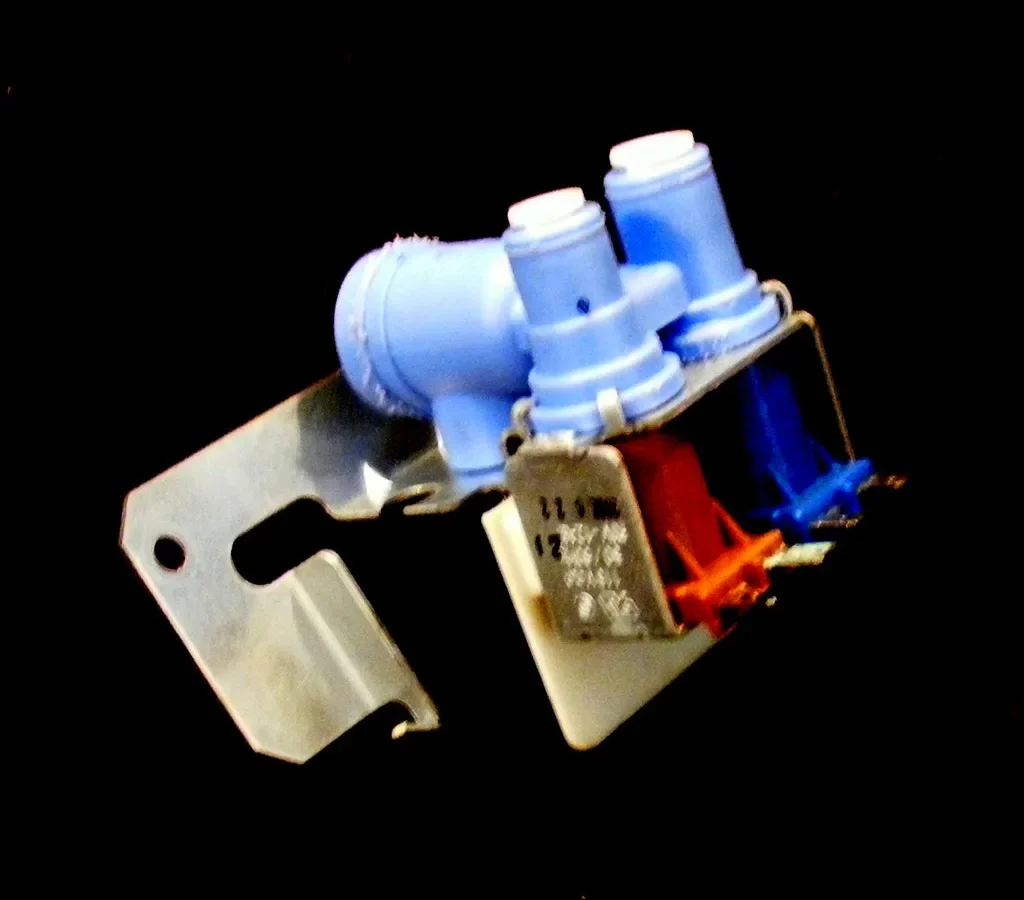
The GE refrigerator water inlet valve is a simple electromechanical device. It has one or two solenoid coils mounted on a brass or plastic body. When you press the dispenser paddle or the ice maker calls for water, the control board sends 120V AC to the solenoid.
That energizes the coil, which lifts a small plunger inside the valve, and water flows through.
That's it. Power in, valve opens. Power stops, valve closes.
There are two common configurations you'll find on GE refrigerators. Single-valve models use one solenoid that controls both the dispenser and the ice maker through an internal diverter. Dual-valve models have two separate solenoids, one for each outlet.
If one side works but the other doesn't on a dual-valve model, you can often replace just the bad side rather than the whole assembly.
The valve sits behind the lower kickplate on most GE refrigerators. On some models, you'll find it behind a metal panel on the back. Either way, it connects to your home's water supply line through a 1/4-inch compression fitting and has a small screen inside that catches sediment.
That screen is important. It's the reason many valves fail.
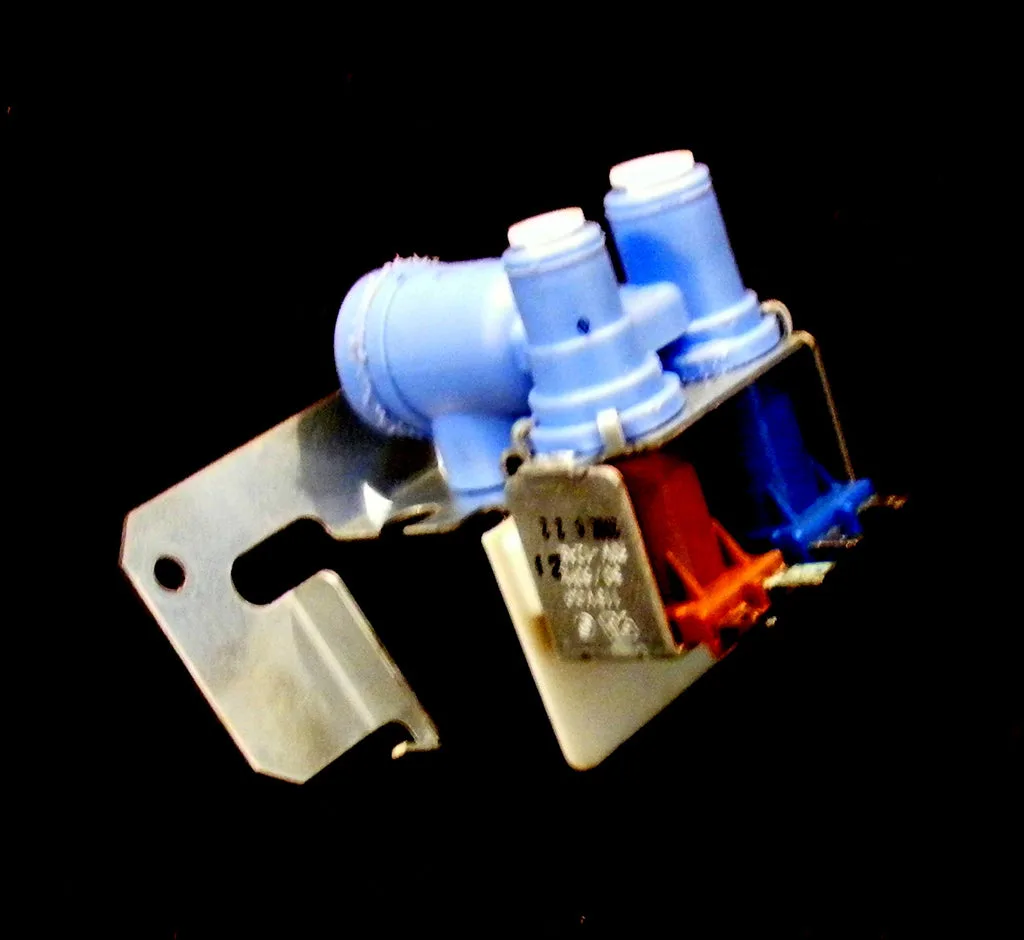
Image source: Bing (Web (fair-use with source credit))
Symptom 1: Valve Buzzes, No Water
You press the paddle and hear a distinct humming or buzzing sound from the lower part of the fridge. The solenoid is trying to do its job. It's getting power.
But nothing comes out.
What's happening: The coil is energized and pulling the plunger, but either the plunger is stuck or something is blocking the water path. This is almost always a physical obstruction issue rather than an electrical one.
Your first step: Bypass the water filter. GE refrigerators route water through the filter before it reaches the valve. If your filter is clogged or overdue for replacement, it can restrict flow enough that the valve opens but barely anything comes through.
Remove the filter and install the bypass plug that came with your fridge. Try the dispenser again.
- If water flows freely without the filter, the filter was the problem. Replace it.
- If it still buzzes with no flow, the valve itself is blocked.
The most common blockage is sediment or scale inside the valve body. Hard water areas wreck these valves. If you see white buildup around your faucets, your fridge valve probably has it too.
The internal screen catches particles, but over time they pack tight enough to prevent flow even when the plunger lifts.
Next step for a blocked valve: You can try to flush it. Disconnect the water line at the valve inlet. Point the valve into a bucket.
Have someone press the dispenser paddle while you watch. If water spits out weakly or not at all, the valve is clogged internally. Replacement is the only reliable fix.
Cleaning them out rarely works long-term because the sediment compacts inside the small passages.
One more thing: On dual-valve models, test both sides. If the dispenser is dead but the ice maker fills fine, only one solenoid path is clogged. Some GE valves let you replace the solenoid separately.
Most of the time though, you'll replace the whole valve body.
Symptom 2: Dead Silent, No Water
This one is more concerning because it means the valve isn't getting power at all. No hum, no click, nothing.
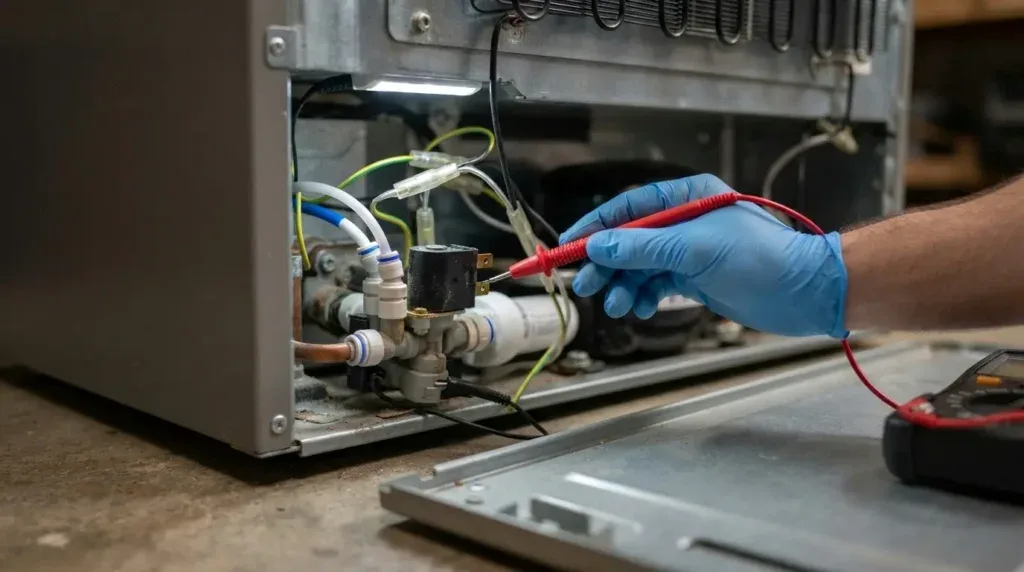
Image source: Bing (Web (fair-use with source credit))
What's happening: The electrical path to the solenoid is broken somewhere. It could be the solenoid coil itself, a wire, a switch, or the control board. You need a multimeter to narrow it down.
Your first step: Unplug the refrigerator. Locate the valve and disconnect the wire harness. Plug the fridge back in.
Set your multimeter to AC voltage. Press the dispenser paddle and touch the probes to the valve terminals.
- If you read 120V AC, the valve has power but won't open. The solenoid coil is bad. Replace the valve.
- If you read 0V, the problem is upstream. No power is reaching the valve.
If you read 0V, work backward through the circuit:
Start with the dispenser switch. The paddle pushes a microswitch mounted behind the dispenser panel. If that switch is bad, it never tells the board to send power.
You can test it with your multimeter set to continuity. Press the switch. If you don't hear a click or get continuity, replace the switch.
Next, check the door hinge wires. This is a common failure point on GE refrigerators. The wires that run from the fridge body into the door pass through the hinge.
Years of opening and closing can break them internally. Wiggle the wire bundle where it enters the hinge while someone presses the dispenser. If the valve suddenly buzzes or water spurts, you found a broken wire.
If the switch and wires check out, the control board could be the issue. That's less common, but it happens. Look for visible damage on the board like burned spots or bulging capacitors.
If everything else tests good, the board may not be sending the signal.
A note on ice maker testing: If your ice maker isn't filling but the dispenser works, the problem is often the ice maker control module rather than the valve. On dual-valve models though, one solenoid could fail while the other works. Test both solenoids using the same voltage method.
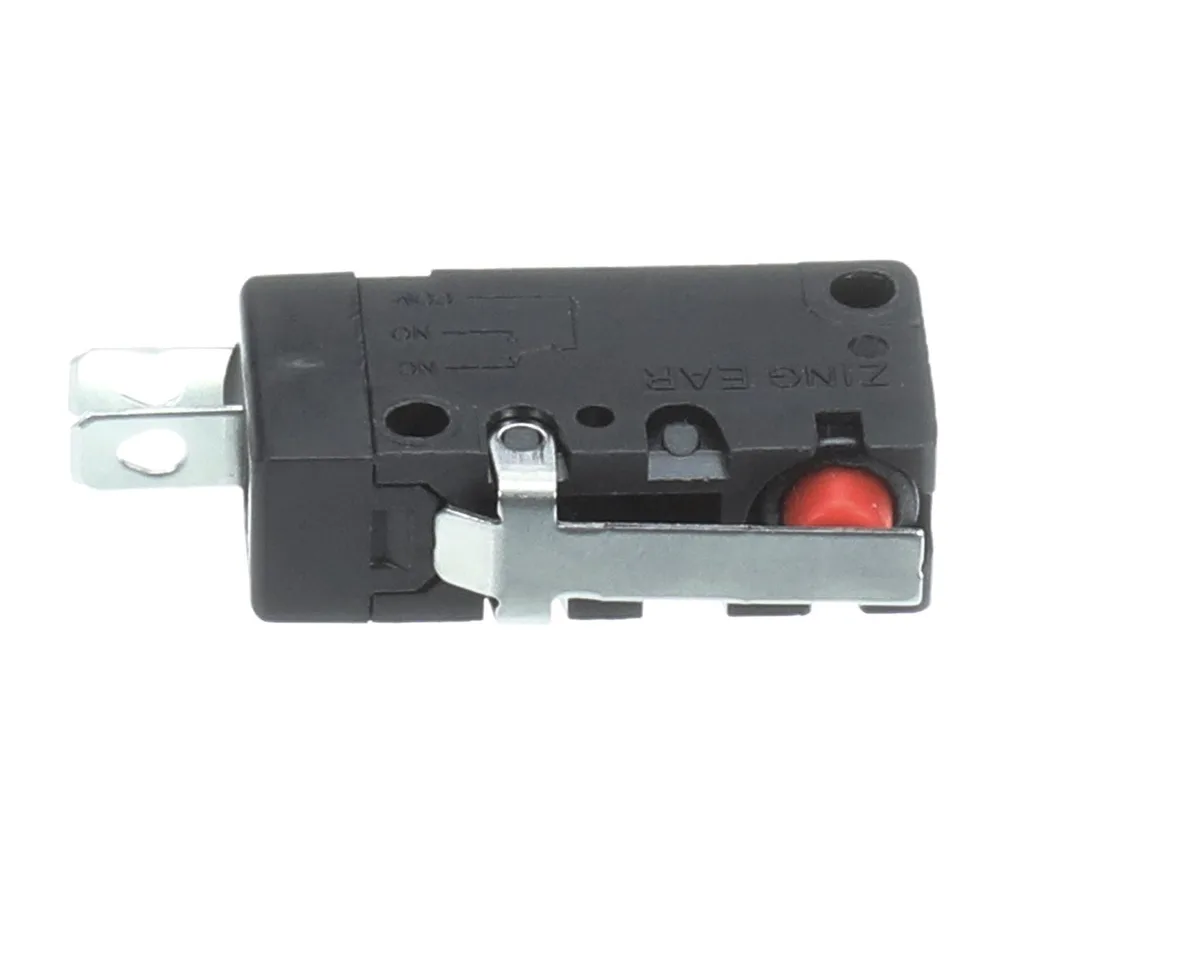
Image source: Bing (Web (fair-use with source credit))
Symptom 3: Constant Drip or Overflow
You find water pooling on the floor beneath the fridge, or the ice maker keeps filling until it overflows. This is the urgent one.
What's happening: The valve is stuck open. The plunger isn't sealing, so water trickles through continuously. It might be a tiny drip you barely notice, or it could be enough to flood your kitchen in a few hours.
Your first step: Unplug the refrigerator immediately. Not just turn off the dispenser. Unplug it.
A stuck-open valve doesn't stop until the power is cut or the water supply is shut off. Then turn off the water line to the fridge if you can reach the shutoff valve.
What causes a stuck-open valve: Debris is the most common reason. A tiny piece of sediment or scale gets lodged between the plunger and its seat. The solenoid can close, but the debris holds the seal open just enough to let water past.
Less commonly, the plunger spring breaks or the solenoid coil fails in a way that leaves the valve partially open.
How to confirm it's the valve: Disconnect the fridge from power and water. Remove the valve. Look at the outlet side.
If water continues to drip from the valve body after you've removed it from the fridge, the internal seal is compromised. Replacement is the only fix.
A quick test: With the fridge unplugged, press the dispenser paddle several times. Sometimes the plunger reseats itself. If the dripping stops, you might have had a temporary jam.
Monitor it closely for the next 24 hours. If it comes back, replace the valve.
One more consideration: If the water is overflowing from the ice maker but the valve itself isn't leaking externally, the problem could be the ice maker's fill control. The ice maker has a thermostat that tells the valve when to stop. If that thermostat fails, the ice maker keeps calling for water even after the tray is full.
In that case, the valve is doing what it's told. Replace the ice maker module, not the valve.
Safety note: Water and electricity inside a refrigerator don't mix. A leak can short out the control board or cause a fire hazard. If you have a slow drip you've been ignoring, don't.
Unplug it and fix it today. The repair is $30 to $60 for a new valve and about 45 minutes of your time. A flooded kitchen costs a lot more than that.
The Complete Valve Replacement Walkthrough
If you've confirmed the valve needs replacing, here's exactly what to do. Order the correct part first. Look for the part number on a sticker directly on the valve body.
Don't rely on your fridge model number alone. Two nearly identical GE fridges can use different valves.
Tools you'll need:
- Multimeter (already used for diagnosis)
- Adjustable wrench or pliers
- Towel or rag
- New GE water inlet valve (OEM preferred)
- Teflon tape for threaded fittings
The step-by-step:
- Unplug the refrigerator. Turn off the water supply line behind the fridge.
- Pull the fridge out from the wall. Give yourself enough room to work behind it.
- Remove the lower back panel. Usually four screws. Set the panel aside.
- Place a towel under the valve. Some water will spill when you disconnect the line.
- Disconnect the water supply line from the valve inlet. Use your wrench. Hold the valve steady with your other hand so you don't twist the plastic mounting bracket.
- Disconnect the outlet water lines from the valve. There may be one or two depending on your model. Use the towel to catch drips.
- Unplug the wire harness from the solenoid coils. Pull straight, don't yank the wires.
- Remove the mounting screws that hold the valve to the fridge frame. Usually one or two screws.
- Install the new valve in the reverse order. Mount it to the frame. Reconnect the wire harness. Attach the outlet lines. Connect the supply line. Use Teflon tape on threaded connections.
- Turn the water supply back on. Check for leaks at every connection point. Tighten gently if needed.
- Plug the fridge back in. Press the dispenser paddle and let water run for two minutes to clear any air from the lines.
- Push the fridge back into place. Check again for leaks after 24 hours.
The whole job takes 30 to 45 minutes for a first-timer. The new valve typically costs $30 to $60 for an OEM GE part. Aftermarket valves run cheaper but often fail faster.
Stick with the genuine part.
Common Mistakes That Waste Time and Money
Replacing the valve without testing it first. This is the number one error we see. People assume a silent dispenser means a dead valve. Sometimes it's a $2 switch or a broken wire.
Test first. Spend ten minutes with a multimeter before you spend $50 on a part.
Buying the wrong valve. The part number matters. GE uses dozens of valve variants. The physical shape, the fitting sizes, and the electrical connector differ between models.
Order by the number stamped on your existing valve, not by "fits GE" in the product title.
Forgetting to bypass the filter. A clogged filter mimics a dead valve perfectly. Always test without the filter before you diagnose further. This one step saves more people than any other tip in this guide.
Overtightening the water line fittings. Brass compression fittings don't need gorilla force. Hand-tight plus a quarter turn with a wrench is plenty. Overtightening cracks the plastic valve body or deforms the brass ferrule.
Ignoring the shutoff valve. Find your fridge's water shutoff valve before you need it. In an emergency, you don't want to be searching behind the fridge while water spreads across the floor. Know where it is.
Make sure it works.
Assuming the valve is the problem with an overflowing ice maker. As we covered, a stuck-open valve can cause overflows, but so can a failed ice maker control module. If the valve tests fine and doesn't drip when disconnected, look at the ice maker first.
When to Call a Pro
Some situations are worth handing off. If you're not comfortable using a multimeter, stop. Guessing with electrical components wastes money and can damage other parts.
Call a pro if:
- You test the valve and get 120V AC but still no water. The valve is bad, but you're unsure about the replacement process.
- You find a bad control board. Board replacement requires special tools and sometimes programming.
- The water line in your wall is the problem. Low pressure from your home plumbing isn't the fridge's fault.
- You don't have access to the shutoff valve. If you can't isolate the water supply, let someone with plumbing experience handle it.
- You're just not into it. No shame in that. A service call runs $150 to $250 and saves you an afternoon of frustration.
Frequently Asked Questions
How do I know if my GE refrigerator water valve is bad?
Listen for sound when pressing the dispenser. A buzz means power is reaching the valve but it's blocked. Silence means no power.
Test with a multimeter. If you read 120V AC at the valve terminals with no water flow, the valve is bad.
Can a clogged water filter cause the valve to buzz?
Yes. A clogged filter restricts water flow enough that the valve opens but barely anything comes through. Remove the filter and install the bypass plug.
If water flows normally, replace the filter. The valve itself is fine.
How much does it cost to replace a GE refrigerator water valve?
The OEM valve part costs $30 to $60. A service call to have a technician replace it runs $150 to $250 total. DIY replacement takes about 45 minutes and requires only basic tools.
Why is my GE refrigerator not making ice but the water dispenser works?
On dual-valve models, one solenoid path can fail while the other works. Test both solenoids. If both have power, the problem may be the ice maker control module or a frozen fill tube.
Can I clean a clogged water valve instead of replacing it?
You can try flushing it with water, but sediment compacts inside the small passages. Cleaning rarely works long-term. Replacement is the only reliable fix for a physically blocked valve.
What causes a GE refrigerator water valve to leak?
Debris trapped between the plunger and its seat is the most common cause. Less often, the plunger spring breaks or the solenoid coil fails in a way that leaves the valve partially open. Replace the valve either way.

Similar Posts