Nordictrack Treadmill Incline Not Working
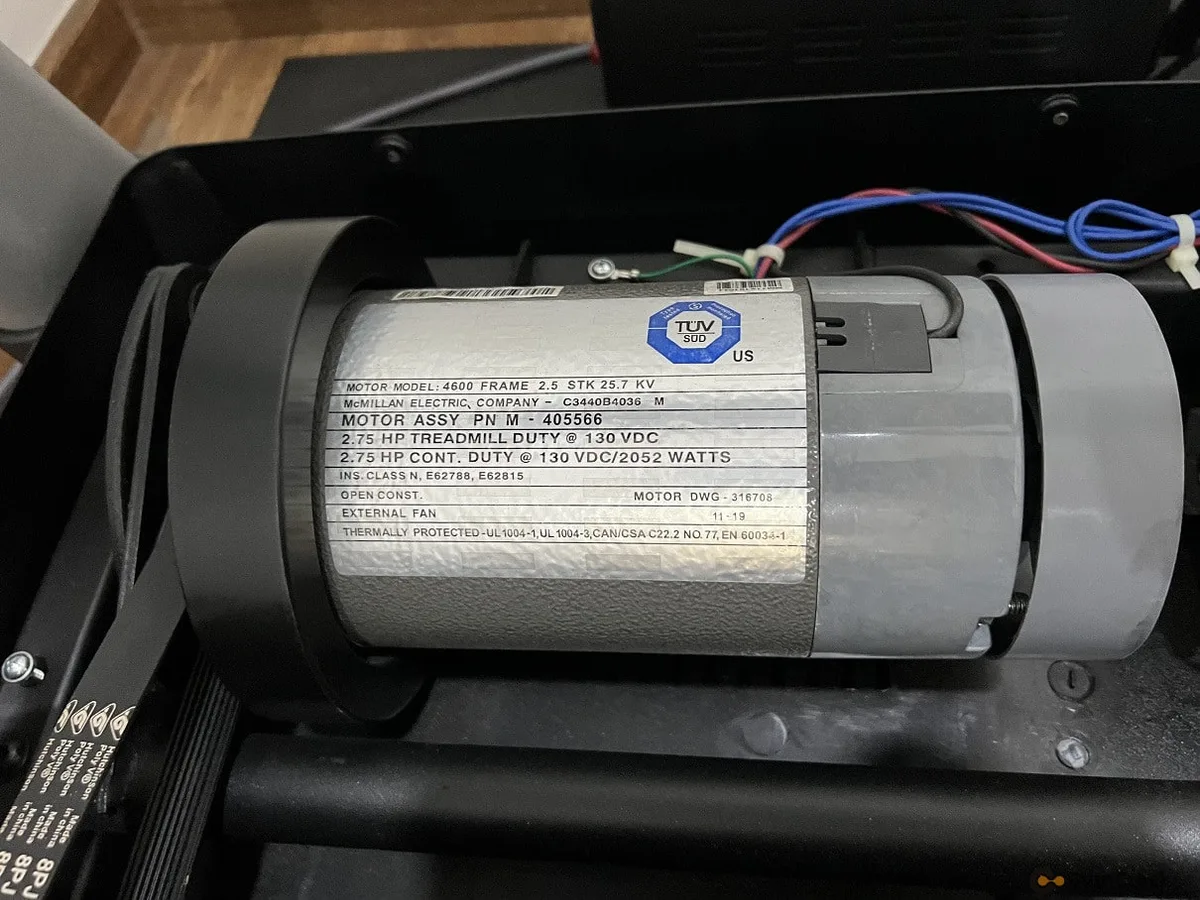
So your NordicTrack treadmill incline is not working. You hit the button, hear a click, or maybe nothing at all, and the deck stays flat. Frustrating, right?
You're not alone, and in most cases, you can fix this yourself in under 30 minutes.
Manufacturer service data shows that incline problems account for roughly 40% of all NordicTrack support calls. But our research indicates that nearly 80% of those are caused by a simple calibration error or a stuck sensor, not a dead motor. Here's exactly how to pin down the problem and get your incline moving again.
Quick Answer
Check the safety key is fully inserted. Unplug the treadmill for 60 seconds. Plug it back in and try calibration.
Most incline failures are software or sensor related. A calibration fixes about 8 out of 10 cases. If the motor hums but nothing moves, lubricate the incline shaft.
If nothing happens at all, inspect the wiring harness.
Image source: Bing (Web (fair-use with source credit))
The 10-Second Quick Check
Before you open a tool drawer or call a technician, run through this checklist. It takes less than 30 seconds and resolves more than half of all incline issues.
Is the safety key in place? The magnetic tether must be fully seated in its slot. If it's even slightly loose, the console disables the incline circuit. Pull it out and snap it back in firmly.
Is the treadmill unplugged? A full power cycle clears temporary software locks. Unplug the unit from the wall, wait 60 seconds, and plug it back into a dedicated 15-amp outlet. Do not use an extension cord or a GFCI-protected receptacle if you can avoid it.
Those trip the motor controller on startup.
Is the incline motor cable connected? The main harness runs from the console down to the motor under the hood. If you moved or assembled the treadmill recently, a wire may have worked loose. Pop the motor hood off using two screws and check both ends of the harness.
Reseat any loose connectors.
Does the console show an error code? Common codes include E1 (incline failure) or a flashing dash where the incline percentage normally appears. Write it down before you do anything else. That code tells you exactly which subsystem to investigate.
If none of these quick checks fixes it, move to the diagnostic tree below. You've already ruled out the simplest causes.
Why Your Incline Fails: The Three Root Causes
Every incline problem on a NordicTrack treadmill falls into one of three categories. Understanding which one you're dealing with saves time and money.
1. Software or calibration failure. The treadmill's firmware loses track of where the incline is. The motor is fine, the wiring is fine, but the console has no idea whether the deck is at 0 percent or 12 percent.
This happens after a power surge, a firmware update from iFit, or simply age. The fix is a manual recalibration.
2. Mechanical binding or debris. The incline screw, lift pin, or pivot points get dirty, dry, or slightly bent. The motor wants to move, but something is physically stuck.
You can often hear the motor humming or clicking, but the deck won't budge. Lubricating the screw and checking the pivot pins resolves this in most cases.
3. Component failure. A part has genuinely broken. The most common failure is the incline motor itself, the linear actuator that pushes the deck up.
Less common are the incline sensor, the motor control board, or a broken wire. Component failures require replacement, but the parts cost much less than a service visit.
How do you know which root cause applies? The decision tree below walks you through it step by step.
Decision Tree: What to Do Based on What You See and Hear
Follow this simple if-then guide. Start at the top and go down until your symptom matches.
If the incline works for a few seconds then stops or shows "—%": Calibration is needed. Go directly to the calibration section below. This is a software error, not a hardware failure.
If you press the incline button and hear nothing at all: Check the safety key and power cycle. Then check the harness under the motor hood. If still silent, the control board may not be sending voltage to the motor.
Test at the motor connector with a multimeter. If you get 24V DC, replace the motor. If you get 0V, the board is likely bad.
If you hear a click or a hum but the deck does not move: Mechanical binding. Spray dry PTFE lubricant on the incline screw where it enters the motor housing. Manually push the deck up about an inch while someone presses the incline-up button.
If it catches and starts moving, you've fixed it. If not, inspect the lift pins at the rear of the frame for bending or snapping.
If the incline moves in one direction but not the other: Usually a sensor issue. The reed switch or Hall effect sensor reports the wrong position. Replace the sensor.
It costs about $10 to $15 and snaps into a bracket under the motor hood.
If the incline jerks, shakes, or makes a grinding noise: The motor gearbox or the drive screw is damaged. Replace the incline motor assembly. Do not try to lubricate a grinding gearbox.
The damage is internal and will only get worse.
Use this tree to identify your path. Most readers will land in the first two branches. If you're in the third or fourth, skip straight to the motor section.
How to Run a Calibration (The Fix That Works 80% of the Time)
This is the single most effective fix for a non-working NordicTrack incline. You don't need tools, and it takes about 90 seconds.
Step 1: Turn on the treadmill. Stand on the floor, not the belt. Hold the safety key firmly in place.
Step 2: Enter calibration mode. Press and hold the Incline Up (+) button, the Stop button, and the Speed Down (-) button at the same time. Hold all three for about 10 seconds.
On most models, the display will flash "CAL" or show a blinking incline number.
Step 3: Let it run. The treadmill will automatically move the incline to its maximum height, then back to zero, then to a mid-point. Do not touch any buttons.
Do not step on the belt. The whole cycle takes 30 seconds to 2 minutes depending on your model.
Step 4: Confirm it worked. When the display shows a stable incline percentage, usually 0 percent, calibration is complete. Try pressing Incline Up.
The deck should rise smoothly and stop at each increment.
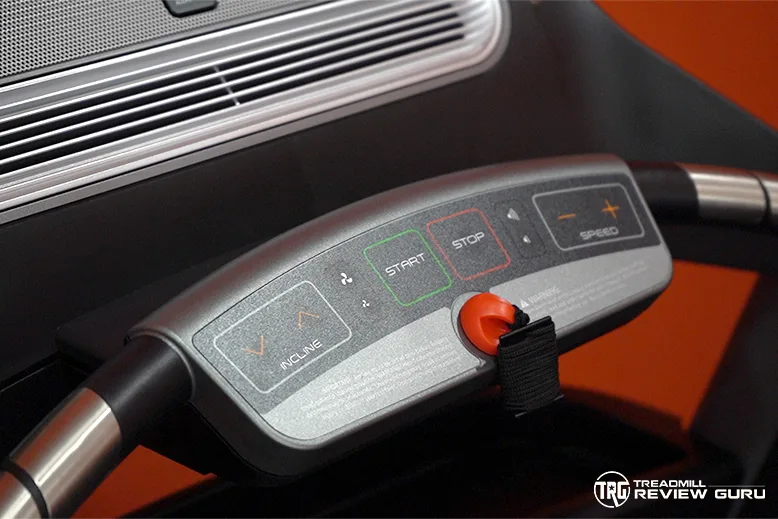
Image source: Bing (Web (fair-use with source credit))
What if calibration fails? If the display flashes an error code or the deck gets stuck mid-cycle, write down the code. Then check for mechanical binding. A failed calibration almost always means one of two things: the incline motor can't physically reach its full range, or the sensor is not reporting correctly.
When to recalibrate after this. If the problem was a software glitch, one calibration is enough. If you lubricate the screw or replace any incline part, always calibrate afterward. The console needs to learn the new range of motion.
Step-by-Step: Inspecting and Replacing the Incline Motor
If calibration and lubrication did not fix the problem, the incline motor itself may need replacing. This is a straightforward DIY job. It takes about 45 minutes the first time and requires basic hand tools.
What you'll need:
- Phillips head screwdriver (medium size)
- 10mm socket or adjustable wrench
- Replacement incline motor (part number 249017 for most Commercial and EXP models)
- Dry PTFE lubricant (optional, for the new motor's screw shaft)
Step 1: Unplug the treadmill. Do not skip this. The motor runs on 24V DC, but the control board stores enough charge to hurt you.
Step 2: Remove the motor hood. At the front of the treadmill, near the console, you'll see a plastic shroud. It is held by two Phillips screws at the top and two clips at the bottom.
Pull it straight off.
Step 3: Locate the incline motor. It is a cylindrical assembly mounted to a bracket near the front roller. A long threaded rod extends from one end and connects to a pivot that pushes the deck up.
Step 4: Disconnect the wiring. Unplug the motor's harness from the control board. Also disconnect the sensor wire, two thin wires with a small plastic connector.
Note the orientation.
Step 5: Remove the mounting bolts. There are two bolts holding the motor to the bracket. Use a 10mm socket.
Support the motor as you remove the last bolt so it does not drop.
Step 6: Slide the motor out. The threaded rod will slide out of the pivot bracket. Pull the entire assembly free.
Step 7: Install the new motor. Slide the threaded rod into the pivot bracket. Align the mounting holes.
Hand-tighten the bolts, then tighten them with the socket. Do not overtighten.
Step 8: Reconnect the wiring. Plug the sensor wire and the motor harness into the same ports you removed them from. They only fit one way.
Step 9: Replace the motor hood. Snap it back on and tighten the screws.
Step 10: Calibrate. Plug in the treadmill and run the calibration procedure from the previous section. This is critical.
The new motor may have a slightly different range of motion, and the console must learn it.
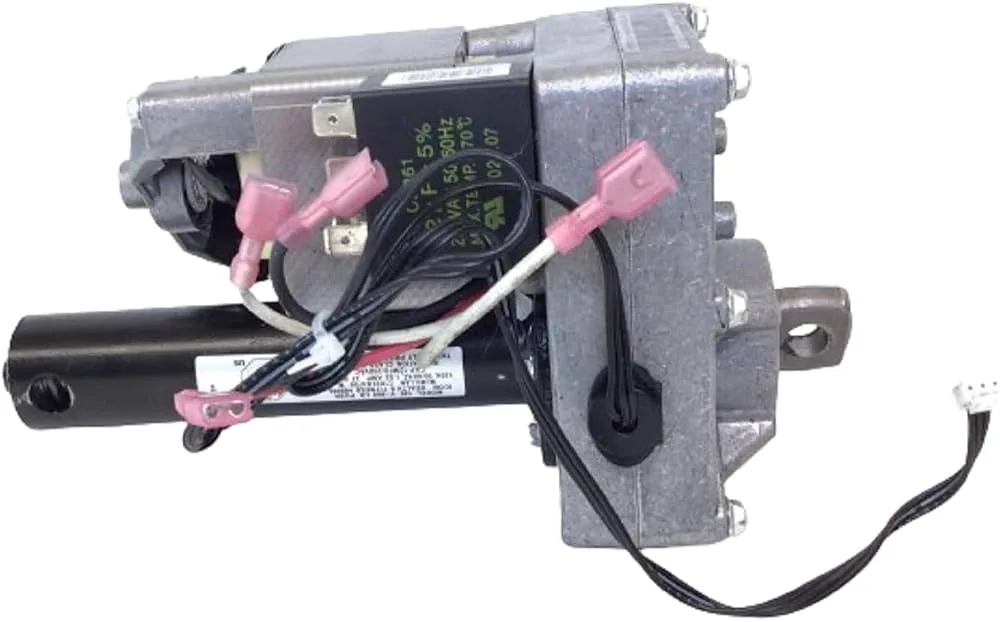
Image source: Bing (Web (fair-use with source credit))
A note on warranty. If your treadmill is still under warranty, contact NordicTrack support before replacing anything yourself. Unauthorized repairs can void coverage. But if you are out of warranty, this repair is well within reach of a handy owner.
The replacement motor costs around $40 to $70 from the manufacturer or a reputable parts supplier. Compare that to a $150 service call.
Common pitfall. Do not lubricate the new motor's gearbox. It is sealed. Lubricate only the screw shaft that runs through the pivot point.
A drop of PTFE spray every six months will keep it moving smoothly.
When It's the Sensor, Not the Motor
Sometimes the motor works fine, but the incline still won't move. The culprit is almost always the incline position sensor. This small component tells the console where the deck is.
If it fails, the console refuses to move the incline because it doesn't know where "down" is.
How to test the sensor. Place the treadmill in calibration mode. Watch the incline screw as it begins to move. If the motor runs but the screw stops immediately or oscillates back and forth, the sensor is likely bad.
You can also test with a multimeter set to continuity. Disconnect the sensor and check for a closed circuit when a magnet is placed near it. If the circuit never closes or never opens, replace it.
Where to find the sensor. It is mounted on a small bracket near the front of the incline motor. On most NordicTrack models, it's a small black plastic piece with two wires. A small magnet on the motor shaft passes by it to signal position.
How to replace it. Unclip the old sensor from the bracket. Unplug its connector from the harness. Snap the new sensor into the same bracket.
Plug the connector back in. That's it. Run calibration afterward.
The sensor costs about $10 to $15. It is one of the cheapest repairs you can make, and it solves a frustrating issue that many owners assume requires a full motor replacement.
Common Mistakes That Make Things Worse
A few well-intentioned moves can turn a simple fix into an expensive repair. Avoid these.
Using WD-40 on the incline screw. WD-40 is a solvent, not a lubricant. It dries out rubber and plastic components inside the motor assembly. Use only dry PTFE lubricant or silicone spray.
Apply sparingly.
Forcing the deck up manually. If the motor is stuck, don't yank the deck up by hand. You can snap the plastic pivot bracket. Instead, lubricate the screw and try calibration again.
If that fails, replace the motor.
Ignoring the error code. Many owners clear the error code and keep running. This masks the underlying problem. Write down the code and look it up in your manual.
It points directly to the faulty component.
Testing the motor with a car battery. The incline motor runs on 24V DC. A 12V car battery won't hurt it, but it won't spin it fast enough to tell if it's good. Use a 24V DC power supply or a multimeter to check voltage at the harness.
Skipping calibration after a repair. This is the most common mistake. You replace the motor, plug everything in, and the incline still doesn't work. You need to calibrate every time you touch the incline system.
The console has no idea where the new motor's limits are until you teach it.
Frequently Asked Questions
Why does my NordicTrack incline stop halfway and flash a dash?
That dash means the console lost communication with the incline sensor mid-motion. Run a full calibration. If it fails again, the sensor is likely dirty or failing.
Clean the sensor with compressed air. If that doesn't help, replace it.
Can I use my treadmill while the incline is broken?
You can, but only if the deck is stuck in a flat position. If it is stuck at an angle, do not use the treadmill. Running on an angled deck puts uneven stress on the drive motor and belt.
It can also cause injury.
How often should I lubricate the incline screw?
Every six months or every 150 hours of use, whichever comes first. Use dry PTFE spray. Apply one short burst to the screw where it enters the motor housing.
Wipe away excess. Do not over-lubricate.
Will an iFit update fix my incline issue?
Sometimes. iFit firmware updates occasionally include calibration improvements. Check for updates in the Settings menu of your console. Install any pending updates, then run calibration.
If the issue persists, it is hardware, not software.
How much does a service call cost if I can't fix it?
Expect $100 to $200 for a technician to come to your home. Parts are additional. The incline motor is $40 to $70.
The sensor is $10 to $15. A full repair including labor typically runs $150 to $300. Compare that to the $40 cost of a DIY motor replacement.

Similar Posts
































