How To Connect A Portable Projector: Easy Setup Guide
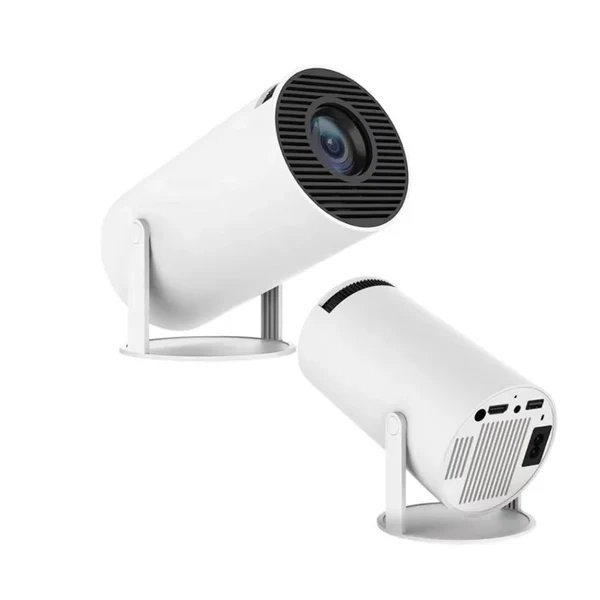
Connecting a portable projector is usually simple: match the source, connect the cable or wireless link, then select the right input.
If you know the basic steps, setting up a portable projector feels a lot less like tech trouble and a lot more like pressing play. I’ve set up projectors for home movie nights, client demos, and travel presentations, and the same rule always applies: the cleanest setup comes from understanding your device ports, signal source, and display settings before you start. This guide walks you through how to connect a portable projector the right way, with practical tips, real-world mistakes to avoid, and simple fixes that save time.
What a Portable Projector Needs to Work
A portable projector is only as good as the connection behind it. Before you plug anything in, make sure you know what kind of input the projector supports and what output your device uses. That small detail is where most setup problems begin.
Most portable projectors work with one or more of these connection types:
- HDMI for laptops, streaming devices, game consoles, and many tablets
- USB-C for newer laptops, phones, and tablets with video output support
- Wireless screen mirroring through Wi-Fi or Bluetooth-based apps
- VGA on older laptops and older business projectors
- AV or RCA on some compact or budget models
- Built-in media playback from USB drives or microSD cards
In my experience, HDMI is still the most reliable choice. Wireless is convenient, but if you want fewer surprises, a cable usually wins. That is especially true when you are watching a movie outdoors or giving a presentation where every second matters.
A good setup also depends on power. Many portable projectors run on a wall adapter, a power bank, or an internal battery. If the projector is battery-powered, check the charge before you begin so it does not shut off halfway through.
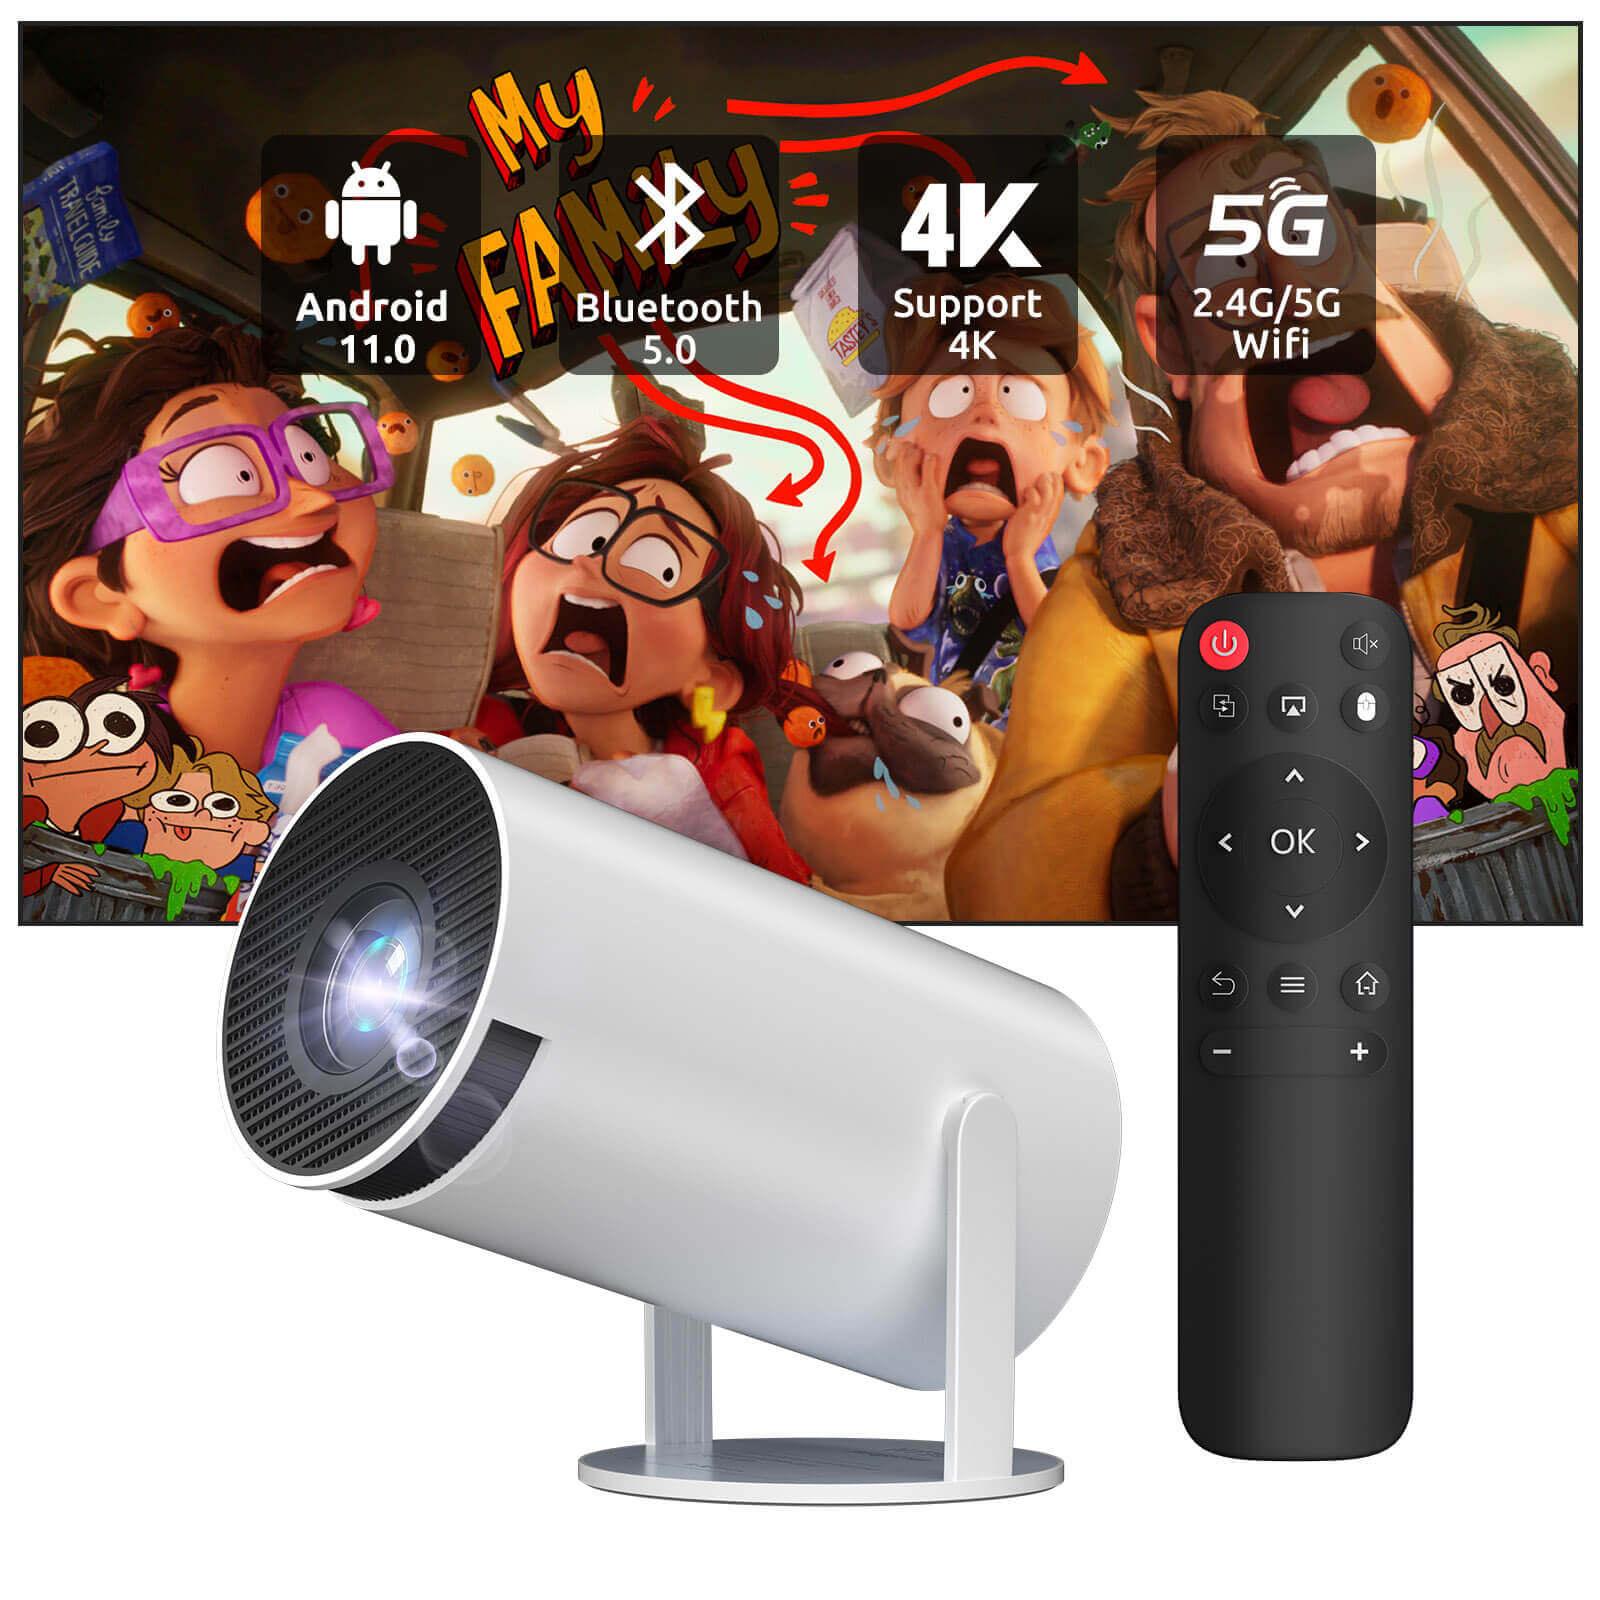
How to Connect a Portable Projector with a Cable
Wired connections are the easiest place to start because they are stable and simple. If you want the fastest way to learn how to connect a portable projector, this is it.
1. Check the ports on both devices
Look at the projector and the device you want to use. Common pairings include:
- Laptop to projector through HDMI
- Phone or tablet to projector through USB-C
- Older laptop to projector through VGA
- Streaming stick to projector through HDMI
If the ports do not match, you may need an adapter. For example, many modern MacBooks need a USB-C to HDMI adapter. Some phones also need a USB-C hub that supports video output.
2. Plug in the cable firmly
Connect one end of the cable to your device and the other end to the projector. Push the connectors in fully, but do not force them. A loose cable is one of the most common reasons a projector shows a black screen.
I learned this the hard way during a backyard movie night. The picture kept cutting out, and the problem was nothing fancy at all. The HDMI plug was half-seated in the port.
3. Turn on the projector and source device
Power on the projector first, then the laptop, phone, or streaming device. Some projectors auto-detect the signal, while others need you to choose the input manually.
4. Select the correct input source
Use the projector remote or onboard controls to switch to the right source. You may see labels like:
- HDMI 1
- HDMI 2
- USB-C
- AV
- VGA
If nothing appears, try the other input options. Sometimes the projector defaults to the wrong port.
5. Adjust display settings if needed
Once the image appears, fix the picture size, focus, and alignment. On a laptop, you may also need to mirror or extend the display.
Helpful settings to check include:
- Display resolution
- Screen mirroring mode
- Aspect ratio
- Keystone correction
- Brightness mode
For best results, keep the source resolution close to the projector’s native resolution. That helps the image look sharper and more natural.
How to Connect a Portable Projector Wirelessly
Wireless setup is great when you want fewer cords and a cleaner space. It is also the most convenient way to connect a portable projector during casual use, though it can be a little less predictable than a cable.
Use Wi-Fi screen mirroring
Many portable projectors support screen mirroring through Wi-Fi. This may work with AirPlay, Miracast, Chromecast-style casting, or a brand app.
Basic steps usually look like this:
- Connect the projector to the same Wi-Fi network as your phone or laptop
- Open screen mirroring, casting, or AirPlay on your device
- Select the projector from the device list
- Confirm the connection if prompted
- Adjust the display once the screen appears
This works well for videos, photos, and casual streaming. For work slides or gaming, latency can be a problem, so test it first.
Use Bluetooth only when supported for audio
Bluetooth is usually not the main video link. On many projectors, Bluetooth is for audio output, not full screen projection. That means you may connect a speaker through Bluetooth while still using HDMI or Wi-Fi for the picture.
If your projector claims Bluetooth video support, read the manual carefully. That feature is less common and may have limits.
Use a casting device
A streaming stick or casting dongle can make setup easier. You plug it into the projector’s HDMI port, connect it to Wi-Fi, and then cast from your phone or laptop.
This is a smart fix when the projector’s built-in wireless tools are clunky. I often recommend this route for people who want one device that works across many projectors.

How to Connect a Portable Projector to a Laptop
Connecting a portable projector to a laptop is one of the most common setups. It is also one of the easiest if you use the right cable and display settings.
On Windows laptops
Most Windows laptops work like this:
- Connect HDMI, USB-C, or an adapter
- Turn on the projector
- Press Windows + P
- Choose Duplicate, Extend, or Second screen only
Duplicate is best for presentations. Extend is useful if you want notes on one screen and content on the other.
On MacBooks
MacBooks often need a USB-C to HDMI adapter unless the projector has USB-C video input.
Steps are simple:
- Connect the cable or adapter
- Turn on the projector
- Open System Settings
- Go to Displays
- Choose mirror or extend mode
If the picture looks stretched, check the aspect ratio and display scaling. Macs can be picky with display matching, but once set, they are usually stable.
Common laptop issues
If your laptop is connected but nothing shows up, try these fixes:
- Switch to the correct projector input
- Replug the cable
- Restart the laptop
- Test another HDMI port or adapter
- Update the graphics driver if the device is older
A bad adapter is often the real culprit. Cheap adapters can look fine but fail under pressure.
How to Connect a Portable Projector to a Phone or Tablet
This is a great option for movie nights, photo sharing, and quick media playback. The trick is knowing whether your phone supports video output or only wireless casting.
For iPhone and iPad
Many Apple devices can connect by:
- Lightning to HDMI adapter on older models
- USB-C to HDMI on newer iPads and some newer iPhones with support
- AirPlay if the projector or casting device supports it
If you use AirPlay, both devices need the same Wi-Fi network. That makes setup easier, but it also means a weak network can hurt performance.
For Android phones and tablets
Android support varies more because not every model supports wired video output. Some phones can use:
- USB-C to HDMI
- Screen mirroring
- Cast features built into the device
- Brand-specific projector apps
Check your phone specs before buying adapters. Not every USB-C port sends video, and that is a common mistake.
Best use cases for phone connections
A phone-to-projector setup works well for:
- Streaming short videos
- Viewing photos
- Sharing casual content
- Playing mobile games on a bigger screen
It is less ideal for long office presentations unless you test the app and latency first.
How to Connect a Portable Projector to a Streaming Device or Game Console
Portable projectors often shine when paired with streaming devices or consoles. This setup turns a small projector into a flexible entertainment hub.
Streaming devices
To connect a streaming device:
- Plug the stick or box into HDMI
- Power it with USB or its own adapter
- Select the correct HDMI input
- Connect to Wi-Fi
- Log in to your streaming apps
This setup is popular because it gives you a familiar interface and better app support than some built-in projector systems.
Game consoles
For consoles like PlayStation, Xbox, or Nintendo Switch:
- Use HDMI for the main connection
- Set the projector to the right input
- Lower display lag if the projector has a game mode
- Adjust brightness and sharpness for better motion clarity
Gaming on a portable projector can be a lot of fun, but lag matters. If you notice delay between controller input and the picture, turn on low-latency mode if the projector includes it.

Best Practices for a Clean and Reliable Setup
A smooth setup is not just about plugging in the right cable. The small habits make a big difference, especially if you connect a portable projector often.
Keep these tips in mind:
- Use short, high-quality cables when possible
- Keep adapters and dongles from bending or pulling at the ports
- Test the setup before guests arrive or before a meeting starts
- Keep the projector level for a sharper image
- Give the projector space for airflow so it does not overheat
- Check audio output separately if you want sound through speakers
- Save your favorite input settings if the projector allows presets
A portable projector is a bit like a camping lantern. It works best when it is prepared, charged, and placed where it can do its job without strain.
One other tip from real use: always carry a backup cable. It sounds boring until the one you need stops working five minutes before showtime.
Troubleshooting Common Connection Problems
Even when you know how to connect a portable projector, small issues still happen. The good news is that most of them are easy to fix.
No image on the screen
Try this:
- Confirm the projector is on the correct input
- Check that the source device is powered on
- Reconnect the cable on both ends
- Try a different cable or adapter
- Restart both devices
Image appears, but it is blurry
This usually means:
- The focus ring needs adjustment
- The projector is too close or too far from the screen
- The resolution does not match well
- The lens may need cleaning
Sound works, but no video appears
This can happen when the device is sending audio but not display output. It often points to:
- Wrong cable type
- Unsupported adapter
- Bad HDMI port
- Phone or tablet that does not support video out
Wireless connection keeps dropping
Common causes include:
- Weak Wi-Fi signal
- Too much network traffic
- Device distance from router
- Software glitch in the projector app
If wireless keeps failing, go back to a cable. Sometimes the simplest route is the most dependable one.
What to Look for When Buying a Portable Projector
If you are still shopping, the right features will make it much easier to connect a portable projector later. Not all models are equal, and connection quality matters as much as brightness.
Look for:
- HDMI input
- USB-C with display support
- Reliable wireless mirroring
- Built-in speakers or audio out
- Native resolution that fits your needs
- Auto keystone and autofocus
- Good battery life if you plan to travel
- Easy menu navigation
Brightness is often listed in lumens, but be careful with marketing claims. Real-world brightness can vary, especially in rooms with ambient light. For best results, use the projector in darker spaces or choose a model with enough light output for your room.
Frequently Asked Questions of How to Connect a Portable Projector
How do I connect a portable projector to my phone?
Use a cable if your phone supports video output, or use wireless casting if the projector supports it. Make sure both devices are on the same Wi-Fi network when using screen mirroring.
Why is my portable projector not showing a picture?
The most common causes are the wrong input source, a loose cable, or an unsupported adapter. Start by checking the projector input and reconnecting the cable firmly.
Can I connect a portable projector without Wi-Fi?
Yes. A wired HDMI or USB-C connection does not need Wi-Fi. You only need Wi-Fi for wireless screen mirroring or casting.
Do all portable projectors work with iPhones?
No, not all of them do. Some need a Lightning or USB-C adapter, while others support AirPlay or a casting device.
Is Bluetooth enough to connect a portable projector?
Usually no. Bluetooth is more common for audio than video. For the picture, you normally need HDMI, USB-C, or wireless screen casting.
How do I improve picture quality on a portable projector?
Use a dark room, clean the lens, adjust focus, and match the source resolution to the projector’s native resolution. A stable connection also helps keep the image sharp and steady.
Conclusion
Learning how to connect a portable projector is really about knowing your ports, choosing the right connection method, and checking the basics before you start. Once you get used to HDMI, USB-C, or wireless casting, the whole process becomes quick and easy.
The best setup is the one that fits your space and your purpose. If you want reliability, use a cable. If you want convenience, try wireless and test it ahead of time. Try the steps in this guide, keep a spare adapter handy, and your next movie night or presentation should go much more smoothly.
If this guide helped, explore more setup tips, subscribe for future how-to articles, or leave a comment with your projector model and connection issue.

Similar Posts