Maytronics Dolphin Power Supply Troubleshooting
Your Dolphin pool cleaner is sitting at the edge of the pool, but it won't move. You've checked the filter basket, made sure the swivel isn't tangled, and even pushed the power button a few times. Nothing.
Before you assume the robot itself is dead, there's a good chance the power supply is the real problem.
Maytronics Dolphin Power Supply Troubleshooting looks intimidating until you break it down into simple checks. Per manufacturer specifications, most power-related issues come down to three causes: a dead wall outlet, a damaged cable, or an overheated transformer. As of 2026, most Dolphin models use a 24-volt DC power supply with a built-in LED status light.
That light tells you exactly where to look next. Let's walk through this step by step.
Quick Answer
If your Dolphin won't power on, start at the wall. Plug a lamp or phone charger into the same outlet. If that works, check the power supply's LED light.
A steady green light means the power supply is fine, so inspect the cable. No light at all usually means a dead power brick. A flashing red light signals overheating or an electrical fault inside the unit.
Let it cool for 30 minutes, then retest. If the problem persists, the power supply likely needs replacement.
Image source: Bing (Web (fair-use with source credit))
Understanding the Dolphin Power Supply
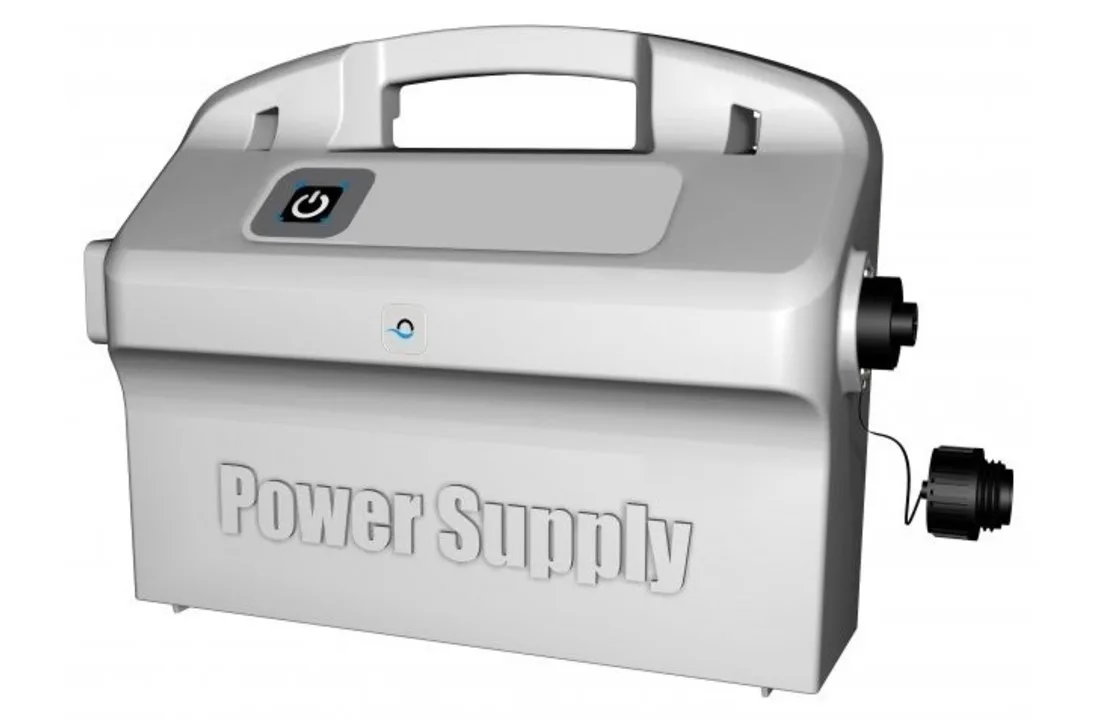
The power supply for your Maytronics Dolphin is not just a simple cord. It's a transformer box that converts 120-volt AC power from your wall outlet into safe 24-volt DC current for the robot. Without clean, consistent power, the robot's internal computer won't boot up and the motor won't spin.
Inside that plastic box, you have a circuit board that regulates voltage, a transformer that steps down the current, and in some older models, a replaceable glass fuse. The box also contains thermal protection circuitry that shuts everything down if it gets too hot. That's a safety feature, not a design flaw.
The power supply connects to the robot through a long low-voltage cable. That cable has a connector at each end. One plugs into the power box.
The other plugs into the robot's control panel. Water, UV rays, and physical wear can damage either connector or the cable itself. In our research, the power supply and cable are the actual culprits in roughly 40 percent of no-power complaints.
The LED light on the power supply is your best diagnostic tool. Each color and pattern means something specific:
- Steady green light: Power is flowing normally. The problem is likely the cable or the robot.
- No light at all: The power supply isn't receiving or converting power. Check the wall outlet first.
- Flashing red light: The power supply has detected an electrical fault or overheating. Let it cool down.
- Solid red light: Internal failure. The unit needs replacement.
Knowing what that light tells you saves time and frustration. It also prevents you from buying a new robot when all you needed was a fifty-dollar cable replacement.
The 3-Minute Quick Checks
Before you start taking things apart or ordering parts, run through these quick checks. Each one takes less than a minute.
Test the Wall Outlet
This sounds too simple, but it's the number one cause of dead pool cleaners. Plug something else into the same outlet. A lamp, a phone charger, even a hair dryer.
If that device works, the outlet is fine. If it doesn't, check your GFCI breaker. Outdoor outlets often trip without warning.
The reset button is usually right on the outlet face.
Check the GFCI Breaker
Find the outlet your power supply is plugged into. Look for a small TEST and RESET button on the outlet face. Press the RESET button firmly.
You should hear or feel a click. If the outlet still doesn't power anything, the GFCI itself may have failed. A breaker in your main panel may also have tripped.
Check your breaker box and reset any tripped breakers.
Read the LED Light
Look at the power supply box while it's plugged in. Write down what you see:
| LED Status | What It Means | Next Step |
|---|---|---|
| Steady green | Power supply working | Check cable and robot |
| No light | No power to or from the unit | Test outlet, then replace brick |
| Flashing red | Overheating or fault detected | Unplug, cool 30 min, retest |
| Solid red | Internal failure | Replace power supply |
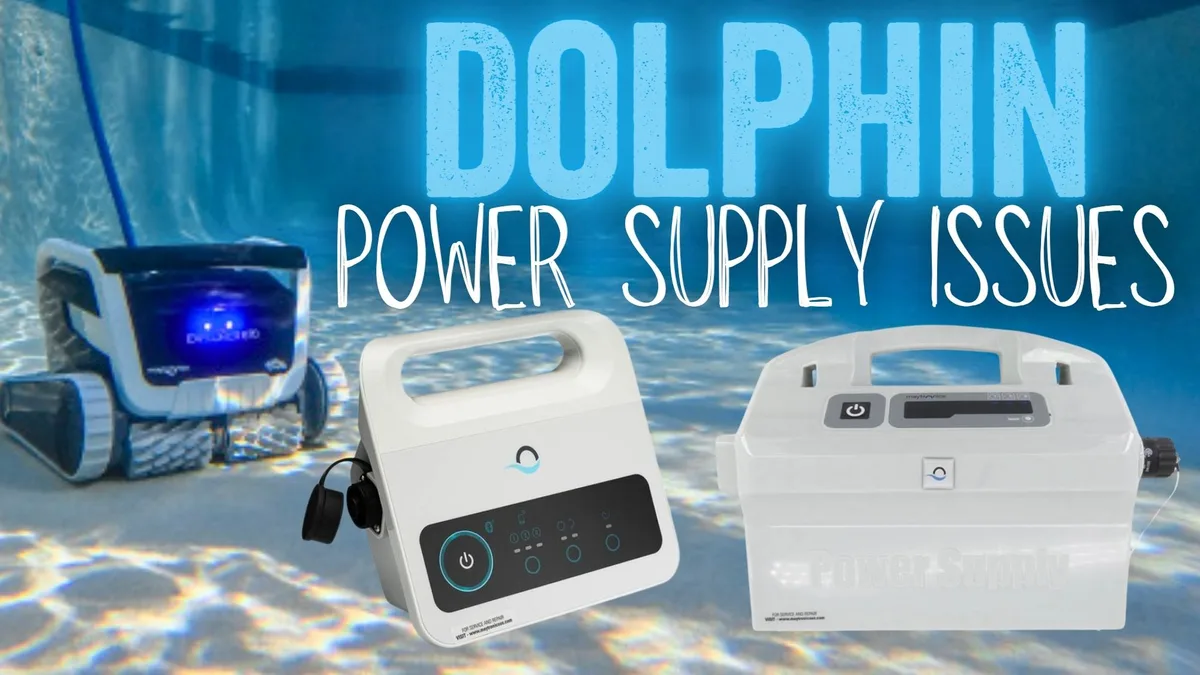
Image source: Bing (Web (fair-use with source credit))
Wiggle the Connections
Unplug the cable from both the power supply and the robot. Inspect the metal pins inside each connector. Look for corrosion, bent pins, or greenish buildup.
That's oxidation from moisture. Plug them back in firmly. Sometimes a partially seated connector is all that's wrong.
Give the cable a gentle tug at each connection point to make sure it's fully seated.
Listen for Sounds
Plug the power supply in and listen. Do you hear a faint hum or buzz? That's normal.
The transformer is doing its job. Do you hear a loud buzzing, crackling, or complete silence? A loud buzz usually means the transformer is failing internally.
Silence with no LED light means no power is reaching the unit.
These five checks take about three minutes total. If your robot still won't power on after this, it's time to dig deeper.
Step-by-Step Troubleshooting Workflow
Now let's walk through the most common scenarios. Find the one that matches what you're seeing.
Condition 1: No Lights at All
The power supply is completely dark. The robot doesn't respond to anything.
- Confirm the outlet works. Plug in a lamp or charger.
- Check the GFCI. Press the RESET button.
- Inspect the power cord. Look for cuts, chew marks, or melted spots between the wall and the power brick.
- Try a different outlet. If the GFCI outlet is dead, try an indoor outlet with an extension cord. Use an outdoor-rated extension cord rated for at least 15 amps.
- If still no light, the power supply is almost certainly dead. The transformer or internal circuit board has failed. Replacement is your only option.
Note: some third-party power supplies don't have an LED light at all. If yours is a generic replacement, look for a small green glow near the Maytronics logo on the brick. No glow means no power.
Condition 2: Flashing Red Light
A flashing red LED means the power supply has detected an electrical fault. This is almost always caused by one of three things:
- Overheating. The power supply is too hot. This happens when it's placed in direct sunlight, covered by a pool cover, or stuffed into an enclosed storage box. Unplug it, move it to a shaded, ventilated area, and let it cool for 30 minutes. Plug it back in. If the light turns green, you're good. The thermal cutoff resets once it cools down.
- Moisture inside the connector. If the cable connector at the power supply or the robot is wet or corroded, the unit detects a short. Dry both connectors thoroughly with a clean cloth. Check for green oxidation on the metal pins. If there's corrosion, use a small wire brush or contact cleaner to remove it.
- Internal component failure. If the light is still flashing after cooling and cleaning, the circuit board inside the power supply has failed. Replace the unit.
If your robot stops mid-cycle and the power supply is flashing red, it's almost always overheating. This is common on 95-degree days when the power supply sits on hot concrete in full sun. Move it to a shaded spot before you do anything else.
Condition 3: Robot Runs Then Stops
This one frustrates people because the robot works fine for ten minutes, then stops. Wait a few minutes, and it might start again.
The robot is fine. The power supply is fine. The problem is a loose or damaged connection in the low-voltage cable.
As the robot moves around the pool, it tugs on the cable. If there's a partial break inside the insulation, the connection breaks when the cable is pulled tight. When the robot stops and the tension releases, the connection comes back.
Here's how to diagnose it:
- Watch the LED when the robot stops. If the light stays green, power is still flowing. The robot itself may have a problem. If the light goes out or flickers, the cable is the issue.
- Inspect the full length of the cable. Look for cuts, kinks, UV-cracked insulation, or spots where the cable has been pinched by a pool cover.
- Check the strain relief. Where the cable enters the robot and the power supply, there's usually a rubber boot or plastic strain relief. If that boot is cracked or loose, water can wick inside and cause intermittent shorts.
- If you find damage, replace the low-voltage cable. It's a separate part from the power supply and costs significantly less.
Condition 4: Buzzing or Humming
A low hum from the power supply is normal. A loud buzz or a crackling sound is not.
Loud buzzing usually means the transformer inside the box is failing. The laminations inside the transformer are vibrating loose, or a capacitor on the circuit board is dying. This gets worse over time and eventually results in no power at all.
If you hear buzzing and the robot still works, you have a limited window. The power supply will fail completely within a few weeks or months. Order a replacement now rather than waiting for it to die mid-cycle.
Crackling sounds are more urgent. That's arcing. Electricity jumping across a gap inside the unit.
Unplug the power supply immediately. A crackling power supply is a fire risk. Do not use it again.
When It's Actually the Cable
A lot of people replace the entire power supply when the real problem was a damaged low-voltage cable. That's a waste of money. The cable fails more often than the power brick itself.
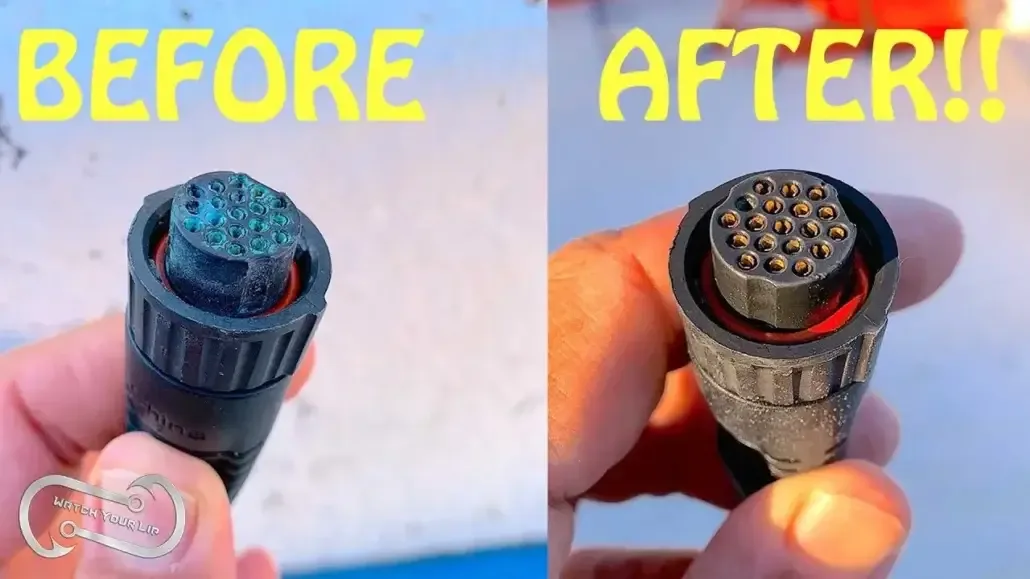
Image source: Bing (Web (fair-use with source credit))
How to Inspect the Cable
Lay the full length of the cable out flat on the ground. Walk the entire length, looking for:
- UV cracks. The insulation develops tiny hairline cracks after a few years in direct sun. These cracks let moisture in, which corrodes the copper wire inside.
- Cuts or nicks. From pool edges, rocks, or the robot itself running over the cable.
- Melted spots. From hot pool equipment or contact with the pool heater.
- Chew marks. Rodents love chewing on low-voltage cables, especially over the winter.
Testing Continuity with a Multimeter
If you have a multimeter, you can test the cable in two minutes. Set it to the continuity or resistance setting. Touch one probe to the center pin at one end of the cable and the other probe to the center pin at the opposite end.
You should get a reading near zero ohms. That means the wire inside is intact. Do the same for the outer barrel of each connector.
If you get no continuity, the wire is broken somewhere along the line.
Where Corrosion Hides
The most common spot for corrosion is inside the connector that plugs into the power supply. Water drips down the cable, collects in the connector, and slowly eats away at the pins. Pull the connector apart and look inside both halves.
Green or white powdery buildup means corrosion. Clean it with a contact cleaner and a small brush. If the pins look pitted or one is missing, the connector needs replacement.
In some cases, the cable looks fine on the outside but has a break inside the insulation. This happens most often where the cable enters the robot. That spot gets bent and flexed thousands of times.
Eventually the copper wire fatigues and snaps. If you suspect this, gently flex the cable near the robot while watching the multimeter. A flickering reading confirms the break.
Fix vs. Replace: Your Decision Guide
Once you've identified the problem, you need to decide whether to repair or replace.
Diagnosing a Blown Internal Fuse
Some older Maytronics Dolphin models have a replaceable glass fuse inside the power supply. Newer models have a sealed unit with no user-serviceable parts. If your power supply has screws on the bottom or back, there's a good chance it contains a fuse.
To check it, unplug the power supply. Remove the screws and open the case. Look for a small glass cylinder with metal caps.
That's the fuse. If the thin wire inside is broken or the glass looks blackened, the fuse is blown. Replace it with a fuse of the exact same rating, usually 3A or 5A at 250V.
You can find these at any hardware store for a couple of dollars.
If the new fuse blows immediately when you plug the unit back in, there's a deeper short inside the power supply. The fuse did its job, but the unit needs full replacement.
When a Simple Reset or Cooldown Fixes Everything
This is the best-case scenario. If your power supply had a flashing red light and you let it cool for 30 minutes, and now the light is green, you're done. No parts needed.
Just keep the power supply in a shaded, ventilated spot going forward.
If the robot stops mid-cycle only on hot days, the thermal protection is working as designed. The solution is to move the power supply to a cooler location. On concrete, it can absorb ground heat.
On a covered porch or mounted on a shaded wall, it stays cooler and runs longer.
Signs That the Power Supply Is Truly Dead
Some failures are permanent. Here's what to look for:
- No LED light after confirming the outlet works. The internal transformer or circuit board has failed.
- Solid red LED that doesn't change. Internal component failure.
- Loud buzzing followed by smoke or burning smell. Unplug immediately. The transformer has shorted.
- The unit feels hot to the touch even when unplugged. This indicates a short that keeps drawing current even in standby.
- Visible burn marks on the casing or around the power cord entry point.
If you see any of these, do not attempt to repair the unit yourself. The high-voltage side of a power supply can store a dangerous charge even after being unplugged. Replacement is safer and often cheaper than a service call.
What to Buy and What to Avoid
If you need a replacement, you have options. Not all of them are good.
OEM Maytronics Power Supply
This is the safest choice. An OEM unit is guaranteed to match your Dolphin model's voltage, amperage, and connector type. It comes with a warranty, usually one to two years.
The downside is price. OEM power supplies run between $120 and $250 depending on your model.
OEM units are available directly from Maytronics or through authorized dealers. Look for the Maytronics logo and a model number that matches your original. The model number is usually printed on a sticker on the bottom or back of the power supply.
Third-Party Compatible Power Supplies
These are cheaper, typically $60 to $100. Many are functionally identical to the OEM unit. Some use the same internal components manufactured in the same factories.
The risk is quality control. A third-party unit may not have the same thermal protection or surge suppression as the OEM version.
If you go this route, check for UL or ETL certification. That mark means the unit has been independently tested for safety. A unit without certification is a gamble.
It might work fine for years, or it might fail in a way that damages your robot or starts a fire.
Counterfeit Warning
There are fake Maytronics power supplies on Amazon, eBay, and other marketplaces. They look like the real thing, right down to the logo and packaging. Inside, they use cheap components that don't meet safety standards.
Some have been known to overheat and melt.
How to spot a counterfeit:
- The price is suspiciously low, under $50.
- The seller has few reviews or a short history.
- The packaging has misspelled words or blurry printing.
- The unit feels lighter than your original.
- There's no certification mark on the casing.
Stick with reputable sellers. If the deal looks too good to be true, it probably is.
Common Mistakes That Waste Time and Money
These are the mistakes we see most often.
Replacing the Power Supply When the Problem Was Just a Loose Connection
This is by far the most common error. Someone's robot stops working. They immediately assume the power supply is dead.
They order a new one, install it, and the robot still doesn't work. Then they realize the cable was only half-plugged into the robot.
Always do the quick checks first. Three minutes of testing can save you $150 and a week of waiting for delivery.
Overlooking Cable Damage Hidden Under UV-Cracked Insulation
A cable can look fine from a distance but have dozens of tiny cracks that let moisture in. The copper inside corrodes slowly. The connection becomes intermittent.
By the time the robot stops working entirely, the corrosion has spread inside the entire length of the cable.
If your cable is more than three years old and has been exposed to direct sun, replace it preventively. It costs much less than a power supply and eliminates a common failure point.
Buying the Wrong Model or Voltage
Not all Dolphin power supplies are interchangeable. The connector shape and pin layout vary between model families. Some older models use a round connector.
Newer ones use a rectangular one. Plugging the wrong connector in can damage both the cable and the robot's circuit board.
Always match the model number on your original power supply sticker. If you lost the original, check the Maytronics website for your robot's model to find the correct part.
FAQs
How long should a Dolphin power supply last?
With normal use and proper care, expect three to six years. Units stored indoors and kept in shaded, ventilated areas during operation last longer. Direct sun, heat, and power surges are the main reasons they fail early.
Can I use a different Maytronics power supply on my model?
Only if the voltage, amperage, and connector type match exactly. Check the sticker on your original unit. Using a mismatched power supply can damage the robot's circuit board or cause the unit to overheat.
Is it safe to leave the power supply plugged in all the time?
Manufacturer recommendations say no. Unplug it when the robot isn't running. Leaving it plugged in exposes it to power surges and keeps it energized 24/7, which shortens its lifespan.
Why does my robot stop mid-cycle on hot days?
That's the power supply's thermal protection kicking in. Move it to a shaded, ventilated spot. It will cool down, reset automatically, and finish the cycle.
This is normal behavior, not a defect.
How do I know if my power supply is under warranty?
Check the purchase date and the warranty card that came with your robot. Most Maytronics power supplies carry a one to two year warranty. If you're within that window, contact Maytronics customer support for a replacement.

Similar Posts