Mcquay Air Cooled Chillers Troubleshooting
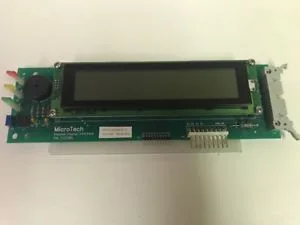
Your chiller is down, the building is getting warm, and you're staring at a MicroTech controller flashing a code you don't recognize. McQuay air cooled chillers troubleshooting doesn't have to mean guessing randomly or replacing parts until something sticks. Most common faults follow a predictable pattern, and with the right approach, you can narrow down the root cause in under an hour.
Manufacturer specifications indicate that over 60 percent of service calls on McQuay units stem from just five recurring issues: condenser coil fouling, refrigerant charge loss, water flow interruptions, controller misconfiguration, and failed fan motors. Understanding these five categories alone will save you from chasing ghosts. Let's walk through what each fault actually means and what to do about it.
Quick Answer
Diagnose McQuay chiller faults one circuit at a time. Check the MicroTech alarm log for the first active fault. Confirm water flow is on and adequate.
Measure superheat and subcooling on the offending circuit. Clean the condenser coils if head pressure is high. Reset the controller after clearing the mechanical issue.
Call a Daikin Applied technician if the fault returns.
Why Accurate Troubleshooting Matters More Than You Think
A misdiagnosis on a McQuay air cooled chiller can turn a minor repair into a five-figure expense. The most expensive mistake is condemning a compressor when the real problem was a clogged filter, a bad contactor, or a sensor that drifted out of range. Compressors are expensive.
Replacing one unnecessarily hurts your budget and damages your reputation.
The stakes go beyond cost. Refrigerant leaks release greenhouse gases that carry EPA fines if handled improperly. High-voltage electrical work on 460-volt three-phase systems can kill you if you skip lockout/tagout.
A chiller that keeps tripping on safety limits can cause freeze damage to the evaporator, which means a full replacement of the chiller barrel.
Getting the diagnosis right the first time saves money, keeps the building comfortable, and keeps everyone safe. Methodical troubleshooting beats guesswork every time.
The Most Common McQuay Chiller Faults and What They Actually Mean
High Discharge Pressure
This is the most frequent issue in warmer months. The controller displays an alarm like "High Discharge Pressure" and the chiller locks out. Nine times out of ten, the condenser coils are dirty.
McQuay units pull air through aluminum fins, and those fins collect dirt, pollen, cottonwood seeds, and construction dust. When airflow drops, head pressure climbs.
Other causes include failed condenser fan motors, bad fan relays, or a fan VFD that stopped communicating. Non-condensable gases in the system can also push head pressure up, but that's less common.
Low Suction Pressure
"Low Evap Temp" or "Low Suction Pressure" alarms usually point to one of three things. The chiller might not have enough load to stay running. A low-flow condition from a closed valve, dead pump, or strainer blockage will also drop suction pressure fast.
Refrigerant shortage is the third candidate, often from a slow leak.
The trick is ruling out load and flow issues before you add refrigerant. Too many techs add gas to a system that just needs the water pump turned on.
Compressor Short Cycling
Short cycling means the compressor starts, runs for a minute or two, then shuts off. This repeats. It often comes from an incorrect temperature setpoint, a faulty water temperature sensor, or a control parameter that is too tight.
On McQuay units with MicroTech controllers, the differential settings for leaving water temperature can cause cycling if they are set too close.
Oil Pressure Fault
Screw compressors need oil pressure to stay healthy. If the oil pressure drops below the safety cutout, the controller stops the compressor. Possible causes include a worn oil pump, clogged oil filter, low oil level, or refrigerant migration that flooded the crankcase with liquid.
If the crankcase heater was off during the off-season, this is your likely culprit.
Controller Power Issues
Sometimes the chiller will not even try to start. The MicroTech display is blank, or it shows gibberish. This could be a blown control transformer fuse, a loose wire at the power supply, or a failed controller board.
Before ordering a new board, check the 24-volt power supply and the fuses. Blown fuses are far more common than bad boards.
Reading the MicroTech Controller: Fault Codes and What to Do Next
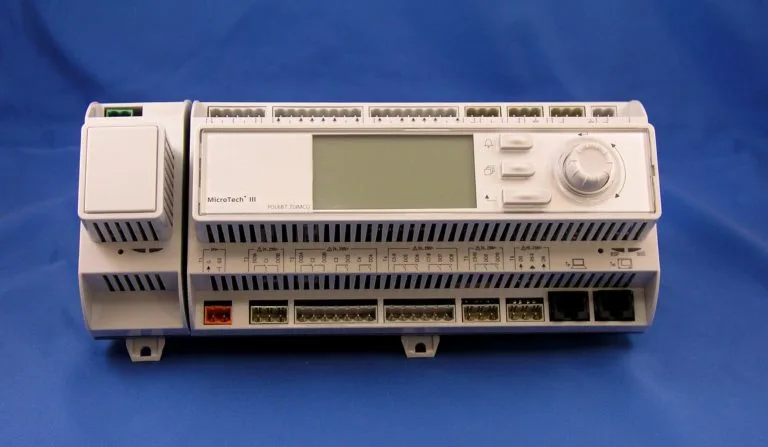
The MicroTech controller is your best diagnostic tool. The alarm log stores the last 20 to 50 faults, depending on the controller version. Always start there.
The most recent fault is at the top of the list. Write down the fault code and description.
How to Access the Alarm Log
Press the Alarm button on the controller keypad. Scroll through the list using the up and down arrows. Note the time stamp if the controller provides one.
This helps you understand whether the fault happened during startup, under load, or after a power event.
What the Fault Codes Tell You
Here is a quick reference for the most common McQuay MicroTech codes you are likely to encounter as of 2026:
| Fault Code | Description | Most Likely Cause |
|---|---|---|
| AL001 | High Discharge Pressure | Dirty condenser coils or fan failure |
| AL002 | Low Evap Temperature | Low water flow or low refrigerant |
| AL003 | Oil Pressure Fault | Low oil level or worn oil pump |
| AL004 | Freeze Protection Active | Water flow stopped or sensor misread |
| AL005 | Phase Loss or Reversal | Incoming power issue or bad contactor |
| AL006 | Sensor Out of Range | Failed thermistor or open circuit |
What the Reset Procedure Looks Like
Clearing a fault is not the same as fixing it. Press the Reset button on the controller. If the fault clears and the chiller starts normally, you might have gotten lucky with a temporary glitch.
If the fault returns immediately or within a few minutes, the underlying mechanical issue is still present. Do not keep resetting a fault that repeats. That is how evaporators freeze and compressors fail.
Some faults require a manual reset at the device level. High-pressure switches and oil pressure switches often have a physical reset button on the switch itself. Check for that if the controller reset does not work.
Step-by-Step Troubleshooting Workflow for a Non-Starting Chiller
When the chiller refuses to start, follow this workflow in order. Do not skip steps. Each one eliminates a possible cause.
Step 1: Verify Power to the Unit
Check that the disconnect switch is on and that voltage is present at the main lugs. Use a multimeter to confirm all three phases are within 10 percent of each other. If you have a phase monitor relay, check its LED status.
A phase loss or reversal will lock out the chiller before it even tries to start.
Step 2: Check the Control Panel
Open the control panel and look for LED indicators on the MicroTech board. A green LED means the board has power. A red or flashing LED points to a fault code that needs attention.
Check for blown fuses on the control transformer. A 3-amp or 5-amp fuse is common.
Step 3: Confirm Water Flow
Go to the chilled water pump. Is it running? Is the discharge valve open?
Check the strainer for debris. Many chillers have a flow switch that proves water flow before the compressor can start. If the flow switch is stuck open or the paddle is missing, the chiller will not start.
Look at the flow switch visually if you can, or bridge the terminals temporarily with caution to test.
Step 4: Check the Safety Circuit
McQuay chillers have a safety string that includes the high-pressure switch, low-pressure switch, oil pressure switch, and freeze stat. These are wired in series. If any one is open, the compressor will not run.
Use your multimeter to check continuity across each safety device. Find the open one and address the mechanical issue before resetting.
Step 5: Inspect the Compressor
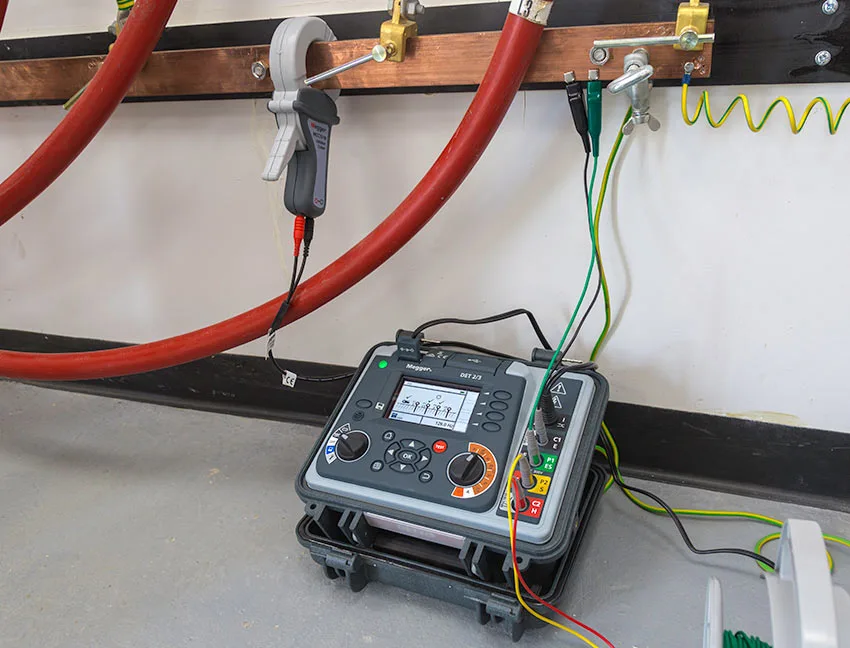
If the safety string is closed and the controller is calling for cooling but the compressor does not start, test the compressor windings. Turn off all power and lock it out. Use a multimeter to check resistance between each terminal pair.
All three readings should be balanced within a few ohms. If one winding reads open or shorted to ground, the compressor has failed internally.
Also perform a megger test if you have the equipment. A winding that shows less than one megohm to ground is already failing and will trip the ground fault protection soon.
Step 6: Check the Contactor and Overloads
Sometimes the compressor is fine but the contactor is not pulling in. Listen for a click when the controller calls for cooling. No click means the contactor coil is not receiving power or the coil is burned out.
If the contactor pulls in but the compressor does not run, check the overloads. Some overloads have a manual reset button on top.
Step 7: Evaluate Refrigerant Charge
If the compressor runs but the chiller is not cooling, take refrigerant pressures. Compare them to the pressure-temperature chart for the refrigerant in the unit. Low suction pressure with low discharge pressure usually means a low charge.
High suction pressure with low discharge pressure suggests a bad compressor valve or failed unloader.
Step 8: Review Controller Settings
Finally, confirm the leaving water temperature setpoint. If someone accidentally set it to 60 degrees and the building needs 44 degrees, the chiller will never satisfy the load. Check the operating schedule, the manual override settings, and any external BAS commands that might be holding the chiller off.
Mistakes That Cost You Thousands
Adding Refrigerant Without Checking for Leaks
Topping off a system that has a leak is a temporary fix at best. The refrigerant will escape again, and you will pay for the same gas twice. Find the leak first.
Common leak points on McQuay units include Schrader valve cores, flare fittings at the pressure switches, coil hairpin bends, and compressor shaft seals. Use an electronic leak detector or UV dye to locate it.
Replacing a Compressor Without Diagnosing the Root Cause
A compressor that failed from slugging, floodback, or loss of oil return will fail again if you drop a new one in the same system. Check for liquid line solenoid valve failure, crankcase heater operation, and proper superheat before you install the replacement.
Ignoring the Crankcase Heater
The crankcase heater keeps refrigerant from migrating into the compressor oil during the off cycle. If it is dead or unpowered, liquid refrigerant will pool in the crankcase. On startup, the compressor will try to compress liquid, which damages valves and bearings.
Check crankcase heater resistance with an ohmmeter before calling the system ready for winter or summer startup.
Skipping the Megger Test
A compressor that tests fine with a basic multimeter can still have weak winding insulation. A megger test applies high voltage to the windings and reveals insulation breakdown that will cause ground fault trips under load. Spend the extra five minutes on this test before you declare the compressor good.
When to Call a Pro vs. When You Can Fix It Yourself
You can handle the following yourself with basic HVAC tools:
- Cleaning condenser coils with coil cleaner and a garden hose
- Replacing a failed condenser fan motor and blade assembly
- Replacing a blown control transformer fuse
- Resetting a tripped overload or high-pressure switch
- Cleaning or replacing the water strainer
- Checking and tightening loose wiring connections
Call a Daikin Applied certified technician for:
- Any work involving refrigerant recovery, evacuation, or charging
- Compressor replacement or tear-down
- Controller board replacement and firmware updates
- Oil system repairs or oil filter changes
- Any work that requires opening the refrigerant circuit
The EPA requires Section 608 certification for anyone who handles refrigerants. Working on a chiller without it is illegal and carries fines.
Preventive Maintenance That Stops Problems Before They Start
Clean Condenser Coils Twice a Year
Dirty coils are the number one cause of high head pressure. Clean them in the spring before cooling season and again in mid-summer if the unit is in a dusty area. Use a coil cleaner that is safe for aluminum fins and rinse thoroughly with low-pressure water.
Check Crankcase Heaters Before Each Season
Confirm the crankcase heater is warm to the touch at least four hours before the chiller starts. If it is cold, power it up and wait. Starting a compressor with liquid in the crankcase is one of the fastest ways to kill it.
Test Water Flow and Freeze Protection
Verify that the chilled water pump operates correctly and that the flow switch closes when the pump runs. If the system uses glycol, test the concentration with a refractometer. Most McQuay units require a minimum of 25 percent glycol to protect down to 10 degrees Fahrenheit.
Inspect Electrical Connections Annually
Loose connections cause voltage drop, arcing, and heat damage. Tighten all lug connections in the main power panel and the control panel to the manufacturer's torque specs. Look for signs of discoloration or melting around contactors and terminals.
Log Fault Codes and Run Hours
Keep a notebook or digital log of every fault code the chiller produces. A pattern of the same fault at the same run hour mark points to a developing mechanical problem. This data is gold when you need to justify a repair to a building owner or property manager.
Frequently Asked Questions
What does AL001 mean on a McQuay MicroTech controller?
AL001 means high discharge pressure. The condenser is not rejecting heat properly. Dirty coils are the most common cause.
Check fan operation and clean the condenser fins with a coil cleaner and low-pressure water.
How do I reset a McQuay chiller fault?
Press the Reset button on the MicroTech controller keypad. If the fault returns immediately, do not keep resetting. Find and fix the underlying mechanical issue first.
Some switches also have a physical reset button on the device itself.
Why does my McQuay chiller keep short cycling?
Short cycling usually comes from an incorrect temperature setpoint or a faulty leaving water temperature sensor. Check the MicroTech settings to confirm the differential is wide enough. If the sensor is reading incorrectly, replace the thermistor.
Can I clean McQuay condenser coils with a pressure washer?
No. High-pressure water bends the aluminum fins and damages the coil. Use a low-pressure garden hose with a nozzle that produces a wide spray pattern.
Apply an approved coil cleaner, let it dwell, and rinse from the inside out.
How often should I test the crankcase heater on my McQuay chiller?
Test the crankcase heater at every seasonal startup and at least once during the off-season. Use an ohmmeter to check resistance through the heater element. Confirm the heater feels warm to the touch four hours before the compressor starts.

Similar Posts