Samsung Dryer Troubleshooting
Your Samsung dryer starts fine, the drum spins, the air feels like it’s moving, but your clothes come out damp. Or worse, it won’t heat at all. Or it throws a cryptic error code that you have to Google at 11 PM.
If that sounds familiar, you’re in the right place. This guide walks you through the most common Samsung dryer problems, the exact order to check things, and which fixes are genuinely DIY versus which ones need a pro.
The good news? Most dryer problems are predictable. Around 80% of no-heat and poor-drying complaints come from just three causes: a clogged vent, a tripped thermal fuse, or a failed moisture sensor.
Samsung’s diagnostic mode makes isolating these issues faster than ever, if you know how to use it. Let’s get you there, step by step.
Image source: Bing (Web (fair-use with source credit))
Quick Answer
Start with your error code. Check the display for tE1, tC, or 9E1 codes first. Unplug the dryer for five minutes to reset the control board.
Clean the lint filter and the vent duct completely. Test the thermal fuse with a multimeter for continuity. Call a professional for gas valve or main board failures.
First Things First: Is It a Quick Fix or a Real Repair?
Before you pull the dryer away from the wall or take the back panel off, let’s figure out what you’re actually dealing with. A lot of Samsung dryer problems are annoyingly simple. Exactly zero of them require a service technician.
You just need to know which bucket you’re in. Here’s how to sort it out fast.
Run the Built-In Diagnostic Test Mode
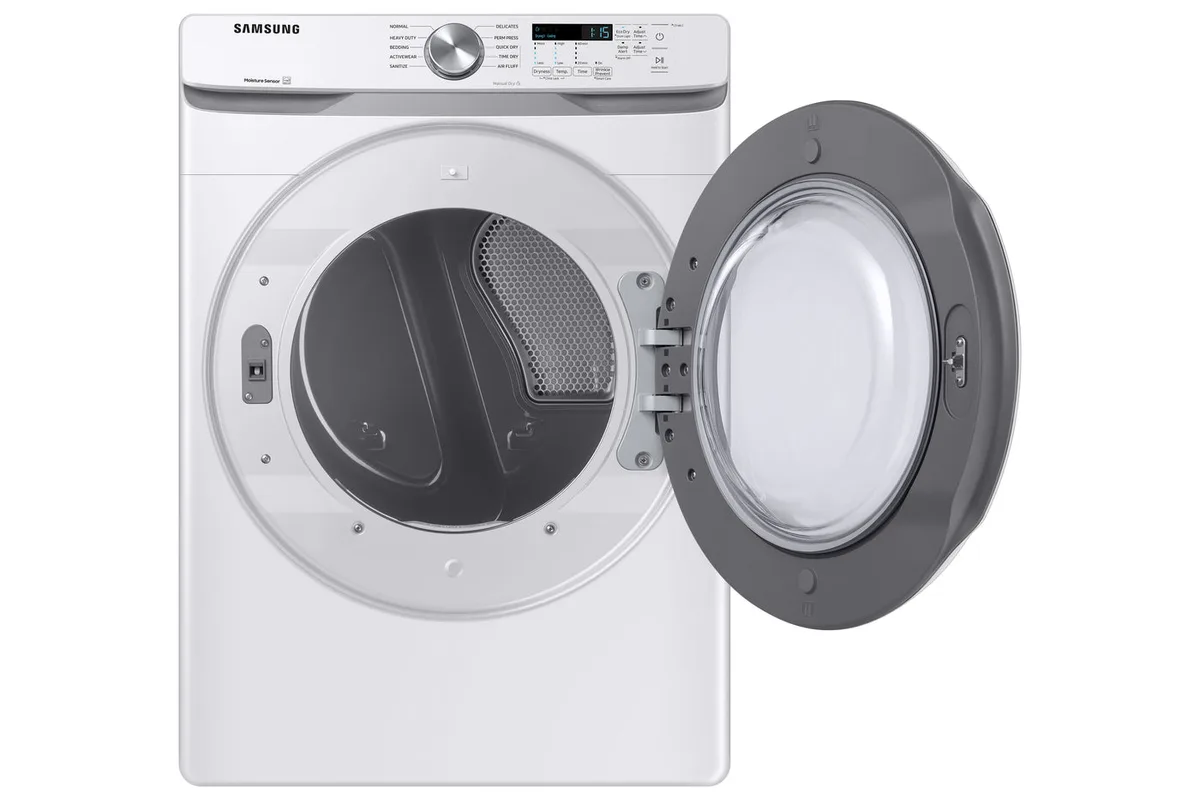
Samsung dryers have a hidden test mode that tells you a lot about what’s wrong in under two minutes. To enter it, turn the dryer on, then press and hold the Temperature and Dry Level buttons simultaneously for about three seconds. On newer models, you might need to press Adjust Time and Start instead.
If that doesn’t work, check your owner’s manual, the exact combo varies slightly by model year.
Once you’re in diagnostic mode, the display starts cycling through internal checks. The drum rotates, the heater kicks on, and you’ll see error codes if anything is misbehaving. A clean test pass means your control board and sensors are fine, which points to a physical issue like a vent blockage or a bad heating element.
Reset the Dryer
Sometimes the simplest fix is the right one. Electronics get confused. A momentary power surge can trip the control board into a fault state that won’t clear until it loses power completely.
Unplug the dryer from the wall outlet and wait a full five minutes. Then plug it back in and try a cycle.
This isn’t a guess. It’s a hard reset that clears transient error codes stored in the microcontroller’s memory. If the error code comes back immediately after a reset, you have a real fault.
If it stays gone, call it a win and move on with your day.
Check the Obvious Stuff First
Check the lint filter. You’d be surprised how many “broken” dryers just have a solid mat of lint blocking the airflow. Reach into the vent hose connection at the back of the dryer and feel for any blockage.
Check that the door is closing completely and the latch is engaging.
Also, verify the dryer is actually plugged in. It sounds silly, but a loose plug can cause intermittent power loss that mimics a failure. For electric dryers, check that both 120-volt legs feeding the outlet are live.
A tripped circuit breaker on one leg will make the dryer spin but not heat, a classic Samsung symptom.
No Heat, But the Drum Tumbles: What to Check
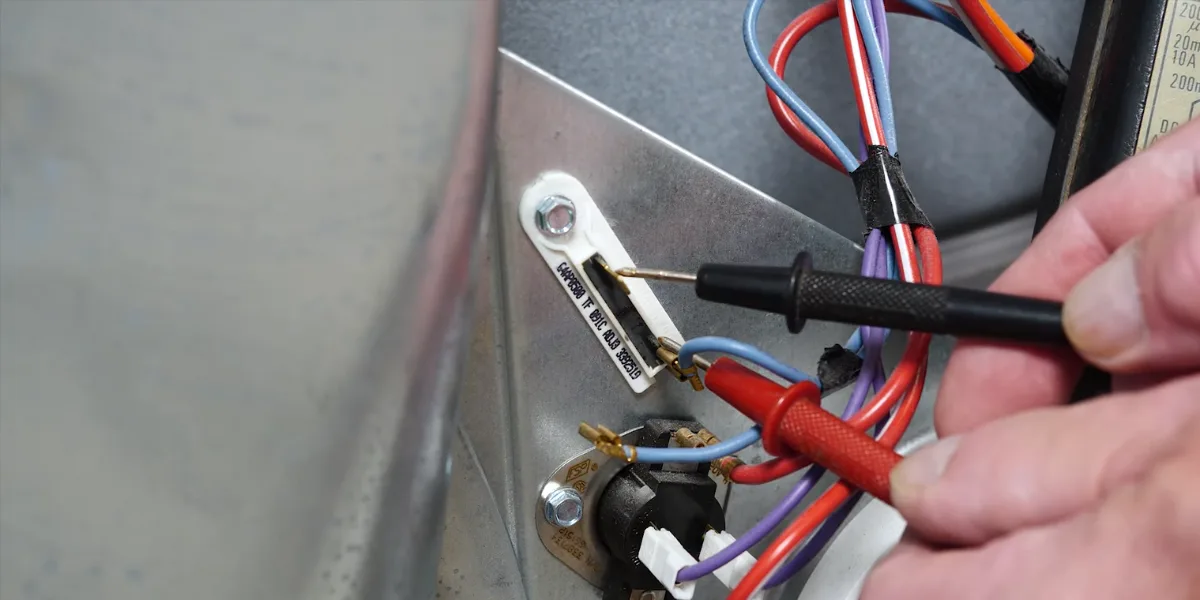
Image source: Bing (Web (fair-use with source credit))
If your dryer spins and moves air but the air stays cold, you’ve narrowed the problem to the heating circuit. On gas dryers, that means the igniter, gas valve, or flame sensor. On electric models, it means the heating element, thermal fuse, or thermistor.
Here’s the order to check them.
Test the Thermal Fuse with a Multimeter
The thermal fuse is a one-time safety device. It sits on the blower housing or near the heating element, and it’s designed to blow if the dryer overheats. Once it blows, it cuts power to the heater.
The dryer will tumble and blow cold air, but it won’t heat.
To test it, first unplug the dryer. The fuse will have two wires connected to it. Disconnect them and set your multimeter to measure resistance (ohms).
Touch one probe to each terminal. You should see a reading near zero ohms. If you see infinite resistance (often displayed as “0.L” or “1”), the fuse is blown and needs replacing.
This is the most common cause of a no-heat condition in electric Samsung dryers. Replacements cost around $15 to $25 from appliance parts suppliers. A blown fuse always happens alongside a cause, usually restricted airflow, so you must fix the venting issue too.
If you just swap the fuse without clearing the blockage, the new fuse will blow within a cycle or two.
Inspect the Heating Element
If the thermal fuse tests fine, the next suspect is the heating element. This is a coiled wire that glows red hot when electricity flows through it. Over years of use, the coil can burn out and break, creating an open circuit.
You’ll need to access the rear panel or the front lower panel, depending on your model.
Visually inspect the coil for any obvious breaks or burn marks. A multimeter test gives you a definitive answer. Disconnect the heating element from its wiring and check resistance across the terminals.
A good element reads between 10 and 50 ohms. Infinite resistance means the element is burnt out and needs replacing.
Based on repair data from appliance service records, the heating element is the most frequently replaced part on electric Samsung dryers after the five-year mark. It’s a straightforward repair with a replacement part costing around $40 to $80. Order the genuine Samsung part, not a generic equivalent, the cheap knockoffs tend to fail faster.
Check the Igniter and Flame Sensor (Gas Models)
Gas dryers use a different heating mechanism. Instead of a coil, they have an igniter that glows red hot and lights the gas burner. If the igniter fails, the gas valve never opens and you get cold air.
The igniter is easy to spot, it’s a small ceramic and wire assembly near the burner tube.
Watch the igniter during a cycle. It should glow bright orange and then click, followed by the sound of the gas flame igniting. If the igniter glows but never clicks, the flame sensor is likely faulty.
If it doesn’t glow at all, the igniter is dead. Both repairs run $50 to $100 for parts.
Verify the Thermistor
The thermistor is a temperature sensor that tells the control board how hot the air is inside the drum. If it fails and reads an incorrect temperature, the board might not power the heater at all. The thermistor is usually mounted near the heating element housing or on the blower wheel.
Test it with your multimeter. A good thermistor reads around 10,000 ohms at room temperature, but don’t rely on that exact number. The resistance should change as you warm it with your fingers.
If the reading stays static or shows infinite resistance, replace it. It’s a $20 part and a five-minute fix.
Dryer Runs But Clothes Stay Damp: The Moisture Sensor
This is the second most common complaint, and it’s sneaky. The dryer runs the full cycle, the air gets hot, but the clothes still feel damp when the timer runs out. Samsung dryers rely on two moisture sensor strips mounted on the inside of the drum, near the lint filter housing.
These strips measure the electrical conductivity of the clothes as they tumble.
When clothes are wet, they conduct electricity easily. As they dry, conductivity drops. The control board uses that change to decide when to stop the cycle.
If the sensor strips are coated with fabric softener residue or hard water minerals, they start sending false signals. The board thinks the clothes are dry way too early and shuts off the heat.
How to Fix It
Locate the two metal strips on the drum baffle. Clean them with a damp cloth and a little rubbing alcohol or fine-grit sandpaper. Wipe them completely dry before starting the next cycle.
This fixes the problem in 90% of cases.
If cleaning doesn’t help, test the sensor’s circuit. You’ll need to access the wiring behind the drum baffle. Disconnect the wires and check continuity between the sensor terminals and the control board connector.
If you see infinite resistance, a wire is broken and needs replacing. A new moisture sensor assembly costs around $30 to $50.
Decoding Samsung Dryer Error Codes
Samsung dryers display specific error codes that point straight to the faulty component. Here’s what the most common ones mean and what you should do.
| Error Code | Meaning | Likely Fix |
|---|---|---|
| tE1 | Thermistor failure | Replace the thermistor |
| tC or tS | Thermistor short circuit | Replace the thermistor |
| 9E1 | High voltage detected | Check supply voltage, power cord, outlet |
| 9E2 | Low voltage detected | Check breaker, power cord, outlet |
| dE or dE1 | Door switch failure | Replace the door switch |
| bE1 | Control board communication error | Replace the main board |
What to Do When an Error Code Appears
Write down the code, then unplug the dryer for five minutes. Plug it back in and run a short cycle. If the code returns, it’s a real fault.
Follow the table above for the likely fix.
If you see tE1 or tC, test the thermistor first. It’s cheap and easy to replace. If you see dE or dE1, check the door latch mechanism for wear.
A loose door that doesn’t press the switch fully will trigger a false door error. Sometimes a small shim behind the latch tightens it up and fixes the problem.
For 9E1 or 9E2, don’t touch the dryer. This indicates a power supply issue. Test the outlet voltage with a multimeter.
You should see between 220 and 240 volts across the two hot legs for an electric dryer. If the voltage is off, call an electrician. Do not attempt to fix wiring issues yourself.
The Venting Problem No One Checks
Here’s the one that gets ignored the most. The vent duct runs behind the dryer, usually through the wall, and exits outside your house. Lint builds up in that duct over time.
It restricts airflow. A dryer with reduced airflow will overheat, which triggers the thermal fuse and cuts the heat entirely.
If your dryer takes two cycles to dry a load, or if the clothes come out hotter than normal, check the vent run first. Disconnect the duct from the back of the dryer and run a cycle. If the dryer heats properly with the duct disconnected, the blockage is in the duct itself.
How to Clear It
Use a vent cleaning kit with flexible rods and a brush attachment. Feed it through the duct from the outside opening and work it back toward the dryer. You’ll pull out a surprising amount of lint.
If the duct is crushed or kinked, replace it with a rigid metal duct, which is the only type recommended by manufacturing standards. Flexible foil ducts trap lint and collapse easily.
This isn’t just a performance issue. Restricted venting is a leading cause of dryer fires. The lint in the duct is highly flammable, and the excess heat from a blocked vent can ignite it.
Clearing the vent annually is cheap insurance.
When to Call a Professional
Some Samsung dryer repairs are best left to a licensed technician. Here’s the honest list.
- Gas valve issues on gas dryers. You’re working with flammable gas and combustion. This isn’t a DIY job.
- Control board replacement. The board itself costs $150 to $300, and a wrong diagnosis can rack up unnecessary parts costs.
- Electrical supply problems. If you’re unsure about voltage testing or you see scorch marks on the outlet, call an electrician.
Gas dryers especially need care. The gas valve assembly is under pressure from the gas line. A misstep can cause a leak, which is a serious safety hazard.
If you suspect the gas valve, igniter, or flame sensor, call a professional. The cost of a service call is far less than the potential consequences.
Preventing Problems Before They Start
You can avoid most of these failures with a little upkeep. Here’s a short list of habits that keep your Samsung dryer running smooth.
- Clean the lint filter before every load. This is non-negotiable.
- Clean the moisture sensor strips every month with rubbing alcohol.
- Clear the vent duct every six months. If you notice longer drying times, do it sooner.
- Don’t leave damp clothes sitting in the drum for hours after a cycle. The humidity stresses the electronics and rusts the sensor contacts.
- Check the door seal for tears. A faulty seal leaks heat and confuses the sensor.
These five habits take ten minutes a month and extend the life of your dryer by years. They also reduce your energy bill, since a dryer running at peak efficiency uses noticeably less electricity or gas.
Cost Reality Check
To give you a clear picture, here’s what the most common repairs actually cost, excluding labor if you do it yourself.
| Part | DIY Cost | Pro Labor Estimate | Skill Level |
|---|---|---|---|
| Thermal fuse | $15–$25 | $100–$150 | Beginner |
| Heating element | $40–$80 | $150–$250 | Intermediate |
| Thermistor | $15–$30 | $100–$150 | Beginner |
| Moisture sensor | $30–$50 | $120–$180 | Intermediate |
| Igniter (gas) | $20–$50 | $150–$250 | Advanced |
| Main control board | $150–$300 | $250–$400 | Advanced |
Do the math before you call someone. If you can use a screwdriver and a multimeter, the thermal fuse, thermistor, and heating element are all well within your reach. Plenty of homeowners with no prior repair experience tackle these jobs successfully.
Final Thoughts
Samsung dryer troubleshooting isn’t guesswork. It’s a logical process of elimination. Start with the cheap and simple checks, reset the dryer, clean the lint filter, clear the vent.
Then move to the electrical tests with a multimeter. Nine times out of ten, you’ll land on a thermal fuse, heating element, or moisture sensor issue that you can fix yourself with a $50 part and an hour of work.
When you hit the gas valve or main board problems, don’t be stubborn. Call a professional. The cost is higher, but the safety margin is worth it.
And if you stay on top of the maintenance habits above, you’ll see fewer of those error codes in the first place.

Similar Posts