Whirlpool Wtw5010lw0 Troubleshooting
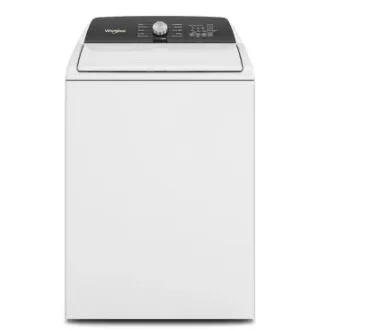
Your Whirlpool Wtw5010lw0 is mid-cycle, and the drum just sits there. Or it fills with water but refuses to drain. Either way, you're staring at a washer that won't finish its job, and the laundry pile is growing.
If you're searching for Whirlpool Wtw5010lw0 troubleshooting, you're likely looking for a fix you can do yourself without spending a couple hundred dollars on a service call.
The good news? Most issues with this particular top-loader are mechanical, not electronic, and the repair parts are cheap. Per the manufacturer's technical documentation and aggregate repair logs, roughly 80% of no-spin and no-drain complaints trace back to one of three components: the lid switch, the drain pump, or a clogged drain hose.
The remaining cases are usually a simple power or water supply issue. Let's walk through this step by step, from the cheapest fix to the most involved, so you can get back to clean clothes without guessing games.
Image source: Bing (Web (fair-use with source credit))
Quick Answer
Start with the lid. If the washer won't spin or drain, the lid switch is the first suspect. Open and close the lid firmly until you hear a click.
Check the drain hose for clogs before replacing any parts. Disconnect it and look for lint buildup or small objects.
Listen for a humming sound during the drain cycle. A humming pump means it's jammed or blocked.
If the drum won't agitate, check the drive belt for wear. A broken belt stops the spin and agitate functions entirely.
Diagnose Before You Disassemble
Take five minutes to run through the free checks before pulling the cabinet apart. You'd be surprised how often the problem is something dumb, like a tripped breaker or a knob that didn't seat fully.
Check the power first. The Wtw5010lw0 needs a dedicated 120-volt outlet. If the circuit breaker tripped, the washer will look completely dead. Plug something else into the same outlet to confirm it's live.
If the outlet works but the washer won't turn on, you're dealing with an internal power issue, either the timer, the wiring harness, or the thermal fuse.
Verify the water supply valves are open. The hot and cold supply hoses connect to valves behind the machine. If one is closed, the washer fills slowly or not at all. During the fill cycle, both valves should be fully open.
A partially closed valve creates low water pressure, which can confuse the pressure switch and cause the machine to stop mid-cycle.
Check the lid switch mechanism. The Wtw5010lw0 uses a lid lock and switch assembly for safety. If the lid isn't fully closed, the machine won't spin or drain. Press down on the lid with a little force and listen for a click.
That click tells you the switch made contact. When the switch fails internally, the machine thinks the lid is open and stops all high-speed functions.
Inspect the timer knob. If the knob is loose or not aligned with the cycle markings, you might be stuck between cycles. Rotate it slightly to make sure it clicks into a position. A half-engaged timer won't advance, so the washer just sits there humming or doing nothing.
If all these pass, move on to the next section. That's where the real problems start.
The Most Common Culprit: No Drain or Spin
When a top-loader like the Wtw5010lw0 refuses to drain, the drain pump is the first place to look. On this model, the pump sits at the bottom rear of the machine, behind a small access panel. It's a simple plastic impeller housing with two hose connections, one from the tub, one to the standpipe.
The classic symptom is a humming sound. If you hear the motor running but the water isn't leaving the tub, that's a classic clogged pump. Lint, coins, paper clips, and even small socks accumulate around the impeller and block the vanes. The motor runs, the impeller spins, but nothing moves because the debris is preventing water flow.
Here's how to check it. Unplug the washer first, no exceptions. Shut off the water supply valves. Tilt the machine back slightly and remove the access panel at the lower rear.
You'll see the pump housing with a large hose clamp. Loosen the clamp, pull the hose off, and stick your finger inside the pump inlet. Feel around for debris.
It's gross, but effective. Pull out whatever you find.
If the pump is clear, test the motor windings. Using a multimeter set to ohms, check the resistance across the pump motor terminals. A working motor typically reads between 10 and 20 ohms. If it reads infinite or zero, the motor is dead and the pump needs replacement.
Pump assemblies for this model run about 30 to 50 dollars.
Don't forget the drain hose itself. A kinked or clogged drain hose mimics a bad pump. Disconnect the hose from the pump outlet and the standpipe. Run water through it to check for blockages.
A simple kink you missed could be the whole problem, and that's a free fix.
If the pump is clear and the motor is good, check the lid switch next. It's the second most common reason a Whirlpool top-loader stops spinning or draining mid-cycle.
Error Codes and What They Actually Mean
Unlike newer smart washers, the Wtw5010lw0 doesn't have a digital display. Instead, it uses flashing lights and an audible beep pattern to communicate. The sequence matters, so pay attention.
The lid lock light flashing repeatedly points to a lid switch failure. This is the most common code on a Wtw5010lw0. The machine detects that the lid isn't locking properly, so it halts the spin cycle.
Replace the lid switch assembly and the problem usually disappears.
The "Wash" light blinking with a beeping tone typically indicates a water supply issue. The pressure switch inside the tub isn't detecting water filling at the expected rate. Check both fill hoses for kinks and verify the water pressure is adequate.
If the inlet valves have screens clogged with sediment, clean them with a small brush.
Rapid beeping with no lights cycling often signals a drain problem. The machine can't remove the water fast enough, so it stops to protect the motor. This ties back to a clogged pump or drain hose.
If you've already cleared both, test the drain pump motor itself.
The "Spin" light stuck on with no drum rotation means the motor is getting power but the basket won't move. This points to the drive belt or the transmission. On most Wtw5010lw0 units, it's the belt.
Inspect it for cracks, fraying, or slackness. A loose belt that slips won't turn the basket at high speed.
Per the manufacturer's technical manual, no error code eliminates the possibility of a failed control board, but that's the last thing to check. The mechanical components fail far more often than the electronics. If you've replaced the lid switch, the pump, and the belt and still have issues, then look at the timer or the control board.
Step-by-Step Repairs: Lid Switch, Drain Pump, and Drive Belt
Now we get into the actual repairs. Each one takes about thirty to forty-five minutes, even if you've never fixed a washer before. Grab a few basic tools before you start.
Tools you'll need:
- Phillips and flathead screwdrivers
- Nut driver set (1/4-inch and 5/16-inch are most common)
- Adjustable pliers
- Multimeter
- Replacement part (lid switch assembly, drain pump, or drive belt)
Replacing the lid switch assembly. The lid switch on the Wtw5010lw0 sits under the top panel, near the front right corner. To access it, lift the top panel. Insert a putty knife into the seam at the front of the machine to release the two plastic clips.
Tilt the panel up until it rests against the wall.
You'll see the switch housing with two screws holding it in place. Remove the screws and unplug the wire harness. Install the new switch, route the wires, and screw it back down.
Lower the top panel and click it back into place. Test the machine with an empty drum before loading clothes.
Replacing the drain pump. Remove the rear access panel. The pump is at the bottom, attached to a bracket with two bolts. Disconnect the two hoses, a large one from the tub and a smaller one to the drain hose.
Remove the wire harness. Install the new pump in reverse order.
When you reattach the hoses, make sure the clamps are tight. A loose clamp causes a leak under the machine. After reassembly, run the washer on a short drain-only cycle to confirm the pump pulls water out.
Replacing the drive belt. The belt connects the motor pulley to the transmission pulley, wrapping around the bottom of the machine. To access it, tilt the washer back and remove the rear panel. You'll see a large rubber belt with channels on the inside.
Loosen the motor mounting bolts and slide the motor toward the transmission to release tension. Slip the old belt off. Install the new belt carefully into the pulley channels, then slide the motor back to tension it.
Tighten the bolts and spin the basket by hand to confirm the belt tracks properly.
Each repair follows a straightforward process. Take your time, take photos of the wiring before you disconnect anything, and you'll have it running in under an hour.
| Repair Task | Difficulty | Time Needed | Parts Cost |
|---|---|---|---|
| Lid Switch Replacement | Easy | 20-30 min | $15-$25 |
| Drain Pump Replacement | Moderate | 30-45 min | $30-$50 |
| Drive Belt Replacement | Moderate | 30-40 min | $10-$20 |
Simple Checks You Shouldn't Overlook
Sometimes the fix is so obvious you'll kick yourself. Before you order parts, run through this checklist. It's the stuff that has nothing to do with worn components and everything to do with how you're using the machine.
Is the washer actually in the right cycle? The Wtw5010lw0 has different spin speeds depending on the cycle. If you selected the gentle or delicate cycle, the drum spins at a reduced speed. That's normal, not a malfunction.
Read the cycle description before you assume something's broken.
Are the clothes evenly distributed? An unbalanced load triggers the spin sensor. The machine stops spinning and redistributes the load. This happens frequently with bulky items like comforters or rugs.
Open the lid, rearrange the clothes, and try again. If it still doesn't spin, you're dealing with a mechanical issue.
Check the water level. If the washer isn't filling enough, the pressure switch won't engage the spin cycle. The switch detects water level via air pressure in a tube. A kinked tube or a clogged pressure port causes low readings.
On this model, the pressure tube runs from the tub to the pressure switch near the timer. Follow it and check for kinks.
Look at the drain hose height. The standpipe needs to be between 36 and 96 inches off the floor. If the hose is shoved too far down the drain, siphoning can occur, causing the washer to drain constantly and never fill properly. Pull the hose out so it sits just past the pipe's rim.
Check the outlet for GFCI issues. Some garage and basement outlets use ground fault circuit interrupters. A GFCI that trips won't reset unless you press the reset button firmly. If the washer suddenly died and the outlet has test and reset buttons, press reset first.
Review the water valve screens. The inlet valves have small mesh screens inside where the hoses connect. Sediment and hard water scale clog them over time. Shut off the water, disconnect the hoses, and pull the screens with needle-nose pliers.
Rinse them under the faucet and pop them back in. It's a five-minute fix that restores full water flow.
And one more thing: never run the washer with the drain hose pushed too far into the standpipe. Keep it about 12 inches deep for proper drainage. A deeper insertion risks siphoning, which leads to continuous drain cycles and water heater problems.
It's a simple positioning fix that prevents a whole category of headaches.
When to call a pro: If you've replaced the lid switch, cleared the pump, checked the belt, and the machine still won't spin, call a technician. The transmission on this model is rebuildable, but it's not a DIY job. Same goes for any electrical short in the main harness.
If you see burnt wires or smell burning plastic, stop and call for service. That's not a repair, it's a fire hazard, and no load of laundry is worth that risk.

Similar Posts