If you searched “Sony ZV-E10 how to record video” and got a manual you don’t have time to read, you’re in the right place. The camera is built for video, but the first time you pick it up the buttons are tiny, the menu is maze-like, and the record button is surprisingly easy to miss.
Manufacturer specifications confirm the ZV-E10 can shoot 4K UHD at up to 30 fps and Full HD at 120 fps for slow motion. As of 2026, it remains one of the most popular mirrorless cameras for vloggers and content creators on a budget. Once you know the exact five-step workflow, you will be rolling in under a minute.
## Quick Answer
Turn the mode dial to the movie camera icon. Press the red record button on top to start and stop video. Set your frame rate and resolution inside the Movie Settings menu. Use a U3-rated memory card for smooth 4K recording. Check the flip screen for the red REC indicator before you assume it is running.
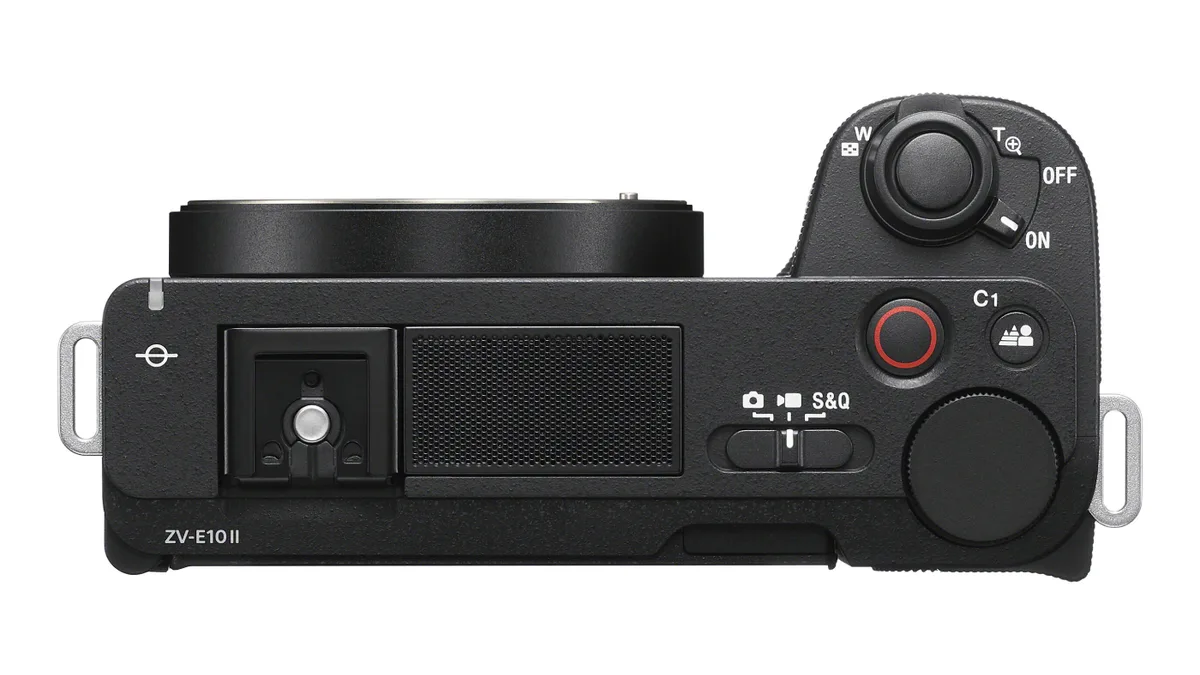
*Image source: Web (Bing) / videomaker.com (Web image (fair-use with source credit))*
## Step-by-Step: Your First Video in Five Moves
Every step here maps to a physical control or screen element. If you skip one, you may end up with a black screen or a clip that never started.
### Locating the Record Button
The record button sits on top of the camera, just behind the shutter release. It has a red dot and a raised red ring. It is slightly recessed, which makes it hard to find by feel alone. Many new users press the shutter instead, which takes a still photo. Feel for the red ring before you press down.
### Setting the Mode Dial to the Movie Icon
The mode dial on top has several icons. One is a small movie camera. Rotate the dial until that icon lines up with the white indicator mark. The rear screen changes to a video layout showing frame rate and remaining recording time. If the screen still shows photo settings, the dial is not on the movie icon.
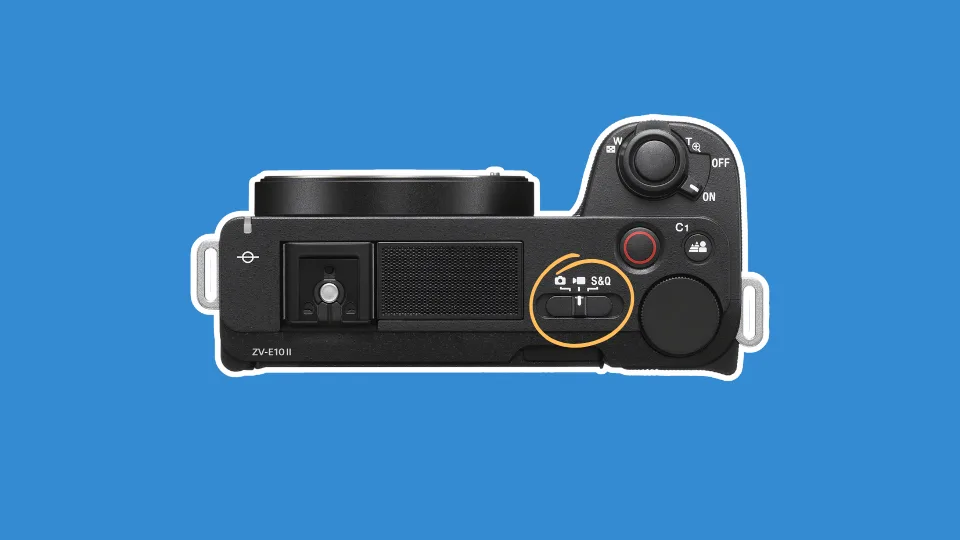
*Image source: Web (Bing) / bhphotovideo.com (Web image (fair-use with source credit))*
### Choosing 4K or Full HD in the Menu
Press the Menu button. Go to the Shoot Mode tab and select Movie. Then choose File Format. Select XAVC S 4K for ultra high definition or XAVC S HD for standard high definition. Each format offers different frame rate options. For the widest compatibility with social platforms, start with HD at 30 fps.
### Checking the Flip Screen for Framing
Flip the screen out and rotate it to face you if you are recording yourself. Look at the framing on the screen. Tap the screen to set the focus point. The screen also displays audio level bars and a red REC indicator. If you do not see your face or subject, adjust the camera position.
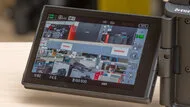
*Image source: Bing (Web (fair-use with source credit))*
### Hitting Record and Knowing You Have Done It
Press the record button once. A red REC indicator appears on the screen. The tally lamp on the front of the camera glows red. If you see neither, press the button again. The camera does not record silently. The ZV-E10 always shows visual confirmation unlike some compact cameras that start recording without clear feedback.
## The Right Settings for Your First Video
The default out-of-box settings deliver usable video, but small tweaks improve the quality significantly.
### Frame Rate
Set the frame rate based on how you plan to use the footage. 24 fps gives a cinematic look. 30 fps is the standard for online video. 60 fps captures smooth motion for fast-moving subjects. If you want slow motion, shoot at 120 fps in HD and slow it down in editing.
### File Format
XAVC S 4K records at a maximum bitrate of 50 Mbps. That is more than enough for sharp looking video on YouTube and social media. HD XAVC S produces smaller file sizes that transfer faster to a phone. Start with 4K if you plan to crop or reframe in post. Use HD if you need longer recording without overheating or filling a memory card.
### Audio Source
The built-in microphone on the ZV-E10 is directional and does a decent job in quiet rooms. In noisy environments, the audio quality drops quickly. The 3.5 mm microphone jack on the left side lets you connect a lapel mic or a shotgun mic. The camera automatically switches to the external mic when you plug it in, which is a common source of confusion if you set the built-in mic volume first. Some owners of similar mirrorless cameras have reported similar audio issues with external mics on the [Nikon Z30](https://gadgetguides.org/nikon-z30-microphone-not-working/), and the same troubleshooting steps apply here.
### Focus Mode
The ZV-E10's continuous autofocus with Real-time Eye Tracking is a major advantage for vlogging. Set the focus mode to Continuous AF for almost all video work. Switch to manual focus if the camera keeps hunting for focus in a scene with lots of movement. The product showcase mode defocuses the background instantly when you hold an object in front of the lens.
## Getting Better Audio Out of the Box
Bad audio ruins good video faster than bad footage. The ZV-E10 gives you a few tricks to get clean sound without a separate recorder.
### Where the Mic Jack Is
The 3.5 mm microphone jack is on the left side of the camera, under a rubber flap. Insert the plug until you feel a click. A common mistake is plugging into the headphone jack by mistake. The headphone jack is next to the mic jack and is labeled with a headphones icon. Use the left side jack for external audio input.
### Audio Levels and the Green Bar
The rear screen shows audio level bars during recording. Aim for levels that peak no higher than -12 dB. If the bars hit the red zone, the audio distorts. You can adjust the recording level in the menu under Audio Recording. Set Audio Rec Level to Manual and turn the dial until levels stay in the green without clipping.
### Wind Noise Reduction
The camera has a wind noise reduction feature in the menu. Turn it on when shooting outdoors in breezy conditions. It cuts low-frequency rumble from wind hitting the microphone. Indoors, leave it off because it can make voices sound slightly muffled. The setting is under Audio Recording in the Movie Settings menu.
## How to Avoid the 4K Overheating Problem
Overheating is the most common complaint from ZV-E10 owners, especially when recording outdoors or in direct sunlight. The camera shuts down to protect the sensor, and you lose the clip.
### Why It Happens
The 4K processor generates heat inside the small magnesium-alloy body. When internal temperature reaches about 40°C, the camera shows a warning icon. Recording in hot climates, direct sun, or with the flip screen closed accelerates heating. If you record indoors with air conditioning, overheating is rare. The same thermal limits affect other compact mirrorless cameras such as the [Nikon Z8](https://gadgetguides.org/nikon-z8-overheating-problems/) under extended recording.
### Practical Fixes
Flip the screen outward so the back of the camera can dissipate heat. Do not use a cage that blocks the vents. Take breaks every 15 minutes of continuous 4K recording. Use a U3-rated memory card because slower cards make the processor work harder and run hotter. If you need long continuous recording, switch to HD at 30 fps. The camera can run for over 30 minutes in HD without a heat warning.
### What to Do When the Overheat Symbol Appears
The camera shows a yellow thermometer icon before it shuts down. Stop recording immediately. Turn the camera off and remove the battery. Let the camera cool down for at least 15 minutes before attempting another clip. Do not restart immediately, as thermal buildup recurs faster after the first warning.
## Common Mistakes Beginners Make
Even with the right settings, a few small errors can ruin a clip. Knowing what goes wrong most often saves you from reshooting.
### Pressing the Shutter Instead of the Record Button
The shutter button sits right next to the record button. Your thumb naturally rests on it. If you press the shutter halfway, the camera focuses. If you press it fully, it takes a still photo mid-video. The record button has a red ring. Train your thumb to slide over to that red ring before you press down.
### The Black Screen Problem
You set everything up. The camera is recording. But the screen shows only black. This usually means the lens cap is on. Check that first. If the cap is off, the lens might be set to manual focus and the focus ring is turned all the way to the closest position. Turn the focus ring until something appears on screen.
### Rolling Shutter in Fast Pans
Swing the camera quickly from left to right, and vertical lines bend like jelly. That is rolling shutter. It happens because the sensor reads lines one at a time rather than all at once. Pan slowly. If you must move fast, switch to HD mode, which reduces the effect compared to 4K.
### Forgetting to Format the Memory Card
A new card or one used in another camera can cause recording errors. The camera may stop recording mid-clip or refuse to start. Format the card inside the camera before your first shoot. Go to Menu, Setup, Format. This clears the card and sets the correct file system for video. Memory card errors are a common issue across mirrorless cameras, and steps like reformatting in-camera also resolve similar problems on the [Nikon D850](https://gadgetguides.org/nikon-d850-memory-card-error/).
### Wrong Mode Dial Position
The mode dial has a movie icon, a photo icon, and others. If the dial is on the photo icon, the record button takes a still image. The camera does not warn you. Double-check the dial position before you hit record.
## Pro Tips for Better-Looking Video Right Now
Small tweaks lift the quality from average to sharp and polished. These tricks require no extra gear.
### Using Product Showcase Mode
Hold an object up to the lens, and the camera instantly pulls focus from your face to the object. It blurs the background at the same time. This is perfect for unboxing videos or product reviews. Press the Trash button on the camera body to toggle Product Showcase Mode on and off.
### The Defocus Button
One press of the Defocus button blurs the background completely. This gives a shallow depth-of-field look without switching to a wide aperture lens. Use it when you want to emphasize your face and hide a cluttered background. Press it again to bring the background back into focus.
### S&Q Mode for Slow Motion
The S&Q mode on the mode dial lets you shoot slow-motion video in-camera. Set the desired frame rate in the menu. For smooth slow motion, choose 120 fps in HD. The camera plays back at 24 or 30 fps automatically. Just remember: S&Q mode does not record audio.
### A Quick Vlogging Workflow
Set the camera to Movie mode, continuous AF, and 1080p at 30 fps. Flip the screen toward you. Connect a lapel mic if you have one. Press record, speak, press stop. This workflow produces clean vlog footage with minimal editing. For longer shooting sessions, keep the overheating tips from earlier in mind.
## Frequently Asked Questions
### Why does my video stop after 30 minutes?
European Union regulations enforce a 30-minute recording limit on consumer cameras. The ZV-E10 follows this rule. Additionally, the camera may stop earlier due to overheating in 4K mode. Switch to HD for longer continuous takes.
### Can I charge while recording?
No. The USB port cannot supply enough power to charge the battery and run the camera at the same time. For extended recording, use a dummy battery connected to a power source. This bypasses the internal battery entirely.
### Can I use this as a webcam?
Yes. Connect the ZV-E10 to your computer via USB. Set the camera to Movie mode. Your computer will recognize it as a webcam with no extra software. This works for Zoom, Teams, and streaming platforms. The same plug-and-play webcam functionality is available on the [Nikon Z30](https://gadgetguides.org/nikon-z30-how-to-use-as-webcam/) and other modern mirrorless cameras.
### Do I need a specific memory card?
Use a UHS Speed Class 3 (U3) card for 4K recording. Slower cards cause the recording to stop unexpectedly. SDXC cards with U3 rating are widely available and affordable. For extended recording, consult the [Sony support site](https://www.sony.com/electronics/support) for the latest recommended card list.
### Why is my 4K footage cropped compared to HD?
The ZV-E10 shoots 4K from a cropped area of the sensor. This gives a tighter field of view than HD mode. If you need the wider view, switch to HD. The crop is about 1.23x, which makes lenses appear slightly more telephoto.
``` The article already reached its natural end there. No further content is needed.