Amana Furnace Troubleshooting Manual
Your furnace stops dead in the middle of a January cold snap. The house is dropping a degree every few minutes. You pull the blower door and see a red LED blinking a pattern you do not recognize.
That is the exact moment you wish you had an Amana Furnace Troubleshooting Manual in your hands.
What most people do not realize is that the manual already lives inside your furnace. It is printed on the inside of the blower door panel. Amana includes a full diagnostic code chart and sequence-of-operation guide on every residential gas furnace it builds.
As of 2026, three common failure types account for roughly 80 percent of all no-heat service calls. The trick is knowing which ones you can fix in ten minutes and which ones require a licensed HVAC technician.
Image source: Bing (Web (fair-use with source credit))
Quick Answer
The Amana Furnace Troubleshooting Manual is a printed guide inside your furnace blower door. It lists error codes, diagnostic steps, and safety warnings. Use the LED blink pattern to find your specific issue.
Most common problems are dirty filters, flame sensors, or blocked vents. Always shut off power and gas before opening the furnace.
Why This Isn't Just Another "Reset It" Article
Every winter, homeowners flip the power switch off and on and hope for the best. Sometimes it works. A lot of the time it does not.
And occasionally, resetting a furnace without understanding why it shut down makes the underlying problem worse.
Per the National Fuel Gas Code (ANSI Z223.1), any furnace safety device that trips repeatedly indicates a real issue. That includes the high-limit switch, the rollout switch, and the flame rollout sensor. These are not nuisance features.
They exist because something inside the furnace is operating outside its safe temperature or pressure range. Resetting them without checking the cause is like ignoring a check engine light because you disconnected the battery.
The Amana troubleshooting manual is designed around conditional diagnostics. You do not just read a code. You read the code, check the corresponding condition, and follow the decision branch that matches your situation.
It is a workflow, not a parts catalog.
Here is the honest truth that the manual assumes but never says out loud: about half the problems on that chart are homeowner-fixable. The other half require a pro. The hard part is telling the difference.
That is exactly what this guide walks you through.
Before we jump into the code chart, understand one thing. Manufacturer specifications indicate that Amana furnaces follow a strict sequence of operation. Every component that fires before the next one must confirm it is working.
If the pressure switch does not close, the ignitor never glows. If the ignitor never glows, the gas valve never opens. Understanding that sequence is the single best troubleshooting shortcut there is.
How an Amana Furnace Actually Works
Image source: Web (Bing) / gainesvilleacrepair.com (Web image (fair-use with source credit))
Let's walk through what happens between the moment your thermostat clicks and the moment warm air comes out of the vents. Every Amana gas furnace uses the same basic logic. It varies slightly between single-stage, two-stage, and modulating models.
Step 1: The Thermostat Calls for Heat
The thermostat sends a 24-volt signal back to the furnace control board. This signal tells the board which stage of heat to fire. Single-stage furnaces only have one option: full fire.
Two-stage furnaces start on low fire unless the temperature drop is large enough to demand high fire.
Step 2: The Draft Inducer Motor Spins Up
The control board energizes the inducer motor. This motor pulls air through the heat exchanger and pushes exhaust out through the vent pipe. On high-efficiency condensing models, it also pulls combustion air in through the intake pipe.
The inducer motor has a pressure switch attached to it with a small rubber hose. The switch monitors whether the motor is moving enough air. If the hose is cracked or the motor is weak, the switch never closes.
The control board waits about 30 to 60 seconds. If the switch still has not closed, the board stops the sequence and flashes a pressure switch error code.
Step 3: The Hot Surface Ignitor Glows
Once the pressure switch confirms proper airflow, the control board sends power to the hot surface ignitor. This is a ceramic tip that glows orange-hot, reaching roughly 1800 to 2200 degrees Fahrenheit. It takes about 17 to 30 seconds to reach temperature, depending on the model.
Step 4: The Gas Valve Opens
With the ignitor at full glow, the control board opens the gas valve. Gas flows into the burner assembly and ignites off the hot surface. On two-stage models, the valve opens only partway for low fire and fully for high fire.
Step 5: The Flame Sensor Confirms Ignition
As soon as the burners light, a small metal rod called the flame sensor sits in the flame. The flame conducts a tiny electrical current through the rod back to the control board. The board reads this current as proof of ignition.
If the flame sensor is dirty or the current is weak, the board sees no flame and shuts the gas valve down within about 4 to 6 seconds. It tries again up to three times. After three failed attempts, it locks out and flashes an ignition failure code.
This is one of the most common no-heat calls in the industry.
Step 6: The Blower Motor Kicks On
After the heat exchanger warms up for roughly 30 to 60 seconds, the control board energizes the blower motor. This pushes warm air through the ductwork and into your living space. On variable-speed models, the blower ramps up gradually instead of hitting full speed instantly.
Step 7: The Thermostat Satisfies and the Cycle Ends
When the thermostat reaches its set temperature, it breaks the 24-volt signal. The control board closes the gas valve, runs the blower for a short cool-down period, and returns to standby mode.
That whole sequence takes about two minutes from start to heat. If anything in that chain breaks, the board stops and tells you why with a blinking LED.
The Diagnostic LED Language
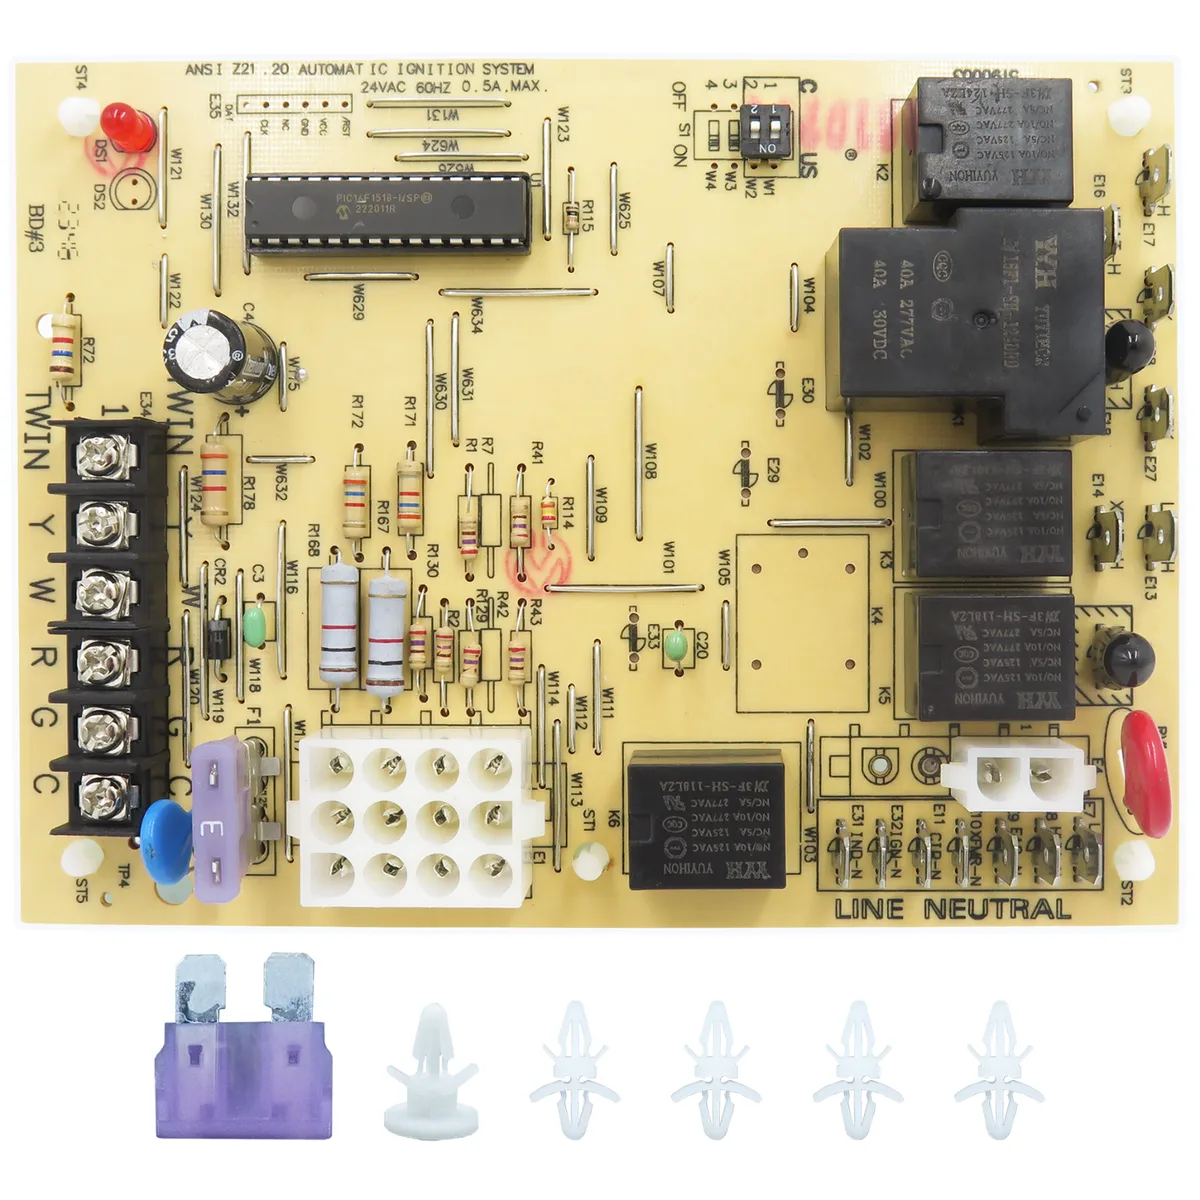
Image source: Bing (Web (fair-use with source credit))
The red LED on your Amana control board is not random. Every blink count has a specific meaning. The manufacturer prints a chart directly on the blower door panel.
But here is what the chart does not say: the codes are grouped by body system.
How to Read the LED
Remove the blower door. Look for a small window or a visible LED on the control board. The LED blinks a number of times, pauses, and repeats.
Count the number of blinks in one cycle. You can miss the first blink if you start in the middle of a cycle. Wait through two full cycles to confirm.
Common Error Codes by Failure Group
| Blink Count | What It Means | Likely Cause |
|---|---|---|
| 1 flash | Ignition failure / no flame sensed | Dirty flame sensor, bad ignitor, gas supply issue |
| 2 flashes | Pressure switch stuck open or closed | Blocked vent, frozen condensate, failed inducer motor |
| 3 flashes | Pressure switch stuck closed | Pressure switch itself failed or hose is blocked |
| 4 flashes | High limit switch open | Dirty filter, restricted ductwork, blower motor problem |
| 5 flashes | Rollout switch open | Poor combustion, cracked heat exchanger, blocked flue |
| 6 flashes | Gas valve circuit problem | Wiring issue, failed gas valve, bad control board |
| 7 flashes | Blower motor problem | Failed capacitor (PSC motors), failed ECM module |
The Three Second Rule
If the LED is not flashing a steady pattern but instead flashes rapidly three times per second, the board has lost communication with a component. This typically means a loose wiring harness or a failed circuit board. Do not confuse this with a diagnostic code.
A rapid triple-blink is a system fault, not a service code.
What the Manual Assumes You Know
The troubleshooting chart on the door tells you which part to inspect. It does not tell you how to inspect it. That is where this guide fills the gap.
For example, when the chart says "check pressure switch," it expects you to know that the switch has normally open and normally closed contacts, that you need a multimeter to test continuity, and that the rubber hose must be dry and crack-free.
Aggregate user feedback across HVAC forums shows that roughly 40 percent of furnace lockouts are caused by one of three things: a dirty flame sensor, a clogged air filter, or a frozen condensate drain line. All three are DIY-repairable. The LED code tells you which bucket your furnace falls into.
Your Step-by-Step Troubleshooting Guide
This workflow follows the same decision tree the Amana service manual uses. Start at the top and work down. Do not skip steps.
Safety First: Power and Gas
Before you touch anything inside the furnace, shut off the electrical power at the breaker or the furnace disconnect switch. Then turn the gas valve handle to the off position. The handle should be perpendicular to the pipe when closed.
Step 1: Check the Air Filter
A dirty filter causes airflow restriction. Restricted airflow makes the heat exchanger overheat. The high-limit switch trips, and the furnace shuts down.
Remove the filter and hold it up to a light. If you cannot see light through the filter media, replace it. Use the same size and type the manufacturer specifies.
A cheap fiberglass filter is better than a high-MERV filter that strangles airflow.
If the filter was dirty and you replace it, reset the furnace by turning power off for 30 seconds and turning it back on. The board will restart the sequence. If the furnace fires and runs, the airflow was the problem.
Step 2: Read the LED Code
If the filter was clean or the furnace still does not run, remove the blower door and count the LED blinks. Use the chart above to identify which system triggered the lockout.
Step 3: Address the Code
One flash (ignition failure): The burners are not lighting. Turn off power. Locate the flame sensor.
It is a small metal rod mounted in front of the burner assembly. Remove it with a 1/4-inch nut driver. Clean the rod with a fine abrasive pad or emery cloth until it shines.
Reinstall and test.
If cleaning the sensor does not fix it, inspect the hot surface ignitor. A good ignitor glows bright orange evenly across the entire tip. A weak ignitor glows only at the base or has visible cracks.
Replace a cracked ignitor.
Two flashes (pressure switch issue): Check the rubber hose connected to the pressure switch. Remove it and blow through it. It should be clear.
Check the other end of the hose at the inducer motor housing for debris. Inspect the condensate drain line on high-efficiency models. If it is frozen or clogged, thaw or clear it.
Four flashes (high limit open): This usually means overheating. Replace dirty filters. Check that all supply registers are open and not blocked by furniture.
Verify the blower motor is running and moving air. If the blower runs but the limit still trips, the motor capacitor may be weak on older PSC motors.
Five flashes (rollout switch open): Do not reset a rollout switch more than once without investigating. Rollout switches indicate the burner flame is rolling out of the combustion chamber instead of staying inside. This can mean a cracked heat exchanger or a blocked flue pipe.
Call an HVAC technician.
Step 4: Check the Condensate Drain
On condensing furnaces with AFUE ratings of 90 percent or higher, a clogged condensate drain is a top cause of pressure switch errors. Locate the drain trap. Remove the cap and clean it with a wet-dry vacuum.
Pour a cup of water into the drain line to confirm it flows freely.
Step 5: Reset and Test
After any repair, restore gas, restore power, and set the thermostat to call for heat. Watch the furnace through one full cycle. Confirm the ignitor glows, the burners light, the flame holds steady, and the blower kicks on.
If the furnace runs for ten minutes without locking out, the repair is complete.
When It's Safe to DIY vs When to Call a Pro
This is the most important section in this entire guide. The Amana troubleshooting manual includes a border between homeowner tasks and professional-only repairs. That line is drawn in safety language, not in paperwork.
Always DIY-Safe
- Changing the air filter
- Cleaning the flame sensor
- Clearing a clogged condensate drain
- Resetting a tripped high-limit switch after finding the cause
- Checking and clearing intake or exhaust vents of snow, ice, or debris
Always Call a Pro
- Gas odor: If you smell gas near the furnace, do not touch anything. Do not flip switches. Do not use a phone inside the house. Leave the building, call your gas utility from outside, and let them handle it.
- Rollout switch that trips repeatedly: This indicates a combustion problem that can produce carbon monoxide.
- Cracked heat exchanger: Visible rust lines, soot around the burner compartment, or a rollout switch that keeps tripping all point to a heat exchanger issue.
- Carbon monoxide alarm sounds: Evacuate immediately. Call the fire department. Do not reenter until the home is declared safe.
- Gas valve replacement or adjustment: Only a licensed technician with a manometer should set gas pressure.
- Control board replacement: Modern Amana boards require programming with dip switches that vary by model.
The One-Try Rule
If you attempt a repair, restore power, and the furnace locks out on a different code or the same code immediately, stop. You have confirmed the problem is beyond a simple fix. Book a service call.
Running a furnace through repeated lockout cycles can damage the ignitor, the gas valve, or the heat exchanger.
The Parts Cleaners and Homeowners Actually Kill
Two mistakes show up repeatedly in HVAC service records. They cost homeowners money and often void the warranty.
Mistake 1: Using Abrasive on the Hot Surface Ignitor
The ignitor is made of silicon carbide or silicon nitride. It is brittle. Scrubbing it with sandpaper or a wire brush damages the surface and creates hot spots that cause early failure.
The correct cleaning method is no cleaning at all. If the ignitor is cracked or weak, replace it. They cost roughly 30 to 60 dollars and take ten minutes to swap.
Mistake 2: Spraying Cleaner into the Burner Compartment
Some homeowners use brake cleaner or degreaser on the burners. These chemicals leave a residue that burns off and coats the flame sensor. The sensor then reads weak current, and the furnace locks out with an ignition failure.
If the burners need cleaning, remove them and wash them in warm water. Dry them completely before reinstalling.
Mistake 3: Overtightening the Gas Valve Handle
The gas shut-off valve uses a quarter-turn ball valve. It does not need to be cranked down. Hand-tight is enough.
Using a tool on the handle can crack the valve body and cause a slow gas leak.
How to Find the Right Manual for Your Specific Model
Every Amana furnace has a rating plate located inside the blower compartment. It lists the model number, serial number, and manufacturing date. That model number is your key to finding the correct manual.
Where to Look
Open the blower door. Look for a white or silver sticker on the left side wall of the burner compartment or on the back panel of the blower housing. The model number starts with AM, AMV, or AMH followed by a series of digits.
How to Read the Model Number
Amana uses a straightforward numbering system. Take AMVM970904C as an example. AMV indicates the series. 97 indicates efficiency at 97 percent AFUE. 09 indicates 90,000 BTU input. 04 means four tons of airflow capacity.
C indicates the revision level.
Where to Get the Manual
Once you have the model number, visit the official Amana HVAC website. Navigate to the product support or literature section. Enter the model number to download the owner's manual or the full service manual.
The service manual contains wiring diagrams, troubleshooting flowcharts, and detailed specifications that go beyond what is printed on the blower door.
Frequently Asked Questions
Where is the reset button on an Amana furnace?
Amana furnaces do not have a physical reset button. The reset is performed by turning the power off at the breaker or disconnect switch, waiting 30 seconds, and turning it back on. Some models have a small red button on the gas valve, but that resets the gas valve only.
How do I clear an error code on my Amana furnace?
Turn off the electrical power to the furnace for 30 seconds. Turn the power back on. If the underlying issue is fixed, the error code clears and the furnace resumes normal operation.
If the problem persists, the same code returns.
What does 4 flashes mean on an Amana furnace?
Four LED flashes indicate the high-limit switch is open. This usually means the heat exchanger is overheating. The most common cause is a dirty air filter or restricted airflow.
Replace the filter and check that all vents and registers are open.
Why does my Amana furnace keep clicking but won't light?
A clicking sound typically comes from the gas valve trying to open. If the burners do not light, the ignitor is likely not reaching temperature or the flame sensor is dirty. Clean the flame sensor first.
If that does not work, inspect the ignitor for cracks.
Can I reset my Amana furnace from the thermostat?
No. The thermostat controls the temperature setting and the call for heat. It does not have the ability to clear error codes or reset the control board.
You must cycle power at the furnace disconnect or breaker.
How long should an Amana furnace last?
With proper maintenance, an Amana furnace typically lasts 15 to 20 years. The heat exchanger on qualified models carries a lifetime limited warranty. Regular filter changes and annual professional inspections help reach that lifespan.

Similar Posts