Gmc Power Window Troubleshooting
You are parked in your driveway, coffee in hand, and you hit the switch. Nothing. Or you hear a sad click.
Or the glass moves an inch then stops. GMC Power Window Troubleshooting does not have to mean a trip to the dealership, but it does mean working through the problem step by step. Get it wrong and you could trash a good regulator or, worse, pinch a finger or short something expensive.
According to aggregate repair data for 2026 model years and earlier, roughly 60% of GMC window failures are electrical, a bad fuse, a broken wire in the door boot, or a worn switch. The other 40% are mechanical: a snapped regulator cable, a seized motor, or a window that has jumped its track. That split tells you where to start looking.
Check power first. Then check parts. Here is how to work through it without wasting your Saturday.
Image source: Bing (Web (fair-use with source credit))
Quick Answer
Check the fuse first. Pull it, hold it to light, look for a broken metal strip. If good, test the door switch by swapping it with a working one.
If that fails, check for broken wires inside the rubber boot between the door and the body. If the window clicks but does not move, the regulator gear is stripped. If the window drops into the door, you need a new regulator or glass clip.
Why This Matters More Than You Think (And How to Stay Safe)
A broken power window sounds like an annoyance. But the stakes get real fast.
Safety first. The door panel on most modern GMCs, Sierra, Yukon, Terrain, sits next to the side curtain airbag. Yank the panel off without disconnecting the battery and you risk triggering the airbag. That is a hospital bill, not a repair bill.
Always disconnect the negative battery terminal first. Wait five minutes after disconnecting to let residual charge drain.
The pinch hazard is no joke. A power window motor can exert over 100 pounds of force. If you are manually moving the glass while someone accidentally hits the switch, fingers get crushed. Keep the key out of the ignition and the battery disconnected.
Fire risk from shorts. A frayed wire in the door jamb boot can arc against metal. In aggregate owner reports, melted wiring harnesses in the driver's door boot are a known weak point on GMT900 and K2XX platform trucks. If you smell burning plastic while testing, stop immediately.
Disconnect the negative battery terminal only. Use a 10mm wrench. Wrap the disconnected cable end in a rag so it cannot touch the terminal while you work.
The Tool Kit You Actually Need
- Multimeter (digital, auto-ranging is easiest)
- Trim removal tool set (plastic wedges, not a flathead screwdriver)
- Torx bit set (T25 and T30 are most common on GMC door panels)
- 10mm socket and ratchet (battery disconnect and regulator bolts)
- Small flathead screwdriver (for prying switch connectors)
- Silicone spray lubricant (not WD-40, which attracts dirt)
- Safety glasses and work gloves
That is everything. No scan tool needed unless you are chasing a BCM code on a 2020+ model, and even then it is rarely the first stop.
The Right Way to Diagnose: Fuse, Switch, Motor, or Regulator?
Follow this order. You will not buy parts you do not need.
Step 1: Check the fuse. This takes five seconds. Open the interior fuse panel (left of the driver's knee, under a cover). Find the power window fuse.
On most GMC trucks and SUVs it is a 20A or 30A mini fuse labeled "PWR WDO" or "WINDOW." Pull it with fuse pliers. Hold it up to light. If the metal strip inside is broken, replace it with the exact same amperage.
Try the window.
If the fuse is good, proceed.
Step 2: Test the switch. This is the most common failure point on older GMCs. The master switch panel on the driver's door gets spills and wear. If one window works from the driver's master switch but not from its own door switch, the problem is likely the individual switch or its wiring.
If no windows work from the master switch, the problem is either the master switch assembly itself or a blown fuse upstream.
To test quickly, swap the suspect switch with a known-working one from another door. If the problem follows the switch, you found your part.
Step 3: Check for power at the motor. Remove the door panel. Unplug the two-wire connector at the motor. Set your multimeter to DC volts.
Have a helper press the switch up and then down. You should see roughly 12V one way and 12V the reverse way. If you get voltage, the motor and regulator are the issue.
If you get no voltage, the problem is in the switch, wiring, or body control module.
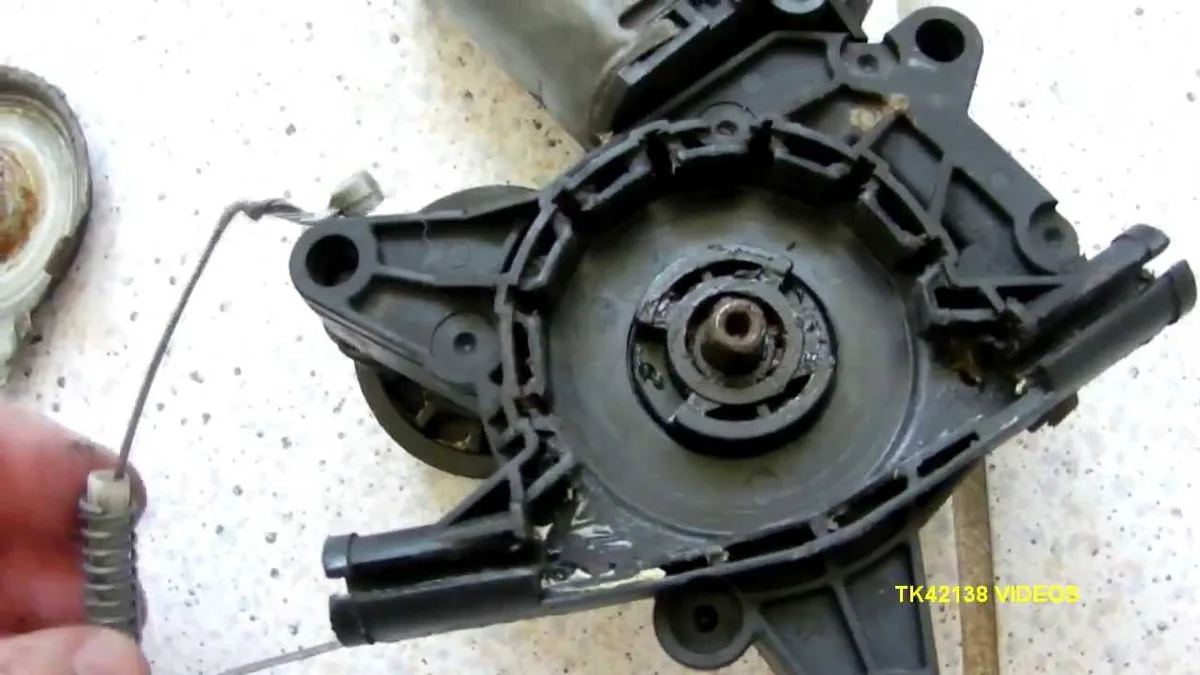
Step 4: Listen for the motor. If you have power at the connector and the motor is silent, the motor brushes are likely worn. If you hear a click but no movement, the regulator gears are stripped or the motor shaft is seized. If you hear the motor running but the glass does not move, the regulator cable has snapped or the plastic clip holding the glass has broken.
Step 5: Check for mechanical problems. Look at the window track. Is the glass sitting crooked? Can you push the window up by hand a half inch?
Does it rattle when you tap it lightly? Those are signs of a broken regulator, not an electrical problem.
When to Guess and When to Measure
| Situation | What to do |
|---|---|
| One window dead, others work | Test that window's switch and motor connector |
| All windows dead from master switch | Check fuse, then master switch assembly |
| Window moves slowly | Lubricate track, test motor current draw |
| Window clicks but won't move | Likely stripped regulator gear |
| Window drops into door | Broken regulator cable or glass clip |
| Window works from one switch only | Faulty switch on the door that does not work |
Step-by-Step: Testing the Electrical Side (Without Wasting Money on Parts)
Most DIYers throw a new motor at a car that needs a fuse. Or they buy a switch assembly when the real problem is a broken wire hidden inside the rubber boot between the door and the body.
The voltage drop test. This catches wiring that looks fine but is not passing full power. Set your multimeter to DC volts. Touch the red lead to the positive terminal of the battery.
Touch the black lead to the positive pin at the window motor connector while a helper holds the switch in the up position. You should see less than 0.5V difference. If you see 1V or more, you have resistance in the circuit, probably a corroded connector or a broken wire.
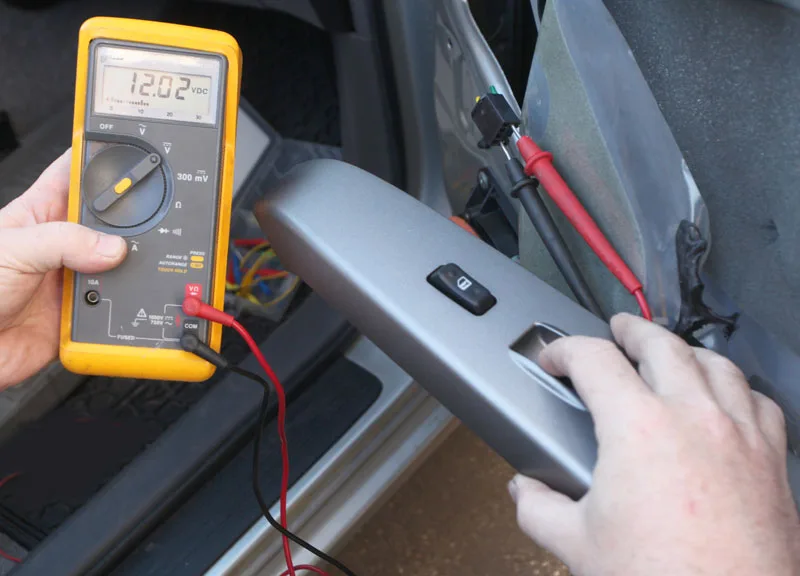
Checking voltage at the motor connector with a helper on the switch. Image source: Bing (Web (fair-use with source credit)).
Test the ground side. Same setup, but touch the black lead to the negative battery terminal and the red lead to the negative pin at the motor connector while pressing the switch. Again, less than 0.5V is good. Higher voltage means a bad ground connection, usually where the ground wire bolts to the door shell.
Check the door boot wiring. This is a notorious problem on GMC trucks from the GMT800 and GMT900 generations. Open the door halfway. Look at the rubber accordion boot between the door and the body frame.
Gently peel it back. You will see a bundle of wires. Look for cracked insulation, bare copper, or broken strands.
If you find a break, solder in a repair section or replace the entire door harness. Do not just wrap it in electrical tape, movement will break it again.
Test the switch properly. Remove the switch panel from the armrest. On most GMCs it pops up with a trim tool. Unplug the connector.
Using your multimeter on ohms or continuity, probe the switch terminals while pressing the button. You should see near-zero resistance when the circuit closes and infinite resistance when open. If the switch feels gritty or clicks but gives erratic readings, replace it.
Test the window lockout feature. A common trick on GMC SUVs: a driver hits the window lockout button and the rear windows stop working from the rear switches. The driver's master switch still works them. If the rear windows only work from the driver's door, the lockout is engaged.
Press the lockout button on the master switch to disengage. Check this before pulling the door panel.
Step-by-Step: Mechanical Problems (Stuck Glass, Broken Regulator, Crooked Track)
Once you have confirmed power is reaching the motor, the problem is mechanical. This is where the real work begins.
How to remove the door panel (the right way). Every GMC model has a slightly different panel, but the process is consistent.
- Pry off the trim piece behind the interior door handle. There is usually a screw behind it.
- Remove the screw or screws behind the armrest grab handle.
- Pop the switch panel up and disconnect it. Set it aside.
- Remove any remaining screws along the bottom edge of the panel.
- Starting at the bottom corner, use a trim removal tool to pop the plastic clips. There are usually six to eight of them. Work your way around the panel.
- Lift the panel up and off the window sill. Disconnect any remaining electrical connectors (speaker, mirror controls, puddle lamp).
- Peel back the plastic vapor barrier carefully. If you tear it, seal it with butyl tape on reassembly to prevent water leaks.
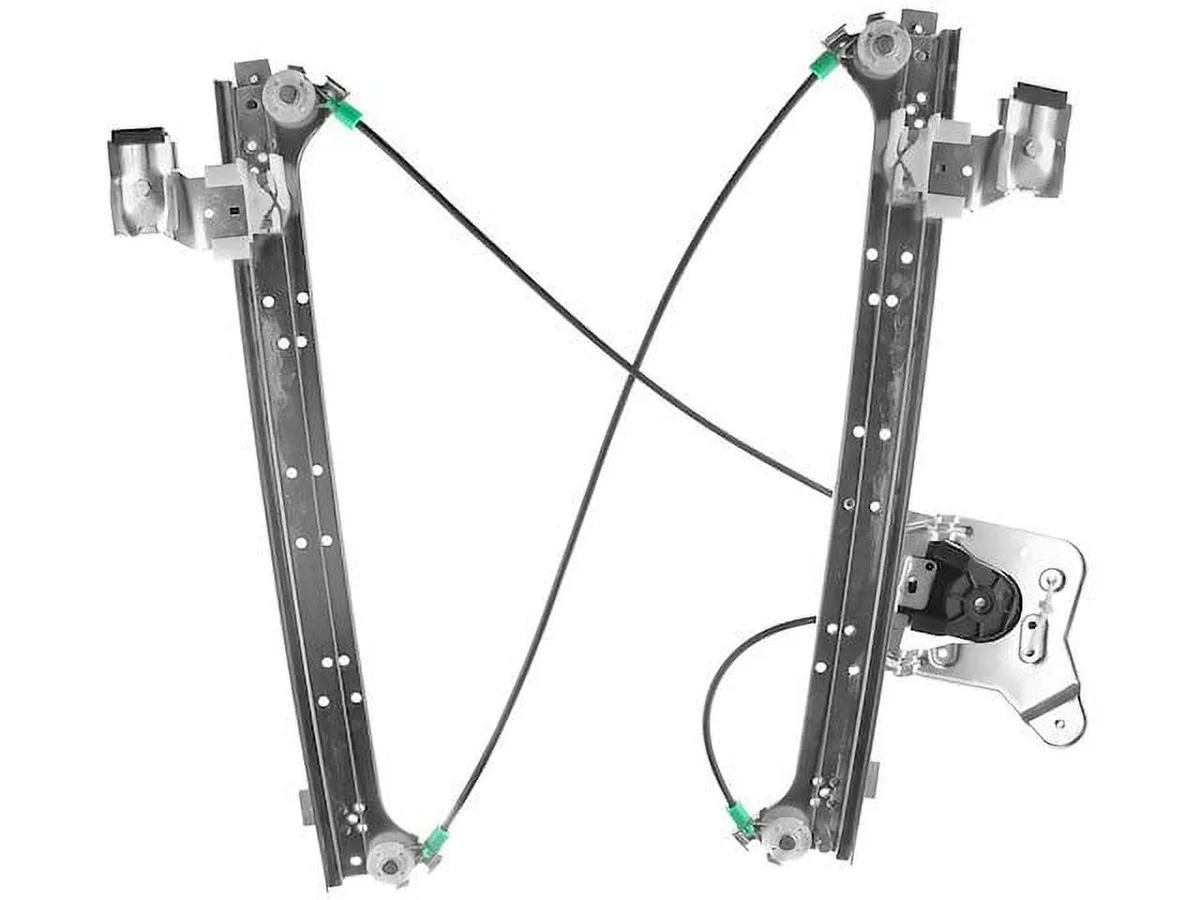
Inspect the regulator. With the vapor barrier peeled back, you can see the regulator assembly. Look for:
- Broken or frayed steel cables (cable-style regulators)
- Stripped gears (white plastic gear with missing teeth)
- Bent scissor arms (scissor-style regulators)
- Rust on the metal tracks (common in salt-belt states)
- A motor that spins freely with no cable movement (snapped cable)
A typical GMC power window regulator assembly removed from the door. Image source: Bing (Web (fair-use with source credit)).
The glass clip failure. On many GMC models, the window glass attaches to the regulator with plastic clips that snap into holes in the glass. These clips get brittle with age and break. The glass then drops into the door.
If you can lift the glass by hand and it moves freely while the regulator stays put, the clip is the problem. You can buy replacement clips for under $20 and avoid replacing the whole regulator.
How to manually raise a stuck window. If the glass is stuck in the down position and rain is coming, you need to get it up. Disconnect the battery first. Then, with the door panel off, use a pair of vise grips to clamp onto the regulator's lift plate (the metal bracket that holds the glass).
Pull straight up. You may need to release tension by prying the regulator arm slightly. Some GMC regulators have a manual crank point, a hex or Torx fitting on the motor.
Turn it with a socket to raise the glass manually.
Lubricating the track. A window that moves slowly is often just dry track channels. Use silicone spray lubricant, not WD-40. Spray into the vertical channels on both sides of the glass.
Run the window up and down a few times. If it speeds up, you are done. If it still drags, the run channel felt may be worn or the track may be bent.
Replacing a regulator yourself. It is doable with basic tools. Support the glass with tape or a clamp before unbolting it from the regulator. Mark the position of the glass on the bracket with a Sharpie.
Unbolt the regulator from the door (usually three or four bolts). Feed the old regulator out through the large access hole. Reverse the process with the new regulator.
Torque the bolts to 8, 12 ft-lbs. The whole job takes 2 to 3 hours for your first door. Do not rush the vapor barrier reinstallation, a water leak will ruin your new regulator in a year.
Common Mistakes That Cost Time and Cash (And How to Avoid Them)
Replacing the motor when it is the regulator. A motor that spins but does not move the glass has not failed. The regulator has. Test the motor with direct battery power before buying one.
Forgetting the door boot wiring. You can replace switches, motors, and fuses all day, and the window still will not work if the wire is broken inside the rubber boot. Check this before buying anything.
Using the wrong fuse amperage. If the 20A fuse blows, do not put a 30A in its place. The wiring is not rated for it. You will melt the harness before the fuse blows again.
Find and fix the short instead.
Tearing the vapor barrier. That thin plastic sheet keeps rain and carwash water out of your interior. Rip it and you will get wet carpets, mold, and corroded connectors. Peel it carefully.
If it tears, buy butyl tape and a sheet of 4-mil plastic from the hardware store.
Breaking the door panel clips. GM door panel clips are single-use in many cases. They compress going in but do not hold well the second time. Buy a bag of replacement clips from an auto parts store before you start.
They cost about $5 for a dozen.
Not recalibrating the auto-up feature. On 2014 and newer GMC models, disconnecting the battery resets the express-up function. To recalibrate: roll the window all the way down, then pull the switch up and hold it for 10 seconds after the window fully closes. Then roll it down and up once more.
Test the one-touch function. If it still does not work, repeat the process.
Assuming the BCM is bad. The body control module on modern GMCs controls window operation. It can fail. But before you spend $500 on a new BCM and dealer programming, rule out every other possibility.
A bad BCM that affects windows will usually cause other symptoms too, door locks acting funny, interior lights not working, or the key fob being unresponsive. If windows are the only problem, the BCM is almost never the cause.
Frequently Asked Questions
Why does my GMC window only work from the driver's switch?
The window lockout button on the master switch is likely engaged. Press it to disengage. If that does not fix it, the switch on the affected door is probably faulty.
Can I drive with a broken window regulator?
Yes, but it is risky. The glass may fall into the door or shatter. Tape it in the up position temporarily.
Replace the regulator as soon as possible.
How much does a GMC window regulator replacement cost?
A DIY regulator assembly costs $80 to $150 from an auto parts store. OEM dealer parts run $200 to $350. Dealership labor adds $150 to $250 per hour.
Why does my window go up crooked?
The window has come off its track or the regulator arm is bent. Remove the door panel and inspect the track alignment. Straighten the track if possible.
Replace the regulator if the arm is bent.
How long does it take to replace a GMC window regulator?
Plan for 2 to 3 hours for your first door. Experienced DIYers can do it in about an hour.
Does disconnecting the battery reset the GMC window auto-up feature?
Yes, on 2014 and newer models. Recalibrate by holding the switch up for 10 seconds after the window closes completely.

Similar Posts