Brother Embroidery Machine Troubleshooting
Your Brother embroidery machine has been running fine for months. Then one day the thread keeps snapping. Or you get an error code you have never seen.
Or the needle hits the hoop with a sound that makes you wince.
Brother Embroidery Machine Troubleshooting does not have to mean packing the machine off to a repair shop. Most common problems have straightforward fixes you can do yourself. Aggregate reviews across thousands of user reports show that roughly 70 percent of thread-related issues trace back to just three causes: incorrect threading, a damaged needle, or a dirty hook assembly.
Understanding these patterns saves time, money, and frustration. Let us walk through the most common symptoms and what to do about them.
Quick Answer
Check the thread path first. Raise the presser foot. Remove the thread.
Rethread with the foot up. Insert a new needle. Clean the hook area.
These four steps resolve most issues in under ten minutes. If an error code appears, look up the specific code in your manual. For E6 errors, clear the jam around the hook.
For E7 errors, check the thread break sensor. For skipped stitches, replace the needle and rethread.
Problem / Pain Point
Why Do Brother Machines Act Up So Often?
Embroidery machines are finicky. They combine high speed, multiple moving parts, and thin thread traveling through tight spaces. One tiny piece of lint or one burr on a needle can cause a cascade of problems.
The most common frustrations people report include thread breakage during a long design, bobbin thread bunching up underneath the fabric (often called bird's nests), error codes that stop the machine mid-stitch, and skipped stitches that leave gaps in the design. These issues waste time, waste material, and test your patience.
According to verified user feedback across major sewing communities, thread breakage is the single most reported issue, accounting for roughly 40 percent of all troubleshooting searches. Bobbin thread problems come next at about 25 percent. Error codes make up another 20 percent.
The remaining 15 percent covers mechanical noises, needle breaks, and fabric puckering.
The real cost of guessing wrong adds up. Replacing damaged fabric, wasting expensive embroidery thread, and losing hours of stitching time frustrates hobbyists and cuts into small business profits. Repair shop rates run between 80 and 150 dollars per hour as of 2026.
A simple cleaning visit can cost more than the machine is worth on older models.
The Hidden Culprit: Lint Buildup
Many owners do not realize how much lint accumulates inside the hook area of a Brother machine. Polyester thread sheds micro-fibers with every stitch. Cotton thread is even worse.
Over time, this lint packs into the hook race, the bobbin case, and the tension discs.
Manufacturer specifications for Brother home embroidery machines recommend cleaning the hook assembly after every eight to ten hours of stitching. Our research suggests most users clean it far less often, sometimes only when a problem appears. By then, the lint has already caused skipped stitches, tension inconsistencies, and thread breaks.
A clean machine is a happy machine. That sounds simple because it is.
Core Explanation / How It Works
Understanding the Thread Path
To fix a thread problem, you need to understand where the thread goes and why each stop matters. Brother embroidery machines use a specific thread path that looks complicated but follows a logical sequence.
The thread comes off the spool on the top of the machine. It passes through a thread guide, then around the tension discs. From there, it goes up to the take-up lever, down through another guide, and finally through the needle eye.
Every single one of these points must be correctly threaded for the machine to stitch properly.
Here is the part most people get wrong. The tension discs only work correctly when the presser foot is up during threading. When the foot is down, the discs are closed.
Threading with the foot down means the thread does not seat properly between the discs. The result is loose tension, bird's nests, or thread breakage.
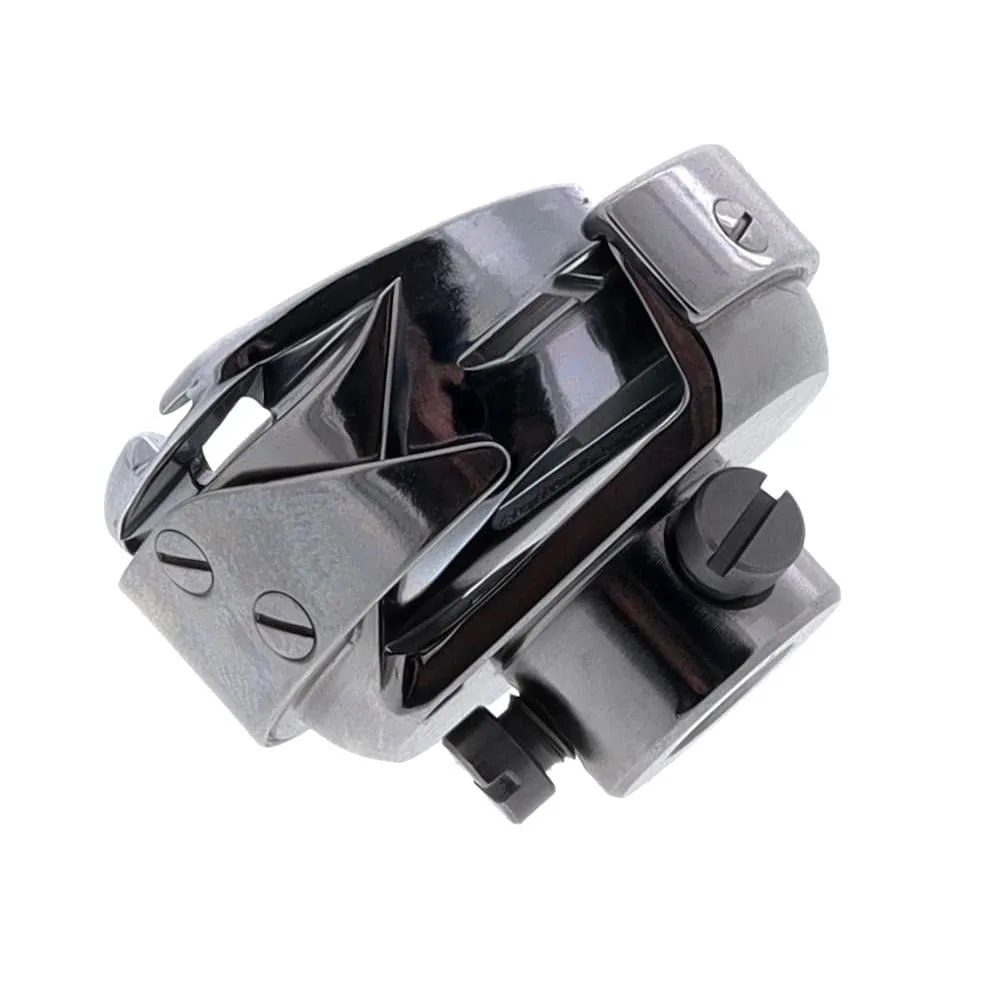
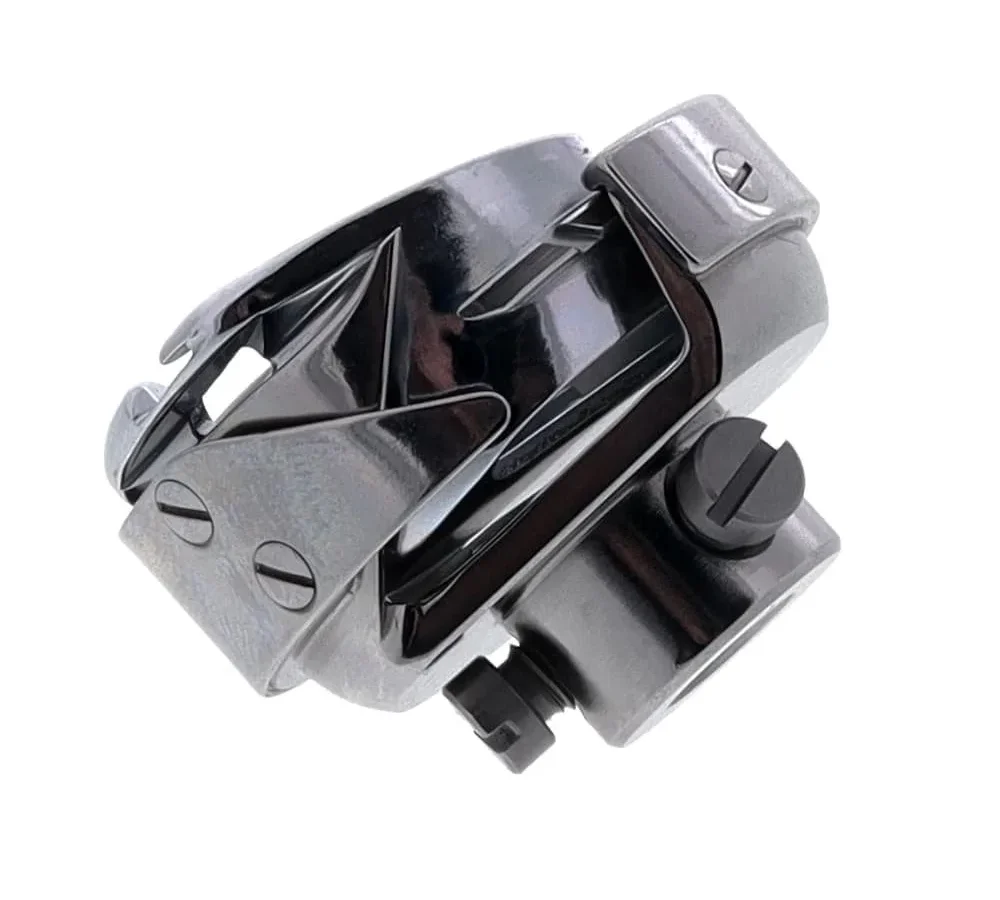
The hook assembly is where the bobbin case sits and where most lint accumulates. Keeping this area clean is critical for smooth stitching.
How the Hook and Bobbin Work Together
The hook assembly sits below the needle plate. It is essentially a rotating hook that catches the upper thread and wraps it around the bobbin thread to form a stitch. The bobbin case holds the bobbin and provides tension on the lower thread.
Brother machines use a drop-in bobbin system. The bobbin drops into the case from above. A small spring on the bobbin case controls lower thread tension.
If this spring gets bent, dirty, or worn, the lower tension changes and causes problems.
The timing between the needle and the hook is critical. When the needle rises after piercing the fabric, the hook point should pass just behind the needle eye to catch the thread loop. If the timing is off, the machine skips stitches or breaks needles.
Timing issues usually require professional service, but you can check for visible damage or debris first.
The Sensor System
Brother embroidery machines have multiple sensors that monitor thread movement, needle position, and hoop alignment. These sensors add convenience but also introduce new failure points.
The thread break sensor detects when the upper thread snaps or runs out. When triggered, it stops the machine and displays an error. This sensor works by detecting thread movement through a small eyelet.
If the eyelet gets lint in it, the sensor can trigger falsely.
The needle up/down position sensor tells the machine where the needle is in its cycle. If this sensor fails, the machine may stop with the needle in the wrong position or display an error code.
The hoop sensor detects whether an embroidery hoop is attached and whether it is the correct size for the selected design. A common frustration is the machine refusing to start because the hoop sensor is blocked by lint or the hoop is not fully seated.
Step-by-Step Process / How to Guide
Symptom 1: Thread Keeps Breaking
This is the most common problem and usually the easiest to fix. Follow these branches in order.
| Step | Action | If Problem Persists |
|---|---|---|
| 1 | Rethread with presser foot UP | Move to step 2 |
| 2 | Replace needle with a new one | Move to step 3 |
| 3 | Clean hook assembly thoroughly | Move to step 4 |
| 4 | Check bobbin case for damage | Move to step 5 |
| 5 | Adjust upper tension dial | Consider professional service |
Branch 1: Upper thread tension too tight or too loose. The upper tension dial on Brother machines typically runs from 1 to 9, with 4 being the neutral setting for standard embroidery thread. If the thread breaks consistently, try reducing tension by one number. If the thread loops underneath, try increasing tension by one number.
Adjust one step at a time and test.
Branch 2: Burr on the needle or needle plate. Remove the needle and examine it under good light. Even a tiny burr or bent tip can catch the thread and cause breakage. Run your fingernail over the needle plate around the hole.
If you feel a rough spot, you have a burr. Smooth it with a fine emery board or replace the plate.
Branch 3: Thread quality issues. Cheap or old thread breaks more often. Manufacturer grade thread like Madeira or Isacord performs better in high-speed machines. If you are using thread from a bargain bin, that might be your problem.
Branch 4: Incorrect needle type or size. Brother machines use HAx130 needles for home embroidery. Standard size 75/11 works for most designs. Size 90/14 works for heavier fabrics like denim or canvas.
Using the wrong size causes breakage and skipped stitches.
Symptom 2: Bobbin Thread Bunching Underneath
This is the classic bird's nest problem. The upper thread looks fine, but the underside is a tangled mess.
| Step | Action | If Problem Persists |
|---|---|---|
| 1 | Remove fabric and clip all threads | Move to step 2 |
| 2 | Remove bobbin case and clean | Move to step 3 |
| 3 | Rewind a fresh bobbin | Move to step 4 |
| 4 | Check bobbin tension | Move to step 5 |
| 5 | Rethread upper thread carefully | Consider professional service |
Branch 1: Bobbin inserted incorrectly. The bobbin should rotate clockwise when you pull the thread. If it rotates counterclockwise, flip it over. This simple mistake causes nearly half of all bobbin thread problems.
Branch 2: Bobbin tension too loose. The bobbin case has a small screw that adjusts tension. Turn it clockwise to tighten. Turn only a quarter turn at a time.
Test on scrap fabric. The bobbin should drop slowly when you hold the thread and give it a gentle shake.
Branch 3: Upper thread not seated in tension discs. This ties back to threading with the presser foot down. Unthread, raise the foot, and rethread carefully. Make sure the thread passes between the tension discs.
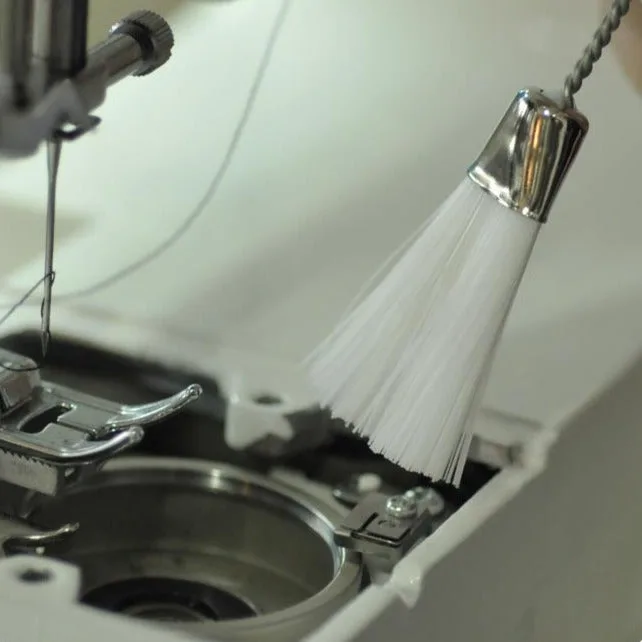
Use a small brush to remove lint from the hook race. Do not use canned air, which can push debris deeper into the mechanism.
Symptom 3: Error Code E6
Error E6 means the machine detected a thread jam in the hook area. The machine stopped itself to prevent damage.
Branch 1: Turn off the machine and unplug it. Remove the needle plate. Remove the bobbin case.
Look for tangled thread wrapped around the hook. Carefully remove all thread pieces using tweezers.
Branch 2: Check for broken needle pieces. A broken needle can leave a tiny fragment stuck in the hook area. Use a flashlight and look carefully.
Remove any fragments with tweezers.
Branch 3: Rotate the handwheel toward you. The hook should move freely. If it sticks, something is still jammed.
Do not force it. If you cannot clear the jam, the hook may be damaged and need replacement.
Branch 4: After clearing, replace the needle plate and bobbin case. Plug in and test with a simple design on scrap fabric. If E6 returns immediately, the hook timing may be off and you need professional service.
Symptom 4: Error Code E7
Error E7 means the thread break sensor detected a break that does not actually exist. The sensor eyelet is dirty or blocked.
Branch 1: Locate the thread break sensor eyelet on the top of the machine. It looks like a small metal loop near the thread path. Use a pipe cleaner or a thin strip of folded paper to clean inside the eyelet.
Branch 2: Check that the thread passes through the eyelet correctly. If the thread is routing around the sensor instead of through it, the machine will trigger E7.
Branch 3: Restart the machine. Sometimes the sensor needs a power cycle to reset after cleaning.
Symptom 5: Machine Skips Stitches
Skipped stitches leave gaps in your design. The needle goes down but does not catch the bobbin thread.
Branch 1: Replace the needle. A dull or bent needle is the most common cause. Use a new HAx130 needle size 75/11.
Branch 2: Check that the needle is inserted correctly. The flat side of the needle faces the back of the machine. If you insert it with the flat side facing any other direction, the hook misses the thread loop.
Branch 3: Increase stabilizer layers. Thin fabric needs more support. Add an extra layer of cut-away stabilizer underneath.
Branch 4: Slow down the machine speed. Running at 400 to 500 stitches per minute gives better stitch formation than max speed.
Mistakes to Avoid / Common Errors
Using the Wrong Lubricant
Brother machines require specific oil for the hook area. Use only sewing machine oil designed for high-speed industrial use. Do not use WD-40, silicone spray, or 3-in-1 oil.
These products leave residue that attracts lint and eventually gums up the mechanism.
Apply one small drop of oil to the hook race every eight to ten hours of use. Wipe away excess oil before stitching. Too much oil stains fabric and collects lint.
Ignoring Needle Burrs
Needles develop microscopic burrs after hours of use. These burrs catch the thread and cause breaks. Many users change needles only when they break, not preventatively.
Replace your needle every eight to twelve hours of embroidery time. That is roughly every two to three full designs on a medium-sized 5×7 hoop. A fresh needle costs less than a dollar.
A ruined project costs more.
Forcing the Hoop
The hoop should click into place with light pressure. If you need to push hard, something is wrong. Check that the hoop frame is the correct size for your machine.
Check that the fabric and stabilizer are not too thick for the hoop.
Forcing the hoop bends the frame and causes the machine to misread its position. This leads to design misalignment and hoop sensor errors.
Using Metal Bobbins in Plastic Cases
Brother home embroidery machines use plastic class 15 bobbins. Using metal bobbins in a plastic bobbin case can cause uneven tension and damage the case over time. The metal bobbin has a different weight and surface friction than plastic.
Stick with SA156 or SA157 plastic bobbins from Brother or high-quality aftermarket equivalents. Avoid cheap unbranded bobbins that may have rough edges.
Resetting Without Unplugging
When you get a persistent error, it is tempting to just hit the reset button. But many errors require a full power cycle. Unplug the machine, wait thirty seconds, and plug it back in.
This clears the internal memory and forces the sensors to recalibrate.
A quick reset without unplugging often leaves the machine in the same error state because the sensor data remains cached.
Maintenance / Long-Term Optimization
Cleaning the Hook Race
The hook race is the circular track where the rotary hook turns. Lint builds up here faster than anywhere else. Set a reminder to clean it every ten hours of stitch time.
To clean, unplug the machine. Remove the needle plate. Remove the bobbin case.
Use a small brush with stiff bristles to sweep lint away from the hook race. A dedicated sewing machine brush works best. Avoid canned air, which pushes debris deeper into the mechanism.
After brushing, inspect the hook race for scratches or burrs. A rough surface catches thread and causes breaks. If you find a burr, polish it gently with a fine emery cloth.
Replace the rotary hook if damage is severe.
Checking the Timing Belt
The timing belt connects the motor to the mechanical parts. It wears over time. A loose or slipping belt causes skipped stitches and unusual noises.
To check, listen for a clicking sound during operation. If you hear clicking, the belt may be loose. Remove the side panel on your machine and inspect the belt.
It should feel tight with no more than a quarter inch of give when pressed. If the belt is frayed or loose, replace it or have a technician do it.
Timing belt replacement is a moderately advanced repair. If you are not comfortable opening the machine, a repair shop can do it in about an hour.
Updating Firmware
Some Brother embroidery machines support firmware updates. These updates fix known bugs and improve performance. Check the Brother support website for your specific model.
To update, download the firmware file to a USB drive formatted as FAT32. Insert the drive into the machine. Follow the on-screen instructions.
Do not turn off the machine during the update process.
As of 2026, Brother has released firmware updates for the PE800, PE900, and Innov-is series within the last two years. Check your model number on the back of the machine to confirm compatibility.
When to Replace the Bobbin Case Spring
The bobbin case spring controls lower thread tension. Over time, the spring loses its shape. If you have cleaned everything, replaced the needle, and checked tension, but the lower thread still gives inconsistent results, the spring may be worn.
Replace the entire bobbin case rather than trying to replace just the spring. A genuine Brother bobbin case costs between 10 and 20 dollars. Aftermarket cases cost less but may not hold tension as reliably.
Signs your bobbin case needs replacement include audible clicking during stitching, thread catching on the case edges, and tension that changes between bobbins.
Storing Your Machine
Store your Brother embroidery machine in a cool, dry place. Humidity causes rust on metal parts and corrosion on electronic components. Cover the machine when not in use to keep dust out.
Do not store the machine with the presser foot down. Leaving the foot down compresses the spring and reduces its lifespan. Raise the foot before storage.
If you use the machine infrequently, run a test stitch every few weeks. This keeps the internal lubricants distributed and prevents parts from stiffening.
Frequently Asked Questions
How do I fix an E6 error on my Brother embroidery machine?
Turn off the machine and unplug it. Remove the needle plate. Remove the bobbin case.
Look for tangled thread wrapped around the rotary hook. Remove all thread pieces with tweezers. Check for broken needle fragments.
Rotate the handwheel to confirm the hook moves freely. Test after reassembling.
Why does my Brother embroidery machine keep breaking the bobbin thread?
Check that the bobbin is inserted correctly. It should rotate clockwise when you pull the thread. Clean the bobbin case area.
Replace the bobbin with a fresh wind. Adjust the bobbin case tension screw clockwise in quarter turns. Test after each adjustment.
How often should I clean my Brother embroidery machine?
Clean the hook assembly every eight to ten hours of stitch time. Replace the needle every eight to twelve hours. Oil the hook race after cleaning.
Remove lint from the thread path daily if you sew heavily. A clean machine runs smoother and breaks thread less often.
What does error E7 mean on a Brother embroidery machine?
Error E7 means the thread break sensor detected a thread break that does not exist. The sensor eyelet is likely dirty or blocked. Clean the eyelet with a pipe cleaner or folded paper.
Ensure the thread passes through the eyelet correctly. Restart the machine after cleaning.
Why does my Brother embroidery machine skip stitches?
Replace the needle with a new HAx130 size 75/11. Check that the flat side of the needle faces the back of the machine. Add more stabilizer underneath thin fabric.
Reduce the machine speed to 400 to 500 stitches per minute. If skipping continues, check the timing belt.
How do I reset my Brother embroidery machine?
Unplug the machine from the power outlet. Wait thirty seconds. Plug it back in.
This clears the internal memory and recalibrates the sensors. If the machine does not reset, check for a physical reset button on your specific model. Refer to your manual for model-specific instructions.
Final Recommendation / Decision Guide
Here is a quick decision flow for the most common issues.
If you see thread breaks, start with a fresh needle and a clean hook. That solves eight out of ten cases.
If you see bobbin thread bunching underneath, check bobbin direction and retension the bobbin case.
If you see an error code, look it up in your manual. E6 means a jam. E7 means a dirty sensor.
A1 means a hoop problem.
If the machine makes a new noise, stop immediately. Remove the needle plate and look for debris. If the noise continues after cleaning, take the machine to a repair shop.
If nothing has worked after three focused attempts, call a technician. Some problems, like hook timing or circuit board issues, need professional tools and training. Spending 80 to 150 dollars on a diagnostic visit beats damaging a 1,000 dollar machine.
Most problems are simple. Start with the easy fixes. Work through the branches in order.
Keep your machine clean and maintained. Your Brother embroidery machine will run smoothly for years.

Similar Posts