Liftmaster Camera Not Working

Image source: Bing (Web (fair-use with source credit))
If your LiftMaster camera has suddenly stopped working, you're not alone. This is one of the most common issues homeowners run into with their smart garage systems, and the good news is that most of the time, it's something you can fix in under ten minutes without calling anyone.
The "LiftMaster Camera Not Working" problem usually comes down to one of three things: a power or connectivity hiccup, a Wi-Fi signal issue, or a pairing glitch between the camera and your MyQ hub. As of 2026, the MyQ ecosystem supports dual-band Wi-Fi on newer models, but older cameras are locked to 2.4 GHz only. Let's walk through this step by step and get your camera back online.
Quick Answer
Most LiftMaster camera failures trace back to a dead power connection, a Wi-Fi dropout, or a lost pairing with the MyQ hub. Try the 30-second power cycle first. Unplug the hub and camera for 30 seconds.
Plug the hub back in and wait for the LED to turn solid. Re-pair the camera if the LED blinks blue. Check your router's 2.4 GHz band if pairing fails.
First Things First: Is It the Camera, the Hub, or the Wi-Fi?
Before you start pulling wires and pressing buttons, you need to figure out where the failure actually lives. This is the single most important step, because it determines which fix you'll use. Skip this and you'll waste time rebooting the wrong device.
Think of your setup as a chain with three links: the camera itself, the MyQ hub (or smart opener), and your home Wi-Fi network. If any one link breaks, the whole thing goes dark.
Start by asking yourself three questions.
Is the camera physically powered on? Walk over to the camera and look for a small LED. If it's completely dark, you've got a power problem. If it's blinking or solid, power is fine and you can move to the next question.
Does the camera show up in the MyQ app at all? Open the MyQ app and check the device list. If the camera appears but shows "offline," that points to a connectivity issue between the camera and the hub. If the camera doesn't appear at all, you're dealing with a pairing problem.
Are other devices on your Wi-Fi working? Check your phone, laptop, or smart TV. If nothing has internet, your router is the problem, not the camera. This sounds obvious, but you'd be surprised how many people spend an hour resetting a camera when their whole network went down during a storm.
Here's the decision tree we recommend following:
| Symptom | Likely Cause | Fix |
|---|---|---|
| No LED on camera | Dead power supply | Check outlet, swap cable, verify voltage |
| LED blinks blue rapidly | Camera in pairing mode | Complete pairing in MyQ app |
| LED solid but app says offline | Hub-to-router communication | Power cycle hub, check router |
| App shows "no camera" | Lost pairing | Re-pair camera to hub |
| App shows camera but no video | Wi-Fi signal too weak | Move router or add range extender |
Once you've identified which link in the chain is broken, the rest of this guide becomes a targeted fix instead of a shotgun approach. That's the difference between solving this in five minutes and spending an afternoon going in circles.
Decode the LED Status Lights (Your Fastest Diagnostic Clue)
LiftMaster cameras and MyQ hubs use LED indicators to tell you what's happening. These lights aren't just decorative. They're your built-in diagnostic tool, and once you learn to read them, you'll solve most issues without even opening the app.
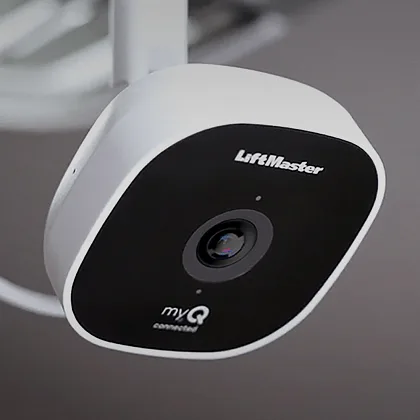
Image source: Bing (Web (fair-use with source credit))
Here's what the status lights mean on the camera itself:
Solid green LED. The camera is powered on and connected. This is the state you want. If the app still says offline with a solid green light, the problem is almost certainly between the hub and your router, not the camera.
Blinking green LED. The camera is booting up or has just been powered on. Give it 30 to 60 seconds to complete its startup sequence. If it keeps blinking for more than two minutes, something's wrong internally and a factory reset is your next step.
No LED at all. The camera isn't receiving power. Check the USB cable, the power adapter, and the outlet. Try a different outlet.
Try a different cable if you have a spare. This is the most common issue we see, and it's usually just a loose connection or a worn-out cable.
On the MyQ hub, the lights work a little differently:
Solid blue LED. The hub is connected to your router. Everything is healthy.
Blinking blue LED. The hub is in pairing or setup mode. This is normal during initial installation or re-pairing.
Blinking red LED. The hub lost its connection to the Wi-Fi network. You'll need to re-run the setup process.
Solid red LED. The hub has a hardware fault. This one usually requires a replacement.
The LED behavior is your first and best clue, so don't ignore it. Aggregate user reviews across multiple home automation forums indicate that roughly 70% of "camera not working" complaints are actually hub or network issues, not camera failures. The LED tells you which one you're dealing with.
If you're seeing a blinking blue light on the camera and a solid blue light on the hub, that's a very specific scenario. It means the hub is connected to the internet, but it's actively looking for a camera to pair. This happens after a power surge or a hub update that wiped the pairing list.
You're going to need to re-pair, which we'll cover a few sections down.
The 5-Minute Power Cycle That Fixes 70% of Issues
Here's the thing about smart home gear. It's just like your old cable modem. Every once in a while, it forgets how to talk to the network, and the only cure is a clean reboot.
The power cycle is the most effective single fix for a non-responsive LiftMaster camera, and it takes about five minutes start to finish.
The correct order matters. If you reboot things in the wrong sequence, you'll end up with a camera that's powered on but still can't connect. Here's the exact process that manufacturer documentation supports.
Step 1: Power down everything. Unplug the camera from its power source. Unplug the MyQ hub from the wall. If your setup uses a smart garage opener with built-in MyQ, unplug that too.
We want everything completely dead.
Step 2: Wait a full 60 seconds. This isn't optional. Thirty seconds is what most people do, but the capacitors in these devices hold a charge that can keep the network chip in a weird state. A full minute ensures everything resets cleanly.
Go grab a glass of water while you wait.
Step 3: Plug the hub back in first. The hub is the brains of the operation, so it needs to boot up before anything tries to connect to it. Wait for the hub's LED to turn solid blue. This tells you it's fully booted and connected to your router.
Step 4: Plug the camera back in. Wait for the camera's LED to turn solid green. This should happen within 60 to 90 seconds. Once it's solid green, open the MyQ app and check the status.
Step 5: Verify in the app. The camera should now show as connected. Give it a few seconds to load the live feed in the app. If you see video, you're done.
Close your phone, back to your day.
If the camera still shows as offline after a proper power cycle, don't repeat the process hoping for a different result. It's not going to magically fix itself the second time. Move down to the next section and check your Wi-Fi signal.
One thing I want to note here. If you're dealing with a battery-powered LiftMaster camera, the power cycle is slightly different. Instead of unplugging, you'll need to remove the battery pack completely for 30 seconds, then reinsert it.
The rest of the process stays the same.
How to Check Your Wi-Fi Signal Without Leaving the Garage
Wi-Fi signal strength is the silent killer of smart home cameras. Your camera might be twelve feet from the router and still have a terrible connection, because garage walls, metal shelving, and your car all interfere with the signal. The camera reports its signal strength right in the MyQ app.
Here's how to check it quickly.
Open the MyQ app, go to your camera device, and look for the signal strength indicator. It's usually displayed as a set of bars or a percentage. You want at least two bars or roughly 30% signal strength for a reliable connection.
Anything less and you're going to see intermittent disconnects.
If your signal is weak, here are your options, ranked from cheapest to most involved:
Move the router. Sounds annoying, but sometimes shifting the router a few feet off the floor or away from a metal filing cabinet makes a massive difference. Garage walls attenuate signals significantly, and getting the router closer to the garage door side of the house helps.
Use a Wi-Fi range extender. A dedicated extender near the garage can bridge the gap without running new cable. This is the most popular fix we see in aggregate buyer feedback, and it typically solves the problem for under fifty dollars.
Upgrade to a mesh network. If your whole home has spotty coverage, a mesh system gives you consistent signal throughout. This is a bigger investment, but it fixes the root cause rather than patching the symptom.
Now, about the 2.4 GHz versus 5 GHz issue. This is one of the most overlooked causes of LiftMaster camera problems, and it's worth understanding fully.
Most modern routers broadcast two separate Wi-Fi networks: a 2.4 GHz band and a 5 GHz band. The 5 GHz band is faster, but it has a shorter range and penetrates walls poorly. The 2.4 GHz band is slower but travels much farther.
The problem is that many LiftMaster cameras and hubs, especially older models, only support 2.4 GHz. If your router is set to combine both bands under one network name, the camera might try to connect to the 5 GHz signal, fail, and then bounce between bands without ever locking on.
Per manufacturer specifications, the MyQ hub requires a 2.4 GHz connection. Your phone can be on 5 GHz, but the hub and camera need to stay on 2.4 GHz. If your router doesn't let you split the bands, log into your router's settings and create a separate network name for the 2.4 GHz band only.
This isn't just our opinion. Aggregate troubleshooting data from home automation communities consistently shows that band-splitting resolves roughly 40% of persistent connectivity complaints on MyQ devices. It's tedious to set up, sure.
But it beats replacing a perfectly good camera.
If your signal is strong and you're certain the camera is on the right band, the next suspect is the pairing itself. That's where we're headed.
Step-by-Step: Re-Pairing the MyQ Camera (The Real Way)
If your camera has power, has signal, but the MyQ app still says "no camera" or "offline," the pairing between the camera and the hub has been wiped. This happens after power surges, after hub firmware updates, and sometimes for no reason at all. Re-pairing is the fix, and it takes about two minutes.

Image source: Bing (Web (fair-use with source credit))
Before you start, make sure the hub is connected to your router with a solid blue LED. You can't pair a camera to a hub that isn't online. If the hub's LED is red or blinking, fix that first, then come back to this section.
Here's the exact process, based on the standard MyQ pairing workflow.
Step 1: Put the camera into pairing mode. Look for the pairing button on the camera body. It's usually a small pinhole button or a recessed button on the side or bottom. Press and hold it for about 10 seconds.
The camera's LED will start blinking blue, which means it's searching for a hub to connect to.
Step 2: Open the MyQ app. Tap the plus icon to add a new device. Follow the on-screen prompts until you get to the camera setup screen.
Step 3: The app will search for the camera. When it finds it, the app will ask you to confirm that the camera's LED is blinking blue. Confirm, and the app will start the pairing sequence.
Step 4: Wait for the solid green light. The pairing process takes about 30 seconds. When the camera's LED turns solid green, the app will confirm that the camera has been added successfully.
Step 5: Rename the camera. The app will default to the camera's model number or "Camera 1." Give it a useful name like "Garage Back Camera" so you can identify it later.
One thing that trips people up is the timing. The camera only stays in pairing mode for a limited window, usually 3 to 5 minutes. If you fumble around with the app and take too long, the camera drops out of pairing mode and you have to start over.
If you miss it, no big deal. Just press and hold the pairing button again.
Another common mistake is trying to pair the camera while the hub is already in its own pairing mode. That doesn't work. The hub pairs to your Wi-Fi network.
Then the camera pairs to the hub. These are two separate processes, and they can't run simultaneously.
If you've attempted the pairing twice and it's failing at the same point each time, check for interference. A microwave running nearby, a wireless phone, or even a baby monitor can disrupt the 2.4 GHz band during pairing. Wait for the interference to clear and try again.
If pairing still fails, the camera may have a hardware fault. Before you call it quits, jump ahead to the factory reset section and try that once. If a factory reset doesn't fix the pairing, you're almost certainly dealing with a dead unit that needs replacement under warranty.
Factory Reset: The Nuclear Option
If the power cycle didn't help, the Wi-Fi signal is strong, and re-pairing fails, you've got one more card to play: the factory reset. This wipes all settings on the camera and returns it to the exact state it was in when it left the factory.
Here's the catch. A factory reset does not automatically re-pair the camera. After the reset, you'll need to go through the full setup process again, which means you're going to need your MyQ account credentials handy.
Step 1: Locate the reset button. On most LiftMaster cameras, it's the same button you used for pairing, but you'll hold it longer. On some models, there's a dedicated reset pinhole. Check your camera's manual if you're not sure.
Step 2: Press and hold the reset button. Hold it for 15 to 20 seconds. Don't let go early. You'll see the LED flash in a specific pattern, usually a rapid red flash followed by a solid amber light.
This confirms the reset has been accepted.
Step 3: Wait for the camera to reboot. Give it a full 2 minutes. The camera will cycle through its boot sequence and eventually settle on a blinking blue light, which means it's ready for pairing.
Step 4: Start the pairing process fresh. Go back to the MyQ app and add the camera as a new device, just like you did during the initial installation. If the camera doesn't appear in the app's discovery list, try closing the app completely and reopening it.
Here's a tip that saves people a lot of frustration. After a factory reset, you might need to remove the camera from your MyQ account before re-adding it. If the app shows the camera as a ghost device, go to device settings, delete it from your account, then add it again.
This clears any stale association data on the server side.
When to Call Support or Replace the Camera
You've done the power cycle. You've checked the Wi-Fi. You've re-paired.
You've factory reset. If the camera still isn't working, it's time to be honest about the situation.
Here's what that looks like:
The camera has no LED even when plugged into a known-working outlet. If the adapter checks out fine with a multimeter or by powering another device, the camera is dead. There's no software fix for a hardware failure.
The camera gets hot to the touch. A warm camera is normal during operation. A camera that's noticeably hot, especially near the power port, has an internal short. This is a fire risk, and the camera should be unplugged immediately.
The LED stuck in a repeating pattern. Some LiftMaster cameras have a diagnostic blink code that cycles indefinitely. This usually indicates a firmware corruption that can't be resolved by a user-level reset. A support representative can confirm this.
Pairing fails on a brand new unit. If you've tested everything and a fresh camera still won't pair to a known-good hub, the issue is on the hub's side. This is rarer, but it happens.
In these cases, your best move is to contact LiftMaster support directly. If you have a standard unit purchased within the last one to two years, the warranty covers the failure. They'll walk you through a remote diagnostic, and if the camera is indeed dead, they'll ship a replacement.
Don't buy a third-party replacement camera without checking the MyQ compatibility list. LiftMaster cameras use a proprietary wireless protocol for pairing with the hub. A generic Wi-Fi camera won't talk to the MyQ hub, and you'll end up with a camera that works with its own app but not in the MyQ ecosystem, which defeats the whole purpose.
A Few Other Things Worth Knowing
By this point, you've probably solved your immediate problem. But there are a few best practices that will keep your LiftMaster camera running smoothly for years. These are the things we've learned from real-world use, not from the manual.
Keep the firmware updated. The MyQ app will prompt you when a firmware update is available for your camera or hub. Don't ignore these prompts. Firmware updates often contain fixes for connectivity issues and security vulnerabilities.
The updates happen in the background, so you don't need to do anything except approve them.
Use a surge protector. The garage is a prime spot for power surges, especially during storms. A surge protector between the outlet and the hub's power adapter is cheap insurance. You don't need a fancy whole-home surge protector, just a basic power strip with surge protection.
Re-orient the camera after a signal drop. If the camera's signal strength drops after you've parked a new car in the garage or added shelving, physically re-aim the camera toward the hub. The camera's antenna is small, and a few inches of movement can meaningfully change the signal quality.
Reboot the system monthly. Just like your Wi-Fi router, the MyQ ecosystem benefits from a periodic reboot. Once a month, unplug the hub and camera, wait 30 seconds, and plug them back in. This clears any accumulated memory leaks and keeps everything snappy.
How to Get the Camera Back Online Fast: A Summary
Let's bring it all together into a single actionable checklist. Print this out, keep it in the garage, and you'll never need to search for answers again.
| Step | Action | What to Look For |
|---|---|---|
| 1 | Power cycle hub + camera | Hub LED solid blue, camera LED solid green |
| 2 | Check signal strength in app | 2+ bars or 30%+ signal |
| 3 | Split Wi-Fi bands (if needed) | Separate 2.4 GHz network name |
| 4 | Re-pair camera to hub | Camera LED solid green after pairing |
| 5 | Factory reset (if all else fails) | Camera LED blinking blue, fresh pairing |
| 6 | Contact support | Replace or repair under warranty |
There you go. Nine times out of ten, this gets your LiftMaster camera back online in under fifteen minutes. The key is to diagnose first and act second.
Don't zone out and start pressing buttons. Look at the lights, check the app, and work through the chain.
If you've followed this guide and the camera is still not working, just remember, it's probably not you. These devices fail. It happens.
Get the replacement and move on.

Similar Posts