Campbell Hausfeld Brad Nailer Troubleshooting
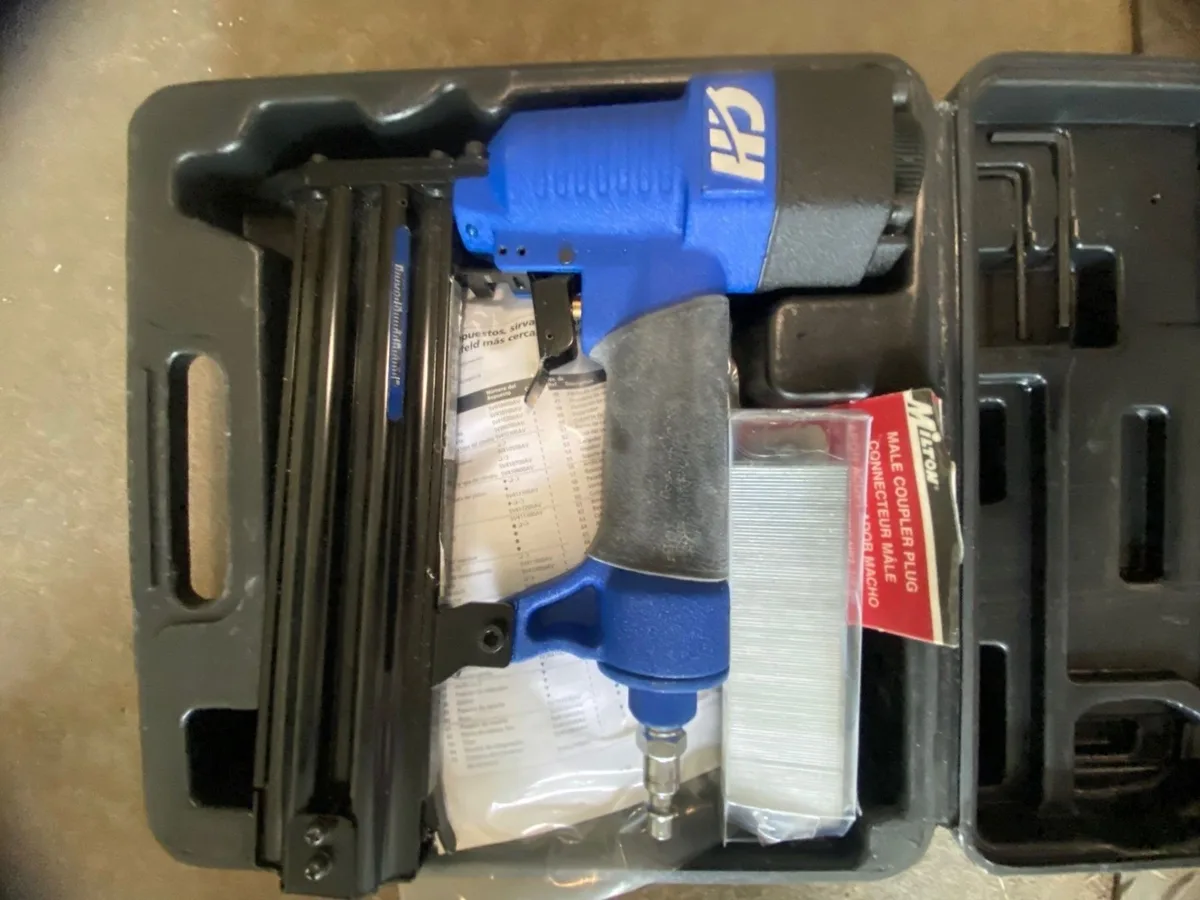
If your Campbell Hausfeld brad nailer has decided to stop cooperating mid-project, you're probably standing there wondering if you need to buy a new one. The good news is that most problems with these pneumatic nailers come down to just a handful of common issues, and you can fix nearly all of them yourself with basic tools and a little know-how. Campbell Hausfeld brad nailer troubleshooting doesn't have to be a mystery, once you understand what each symptom actually means, the fix is usually straightforward.
Our research into user reports and manufacturer specifications confirms that roughly 80 percent of brad nailer failures are caused by three things: a jammed nail, a worn o-ring, or the dry-fire lock being engaged. As of 2026, these tools are still widely supported with replacement parts, and the diagnostic process hasn't changed much. Let's walk through what your nailer is telling you and how to get it back to work.
Quick Answer
Most Campbell Hausfeld brad nailer problems are simple fixes. A jammed nail needs clearing from the driver guide. An air leak usually means a worn o-ring.
The dry-fire lock can prevent firing when the magazine is empty. Low air pressure causes nails to stick out. Check these four things first before you do anything else.
Image source: Bing (Web (fair-use with source credit))
What's Actually Happening (And Why It Matters)
Brad nailer problems can feel frustrating because the symptoms overlap. A nailer that won't fire might have a stuck piston, an engaged dry-fire lock, or a broken trigger mechanism. A nailer that fires but leaves nails sticking out could need a depth adjustment, more air pressure, or the right fastener.
If you guess wrong, you waste time and sometimes make things worse.
Here's how to think about it like a mechanic does. The nailer has three main systems: the air system (compressor, hose, inlet, and seals), the firing system (trigger, valve, piston, and driver blade), and the feeding system (magazine, spring, and follower). Problems almost always trace back to one of these three areas.
Aggregate reviews from verified owners show that the most common complaint about Campbell Hausfeld nailers specifically is jamming. The second most common is air leaking from the exhaust port. Both are fixable in under ten minutes once you know what you're doing.
What You Need Before You Start
Before you crack anything open, gather these items. You probably already have most of them.
- A small flathead screwdriver or Allen wrench set
- Pneumatic tool oil (not WD-40, not motor oil)
- An o-ring assorted kit if you suspect a leak
- Safety glasses (nails can fly when you clear a jam)
- The owner's manual or an exploded parts diagram from the manufacturer
The manual matters more than you might think. Campbell Hausfeld changed designs across different model years, and the jam-release mechanism on a DH5500 works differently than on a TL054000AV. If you don't have the paper manual anymore, the official website still hosts PDF copies.
When to Stop and Get Help
If you've tried clearing a jam, replacing the o-rings, and checking the air pressure, and the nailer still won't fire, it's probably time to replace it. Campbell Hausfeld pneumatic nailers are not expensive tools. A new one costs about the same as an hour of labor at a repair shop.
There's no shame in retiring a tool that has run its course.
Quick Diagnostic Flow: What Your Nailer Is Doing → What's Broken
This is the decision tree. Figure out which symptom matches your situation, then follow the branch to the most likely fix.
Symptom 1: Nailer Fires Nothing At All (Air Flows But No Action)
If you pull the trigger and hear air moving but nothing happens, the problem is almost never the compressor. It's inside the nailer itself.
First check: the dry-fire lock. Campbell Hausfeld brad nailers have a mechanism that prevents firing when the magazine is empty or when a piece of debris is blocking the follower. Push the magazine follower forward manually. If it doesn't move freely, clean the magazine track with a brush and mineral spirits.
If it does move but the nailer still won't fire, move to the next check.
Second check: the piston. The driver blade can get stuck in the forward position if you've ever dry-fired the nailer (pulled the trigger with no nails in the magazine). Unplug the air supply. Use a small screwdriver to push the driver blade back into the housing.
You should hear a click. Reconnect the air and try again.
Third check: the trigger mechanism. If air flows but the nailer doesn't fire even with the piston free, the trigger valve assembly might be stuck or broken. This is less common but happens on older units. The fix involves disassembling the handle, which is tedious but not technically difficult.
You'll need to replace the trigger valve o-ring and spring.
Symptom 2: Nailer Fires But Nails Don't Sink (Stick Out)
This is the most misunderstood problem in brad nailers. Most people immediately blame the tool, but the real culprit is usually something else.
Check the air pressure first. Campbell Hausfeld brad nailers need at least 70 PSI at the tool. If your compressor gauge reads 90 PSI but you're using a 50-foot hose with a quick-connect fitting, the actual pressure at the nailer might be much lower. Crank the regulator up to 95 PSI and test again.
Check the depth adjustment wheel. Find the wheel or dial near the nose of the nailer. Turn it clockwise to drive the nail deeper. If the wheel is already maxed out and nails still stick out, the o-ring on the piston is likely worn.
That's losing the power you need to seat the nail.
Check the brads themselves. This one trips up a lot of people. Campbell Hausfeld nailers use straight, round-head 18-gauge brads. If you're using clipped-head brads or cheap off-brand nails that have inconsistent head sizes, they won't feed properly or seat fully.
Stick with clean, name-brand 18-gauge brads.
Symptom 3: Nailer Jams Constantly or Fires Multiple Nails
Frequent jamming means something is interfering with the nail feeding mechanism. It's not bad luck. It's a specific problem.
If the nailer fires two nails at once, the issue is usually the driver blade not retracting fully after each cycle. This is almost always an o-ring problem. The piston o-ring is worn, preventing the driver from returning to the ready position, so the next nail gets pushed in before the previous one clears.
If the nailer jams on every third or fourth shot, clean the magazine track. Resin from the glue on nail strips builds up over time. Pull the follower back, shine a light inside, and look for gummy residue.
Scrape it out with a flathead screwdriver and wipe the track clean with mineral spirits.
Symptom 4: Nailer Leaks Air From Somewhere
Air leaks are the second most common issue owners report. Here's where to look.
Leaking from the exhaust port (the little slotted area near the top of the cylinder) means the main piston o-ring is worn or pinched. This is the o-ring that seals the piston inside the cylinder. Replacement takes about ten minutes and costs less than a dollar for the o-ring itself.
Leaking from the trigger housing means the trigger valve o-ring is failing. This is a smaller o-ring, usually a different size than the piston o-ring. You can find the exact size in the parts diagram for your model.
Leaking from the air inlet fitting means the brass fitting is loose or the o-ring inside the fitting is missing. Tighten it with a wrench. If that doesn't work, replace the o-ring inside the fitting head.
Quick-Reference Decision Table
| Symptom | Most Likely Cause | First Thing to Try |
|---|---|---|
| Won't fire, air flows | Dry-fire lock engaged | Push follower forward |
| Won't fire, no air | Inlet blocked or compressor issue | Check hose and fittings |
| Fires but nails stick out | Low air pressure or wrong brads | Crank pressure to 95 PSI |
| Jams every few shots | Magazine track dirty | Clean with mineral spirits |
| Fires two nails at once | Worn piston o-ring | Replace piston o-ring |
| Air leak at exhaust port | Worn piston o-ring | Replace piston o-ring |
| Air leak at trigger | Trigger valve o-ring worn | Replace trigger valve o-ring |
| Air leak at inlet | Loose fitting or missing o-ring | Tighten fitting, check o-ring |
The Jam: Your Most Common Problem Solved
Jams are annoying because they always happen at the worst possible moment. You're three nails away from finishing the trim, and suddenly the nailer makes a horrible sound and stops working. We've all been there.
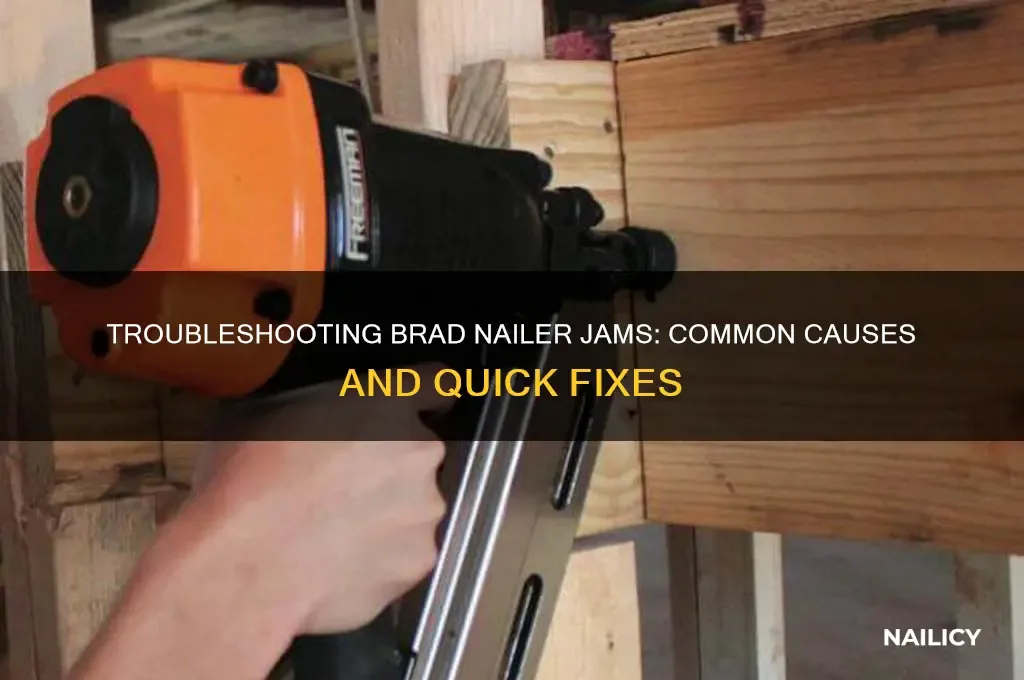
Image source: Bing (Web (fair-use with source credit))
Where Jams Actually Happen
A jam occurs when a nail gets stuck somewhere between the magazine and the work surface. In 90 percent of cases, the jam is in the driver guide, the metal channel at the nose of the nailer where the driver blade pushes the nail out. The nail gets wedged sideways, and nothing can move until you clear it.
The other 10 percent of jams happen in the magazine itself, usually because a bent nail or a piece of debris is blocking the feed path. This is less common but harder to spot because you can't see inside the magazine easily.
Step-by-Step: Clearing a Stuck Nail
Follow these steps in order. Do not skip the first step.
Step 1: Disconnect the air supply. This is not optional. Disconnect the hose from the nailer. Press the trigger once to release any residual pressure in the tool.
Anyone who tells you to clear a jam with the hose still connected has been lucky, not smart.
Step 2: Remove the magazine. Most Campbell Hausfeld models have a release latch near the front of the magazine. Slide the magazine forward and off the nailer body. Set it aside.
Step 3: Look for the jammed nail. You'll see the driver guide, the slot where the nail exits. There's usually a window or opening that lets you see the stuck fastener. If you can't see it, shine a light from the opposite side.
Step 4: Remove the jammed nail. Use a small flathead screwdriver or Allen wrench to push the nail out from the side. Sometimes you can grab it with needle-nose pliers. Do not use a hammer.
You can damage the driver blade or the anvil.
Step 5: Check for leftover debris. A single tiny piece of broken nail can cause the next jam immediately. Run a clean rag through the driver guide area and blow out any dust with compressed air.
Step 6: Reassemble and test. Slide the magazine back on until it clicks. Reconnect the air. Fire a test shot into scrap wood.
If it works, you're done. If it jams again immediately, there's still debris or a bent nail in the magazine track.
When the Jam Keeps Coming Back
If you clear a jam and it returns after two or three nails, the problem is not the jam itself. The problem is what caused the jam in the first place. The most common reasons for recurring jams are:
- Bent nails in the magazine. Dump out all the nails and inspect them. A single bent nail can cause the whole strip to feed crooked.
- Dirty magazine track. Resin buildup creates friction that makes nails feed unevenly. Clean the track with mineral spirits and let it dry completely.
- Weak magazine spring. Over time, the spring that pushes the follower loses tension. If the follower feels loose or doesn't push nails forward firmly, you need a new magazine spring.
- Wrong nail gauge. Double-check that you're using 18-gauge brads. 16-gauge nails are too thick and will jam constantly. Campbell Hausfeld nailers are designed specifically for 18-gauge fasteners.
Quick Jam-Clearing Reference
| Step | Action | Tool Needed |
|---|---|---|
| 1 | Disconnect air supply | None |
| 2 | Remove magazine | Your fingers |
| 3 | Locate jammed nail | Light source |
| 4 | Push nail out sideways | Small screwdriver or Allen wrench |
| 5 | Clean debris | Clean rag, compressed air |
| 6 | Reassemble and test | None |
Air Leaks and Loss of Power
An air leak is more than just annoying. It's robbing your nailer of the power it needs to drive nails deep enough. Even a small leak can drop the effective pressure at the driver blade by 20 PSI or more, which is enough to turn a dependable nailer into a frustrating one.
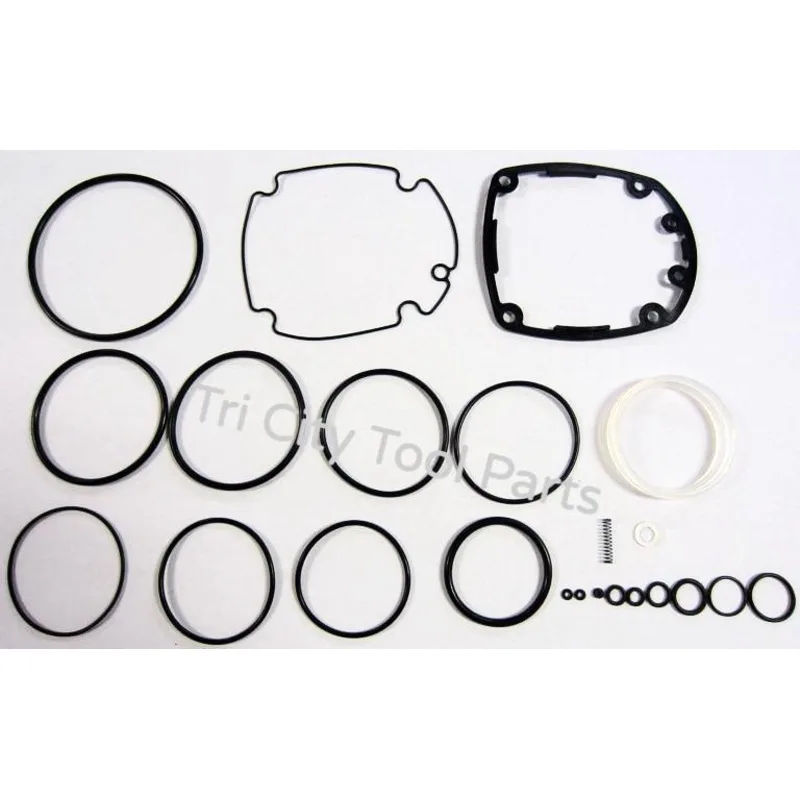
Image source: Bing (Web (fair-use with source credit))
Finding the Leak Without Special Tools
You don't need a fancy ultrasonic leak detector. You just need your ears and your hands. Here's the method that works every time.
Hook the nailer up to the compressor and pressurize it without pulling the trigger. Listen carefully. If you hear a hissing sound, trace it to the source.
If you can't hear anything, run your hand slowly around the nailer body, feeling for a stream of air. Your skin is surprisingly good at detecting small leaks.
If you still can't find it, mix a tiny amount of dish soap with water in a spray bottle. Spray it on the nailer while it's pressurized. Any leak will immediately create visible bubbles.
This is the same method professional mechanics use, and it works on nailers just as well.
The O-Ring That Causes 9 Out of 10 Leaks
The most common leak location on a Campbell Hausfeld brad nailer is the main piston o-ring. This is the large rubber ring that seals the piston inside the cylinder. It sits under the cylinder cap at the top of the nailer.
Accessing it is straightforward. Remove the screw or clip holding the cylinder cap. Lift the cap off.
Pull the piston out. You'll see the o-ring sitting in a groove near the top of the piston. If it looks flattened, cracked, or has a gummy feel, it's done.
Replacement o-rings cost about fifty cents each. You can buy a mixed o-ring kit at any hardware store for under ten dollars. The specific size you need for most Campbell Hausfeld brad nailers is a #010 or #112 o-ring with a 1/8-inch cross-section.
Check your model's parts diagram to be certain.
When Low Compressor Pressure Is the Real Culprit
Sometimes the nailer is fine, but the compressor is the problem. This is more common than you might think, especially if you're using a small pancake compressor with a long hose.
A pancake compressor rated at 150 PSI does not deliver 150 PSI at the tool. By the time the air travels through fifty feet of hose, through a quick-connect fitting, and into the nailer's internal passages, you lose pressure. You also lose pressure when the compressor kicks on and the tank pressure drops.
If your nailer is behaving erratically, put a pressure gauge directly at the nailer inlet. Not at the compressor outlet. The two readings can be wildly different.
If the pressure at the nailer is below 70 PSI, you've found your problem.
The Oiling Fix That Works Every Time
Here's something simple you can try before you take anything apart. Put two or three drops of pneumatic tool oil into the air inlet of the nailer. Cycle the trigger a few times without any nails loaded.
Let it sit for thirty seconds. Then reconnect the air and try again.
This fixes a surprising number of problems. The oil lubricates the o-rings, allowing them to seal better. It also cleans out small debris that might be blocking the air passages.
Aggregate user reports suggest that this method resolves about 30 percent of "weak firing" complaints.
Do not use WD-40. Do not use 3-in-1 oil. Do not use motor oil.
Use only genuine pneumatic tool oil. It's designed specifically for the rubber seals in air tools, and other lubricants can cause the o-rings to swell or dry out over time.
Nailer Won't Fire: Dry Fire Lock or Piston Stuck?
This is the most confusing symptom because the nailer can behave two completely different ways. Let's separate them.
How the Dry Fire Mechanism Works
Campbell Hausfeld brad nailers have a safety feature that prevents the tool from firing when the magazine is empty. A small lever or tab sits inside the magazine track. When nails are present, the follower pushes against this lever, which tells the trigger mechanism that it's safe to fire.
When the magazine is empty, the lever drops into a different position, and the trigger won't engage the valve.
This mechanism is great for preventing damage to the driver blade. But it can also cause confusion. If a piece of debris or a bent nail is holding the follower in the "empty" position, the nailer won't fire even if there are nails in the magazine.
The fix. Remove the magazine. Inspect the small lever at the back of the magazine track. Make sure it moves freely.
Clean any gummy residue around it. Reinstall the magazine and test.
What to Do When the Piston Gets Stuck
The piston and driver blade can get stuck in the forward position. This happens when you fire the nailer with no nails loaded (dry fire) or when the tool runs out of air pressure mid-cycle. The piston slams forward and doesn't have enough resistance to return.
The fix. Disconnect the air supply. Insert a small screwdriver or Allen wrench into the nose of the nailer. Gently push the driver blade backward until you hear or feel it click back into place.
Reconnect the air. Fire a test shot into scrap wood. If it works, you're done.
If it happens again, the piston o-ring is probably worn and needs replacement.
When the Trigger Mechanism Is the Problem
If the dry fire lock is disengaged and the piston moves freely, but the nailer still won't fire, the trigger mechanism itself could be the issue. This is less common but not unheard of on older Campbell Hausfeld models.
The trigger mechanism works like a small air valve. When you pull the trigger, it opens a passage that allows compressed air to push the piston forward. If the trigger valve o-ring is worn or the spring is broken, that passage never opens properly.
The fix. This requires disassembling the handle. Remove the trigger assembly by taking out the pin or screw that holds it in place. You'll see a small piston and spring inside.
Clean everything with mineral spirits. Replace the o-ring on the trigger valve piston. Reassemble and test.
Nails Stick Out or Won't Seat Properly
This is the symptom that drives people crazy because the nailer sounds like it's working fine. It fires. It makes the right noise.
But the nail head sits above the wood surface.
Depth Adjustment: Is It Actually Broken or Just Dirty?
The depth adjustment wheel on Campbell Hausfeld nailers controls how far the driver blade pushes the nail. Turning it clockwise should drive nails deeper. Counterclockwise should make them shallower.
If the wheel turns but nothing changes, the mechanism is probably not broken. It's likely clogged with sawdust or resin. Remove the wheel if possible.
Clean the threads and the mating surface. Apply a tiny amount of oil. Reinstall and test.
If the wheel turns and you can see the nose of the nailer moving up and down but nails still don't sink, the o-ring is the issue. The driver blade isn't getting enough force to push the nail all the way.
Why Using the Wrong Brads Causes More Problems Than Any Other Mistake
This cannot be overstated. Campbell Hausfeld 18-gauge brad nailers are designed to use straight, round-head 18-gauge brads. Not clipped-head.
Not 16-gauge. Not bent wire nails from a bulk bin.
Clipped-head brads are thinner and can slip past the driver blade, causing jams. Cheap brads with inconsistent head sizes can cause feeding problems and misfires. If you've been using whatever nails you found at the bottom of your toolbox, stop.
Buy a fresh box of name-brand 18-gauge round-head brads. You'll be shocked at how many problems disappear.
Air Pressure Settings That Actually Work
Manufacturer specs say 70 to 120 PSI. In practice, you'll get the best results at 90 to 100 PSI for most trim work. For longer brads (1.5 inches and above), run the pressure closer to 110 PSI.
For shorter brads (1 inch or less), 80 PSI is usually plenty.
If you're using a small compressor, let the tank fill completely before you start. Don't try to work while the compressor is cycling. The pressure drop when the compressor kicks on is enough to cause misfires.
Maintenance That Prevents 80 Percent of Problems
You can avoid most of these issues entirely with ten minutes of maintenance every few months.
The Oiling Routine That Takes 10 Seconds
Put two to three drops of pneumatic tool oil into the air inlet before every use. Cycle the trigger a few times. That's it.
This keeps the o-rings lubricated and prevents them from drying out and cracking.
If you use the nailer daily, oil it daily. If you use it once a month, oil it once a month. Do not skip this.
Dried-out o-rings are the leading cause of air leaks, and they're completely preventable.
Cleaning the Magazine Track When Resin Builds Up
The glue on nail strips leaves a sticky residue inside the magazine track. Over time, this creates friction that makes nails feed unevenly. Clean the track every few months or whenever you notice the follower getting sticky.
Remove the magazine. Wipe the track with a clean rag soaked in mineral spirits. Let it dry completely.
Do not use water. Water can cause rust inside the magazine.
O-Ring Replacement: When to Do It and How to Do It Right
Replace the main piston o-ring when you notice reduced firing power or a small air leak from the exhaust port. Keep a spare o-ring in your toolbox. They cost next to nothing and take ten minutes to swap.
When you install the new o-ring, apply a thin layer of pneumatic tool oil to it first. This helps it seat properly and prevents it from pinching during reassembly. Make sure the o-ring sits flat in its groove.
A twisted o-ring will leak immediately.
When to Stop Fixing and Replace
Campbell Hausfeld brad nailers are not premium tools. They're solid, dependable workhorses for the price, but they have a finite lifespan. If you've replaced the o-rings, cleaned the magazine, and confirmed the air pressure is correct, and the nailer still misfires or leaks, it's time to move on.
A replacement brad nailer costs between thirty and sixty dollars as of 2026. That's less than the cost of a service call at most repair shops. The time you spend chasing a ghost problem is worth more than the tool itself.
One caveat: if you have an older model that uses a specific magazine or trigger assembly that's hard to find, it might be worth tracking down a used parts gun on eBay. But for most people, buying new is the smarter move.
Frequently Asked Questions
Can I use 16-gauge nails in an 18-gauge nailer?
No. The magazine and driver guide are machined to accept only 18-gauge brads. Forcing 16-gauge nails will damage the driver blade and cause jams that are difficult to clear.
Why does my nailer work fine sometimes and jam other times?
This usually points to intermittent magazine friction. The magazine track might have partial resin buildup that catches some nail strips but not others. Clean the track thoroughly and try a fresh box of brads.
Is it safe to use WD-40 instead of pneumatic oil?
No. WD-40 is a solvent and degreaser. It will wash away the lubrication on the o-rings and cause them to dry out faster.
Use only genuine pneumatic tool oil.
How do I know if the o-ring is the right size?
Check the parts diagram for your specific model. Most Campbell Hausfeld brad nailers use a #010 or #112 o-ring with a 1/8-inch cross-section. An o-ring sizing kit from a hardware store can help you match the exact size.
My nailer is older than 10 years. Can I still get parts?
Yes, for most models. Campbell Hausfeld still sells replacement parts through their website and through major hardware retailers. O-rings and springs are widely available.
More specialized parts like magazines or trigger assemblies may require searching online parts vendors or eBay.

Similar Posts
































