How To Configure A Mesh WiFi System: Easy Setup Guide
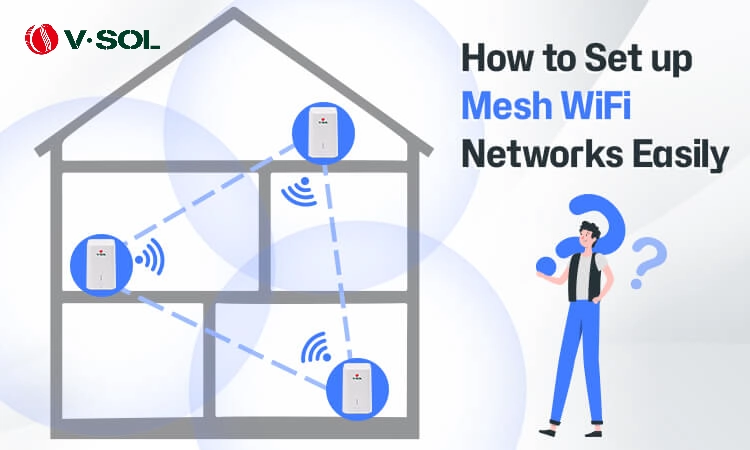
A mesh WiFi system is configured by placing nodes correctly, using the app, and tuning settings for your home layout.
A strong mesh network can feel like upgrading from a narrow hallway to an open floor plan. When it is set up right, your WiFi stops fighting you and starts following you from room to room. In this guide, I’ll walk you through how to configure a mesh WiFi system the right way, based on real setup habits, common mistakes I’ve seen, and the small tweaks that make a big difference.

What a Mesh WiFi System Does
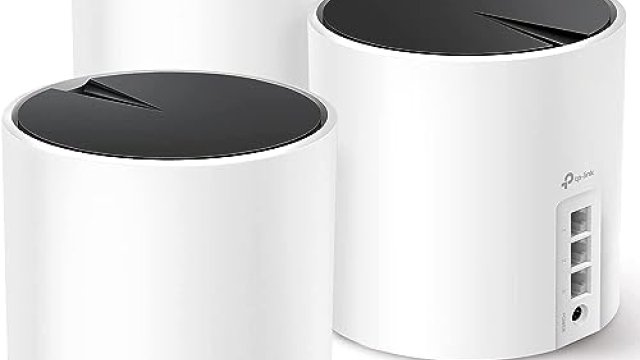
A mesh WiFi system uses one main router and one or more satellite nodes to spread wireless coverage across your home. Instead of depending on a single router in one spot, the system creates a wider, smarter network that helps devices stay connected as you move around.
This is useful in larger homes, multi floor spaces, and places with thick walls. It can also help in homes where a single router leaves dead zones in bedrooms, basements, garages, or home offices.
A mesh system is not magic. It works best when the main unit, nodes, and app settings are all matched to your space. That is why learning how to configure a mesh WiFi system properly matters so much.
Before You Configure Your Mesh WiFi System
Before you plug anything in, take a few minutes to prepare. Good setup starts with placement, internet access, and a clean plan for the network.
Here is what to check first:
• Internet service is active and working
• Your modem is ready
• Your ISP login details are available if needed
• You know where the strongest central spot in the home is
• You have the mesh app installed on your phone
• Your old router is ready to be replaced or switched to bridge mode if needed
I learned this the hard way during one early setup. I rushed the process, placed a node too far away, and blamed the system for a weak signal. The truth was simple: the node was trying to grab a signal that was already too weak.
A little planning saves a lot of frustration later.

Step-by-Step: How to Configure a Mesh WiFi System
1. Unbox and identify the main parts
Most mesh systems come with a main router unit, one or more nodes, power adapters, and an Ethernet cable. Some brands also include wall mounts or quick-start cards.
Take a moment to match each unit with the instructions. Many systems label the main router and nodes differently, and mixing them up can slow the process.
2. Connect the primary mesh unit to your modem
Plug the main mesh router into your modem using the included Ethernet cable. Then connect the power and wait for the lights to stabilize.
If your modem has router functions built in, you may need to place it in bridge mode or modem-only mode. This avoids double NAT issues, which can cause trouble with gaming, video calls, and some smart home devices.
3. Download the mesh app
Most modern mesh systems are configured through a mobile app. Open the app, create or sign into your account, and follow the setup prompts.
The app usually handles:
• Device detection
• Firmware updates
• WiFi name and password setup
• Node pairing
• Security settings
This is where how to configure a mesh WiFi system gets much easier. The app walks you through the basics, but the quality of your final setup still depends on good placement and sensible settings.
4. Create your network name and password
Choose a WiFi name and password you will actually remember. Keep it simple and secure.
A few tips:
• Use one network name for both 2.4 GHz and 5 GHz if the system supports band steering
• Avoid personal details in the network name
• Use a strong password with letters, numbers, and symbols
Many mesh systems automatically combine bands, which helps devices connect to the best signal without you doing anything manually. That is one of the biggest benefits of a mesh WiFi system.
5. Place the first node near the main router during setup
During initial pairing, keep the first node close to the main router. Once the app confirms the node is connected, you can move it to its final spot.
This is a common mistake point. People often try to place the node in its final room too early. If the node cannot get a strong signal during setup, the whole system may perform poorly.
6. Add the remaining nodes one at a time
Add each extra node one by one. Let the app confirm each connection before moving to the next.
For best results:
• Place nodes halfway between the main router and the weak area
• Keep them in open areas, not inside cabinets
• Avoid placing them near microwaves, cordless phones, or large metal objects
• Use floors and walls wisely, especially in multi level homes
Think of each node like a relay runner. If the handoff point is too far, the race gets sloppy.
7. Move nodes to their final locations
After setup, move nodes into their planned spots. Then test signal strength in the rooms you care about most.
A solid rule is to keep each node within good signal range of another node or the main router. If one node is too isolated, it may create a weak chain instead of a strong mesh.
8. Run firmware updates
Firmware updates matter more than many people think. They can improve speed, stability, security, and device compatibility.
During my own testing, one update fixed random drops on a smart TV that had been acting stubborn for weeks. It was a small change with a big payoff.
9. Set up smart features and security options
Many mesh systems offer useful tools such as:
• Parental controls
• Guest networks
• Device prioritization
• Security scanning
• QoS or traffic management
Use only the features you need. The goal is not to turn your WiFi into a control room. It is to make your home network safer and easier to use.
10. Test coverage in real rooms
Walk through the house with a phone or laptop and test WiFi in each important room. Check:
• Signal bars
• Load speed
• Video call quality
• Streaming stability
• Smart device response
Run tests at different times of day if possible. Network traffic can change a lot in the evening when the whole house is online.

Best Placement Tips for a Strong Mesh Network
Placement is often the difference between a great mesh system and a disappointing one. Even the best hardware struggles if the nodes are hidden or spaced badly.
Use these placement tips:
• Put the main router in a central location if possible
• Keep nodes out in the open, not behind TVs or in closets
• Elevate units on shelves or tables for better spread
• Avoid corners, thick walls, and dense objects
• Keep nodes evenly spaced
• Test before finalizing each spot
In real homes, placement has to fight furniture, walls, appliances, and family habits. That is normal. The trick is to work with the layout, not against it.
If your home has multiple floors, place one node on each level if needed. Stairwells, open landings, and hallways often work better than tucked-away rooms.
Common Mistakes to Avoid
A lot of setup problems come from a few repeated mistakes. I have seen these again and again, both in homes and small offices.
• Placing nodes too far apart
• Keeping the main router next to the modem in a bad spot
• Leaving the old router in full router mode
• Ignoring firmware updates
• Using the same poor placement from a previous router setup
• Expecting one node to cover an entire large house
• Hiding nodes inside cabinets or entertainment centers
The biggest mistake is assuming mesh WiFi fixes every layout problem. It improves coverage, but it still needs smart placement and realistic expectations.
How to Configure a Mesh WiFi System for Different Home Types
Small apartments
In small spaces, one main unit and one node may be enough. In some apartments, the extra node may not even be necessary unless you have thick walls or many devices.
Try to keep the main unit central. If the apartment is open, you may only need the base system.
Medium homes
A two or three unit setup often works well here. Put the main router near the modem, then place nodes in the middle of the home and near weaker rooms.
This is where how to configure a mesh WiFi system becomes more about balance than raw power. You want even coverage, not just maximum bars in one corner.
Large homes
Large homes often need more than two nodes, but adding too many can cause overlap and confusion. More is not always better.
Use just enough nodes to cover weak areas with stable links. Test each room before adding another node.
Multi floor homes
For stairs and upper floors, place nodes where signals can travel vertically with fewer obstacles. Open areas near staircases often work better than closed bedrooms.
If you have a basement, one node near the stair landing can sometimes help more than placing it deep in the basement itself.
Advanced Settings Worth Adjusting
Most people never touch the advanced options, but a few can help a lot.
• Band steering: Helps devices choose the best band automatically
• Device prioritization: Gives bandwidth to work devices or streaming boxes
• Guest network: Keeps visitors off your main network
• QoS settings: Helps manage traffic during busy times
• Access point mode: Useful if your existing router must stay in place
Not every system exposes the same controls. Some brands keep things simple, while others offer much deeper customization.
If you are not sure what a setting does, change one thing at a time and test. That is the safest way to learn.
Performance Checks After Setup
Once your mesh WiFi system is running, do a few simple tests.
Check:
• Speed in the room nearest the main router
• Speed in the farthest room
• Signal quality on each node
• Roaming behavior when walking around
• Streaming and video call stability
If you notice drops while moving between rooms, the nodes may be too far apart or overlapping too much. Small placement changes can often fix this without buying more hardware.
I usually tell people to think of the network like a chain of stepping stones. If one stone is slippery or too far away, the whole walk gets messy.
When to Reset and Start Over
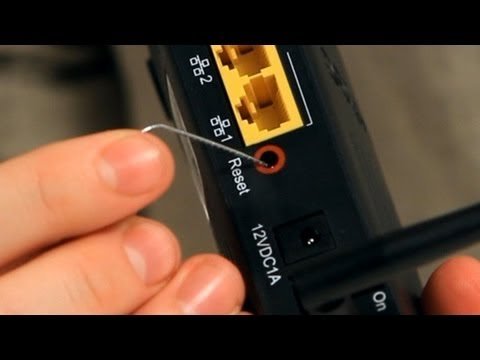
Sometimes the best fix is a clean reset. If setup went wrong, if a node will not pair, or if performance stays poor after placement changes, reset the system and begin again.
A reset is worth trying when:
• The app cannot find a node
• WiFi names or passwords are stuck
• Speeds are unstable for no clear reason
• Firmware updates failed
• The system was moved to a new home
Resetting is not failure. It is often the fastest path to a clean, stable network.
Frequently Asked Questions of How to Configure a Mesh WiFi System
How far apart should mesh WiFi nodes be placed?
Most nodes should be placed where they still get a strong signal from the main router or another node. In many homes, that means halfway between weak zones rather than at the very edge of coverage.
Do I need to replace my old router?
Not always. Some mesh systems can work with your existing router in access point mode, but many people get better results by letting the mesh system handle routing fully.
Can I use mesh WiFi with any internet provider?
Yes, in most cases mesh WiFi works with cable, fiber, DSL, and fixed wireless service. You still need a compatible modem or gateway from your provider.
Why is my mesh WiFi slower than expected?
Slow speeds often come from bad node placement, signal interference, outdated firmware, or a modem/router conflict. Test each node location and update the system before assuming the hardware is weak.
How many mesh nodes do I need?
That depends on your home size, wall materials, and number of floors. Many small homes need two units, while larger or multi floor homes may need three or more for stable coverage.
Conclusion
Configuring a mesh WiFi system is mostly about smart placement, clean setup, and a few careful checks after installation. Once the main unit, nodes, and settings are aligned with your home, the network usually becomes much easier to live with.
The best results come from patience and testing. Start simple, place each node with care, update the firmware, and adjust only when needed. If you want better coverage without constant drops, take the time to configure your mesh WiFi system the right way and enjoy a network that finally keeps up with your day.
If this guide helped, explore more home networking tips and share your setup experience in the comments.

Similar Posts