How To Install A Wifi Range Extender: Easy Setup Guide
A WiFi range extender boosts weak signals by rebroadcasting your router’s wireless network.
If you have ever had WiFi that works great in one room and fades out in another, you already know why this matters. Installing a WiFi range extender is one of the simplest ways to spread coverage through a home, apartment, or small office without replacing your router. I’ve set up more than a few extenders over the years, and the process is usually straightforward once you place the device in the right spot and connect it the right way.
What a WiFi Range Extender Does
A WiFi range extender is a small device that picks up your router’s signal and sends it farther. Think of it like a relay runner passing the baton. It does not create internet on its own. It only helps your existing WiFi reach places where the signal is weak.
That said, not every extender works the same way. Some plug into a wall outlet and use a simple setup app. Others support dual-band or tri-band connections, which can help reduce slowdowns. In my experience, the biggest mistake people make is expecting an extender to fix every network problem. It helps with range, but it cannot fully solve a bad internet plan, a weak router, or thick walls that block signals.
Before You Install a WiFi Range Extender
Before you start, take a minute to check a few basics. This step saves time and prevents a lot of frustration later. I learned this the hard way after setting up an extender too far from the router and wondering why the signal got worse instead of better.
Here is what you should have ready:
- Your WiFi network name and password
- The extender’s model number and setup instructions
- A smartphone, tablet, or laptop for setup
- A free electrical outlet between the router and dead zone
- Access to your router if you need WPS or admin settings
You should also know where your weak WiFi area is. The goal is not to place the extender inside the dead zone. Instead, place it where it still gets a solid signal from the router and can pass that signal onward.
If possible, check your router’s signal strength with your phone in different rooms. A simple rule I use is this: if the router signal is already poor at the extender’s location, the extender will likely underperform there too.
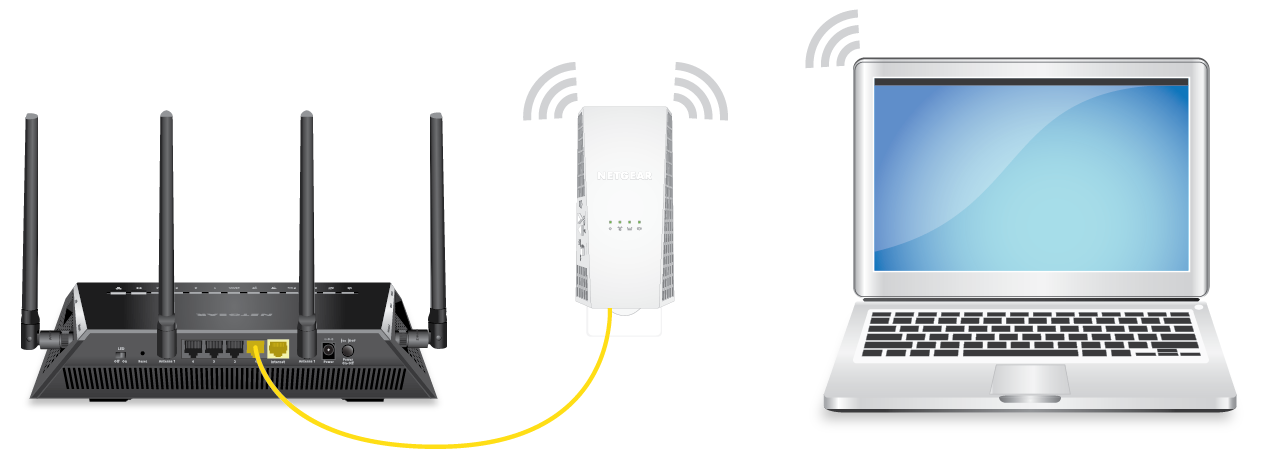
How to Install a WiFi Range Extender Step by Step
The exact setup can vary by brand, but most extenders follow the same basic process. If you want the clearest path, use these steps.
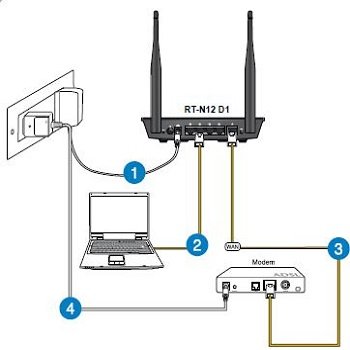
1. Plug in the extender near your router
Start close to your router. This makes the first setup much easier and helps ensure a strong connection during pairing. I usually place the extender in the same room as the router the first time, then move it later.
Wait for the power light to turn on. Some models take a minute or two to boot up fully. If the device has signal lights, do not worry about them yet.
2. Connect the extender to your router
You usually have two main options.
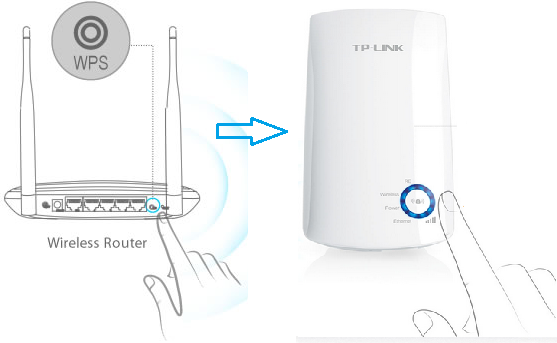
- WPS setup: Press the WPS button on your router, then press the WPS button on the extender. They should connect automatically.
- Manual setup: Connect your phone or laptop to the extender’s temporary WiFi name, then open the setup page or app and enter your home network details.
WPS is fast, but manual setup is often more reliable. Many network pros prefer manual setup because it gives you more control over the name, password, and band settings. That has been my experience too, especially when helping people with older routers.
3. Follow the setup app or browser page
If your extender uses an app, open it and follow the prompts. If it uses a browser setup page, you may need to type in an address like a local setup address listed in the manual. The screen will usually ask you to choose your home WiFi network and enter the password.
Make sure you select the correct band if your router offers both 2.4 GHz and 5 GHz. The 2.4 GHz band usually reaches farther, while 5 GHz often gives faster speeds at shorter distance. If you are unsure, start with the same band your devices already use most often.
4. Rename the network if needed
Some extenders let you keep the same network name as your router. Others add a suffix like “_EXT” or “_Plus.” Both options can work.
If you want your phone or laptop to switch smoothly between the router and extender, a matching or near-matching name can help. But if you want more control during testing, a separate name makes it easier to know which network you are using. I often recommend a separate name during setup, then adjusting it later if needed.
5. Move the extender to the best location
Once the extender is connected, unplug it and move it to a spot between your router and the weak area. The best location is usually about halfway, but not always exactly in the middle. The real goal is a place where it still gets a strong enough signal from the router.
A good test is to look at the extender’s signal lights. If they show a weak link to the router, move the extender closer. If the extender is too close to the router, it may not help the far room enough. Finding the sweet spot is a little like tuning a radio. Small moves can make a big difference.
6. Test your WiFi speed and coverage
After moving the extender, test your connection in the weak room. Open a video, browse a few sites, or run a speed test. You want steady coverage, not just a signal icon that looks full.
If the connection is still slow, try these fixes:
- Move the extender a few feet at a time
- Reduce interference from walls, mirrors, and appliances
- Reboot the router and extender
- Check for firmware updates
- Switch to a different band if supported
In many cases, a small change in placement improves performance more than anything else.

Best Placement Tips for Better Performance
Placement matters more than many people expect. A poorly placed extender can actually make your network feel worse because it repeats a weak signal. That is why I always tell people to think of the extender as a messenger, not a magician.
Use these placement tips:
- Place it where the router signal is still strong
- Keep it away from microwaves, cordless phones, and thick concrete walls
- Avoid hiding it behind a TV or in a cabinet
- Put it in an open area, if possible
- Keep it off the floor and away from metal objects
If your home has several floors, try placing the extender on the staircase landing or an open hallway. That often works better than hiding it inside the dead zone. In apartments, placing it near the doorway between rooms can help spread the signal more evenly.
Common Problems and How to Fix Them
Even when the setup is simple, things can go wrong. The good news is that most problems are easy to fix.
The extender will not connect
If the extender will not connect, check the password first. A single wrong character can block the setup. If you are using WPS, make sure the router supports it and that the button was pressed within the allowed time window.
The WiFi is still weak
If the signal is still poor, the extender may be too far from the router. Move it closer and test again. Also, remember that walls, floors, and appliances can weaken signals fast.
The internet feels slow
An extender can improve coverage, but speed may drop a little because it is repeating traffic. That is normal for many models. To reduce this, use a dual-band or mesh-capable model if you need better performance.
Devices keep switching between networks
If your devices bounce between the router and extender, try adjusting the network names or moving the extender. Some devices are “sticky” and hold onto weaker signals too long. I have seen this happen often with older phones and laptops.
The extender keeps dropping offline
Update the firmware if your model allows it. Also check whether the outlet is stable and whether the extender is overheating. Sometimes the simplest fix is moving it to a better vented spot.
When a WiFi Range Extender Is the Right Choice
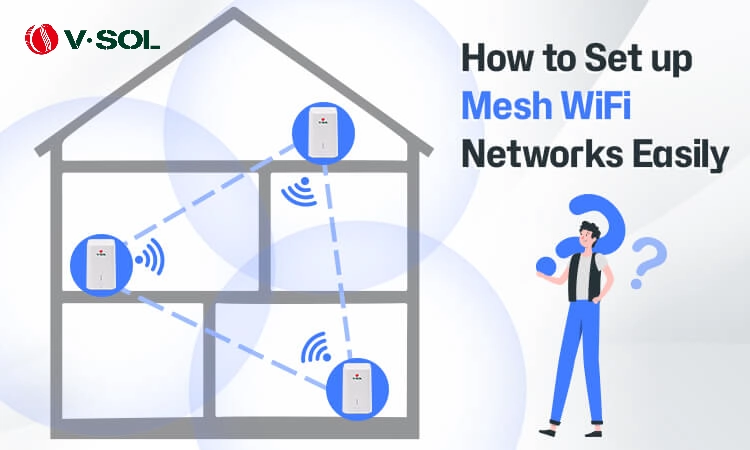
A WiFi range extender is a smart choice when you want better coverage in one or two problem areas. It is often ideal for bedrooms, garages, patios, and upstairs rooms. It is also a budget-friendly option if you do not want to replace your whole network.
Still, it is not always the best solution. If your home is large, has many dead zones, or needs fast speeds everywhere, a mesh WiFi system may work better. That lines up with general guidance from networking professionals and consumer testing groups: extenders are great for range, but mesh systems usually win for whole-home consistency.
WiFi Extender vs. Mesh System
People often confuse these two. They both improve coverage, but they work differently.
A WiFi range extender:
- Repeats your current WiFi signal
- Is usually cheaper
- Works well for smaller coverage gaps
- May reduce speed in some cases
A mesh system:
- Uses multiple coordinated nodes
- Offers smoother roaming between rooms
- Usually performs better in larger homes
- Costs more, but can be easier to manage
If you only need to fix one weak room, installing a WiFi range extender is often enough. If your home has several problem spots, mesh may be the better long-term investment.
Security and Setup Best Practices
Security matters just as much as signal strength. When you install a WiFi range extender, treat it like part of your home network, not just a plug-in gadget.
Here are a few smart habits:
- Use a strong WiFi password
- Update the extender’s firmware when available
- Change the default admin password if the model uses one
- Buy from a trusted brand with regular updates
- Use WPA2 or WPA3 if your router supports it
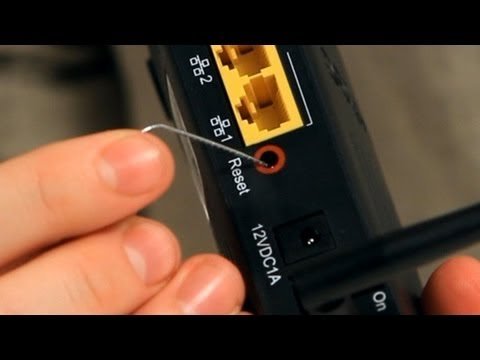
I also suggest writing down the setup details somewhere safe. That helps later if you need to reset the device. A reset is common after power issues or network changes, and having the password handy can save a lot of time.
Real-World Tips From Experience
Over time, I’ve found that successful extender setups usually come down to patience and placement. People often expect instant perfection, but the first spot is rarely the best spot. Moving the device just a few feet can change the result more than restarting it five times.
A few practical lessons stand out:
- Start close, then move outward after setup
- Watch the indicator lights, not just the WiFi bars on your phone
- Test streaming, calls, and browsing, not only speed tests
- Don’t place the extender in the dead zone
- If speeds are still poor, the problem may be the router, not the extender
That last point is important. Sometimes the extender gets blamed for an issue that starts with the router or internet plan. Good troubleshooting means looking at the whole network, not just one device.
Frequently Asked Questions
How do I know where to place a WiFi range extender?
Place it halfway between your router and the weak area, but only where it still gets a good signal. If the extender is too far from the router, it will repeat a weak connection and performance will suffer.
Do I need an app to install a WiFi range extender?
Not always. Many extenders can be set up with a browser page or WPS button instead of an app. The app can make setup easier, but it is not required on every model.
Will a WiFi range extender make my internet faster?
Not usually. It mainly improves coverage, not your internet plan speed. In some cases, it may slightly reduce speed because it is repeating the signal.
Can I use more than one WiFi range extender?
Yes, but it is not always the best idea. Too many extenders can add lag and create a messy network, so a mesh system is often better for larger homes.
Why is my extender connected but the internet is still slow?
The extender may be receiving a weak signal from the router, or the area may have too much interference. Try moving it closer to the router and away from thick walls, metal objects, and electronics.
Should I use the same WiFi name for the extender?
You can, but it depends on your setup goals. Using the same name can make roaming easier, while a different name makes troubleshooting simpler.
Conclusion
Installing a WiFi range extender is one of the easiest ways to improve wireless coverage in a home or office. The main steps are simple: set it up near the router, connect it properly, move it to a strong middle spot, and test the result in the weak area. When you place it well and avoid common mistakes, a WiFi range extender can turn a frustrating dead zone into a usable, steady connection.
If your signal problems are small to moderate, this fix is often enough. If you want, take the next step today by checking your router placement and testing the best spot for your extender. Then explore more home networking tips or leave a comment with your setup question so you can get the most from your WiFi.

Similar Posts