How To Install A Dash Cam: Easy Step-By-Step Guide
A dash cam installs best when you plan the route, hide the wire, and test the camera before driving.
A proper dash cam install is not hard, but it does reward patience, clean cable routing, and a little know-how. I’ve worked through enough installs to know that the difference between a shaky setup and a solid one usually comes down to the small details: power source, mount position, and whether the camera can run without draining your battery. If you want a setup that looks factory neat and works every time you need it, this guide on how to install a dash cam will walk you through it step by step.
What You Need Before You Install a Dash Cam
Before you start the dash cam install, gather everything first. That saves time and keeps you from stopping halfway through because you’re missing a fuse tap or pry tool. A smooth install is a lot like cooking: prep matters more than rushing.
Here’s the basic list most people need:
- Dash cam unit
- Mount oradhesive tape
- Power cable
- MicroSD card
- Fuse tap kit for hardwiring
- Trim removal tool
- Small zip ties or cable clips
- Fuse tester or multimeter
- Alcohol wipes or a microfiber cloth
If you are doing a simple 12V cigarette lighter install, you may only need the camera, cable, and mount. If you want parking mode or a cleaner look, a hardwired dash cam install is usually the better choice.
Also check your car model before you begin. Some vehicles have loose headliner edges, while others have tight trim that needs careful handling. I once rushed a setup in a compact sedan and nicked a plastic clip because I skipped the trim tool. That tiny mistake turned a 20-minute job into a frustrating afternoon.
How to Install a Dash Cam Step by Step
Installing a dash cam is mostly about choosing the right power method and hiding the cable neatly. The actual steps are simple once you know the order. I always tell people to think of it like setting up a phone charger in a tidy room: it should work, but it should also disappear into the background.
1. Choose the Best Mounting Spot
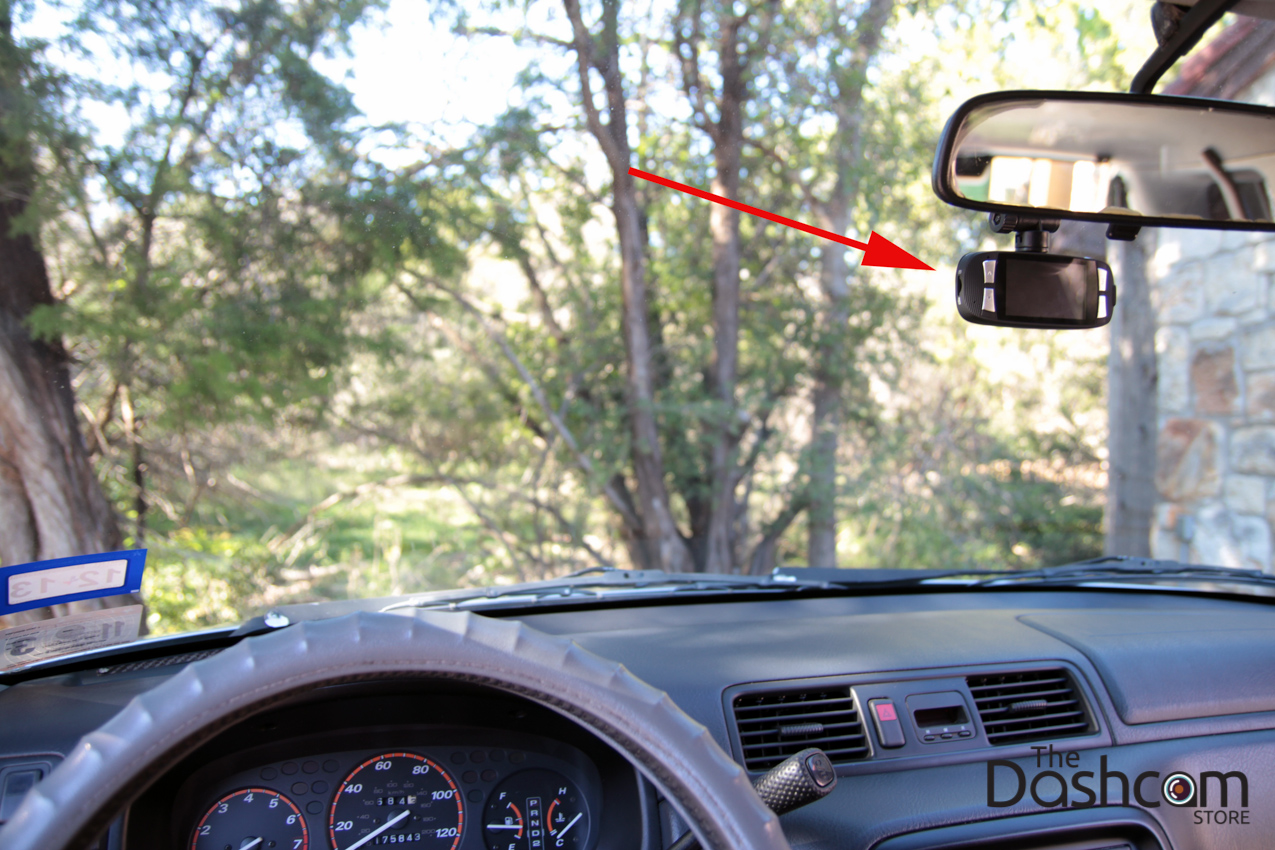
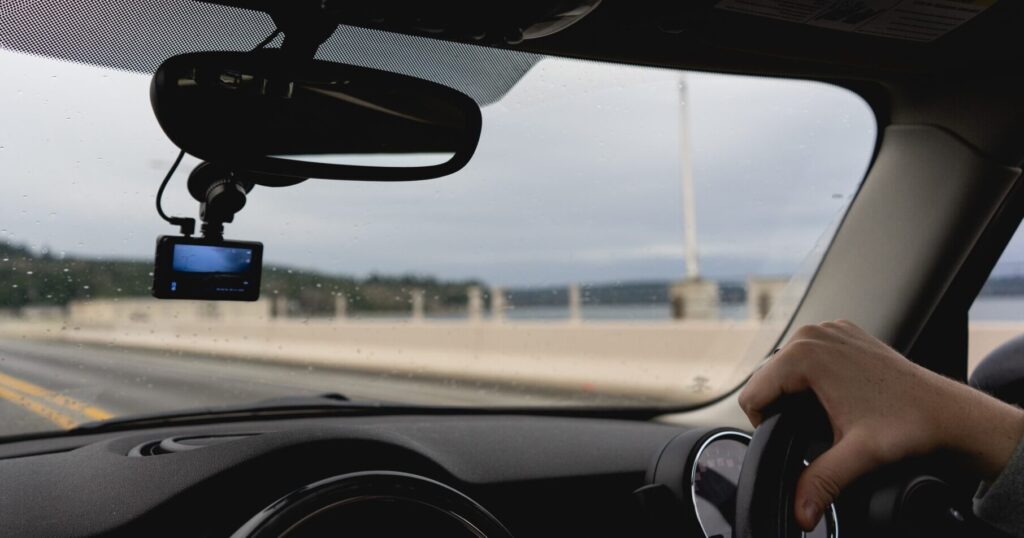
The best place for a dash cam is usually behind the rearview mirror, near the center of the windshield. That gives you a clear view of the road without blocking your sightline. It also keeps the camera less visible from outside, which can help reduce theft risk.
Make sure the lens has a wide, open view. Avoid placing it where the mirror, tint strip, or windshield sensors block the image. On some cars, I’ve seen people mount the camera too low, then wonder why half the hood fills the frame.
2. Clean the Windshield
Before attaching the mount, clean the glass with alcohol wipes or a glass-safe cleaner. Dust, oil, and heat can weaken adhesive over time. If the windshield is dirty, the dash cam may drop later, especially in hot weather.
Let the area dry fully before you stick anything on. This small step matters more than most people think.
3. Attach the Dash Cam Mount
Most dash cams use either an adhesive mount or suction mount. Adhesive mounts usually look cleaner and hold better long term. Suction mounts are easier to remove, but they can loosen with heat and vibration.
Press the mount firmly for the recommended time. If the adhesive pad came with the camera, wait a few minutes before hanging the unit on it. If you install it in a cold garage, warm the glass a little first so the adhesive bonds better.
4. Connect the Power Cable
Now plug the cable into the dash cam. The next step depends on how you want to power it.
You usually have three options:
- 12V power outlet install: easiest and fastest
- Hardwired install: best for parking mode and cleaner wiring
- OBD2 power install: simple middle ground on some vehicles
For many drivers, the 12V outlet is the easiest dash cam install. For a more permanent setup, hardwiring is usually the better long-term answer.
5. Route the Cable Neatly
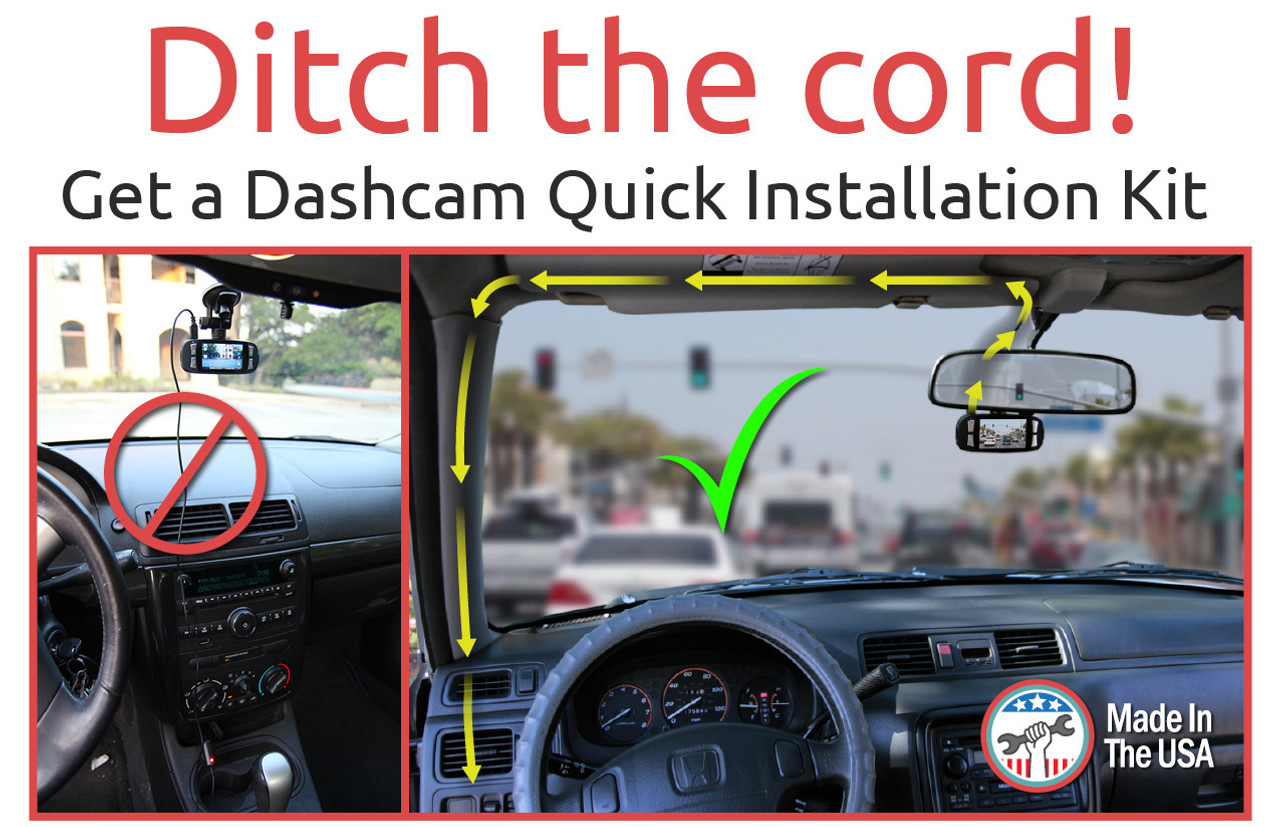
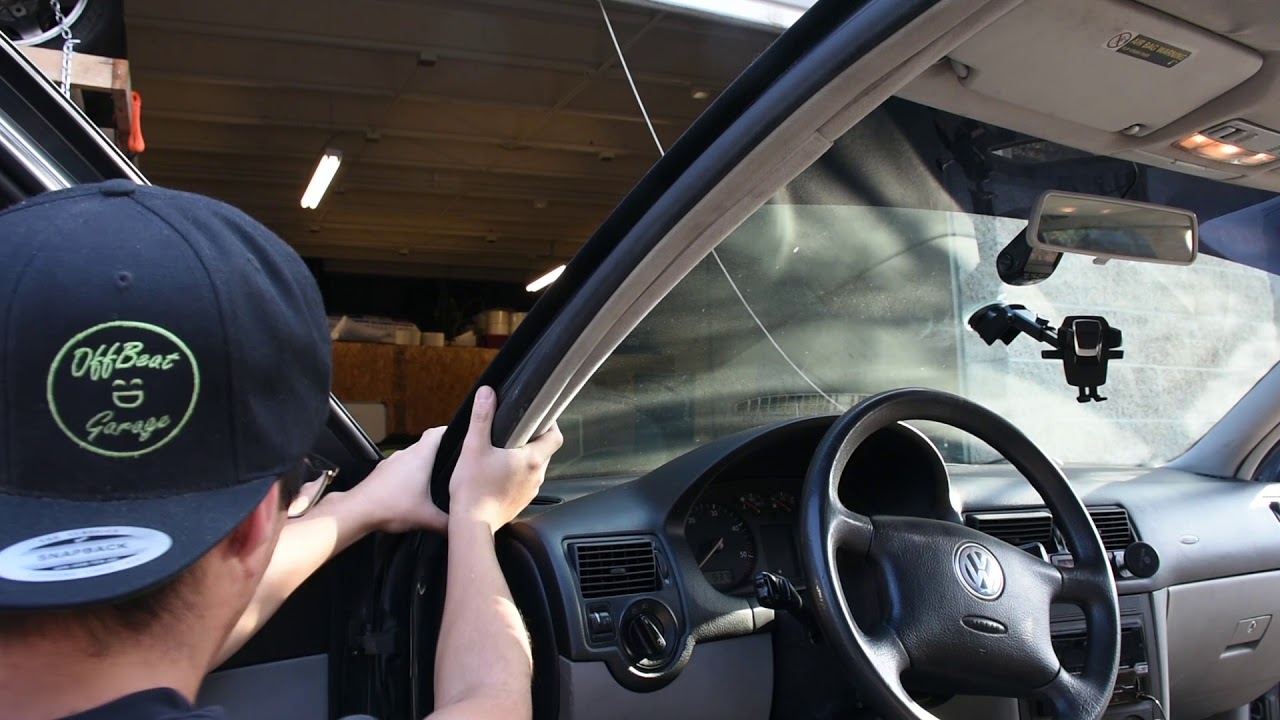
Tuck the cable into the headliner, then down the A-pillar trim, and toward the power source. Use a trim tool so you do not damage the plastic. Keep the wire away from the steering wheel, airbags, and pedals.
This part can feel fiddly, but it’s worth doing right. A loose cable swinging in front of the windshield gets annoying fast. I’ve fixed several “temporary” installs that turned into permanent spaghetti, and almost every time, the owner said the same thing: “I meant to clean it up later.”
6. Connect the Camera to Power
If you are using the cigarette lighter, plug it in and make sure the camera powers on. If you are hardwiring, connect the fuse tap to the correct fuse box location and ground the wire to a metal bolt or grounding point.
For hardwired installs, many dash cams use three wires:
- Constant power for parking mode
- Ignition power to know when the car is on
- Ground for safety and completion of the circuit
If you are not sure which fuses to use, check your vehicle manual or a reliable fuse guide. The wrong fuse choice can cause issues like battery drain, blown fuses, or a camera that resets at the wrong time.
7. Insert the MicroSD Card
A dash cam needs a good microSD card to store video properly. Use a high-endurance card designed for constant recording, not a cheap card from a drawer. Dash cams write and overwrite video all day, and regular cards wear out faster.
Insert the card before you start testing. Format it in the camera if the manual recommends it. This helps avoid file errors and recording glitches later.
8. Adjust the Angle
Turn the camera on and set the lens angle so the road fills most of the frame. You want the horizon level and the hood visible only a little, if at all. Too much sky is a common mistake, and it wastes useful footage.
Sit in the driver’s seat and check what the camera sees. A good angle should capture the lane ahead, nearby vehicles, and traffic lights when possible.
9. Test the Recording
Start the car and confirm the dash cam powers up, records, and saves footage. Then stop the engine and see whether the camera shuts down correctly or enters parking mode if your setup supports it. Check the video quality on the camera screen or app.
I always do a short test drive after a dash cam install. That is where cable rattles, poor angles, and loose mounts show up. A five-minute test can save you from losing important footage later.
10. Secure the Extra Cable
After the camera works, tuck away any extra cable behind trim or inside the glove box area. Use zip ties or clips if needed. The goal is a clean finish with no dangling wire in sight.
A neat install is not only about looks. It also reduces distractions and makes the setup feel like it belongs in the car.
Hardwired vs. Plug-in Dash Cam Install
The best power option depends on how you drive and what features you want. Both methods work, but they solve different problems. When people ask me which one to choose, I usually say: if you want simplicity, go plug-in; if you want parking protection, go hardwired.
Plug-in Install
A plug-in dash cam install uses the 12V socket or accessory outlet. It is the easiest route for beginners. You just connect the power cable and start using the camera.
Benefits include:
- Fast setup
- No fuse box work
- Easy to remove when needed
- Lower risk for first-time installers
Limitations include:
- Visible cables if not routed well
- May turn off with the car
- Usually no parking mode
Hardwired Install
A hardwired dash cam install connects directly to the fuse box. It is more work, but it gives a cleaner look and often supports parking mode. This is the setup I recommend for drivers who park on the street or want all-day coverage.
Benefits include:
- Cleaner finish
- Parking mode support
- No need to use the 12V outlet
- More permanent installation
Limitations include:
- More tools required
- Needs basic electrical care
- Possible warranty concerns if done poorly
According to road safety and insurance research, video evidence can help settle claims more clearly, especially in disputed accidents. That is one reason many drivers see dash cams as more than just gadgets. They are like a silent witness riding with you.

How to Hide Dash Cam Wires the Right Way
Clean cable management is one of the biggest signs of a good dash cam install. It makes the car look factory fitted instead of improvised. It also helps keep the wire safe from wear and snagging.
Here are the best ways to hide dash cam wires:
- Tuck the wire into the headliner first
- Run it along the A-pillar trim
- Keep it away from airbags
- Use trim tools instead of metal tools
- Secure loose sections with small clips or ties
One thing to remember: some A-pillars contain side curtain airbags. Do not run the cable where it could interfere with airbag deployment. If you are unsure, route the wire around the trim, not across it. Safety always comes first, even if it takes a little longer.
Common Mistakes to Avoid During Dash Cam Installation
A lot of dash cam problems come from small install mistakes, not bad cameras. I’ve seen good models fail simply because the setup was rushed. The camera is only as good as the install behind it.
Avoid these common mistakes:
- Mounting the camera too low or too high
- Using a weak or old memory card
- Forgetting to format the card
- Leaving loose cables visible
- Blocking the camera with the mirror or tint strip
- Connecting the wrong fuse when hardwiring
- Ignoring airbag paths in the trim
- Skipping the test recording step
One of the biggest issues I’ve seen is heat. Dash cams mounted too close to the top edge of a hot windshield can overheat in summer. If your climate is very warm, choose a camera rated for high temperatures and use quality adhesive.
How to Install a Dash Cam with Parking Mode
Parking mode is one of the main reasons people choose a hardwired dash cam install. It lets the camera record while the car is parked, often using motion detection or impact detection. That can help capture hit-and-run events, parking lot damage, or suspicious activity.
To use parking mode, you usually need:
- A hardwire kit
- A constant power fuse
- A low-voltage cutoff feature
- A camera that supports parking recording
Low-voltage cutoff is important because it helps protect your car battery from draining too far. This feature is a smart safety net, especially if your car sits for long periods. In my experience, this is the part people forget most often, then they wonder why the battery feels weak after a week of parking mode use.
How to Tell if the Dash Cam Is Working Properly
After you install a dash cam, do not assume it works just because the screen lights up. A proper check means testing the power, recording, file saving, and shutdown behavior. Think of it like checking the brakes after new pads are fitted.
Look for these signs:
- The camera turns on when the car starts
- Recording begins automatically
- Footage saves correctly to the memory card
- The camera shuts down cleanly when power is off
- Parking mode activates if supported
- The image is level and clear
If your video is shaky, blurry, or crooked, adjust the mount before you drive. It is much easier to fix the angle now than after you need the footage.
Maintenance Tips After You Install a Dash Cam
A dash cam does not need much care, but a little maintenance goes a long way. Regular checks keep it reliable and ready. I treat dash cams like smoke alarms: you want to know they work before you need them.
Keep up with these habits:
- Format the microSD card every few weeks or per the camera manual
- Check the mount for heat damage or looseness
- Clean the lens with a soft microfiber cloth
- Review footage now and then
- Update the firmware when needed
- Replace worn memory cards on schedule
If your camera starts failing, the card is often the first thing to check. Dash cam memory cards wear out faster than people expect because they record constantly. A high-endurance card helps, but it is still smart to replace it once it shows signs of trouble.
Frequently Asked Questions of How to Install a Dash Cam
Do I need a professional to install a dash cam?
Not always. Many dash cams are easy to install with a plug-in power source and basic cable routing. If you want hardwiring or parking mode and do not feel comfortable working with fuses, a professional install can be worth it.
How long does it take to install a dash cam?
A simple plug-in dash cam install may take 15 to 30 minutes. A hardwired install often takes 45 minutes to 2 hours, depending on the car and how carefully you hide the wires.
Can a dash cam drain my car battery?
Yes, if it is hardwired without a low-voltage cutoff or left in parking mode too long. Most modern hardwire kits include battery protection, which helps reduce that risk.
Where should I place the dash cam on the windshield?
The best spot is usually behind the rearview mirror, centered and high on the windshield. That keeps the view clear while giving the camera a wide look at the road ahead.
What kind of memory card should I use?
Use a high-endurance microSD card made for dash cams or surveillance use. Regular cards can fail sooner because dash cams record and overwrite video all the time.
Can I install a dash cam in any car?
Most vehicles can support some form of dash cam install. The main differences are power access, trim design, and whether the fuse box is easy to reach.
Conclusion
Installing a dash cam is one of those upgrades that feels small until the day it saves you a big headache. If you choose the right power method, mount it in a good spot, and route the cable neatly, you can get a clean setup that works every day with very little upkeep. A careful dash cam install gives you better footage, less clutter, and more peace of mind on the road.
If you are ready, take your time, follow the steps, and test everything before you drive away. A few extra minutes now can make all the difference later. If this guide helped, explore more car safety tips, share it with a friend, or leave a comment with your own dash cam install experience.

Similar Posts