How To Mount An Action Camera: Easy Pro Tips
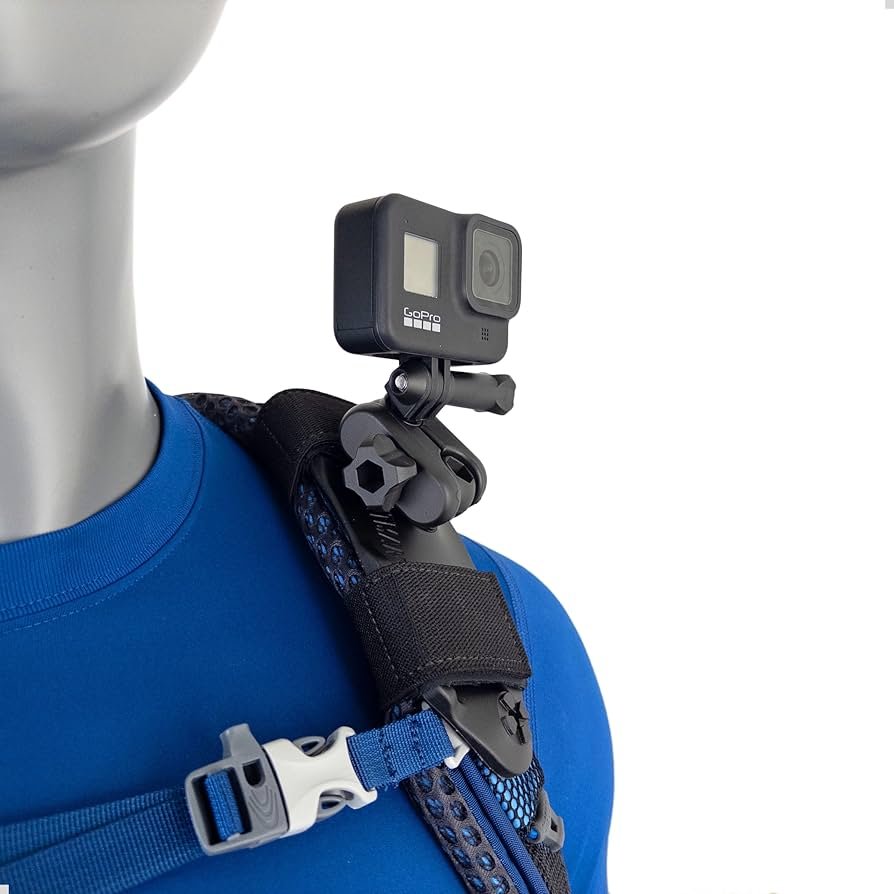
Mount an action camera by choosing the right mount, cleaning the surface, and locking it down securely.
If you want steady, useful footage, the mount matters just as much as the camera itself. I’ve tested action camera setups on helmets, bikes, cars, tripods, and even tricky curved surfaces, and the same rule always applies: good placement, solid attachment, and a quick safety check make the biggest difference. In this guide, I’ll walk you through how to mount an action camera the right way, so you get cleaner shots, fewer shake issues, and less risk of losing your gear on the move.

How to Mount an Action Camera the Right Way
Mounting an action camera is really about three things: choosing the best angle, using the right mount for the job, and making sure everything stays secure. A shaky or loose setup can ruin footage fast, and in some cases, it can even damage your camera.
The good news is that the process is simple once you know the basics. Whether you are filming sports, travel, motorsports, or everyday clips, the same core steps apply.
Start with the Right Mount for Your Activity
Not every mount works for every situation. A helmet mount is great for first-person footage, while a suction mount is better for smooth car shots. A tripod adapter works well for static shots, and adhesive mounts are common for bikes, boards, and helmets.
Here are the most common mount types:
- Helmet mounts: Useful for immersive POV shots
- Chest mounts: Great for stable action footage and a natural angle
- Handlebar mounts: Best for bikes, scooters, and motorbikes
- Suction mounts: Ideal for cars and other smooth surfaces
- Adhesive mounts: Good for curved or flat hard surfaces
- Tripod mounts: Best for stable, stationary filming
From my own experience, people often choose a mount based on what looks cool instead of what fits the activity. That usually leads to bad framing or loose hardware. The safest approach is to match the mount to the motion and surface.
Check the Camera Compatibility
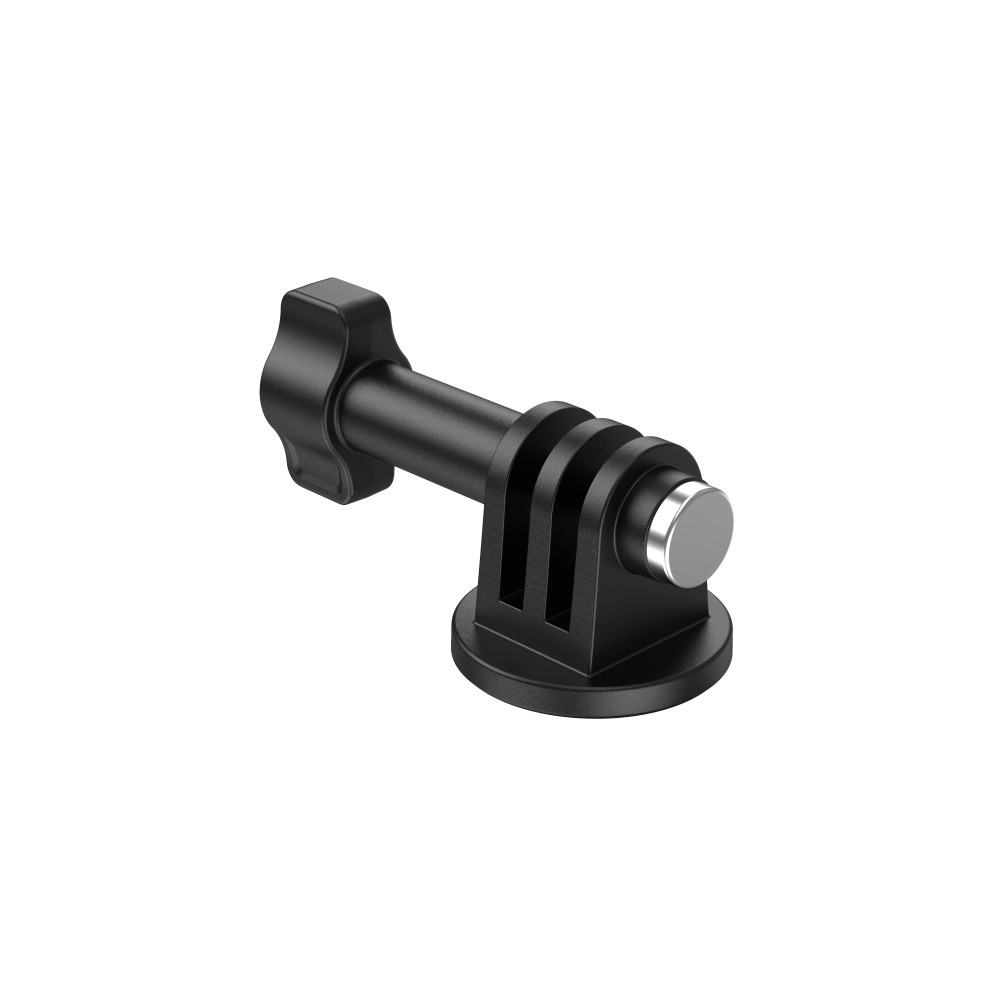
Before you attach anything, make sure your action camera works with the mount system. Most brands use a standard two-prong mount or a similar adapter system, but not all accessories are universal.
Check for:
- Mount size and connector style
- Screw length and tightening method
- Adapter compatibility
- Weight support for the mount
If the mount and camera do not line up well, the setup may tilt, wobble, or pop free under stress. I once tried a third-party adapter that looked fine on the desk but shifted during a bumpy ride. It held for a minute, then slowly rotated until the shot was useless.
Clean the Surface First
This step sounds small, but it makes a huge difference. Dust, oil, and moisture can weaken adhesive pads and suction cups. A mount that seems secure at first may fail later if the surface was not prepared properly.
Use these steps:
- Wipe the surface with a clean microfiber cloth
- Remove grease or dirt with rubbing alcohol
- Let the surface dry completely
- Press adhesive mounts firmly for the recommended time
For curved helmets, boards, or car panels, surface prep is not optional. It is the foundation of a strong hold.
Position the Camera for the Best Angle
Once the mount is secure, think about what you want the video to show. A good angle makes your footage feel smooth and intentional, while a bad one can make everything look awkward or crooked.
Helpful tips for framing:
- Center the horizon when possible
- Tilt slightly downward for activity shots
- Avoid blocking the lens with straps, hands, or gear
- Test the angle before you start moving
A small angle shift can change the whole feel of the video. When I mount an action camera on a helmet, I usually do a quick test recording and check whether the frame captures too much sky or too much chin. It saves time later.

How to Mount an Action Camera on Different Surfaces
Different surfaces need different mounting methods. What works on a bike may not work on a surfboard or dashboard. If you learn the surface first, you can pick a safer setup and avoid trial and error.
On a Helmet
Helmet mounting is popular because it gives a strong point-of-view shot. The trick is to keep the camera low-profile and balanced so it does not feel heavy or awkward.
Steps to follow:
- Clean the helmet shell with alcohol and let it dry
- Choose a curved adhesive mount for curved helmets
- Place the camera where it will not block vision
- Press the adhesive firmly and let it cure if needed
- Use a safety tether if available
Do not mount on a weak spot, vent, or loose accessory area. If the helmet is for safety use, make sure the mount does not interfere with its main function.
On a Bicycle or Motorcycle
Handlebar and stem mounts are common for two-wheel filming. They are easy to install and often provide a stable forward-facing view.
Best practices include:
- Use a mount made for the bar diameter
- Tighten all clamp screws evenly
- Add a rubber insert if the mount includes one
- Aim the camera slightly downward to capture the road and scenery
- Check for cable interference or brake line contact
Vibration is the biggest issue here. A mount that feels tight in the garage may still shake on rough roads, so test it on a short ride first.
On a Car
For car footage, suction mounts and dashboard mounts are the most useful. Suction mounts work best on smooth glass or polished panels.
To mount safely:
- Clean the glass or panel completely
- Attach the suction cup to a smooth, dry surface
- Lock the suction mechanism fully
- Tug lightly before driving
- Avoid placing it where airbags deploy
This last point is important. A camera should never block your view or sit in an area that could interfere with vehicle safety systems.
On a Tripod
If you want steady, fixed shots, a tripod is a simple and reliable option. This is one of the easiest ways to mount an action camera because it works well for travel, tutorials, and time-lapses.
Use a tripod adapter if needed, then:
- Screw the camera in snugly
- Adjust the legs on a flat surface
- Keep the tripod away from edges or wind
- Add a weight or bag for extra stability outdoors
I use tripods often for product shots because they let me frame carefully without worrying about movement. They are also the easiest option when you need repeatable angles.
On a Chest Harness
Chest mounts give a stable, body-level view that feels natural and less shaky than a helmet mount in some situations. They are especially useful for sports like skiing, mountain biking, and hiking.
To use one well:
- Adjust the straps so the harness fits snugly
- Place the camera in the center of the chest
- Test the angle while standing and moving
- Make sure the camera is not bouncing
The key is comfort. If the harness is too loose, the footage will bob up and down. If it is too tight, it becomes distracting fast.
Step-by-Step: How to Mount an Action Camera Securely
A secure setup is not just about tightening a screw. It is about building confidence in the mount before you start recording.
Step 1: Gather Your Gear
Before you begin, make sure you have:
- The action camera
- The correct mount
- The mounting screw or adapter
- A cleaning cloth
- Alcohol wipes or cleaning solution
- Optional safety tether or backup strap
Having everything ready keeps the process smooth and reduces the chance of rushing.
Step 2: Inspect the Mount
Look for cracks, worn rubber, stripped threads, or weak clips. Even a small defect can fail under pressure, especially during high-speed movement.
If anything looks damaged, replace it. I have seen perfectly good cameras get saved by a simple habit of checking accessories before every trip.
Step 3: Clean and Dry the Mounting Area
Wipe away dirt, sweat, dust, and oil. Then let the area dry fully before placing adhesive or suction mounts.
This matters because clean contact equals stronger grip. Think of it like sticking tape to a dusty table versus a clean one.
Step 4: Attach the Mount
Place the mount carefully and press it into position. If it is adhesive, apply firm pressure and give it time to bond. If it is a clamp, tighten it evenly so it sits straight.
Avoid forcing the mount into place. A forced fit often creates stress points that loosen later.
Step 5: Attach the Camera
Slide or click the camera into the mount, then tighten the screw until it feels secure. Do not overtighten if the threads are small or the parts are plastic.
The camera should sit firm without wobble. If it moves, the setup is not done yet.
Step 6: Test the Angle and Stability
Before filming, shake the setup lightly and check the frame on the camera screen or app. Move around if possible and see whether the shot stays level.
A short test can save a long reshoot. This is especially true for action camera mounting on bikes, helmets, and moving vehicles.
Step 7: Add a Safety Backup
For expensive gear or high-motion use, a safety tether is worth it. If the main mount fails, the tether can keep the camera from falling away completely.
It is a simple backup that can prevent a costly mistake.

Tips for Better Footage After Mounting
Mounting an action camera well is not just about holding it in place. It is also about getting clean, watchable footage.
A few small habits help a lot:
- Keep the horizon level when possible
- Use the widest useful field of view
- Avoid placing the camera too high if it makes the shot unstable
- Reduce vibration with rubber inserts or padded mounts
- Check lighting direction so the lens does not face harsh glare
- Clean the lens before every shoot
One of the biggest mistakes I made early on was ignoring lens smudges. The footage was technically fine, but it looked soft and hazy. A quick wipe would have fixed it.
When to Use Accessories
Some accessories make mounting easier and safer. These include extension arms, anti-vibration pads, quick-release clips, and waterproof housings.
Use them when you need:
- A better angle
- Less vibration
- Extra protection in rain or dust
- Faster swaps between setups
Just remember that every added piece can create more bulk. Keep the setup as simple as possible while still meeting your filming goal.
Common Mistakes to Avoid
A lot of mounting problems come from simple oversights. Most of them are easy to prevent.
Watch out for these mistakes:
- Mounting on a dirty surface
- Using the wrong adapter
- Overtightening plastic parts
- Ignoring vibration
- Blocking the lens with straps or gear
- Forgetting to test the camera before the main activity
- Mounting in a way that affects safety equipment
The best setups are often the cleanest ones. You want the mount to do its job quietly in the background, like a good seatbelt.

Benefits and Limitations of Proper Action Camera Mounting
A well-mounted action camera gives you more than just stable footage. It also improves comfort, safety, and shooting confidence.
Benefits
- Better video quality with less shake
- More consistent framing
- Safer filming during sports or travel
- Less chance of losing the camera
- Easier hands-free recording
Limitations
- Some mounts can leave adhesive residue
- Curved or rough surfaces may reduce grip
- Strong vibration can still affect footage
- Not every mount fits every camera or activity
- Poor placement can still create bad angles
Good mounting helps a lot, but it cannot fix every filming problem. If the camera settings are wrong or the scene is too dark, the footage can still suffer.
Frequently Asked Questions of How to Mount an Action Camera
How do I know which action camera mount to use?
Choose the mount based on the surface and activity. Helmet mounts work well for POV shots, suction mounts work best on smooth surfaces, and clamp mounts are great for bars or poles.
Can I mount an action camera without drilling holes?
Yes, most action camera setups do not require drilling. Adhesive mounts, suction mounts, clamps, and straps are all common no-drill options.
How long should I wait before using an adhesive mount?
It is best to follow the mount instructions, but many adhesive mounts need some time to bond before heavy use. In general, giving it a full set period helps improve hold, especially on curved or outdoor surfaces.
What is the safest way to mount an action camera on a helmet?
Use a mount designed for helmets, place it where it does not affect vision, and make sure the adhesive bonds to a clean surface. A safety tether is also smart if you want extra protection.
Why does my action camera footage shake even when the mount feels tight?
That usually happens because of vibration, not loose parts. Rubber inserts, better mount placement, and more stable attachment points can help reduce shake.
Can I mount an action camera in the rain?
Yes, if the camera and mount are rated for wet use or protected with a waterproof housing. Still, check that the mount stays secure on wet surfaces and dry it after use.
Conclusion
Mounting an action camera the right way comes down to smart placement, the right hardware, and a careful setup check before you hit record. Once you understand the surface, the motion, and the angle you want, the rest gets much easier.
Take a few extra minutes to clean the surface, test the mount, and secure the camera properly. That small effort can turn shaky, frustrating clips into footage you will actually want to keep and share. If you are planning your next shoot, try these steps and see how much better your results become.

Similar Posts





























[…] See also How To Mount An Action Camera: Easy Pro Tips💡 Our Insight […]
[…] sunlight to darker underwater scenes, something cheaper cams struggle with. Paired with a good action camera mount, it also works great on a mask strap or handheld tray. The touchscreen is responsive even with a […]
[…] you’re new to this category, securing a camera to a helmet or handlebar is a skill on its own. And before you head out, the right settings before you leave the house can […]
[…] It's worth noting this model isn't positioned for underwater swimming, so treat it as a land-based vlogging tool that pairs well with getting the basics of mounting right. […]
[…] helmet mount, the footage stays stable and the shadows stay detailed. A couple of minutes spent on mount placement before the ride makes a bigger difference than any […]
[…] you settle on a mount, think about proper camera positioning, because the mount's length and angle control whether the chin vent appears in your […]
[…] is what you want for capturing a jump or a splash in genuine slow motion. Owners also noted that a solid mounting strategy matters more with this camera, since its stabilization is already so […]
[…] with riders getting through full 90-minute trips and still having battery left. Pair it with proper mounting so the camera angle stays stable at speed. The IPX6 rating covers light rain without […]