Kawasaki Ft730v Efi Problems
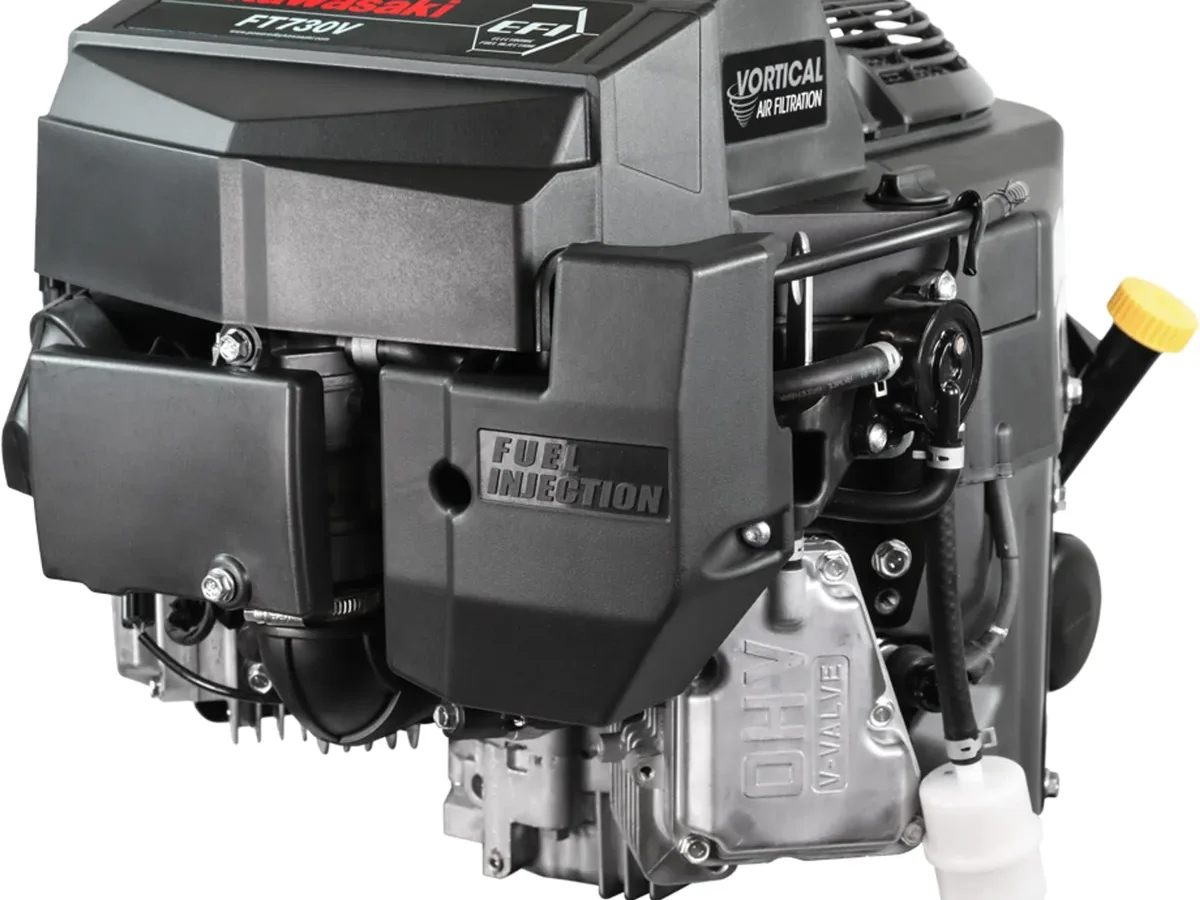
If your Kawasaki FT730V EFI powered mower won't start, runs rough, or stalls under load, you are not alone. Kawasaki FT730V EFI problems are frustrating. The electronic fuel injection system hides its failures behind blinking lights and subtle symptoms. A carbureted engine tells you what is wrong. An EFI system just stops working.
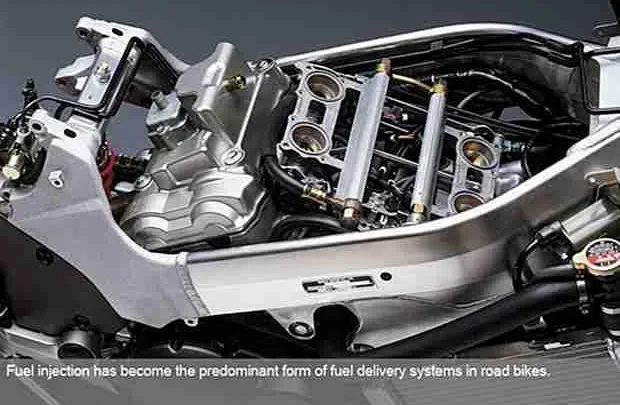
The FT730V EFI is a 726 cc V-twin engine that meets EPA Phase 3 emissions standards. As of 2026, it remains a common powerplant in zero-turn mowers from brands like Dixie Chopper, Ferris, and Kawasaki's own commercial lineup. The system uses a sealed ECU, a single injector per cylinder, and a set of sensors that must all agree before the engine fires. When one fails or a ground connection corrodes, the engine goes dead.
Quick Answer
The most common Kawasaki FT730V EFI problems are fuel delivery failures and sensor faults. A failed fuel pump, clogged injector, or bad crank position sensor stops the engine cold. Start with the ECU blinking code. Then check battery voltage, fuel pressure, and crank sensor resistance in that order. The engine needs 40 to 50 psi of fuel pressure and a crank sensor reading between 150 and 200 ohms to run. A corroded ECU ground connection causes more no-starts than any sensor.
Why the Kawasaki FT730V EFI Acts Up: The Real Failure Points
The FT730V EFI runs in harsh conditions on a mower deck. Heat, vibration, dust, and ethanol fuel create a perfect storm for electrical and fuel system failures. The system has only a handful of components that actually fail.
First cause: ethanol gasoline. The FT730V EFI handles up to 10 percent ethanol. Ethanol attracts water. That water separates from the fuel over time, especially if the mower sits. Water settles at the bottom of the tank and gets pulled into the fuel pump. Water does not lubricate the pump's internal components and causes corrosion inside the injector and fuel pressure regulator. Commercial mower mechanics report fuel system contamination as the number one cause of no-start. If your mower sat unused for more than a month, start with the fuel system.
Second cause: corrosion at the ECU ground. The ECU grounds through a black wire attached to a stud on the engine block or frame. The stud is exposed to grass clippings, moisture, and battery acid fumes. Over time, corrosion adds resistance. The ECU needs a solid ground to operate the fuel pump relay and injectors. Even small corrosion can mimic a dead ECU. A quick wire brush cleaning fixes this in thirty seconds. Many mechanics replace the ECU before checking the ground.
Third cause: failed crank position sensor. The crank position sensor is a magnetic pickup that reads a reluctor wheel on the flywheel. It tells the ECU when to fire injectors and spark plugs. When it fails, the ECU does not know the engine position and refuses to fire injectors. The engine cranks strongly but never tries to start. This sensor is a common failure and easy to test with a multimeter.
Fourth cause: injector clog. The FT730V EFI uses a single injector per cylinder with very small orifices. When the mower sits, fuel evaporates inside, leaving varnish and deposits. A partially clogged injector causes rough idle and surging. A fully clogged injector makes the engine run on one cylinder or not at all. Professional cleaning is possible, but many mechanics replace it because cost nearly matches a new injector.
Fifth cause: throttle position sensor drift. The throttle position sensor is a potentiometer. Over time the wiper track wears unevenly, causing the voltage signal to wander. The ECU sees erratic throttle position and responds with hunting idle or surging under load. The sensor is not adjustable; replacement is the only fix.
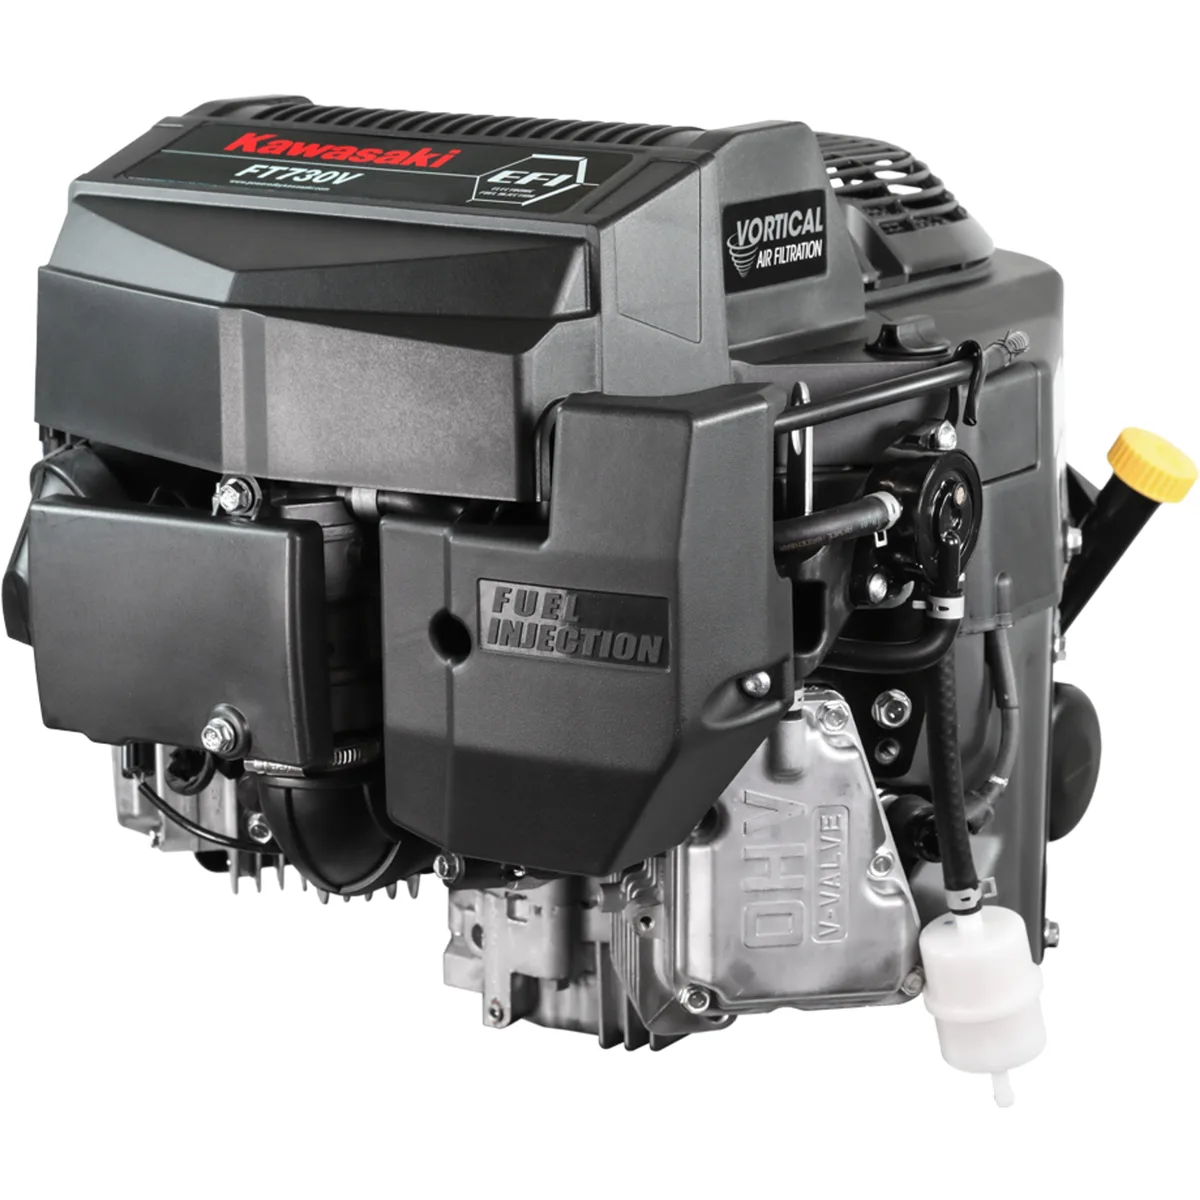
Image source: Bing (Web (fair-use with source credit))
Before You Touch Anything: Safety First and Essential Tools
Working on an EFI fuel system involves pressurized fuel lines and electrical components. Take precautions. The FT730V EFI system holds pressure in the fuel rail even with the engine off. Opening a fuel line without depressurizing sprays fuel.
Depressurize the fuel system properly. Locate the fuel pump relay in the fuse box. Remove the relay. Crank the engine for five to ten seconds. The engine may try to start on residual fuel but will stall. Fuel pressure drops to zero. Then you can safely disconnect fuel lines.
Disconnect the battery negative terminal. This prevents accidental shorts and protects the ECU from voltage spikes. Connect the battery only when a test requires power.
Gather these tools before you begin:
| Tool | What it tests |
|---|---|
| Digital multimeter | Battery voltage, crank sensor resistance, ground continuity |
| Fuel pressure test kit with Schrader adapter | Fuel pressure at the rail |
| Noid light | Injector pulse signal from ECU |
| Compression tester | Mechanical health of cylinders |
| Vacuum gauge | Intake restriction and valve timing |
| Wire brush and dielectric grease | Cleaning ground connections |
| Spark plug socket and gap tool | Spark plug condition and gap |
You do not need all tools for every problem. The multimeter and fuel pressure test kit are used most often. Ensure the multimeter has a frequency (Hz) function for crank sensor testing.
Work in a clean area. The engine has exposed connectors. Before unplugging anything, blow compressed air around connectors. Use contact cleaner on any connector you disconnect. Apply dielectric grease before reconnecting.
Understand the ECU reset procedure. The ECU stores fault codes. After fixing a problem, clear codes by disconnecting the battery negative terminal for ten seconds, then reconnecting. Many mechanics skip this and chase ghost problems.
The Three Most Common No-Start Culprits (and How to Check Them)
When the engine cranks but won't start, the FT730V EFI needs three things: fuel pressure, spark timing, and injector pulse. These three components account for roughly 80% of no-start conditions.
Fuel Pump and Pressure – The Ethanol Enemy
The FT730V EFI uses an in-tank electric fuel pump or an inline pump depending on the mower manufacturer. These pumps are reliable for about 500 to 800 hours. After that, internal brushes wear or the check valve fails. The most common symptom is a humming pump that does not build pressure.
Testing fuel pressure. Connect a fuel pressure test kit to the Schrader valve on the fuel rail. With the key on and engine off, pressure should rise to 45–55 psi and hold. If pressure drops immediately after the pump stops, the check valve is leaking. If pressure never exceeds 30 psi, the pump is weak or the fuel filter is clogged.
The ethanol factor. Ethanol fuels absorb water. When water concentration reaches about 0.5%, phase separation creates a layer of watery ethanol at the bottom of the tank. The fuel pump pickup sits at the bottom and pulls that contaminated fuel, corroding the pump's commutator and brushes. If your mower sits more than two months, drain the tank completely and refill with fresh fuel.
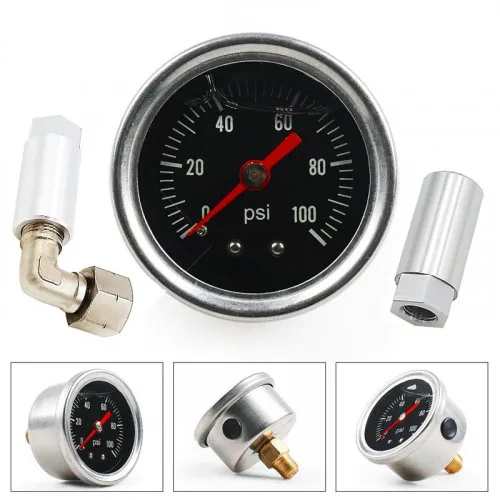
Image source: Bing (Web (fair-use with source credit))
Fuel filter location and service interval. The FT730V EFI has a small inline fuel filter between the pump and the fuel rail. Replace it every 200 hours or once per season. A clogged filter causes low fuel pressure and surging. Replace the filter before the pump.
Crank Position Sensor – The Silent Stopper
The crank position sensor sits on the side of the engine block near the flywheel. It is a small black plastic component held by a single bolt with a two-wire connector. When it fails, the ECU receives no crank signal, shuts off the fuel pump relay and injector pulse. The engine cranks but never fires.
Testing the crank sensor with a multimeter. Disconnect the sensor connector. Measure resistance across the two pins. Specification is 150–200 ohms at room temperature. Open, shorted, or out-of-range readings mean replacement. A sensor that reads 150 ohms cold but jumps to 500 ohms when hot is also failed—thermal failure is common.
Testing the sensor output signal. Set multimeter to AC voltage and crank the engine. The sensor should produce at least 0.5 volts AC. Less indicates a wide air gap or weak sensor. The air gap should be 0.5–1.0 mm; no adjustment is possible.
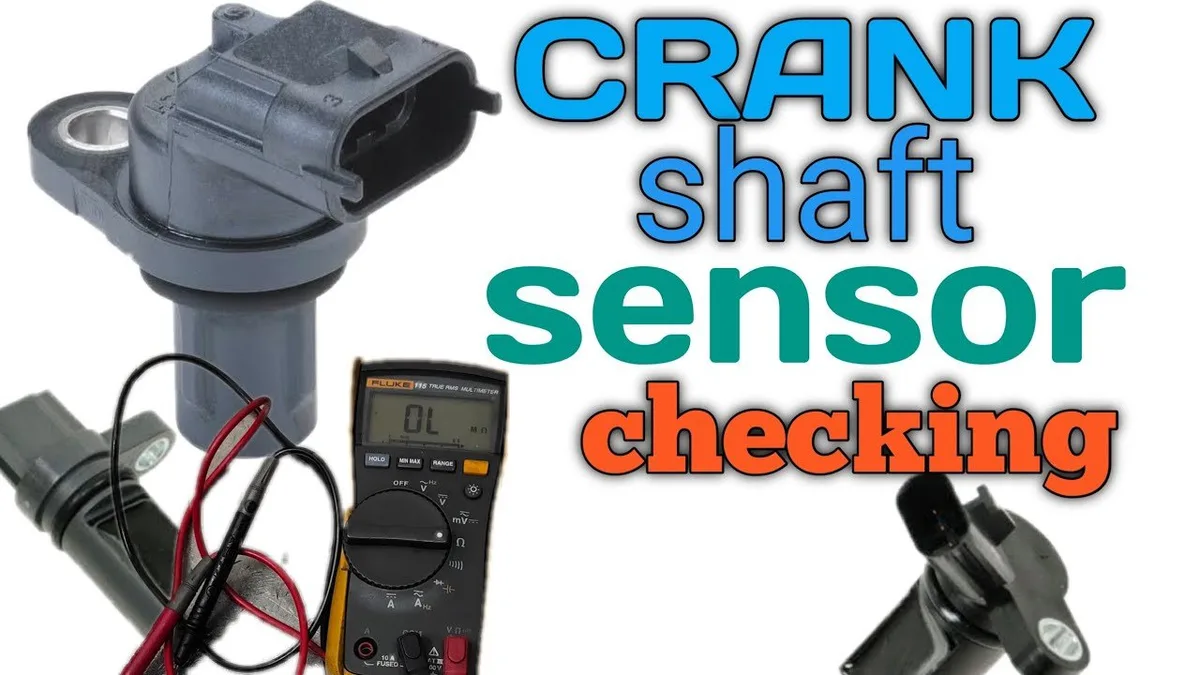
Image source: Bing (Web (fair-use with source credit))
Replacement cost and difficulty. The crank position sensor costs $30–$50 and takes about fifteen minutes to replace. Remove the bolt, unplug connector, pull old sensor out, push new one in, tighten bolt. If you suspect the sensor, replace it—cheaper than diagnostic time.
ECU Ground – The Overlooked Simple Fix
The ECU ground wire attaches to a stud on the engine block or mower frame. Look for a black wire with a ring terminal attached to bare metal. Over time, vibration loosens the nut, and moisture and grass create corrosion that acts as an insulator.
Testing the ground connection. Use a multimeter on resistance. Connect one lead to the ECU ground wire ring terminal, the other to a clean bare metal part of the engine block. You should see less than one ohm. Five ohms or more indicates a compromised ground. Remove the nut, clean the ring terminal and surface with a wire brush until shiny, reattach, and apply dielectric grease.
Why mechanics miss this. The ground stud often looks clean, but corrosion happens between the ring terminal and stud surface—invisible without removal. Many mechanics swap the ECU and find the engine starts because removing and reinstalling the ground cleaned the connection. The original ECU was fine.
Preventive maintenance. Clean the ECU ground connection once per season. It takes two minutes and prevents more no-start and intermittent running conditions than any other maintenance step.
Reading the Blinking Light: Kawasaki's Self-Diagnostic System
The FT730V EFI ECU has a built-in diagnostic system communicated through a small LED on the ECU itself. When the engine runs normally, the LED stays off or glows steady. When a fault is detected, the LED flashes a specific blink code.
How to read the blink code. Locate the ECU and find the small round LED. Turn the key to ON without cranking. The ECU runs a self-test. The LED flashes a number of times, pauses, then repeats. Count the flashes in each group—that is the fault code.
- 1 flash: No faults stored.
- 2 flashes: Crank position sensor fault.
- 3 flashes: Throttle position sensor fault.
- 4 flashes: Intake air temperature sensor fault.
- 5 flashes: Engine coolant temperature sensor fault.
- 6 flashes: Fuel pump fault.
- 7 flashes: Injector fault.
- 8 flashes: Ignition coil fault.
Interpreting the codes. A two-flash code means the crank sensor circuit is open, shorted, or invalid. Start with the crank sensor test. A three-flash code means TPS voltage out of range—check the connector for corrosion. A six-flash code means the fuel pump circuit is not functioning—check the relay and fuse first.
What to do after reading the code. Perform the corresponding test for that component. Clear the code by disconnecting the battery for ten seconds. If the code returns immediately, the component is bad. If not, the fault was intermittent—you now know which circuit to focus on.
Limitations of the diagnostic system. The blink code only identifies electrical faults. It does not detect mechanical problems like low compression, clogged injectors, or slightly low fuel pressure. A single flash does not mean the engine is healthy—only that the ECU sees no electrical faults.
Step-by-Step Troubleshooting Flow (From Easiest to Hardest)
If the blink code is not helpful or you want to be thorough, follow this flow. Start with simple checks requiring no tools. Do not skip steps.
Step 1: Battery and Connections
The FT730V EFI ECU is sensitive to voltage. If battery voltage drops below 10.5 volts during cranking, the ECU shuts down the fuel pump and injectors. The engine cranks but never fires.
Test the battery at rest. Set multimeter to DC voltage. A fully charged battery reads 12.6 volts or higher. At 12.2 volts, about 50% charged. At 11.9 volts, nearly dead. If below 12.4, charge fully before proceeding.
Test the battery under cranking. Have a helper crank while you watch the multimeter. Voltage should not drop below 10.5 volts. If it drops to 10 volts or lower, replace the battery. A battery showing 12.6 volts at rest but dropping to 9 volts under load is failing.
Check battery cable connections. Remove cables, clean terminals and cable ends with a wire brush, reattach and tighten. Corroded terminals cause voltage drop under load.
Step 2: Fuel Pressure Test
If the battery checks out, move to fuel pressure. Connect the test kit to the Schrader valve, turn key to ON. The pump should run for about two seconds. Pressure should rise to 45–55 psi and hold. Slow rise or pressure below 40 psi means a weak pump or clogged filter.
Test the pressure drop. After the pump stops, pressure should hold steady for at least five minutes. Quick drop means a leaking check valve or fuel pressure regulator, causing hard starting.
Test under load. Start the engine. Fuel pressure should remain 40–50 psi at idle and under load. A drop when increasing throttle indicates a clogged filter or weak pump. A rise above 50 psi indicates a blocked return line or faulty regulator.
Step 3: Injector Pulse Test (Noid Light)
If fuel pressure is good, confirm the ECU sends the injector pulse signal. Unplug the injector connector, plug the noid light into the harness, and crank. The noid light should flash with each crankshaft revolution. If it flashes, the ECU and crank sensor work. If not, the ECU lacks a crank signal or is faulty.
Test both cylinders. If one injector pulse is missing but the other works, the fault is in wiring or ECU output for that cylinder. If both have no pulse, the fault is in the crank sensor circuit or ECU power supply.
What if the noid light flashes but the engine does not start? Fuel delivery is the problem. Check for a clogged injector: remove the injector, point it into a container, and crank. Fuel should spray in a fine cone pattern. A dribble or no spray means the injector is clogged.
Step 4: Compression and Valve Clearance Check
A no-start can be mechanical. The FT730V EFI compression specification is 120–160 psi with the engine warm and throttle wide open. Below 100 psi on either cylinder, the engine will not start.
Perform a compression test. Remove both spark plugs, install the compression tester in one plug hole, hold throttle wide open, crank for four to five compression strokes. Record. Repeat on the other cylinder. Readings should be within 10% of each other. A difference over 15 psi indicates a valve or ring problem.
Check valve clearance. Recommended clearance: intake 0.10–0.15 inches, exhaust 0.15–0.20 inches, measured cold. Tight exhaust valves are common due to carbon buildup, causing low compression and misfire.
Adjusting the valves. Remove valve cover, rotate engine to top dead center on compression stroke for the cylinder being adjusted. Loosen lock nut, insert feeler gauge of correct thickness, turn adjustment screw until light drag, tighten lock nut, recheck. Do both cylinders. Adjust every 300 hours or once per season.
Step 5: Throttle Body and Idle Air Passage Cleaning
If the engine starts but idles roughly, hunts, or stalls when you release the throttle, the idle air passage in the throttle body is probably clogged. The ECU controls idle speed by regulating airflow through a bypass passage—that passage gets clogged with carbon and oil residue.
Clean the throttle body. Remove air filter housing and intake duct. Spray throttle body cleaner into the bore, use a soft brush to clean the throttle plate and bore walls. Pay special attention to the small bypass port near the throttle plate. Let it soak, then wipe clean.
Do not use carburetor cleaner. Carburetor cleaner is too aggressive and strips the throttle body coating, damaging seals. Use a cleaner labeled for throttle bodies.
Check the intake air temperature sensor. The IAT sensor is mounted in the intake duct near the throttle body. If covered in oil residue, clean gently with throttle body cleaner and a soft cloth. A dirty IAT sensor causes the ECU to add too much or too little fuel, resulting in surging and poor cold-start performance.
Mistakes That Cost Time and Money (Real Mechanic Experience)
Mistake 1: Replacing the ECU without checking the ground. A corroded ground causes no spark and no injector pulse—same symptoms as a dead ECU. Cleaning the ground is free. Always clean it first.
Mistake 2: Replacing the fuel pump without checking the filter. A clogged filter causes the same low-pressure symptoms as a weak pump. The filter costs $10 and takes five minutes. Replace it first.
Mistake 3: Ignoring the battery voltage under load. A battery reading 12.6 volts at rest can drop below 10 volts during cranking, shutting down the ECU. Always test under load.
Mistake 4: Overlooking the crankshaft position sensor. The crank sensor fails without warning. The engine cranks strongly, so mechanics assume it is fine—but the sensor only tells the ECU when to fire. Test resistance early.
Mistake 5: Using carburetor cleaner on the throttle body. Carburetor cleaner strips the protective coating and dries out seals, creating vacuum leaks. Use throttle body cleaner only.
Mistake 6: Skipping the valve adjustment. Exhaust valves tighten over time due to carbon buildup, causing low compression and misfire. Perform a compression test early and check valve clearance before replacing sensors.
Mistake 7: Not clearing the ECU memory. After replacing a sensor, the ECU may operate in limp mode with the old fault code still stored. Disconnect the battery for ten seconds to clear codes.
When to Stop Diagnosing and Call a Pro (Or Swap the Carb)
When to call a pro with a scan tool. The FT730V EFI ECU can be scanned with a Kawasaki diagnostic tool for live data—fuel trim, sensor voltages, injector pulse width. If you have checked common causes and the engine still runs poorly, a scan tool can identify a slow sensor within spec. A professional scan costs less than guessing.
When to consider a carburetor conversion. The FT730V EFI can be converted to carbureted using parts from the carbureted version. This requires a carburetor, intake manifold, throttle linkage, different fuel pump, and addressing ECU wiring (a standalone ignition module is available). This is a weekend project for an experienced mechanic.
When to replace the engine. If the engine has high hours (1500–2000 typical service life) and multiple failed components, replacement is often cheaper than piecemeal repairs. A new FT730V EFI long block costs around $2000.
When to walk away from intermittent problems. Intermittent failures that happen once a week are hard to diagnose—often a loose connector, failing hot sensor, or chafed wire. Consider replacing all common sensors preventatively: crank sensor, throttle position sensor, and fuel pump relay total under $150—cheaper than diagnostic labor.
Long-Term Maintenance That Prevents 90% of EFI Headaches
- Change the fuel filter annually (every 200 hours). Costs $10, takes five minutes.
- Use fuel stabilizer during storage if the mower sits more than two weeks. Run engine five minutes to circulate.
- Drain the tank for long storage (three months or more). Run engine until it stalls to empty the fuel system.
- Clean the ECU ground annually—remove ring terminal, wire brush, apply dielectric grease, reattach.
- Check the crank sensor connector annually for corrosion or loose pins; apply dielectric grease.
- Replace spark plugs every 200 hours with NGK BPR4ES or equivalent, gapped to 0.76 mm.
- Adjust valve clearance every 300 hours.
- Use fresh fuel—87 octane with no more than 10% ethanol. Do not buy more than you will use in a month.
- Run the engine dry before winter storage—drain tank, run until stall, remove spark plugs, spray fogging oil into cylinders, crank a few revolutions.
Frequently Asked Questions (FAQs)
How do I know if my FT730V EFI fuel pump is bad?
Listen for the pump when you turn the key to ON. It should run for two seconds and stop. If it runs continuously or not at all, test fuel pressure. Below 40 psi indicates a weak pump; below 30 psi confirms failure.
Can I bypass the ECU on a Kawasaki FT730V EFI?
You cannot bypass the ECU and keep the engine running normally. A standalone ignition module is available for a carburetor conversion, but that replaces the entire fuel system.
What does two flashes on the FT730V EFI mean?
Two flashes indicate a crank position sensor fault. Test sensor resistance (150–200 ohms). Open or shorted means replacement. Also check wiring between sensor and ECU.
How much does it cost to fix a Kawasaki FT730V EFI no-start?
Cost varies from $0 (ground cleaning) to several hundred for a fuel pump or ECU. Most problems fall in the $30–$150 range for parts. Following the troubleshooting flow saves diagnostic fees.
Is the Kawasaki FT730V EFI reliable?
Yes, with proper maintenance. The EFI system is more reliable than the carbureted version in cold weather and at altitude. Problems come from ethanol fuel, poor ground connections, and ignored maintenance. A well-maintained FT730V EFI easily reaches 1500 hours.
Can I use Seafoam or injector cleaner in my FT730V EFI?
Use a cleaner labeled for EFI systems. Avoid products claiming to clean injectors through the fuel system. For clogged injectors, remove and clean them professionally. Fuel system cleaners are for prevention, not cure.
Why does my FT730V EFI surge at idle?
Surging idle usually means a vacuum leak or dirty throttle body. Clean the throttle body and idle air passage. Check for cracks in the intake boot. If the surge continues, test the throttle position sensor and replace it if voltage drifts.

Similar Posts