Motorhome Hot Water Heater Troubleshooting
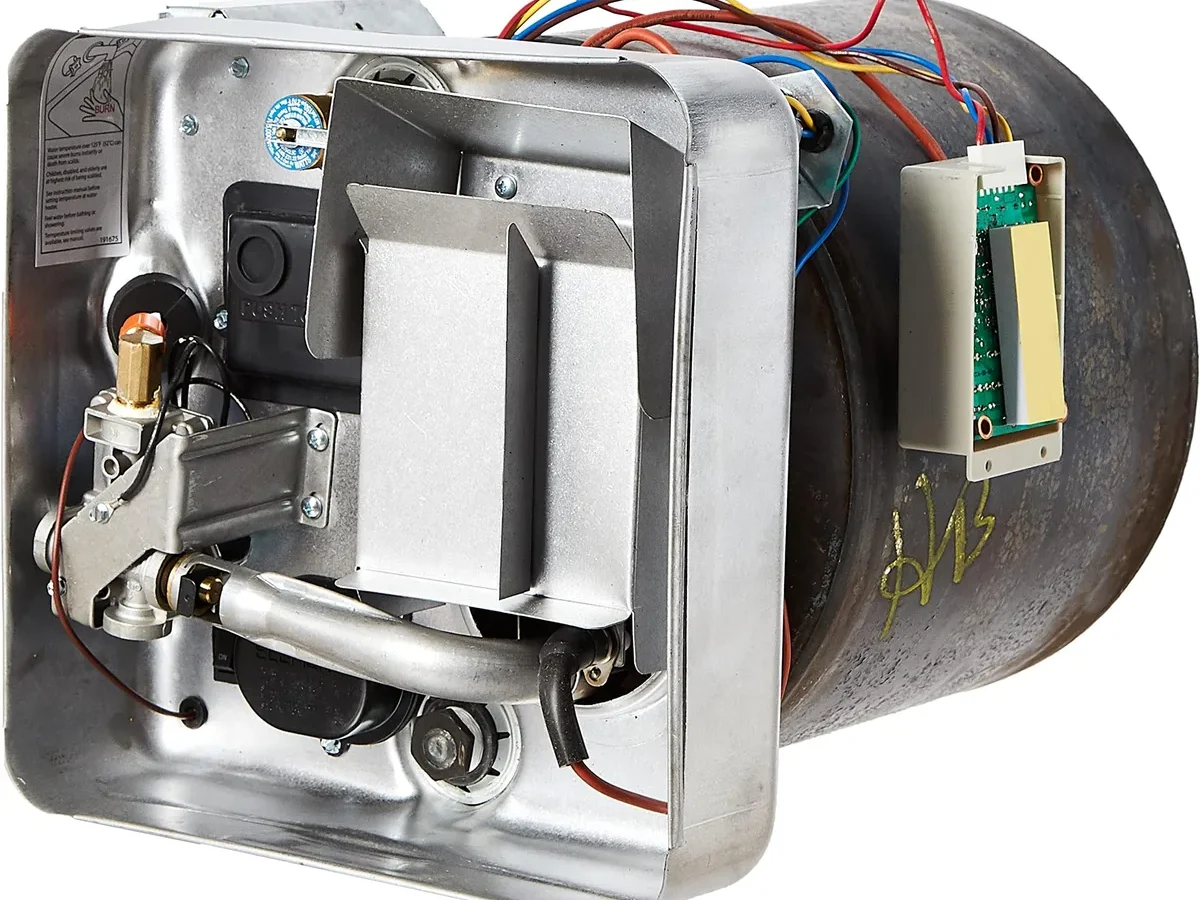
Your motorhome hot water heater troubleshooting usually starts with the same question: why isn't the water hot? You flip the switch, hear the clicking, but nothing happens. Or maybe you get lukewarm water that never reaches temperature.
It's frustrating, but most of the time the fix is simpler than you think.
Per manufacturer specifications, most RV water heaters operate at a gas pressure of 11 inches water column for propane. As of 2026, direct spark ignition systems are standard on nearly all new units. Let's walk through the most common causes and how to fix them safely.
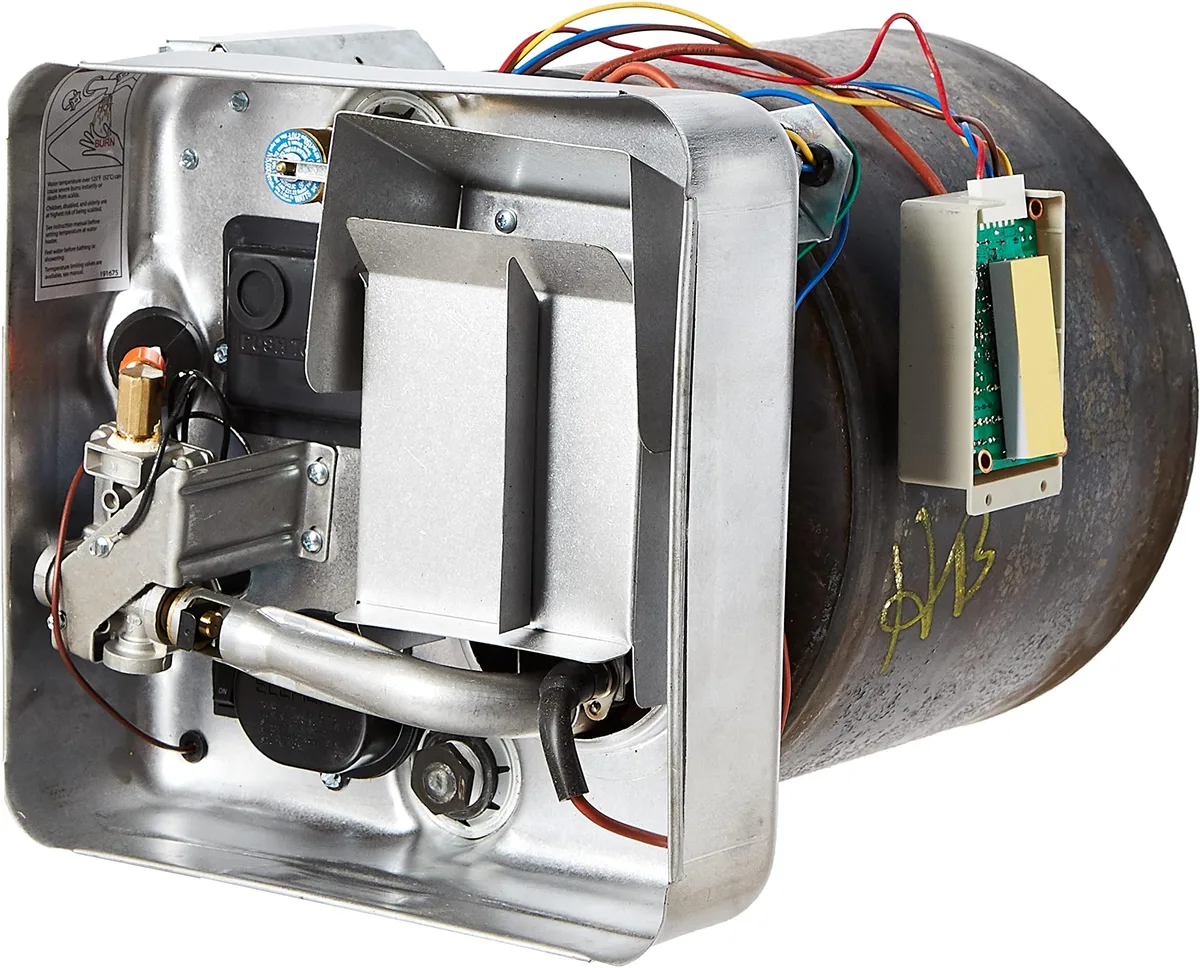
Image source: Bing (Web (fair-use with source credit))
Quick Answer
Start with the basics. Check your propane supply and 12-volt power. Verify the bypass valve isn't set to winterize.
Look for a tripped GFCI breaker. Never run an empty water heater.
Before You Touch Anything: The Safety Basics
Safety comes first when you are working with propane, electricity, and hot water under pressure. A mistake can cause a gas leak, a fire, or even an explosion.
Propane safety is nonnegotiable. If you smell gas near the water heater, stop immediately. Turn off the propane at the tank. Open windows and doors to ventilate.
Do not flip any switches or create sparks. According to the Propane Education & Research Council, any gas odor in a confined space requires immediate evacuation and a professional inspection.
Carbon monoxide is another hidden danger. A water heater burner that is not burning cleanly can produce CO. Every motorhome should have a working CO detector installed near the sleeping area.
The pressure relief valve is there for a reason. That small valve on the tank releases pressure if the water gets too hot. Never cap or block it. If it is leaking, replace it right away.
Never operate the water heater without water in the tank. Running the electric element on a dry tank destroys it in seconds. Fill the system and bleed the air at the faucets before turning on the heater.
Turn off power before you open the access panel. That means both the 12-volt DC power to the control board and the 120-volt AC power to the electric element. Flip the breaker and disconnect the battery if you need to.
Why Your Water Heater Isn't Working (The Most Common Culprits First)
Before you dive into complex diagnostics, check the simple things. About 70 percent of no-hot-water problems come from just three causes.
Bypass valve left in the winterize position. This is the most common mistake. If the bypass valve is open, water flows around the tank instead of through it. Locate the bypass valves and turn them to the normal operating position.
Propane tank is empty or the valve is off. Check the propane gauge. If you have a dual tank system, make sure the changeover valve hasn't switched to an empty tank. Also check that the propane valve is fully open.
Tripped GFCI or circuit breaker. The 120-volt electric side runs through a GFCI protected circuit. Check the GFCI outlet in the bathroom or kitchen. Reset it.
Also check the main AC breaker panel for a tripped breaker.
Bad control board or wiring. Check the DC fuse panel for a blown fuse. Use a multimeter to confirm 12 volts at the control board.
Dirty burner or igniter. Spiders and debris can block the burner tube. Cleaning these components fixes a surprising number of gas side failures.
Gas Side Troubleshooting: Clicking, No Flame, or Flame That Won't Stay
The gas side is the most common source of trouble. You hear the igniter clicking, but the burner either never lights or lights and then goes out.
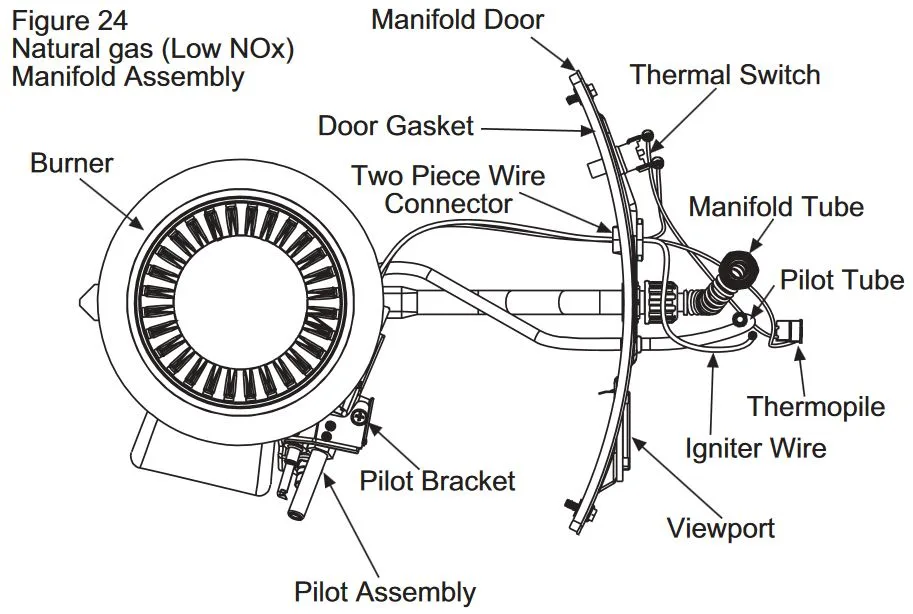
Image source: Bing (Web (fair-use with source credit))
Clicking but no flame. The most likely cause is air in the propane line. Purge the air by lighting a stove burner for 30 to 60 seconds before attempting to light the water heater. If that does not work, inspect the burner tube for blockages.
Flame lights but goes out after a few seconds. This points to a dirty flame sensor. Carefully clean the sensor with fine sandpaper. If that does not fix it, replace the sensor.
No spark at all. Check 12-volt power to the control board. Listen for a buzzing sound from the igniter. No buzzing means no spark.
Try cleaning the igniter electrode gap to about 1/8 inch from the burner tube.
Flame is weak or yellow. A strong propane flame should be blue with a small yellow tip. A yellow flame means incomplete combustion. This can be caused by low gas pressure, a dirty burner orifice, or poor ventilation.
Electric Side Troubleshooting: No Heat, Tripped Breaker, or Slow Recovery
The electric side is simpler than the gas side. Most problems come down to a tripped breaker, a burned out element, or a bad thermostat.
No heat at all. Start at the breaker panel. Reset the water heater breaker. If it trips again immediately, there is a short.
Next, check the high limit thermostat. Press its reset button firmly. If the button clicks, you have found the issue.
Slow recovery or lukewarm water. The electric element may be covered with sediment. Mineral deposits insulate the element from the water. Drain the tank and flush out the sediment.
If the element looks heavily encrusted, replace it.
Tripped GFCI after reset. This usually means the electric element has shorted to ground. Unplug the element wires and test resistance between each terminal and ground. You should see infinite resistance.
Any reading near zero means the element is bad.
| Symptom | Likely Cause | Solution |
|---|---|---|
| No heat, breaker OK | Tripped high limit thermostat | Press reset button |
| Breaker trips immediately | Short in element or wiring | Replace element |
| Lukewarm water | Sediment on element | Flush tank, replace element |
| No heat, GFCI tripped | Element shorted to ground | Replace element |
Element replacement is straightforward. Turn off all power. Drain the tank. Remove the wires.
Unscrew the element with a socket wrench. Apply thread sealant to the new element and screw it in. Fill the tank before restoring power.
The Anode Rod and Tank Health: Smells, Rust, and Leaks
The anode rod is a sacrificial metal rod that corrodes instead of your steel tank. Without it, the tank rusts from the inside out.
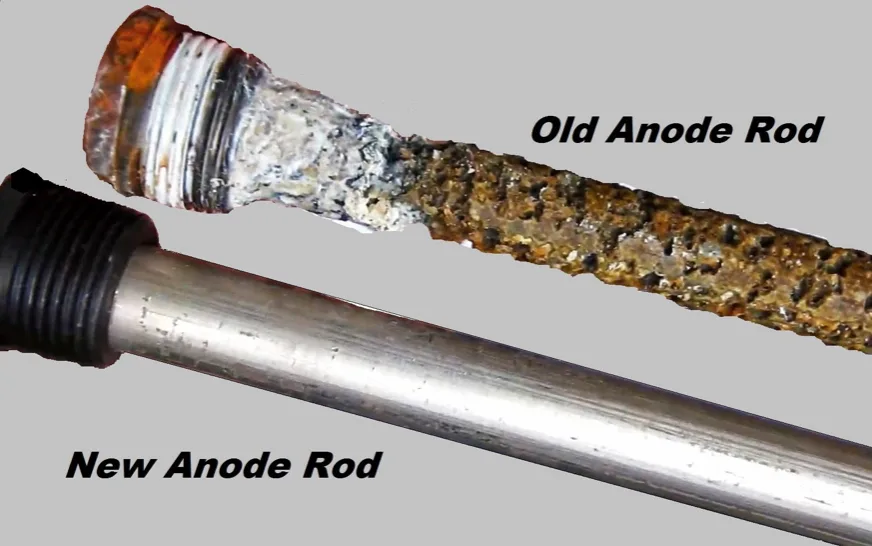
Image source: Bing (Web (fair-use with source credit))
Rotten egg smell in the hot water. That sulfur odor is caused by bacteria reacting with the anode rod. Replace it with a zinc or aluminum rod instead of magnesium. Flush the tank thoroughly.
Rusty or brown water. This means the anode rod is completely consumed. Replace it immediately. If you let it go too long, the tank will develop leaks.
How to check the anode rod. Locate the hex head plug on the front or bottom of the tank. Use a 1 1/8-inch socket to remove it. If the rod is less than 1/4 inch thick or the steel core wire is exposed, replace it.
Check it every six months. Replace it every one to two years.
Leaks from the tank itself. Check the fittings first. The drain plug, pressure relief valve, and inlet and outlet connections are common leak points. If the tank itself is cracked, there is no repair.
Look for pinhole leaks along the bottom seam.
Winterization and Bypass Valve Mistakes (More Common Than You Think)
Winterization mistakes cause more water heater failures than any mechanical issue. The bypass valve is the culprit most of the time.
The bypass valve has two positions. In the normal position, water flows into the tank. In the winterize position, water bypasses the tank entirely. This lets you run antifreeze through the plumbing without filling the tank.
The most common mistake is leaving the bypass valve in winterize position. You get cold water because the water never enters the tank. The fix is to locate the bypass valves and turn them to the normal operating position.
Three valve bypass systems are the most common. Open the hot and cold valves and close the bypass valve for normal operation. Close the hot and cold valves and open the bypass valve to winterize. Label the valves with a permanent marker to prevent confusion.
Proper draining requires more than just pulling the plug. Open a hot water faucet inside the motorhome after removing the drain plug. This lets air into the system and allows the tank to drain fully.
Never pour RV antifreeze directly into the tank. The bypass valve diverts it around the tank. If you do, flush it out thoroughly before using the heater.
When to Call a Pro vs. Fix It Yourself
Some repairs are straightforward. Others require specialized tools or knowledge.
Do it yourself with confidence. Replacing the anode rod is a 15 minute job. Cleaning the burner tube and igniter is safe. Replacing the thermocouple or flame sensor is simple.
Flushing the tank and replacing the electric element are both easy with basic tools.
Call a professional for these issues. Gas pressure problems require a manometer. Control board replacements sometimes need programming. Tank replacement is a major job.
If you smell gas and cannot find the leak, stop and call a certified RV technician.
The cost of a professional visit varies. A simple service call runs 75 to 150 dollars. Parts are extra. Replacing a control board typically costs 200 to 400 dollars including labor.
Tank replacement runs 500 to 1000 dollars for the unit alone.
Trust your gut. If you feel unsure about any step, stop. A mistake with propane or high voltage can cause real harm.
Tankless Water Heaters: Different Troubleshooting Steps
Tankless water heaters work differently. They heat water on demand using a high power gas burner. The failure points are different.
Low water flow is the most common tankless problem. These units need a minimum flow rate to activate. If your water pump pressure is low or a screen filter is clogged, the heater will not fire. Clean the inlet screen.
Most units need at least 0.5 gallons per minute.
Gas pressure issues are more critical with tankless systems. They need higher BTU output than tank style heaters. Low propane pressure will cause the burner to cycle on and off. Have a professional verify the gas pressure.
Scale buildup in the heat exchanger reduces heat transfer. This causes lukewarm water. Descale the heat exchanger with a vinegar solution every six months.
Error Codes and What They Mean
Modern water heaters use flashing LED codes to tell you what is wrong. The pattern of flashes corresponds to a specific fault.
Suburban units use a sequence of flashes. One flash means a failed igniter. Two flashes indicate a flame sense failure. Three flashes point to a high limit thermostat trip.
Four flashes mean a bad temperature sensor.
Atwood and Dometic units have similar codes. A solid red light means no power. Flashing red indicates a fault. A green light means normal operation.
Truma tankless units display codes on the interior panel. Code E1 means low water flow. Code E2 indicates a gas supply issue. Code E3 points to a combustion problem.
Code E4 means the unit has overheated.
Resetting clears most temporary codes. Turn off the water heater. Disconnect 12-volt power for 30 seconds. Reconnect and try again.
If the code returns, fix the underlying problem.
Routine Maintenance That Prevents Breakdowns
Preventive maintenance extends the life of your water heater by years. A little effort every few months saves you from cold showers and expensive repairs.
Flush the tank every six months. Drain the tank completely. Let water run through until it runs clear. Close the drain, fill the tank, and you are done.
Clean the burner assembly annually. Remove the burner tube and brush out debris. Check the igniter electrode for cracks. Clean the flame sensor.
This takes about 30 minutes.
Check all electrical connections. Vibration from driving can loosen wires. Tighten terminals on the control board and heating element. Look for corrosion on plugs.
Inspect the pressure relief valve annually. Lift the lever and let it snap back. You should hear a gush of water and then a clean seal. If water continues to drip, replace the valve.
Parts Lifespan and Replacement Schedule
Knowing when parts wear out helps you plan replacements before they fail.
| Part | Typical Lifespan | Replacement Cost |
|---|---|---|
| Anode rod | 1-2 years | $10-20 |
| Electric element | 3-5 years | $25-40 |
| Thermocouple | 3-5 years | $15-25 |
| Control board | 5-8 years | $100-200 |
| Pressure relief valve | 3-5 years | $10-15 |
| Igniter electrode | 5-8 years | $20-30 |
| Complete water heater | 10-15 years | $300-800 |
Anode rods fail fastest in hard water areas. Check your rod every six months if you live in the Southwest or Midwest. Soft water areas can go a full year between checks.
Electric elements fail slowly. They develop tiny cracks that let moisture into the wiring. This causes the GFCI to trip. Replace the element before it shorts completely.
Control boards fail from voltage spikes. Using a surge protector for your entire motorhome protects the water heater control board and all other electronics.
Frequently Asked Questions
Why does my motorhome water heater keep clicking but not lighting?
Air in the propane line is the most common cause. Light a stove burner for 30 seconds to purge the line. If that does not work, check for blockages in the burner tube from spider webs or debris.
How often should I replace the anode rod?
Check it every six months. Replace it when it is less than 1/4 inch thick or when the steel core wire is visible. Hard water areas may need replacement every year.
Can I run my water heater on electric and gas at the same time?
Yes, most dual fuel water heaters allow both sources to run together. This gives you faster recovery. Just make sure you have enough amperage on your shore power connection to handle the electric element.
Why does my hot water smell like rotten eggs?
That sulfur smell comes from bacteria in the tank reacting with the magnesium anode rod. Replace it with a zinc or aluminum anode rod. Flush the tank thoroughly to remove the bacteria.
What does the reset button on my water heater do?
The high limit thermostat has a small reset button. It trips if the water temperature exceeds 140 degrees Fahrenheit or if there is a problem. Press it firmly until it clicks to reset it.
How do I know if my water heater tank is cracked?
Look for water pooling under the unit. Check the bottom seam for pinhole leaks or rust stains. If the tank is cracked, there is no repair.
You need a full replacement.

Similar Posts