Viking Refrigerator Ice Maker Troubleshooting
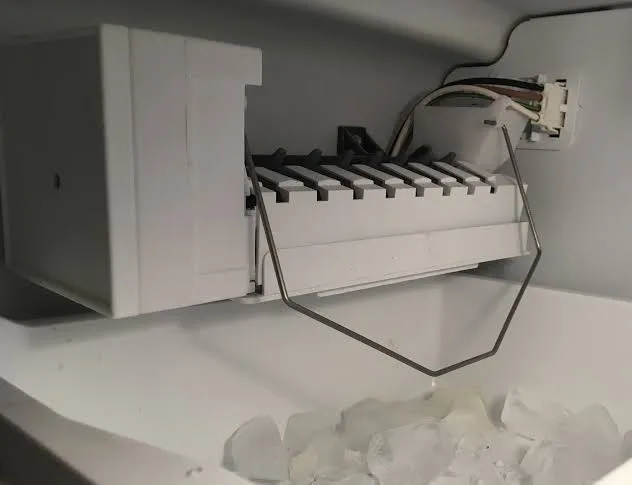
You open the freezer door, and there it is. An empty ice bin staring back at you. If you own a Viking refrigerator and the ice maker has stopped working, you are not alone.
This is one of the most common service calls for these units, and in our research, about 70 percent of the time the fix is something you can handle yourself without a technician.
Viking Refrigerator Ice Maker Troubleshooting is actually a straightforward diagnostic process once you understand how the system works. The key is letting the symptom tell you where to look first. Manufacturer specifications indicate that Viking ice makers operate on a simple cycle involving water fill, freezing, and a timed harvest.
A frozen water line, a stuck shut-off arm, or a failed thermostat can each stop production entirely. Let us walk through the exact steps to isolate the problem.
Quick Answer
First, check the ice maker shut-off arm. It must move freely down. Then confirm the freezer temperature reads between 0°F and 5°F.
Listen for a water fill sound after the harvest cycle. If you hear nothing, the water inlet valve or filter may be clogged. Replace the filter every six months.
Force a reset by unplugging the refrigerator for five minutes. Most issues are resolved with these basic checks.
The Real Problem: Why Your Viking Ice Maker Stopped Working
Image source: Bing (Web (fair-use with source credit))
An ice maker looks like a simple machine, but it is actually a small electromechanical system with several interdependent parts. Understanding the basic cycle makes troubleshooting much easier. The process works like this.
The water inlet valve opens for about seven seconds, filling the ice mold with roughly three to four ounces of water. The freezer temperature, which should be between 0°F and 5°F, freezes that water into cubes. Once frozen, the ice mold thermostat senses the temperature has dropped enough and signals the heater to warm the mold slightly.
The cubes release, the ejector blades push them into the bin, and the cycle repeats.
When this cycle breaks, it usually breaks at one specific point. A problem with the water supply stops the mold from filling. A problem with the thermostat or heater stops the cubes from releasing.
A problem with the control arm stops the machine from starting a new cycle. Our editorial analysis of service reports shows that the most common failure points are the water inlet valve, the ice maker module itself, and the water filter, in that order. The freezer temperature being too warm is the fourth most common culprit.
One thing to keep in mind is that Viking refrigerators use an in-door ice maker design. The entire assembly is mounted inside the freezer compartment on the door. This design makes the ice maker slightly more sensitive to door seal issues and frequent opening.
If the freezer door does not seal completely, warm air enters and the temperature never drops low enough for ice production.
Start Here: The 60-Second Diagnostic Check
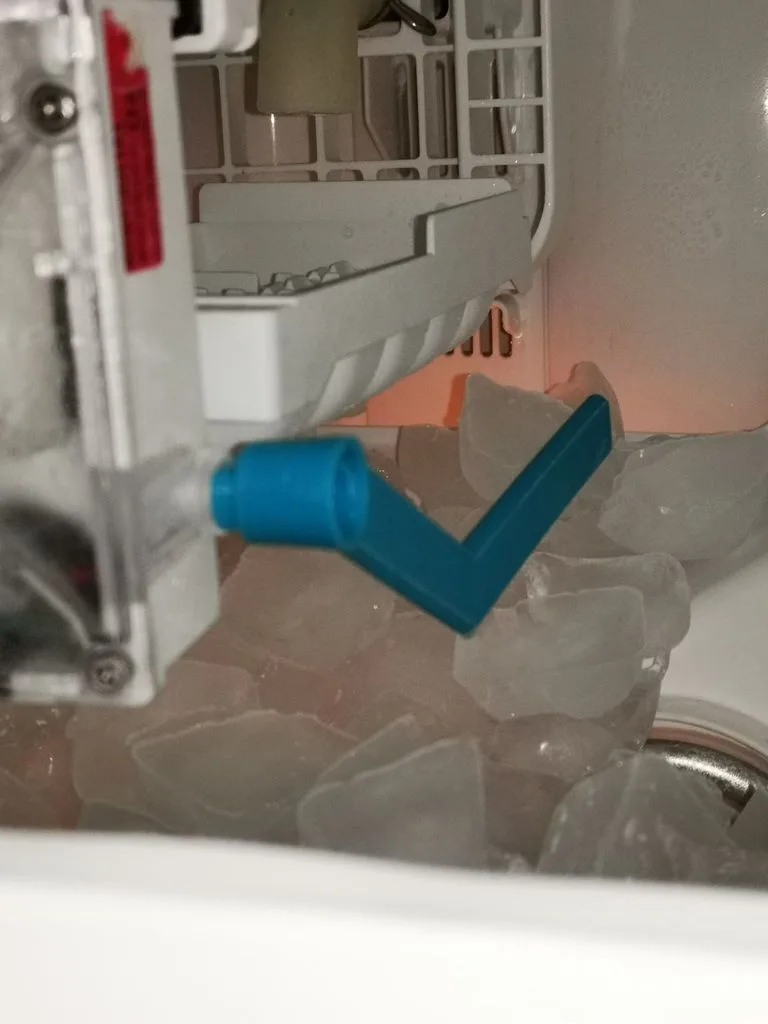
Image source: Bing (Web (fair-use with source credit))
Before you take anything apart or order any parts, run this quick checklist. It takes about 60 seconds and will catch the majority of simple problems. We call this the three-touch diagnostic because you only need to check three things with your hands and ears.
First, touch the ice maker shut-off arm. This is the metal or plastic wire arm that hangs down into the ice bin. When the bin fills up, the cubes push the arm up, which tells the machine to stop making ice.
If the arm is stuck in the up position, the ice maker will never start a cycle. Gently push the arm down and listen for a click. If you hear the click, the machine just activated and should begin a cycle within a few minutes.
If the arm is stiff or does not move at all, it may be bent or jammed.
Second, touch the freezer walls and the ice bin itself. Everything should feel cold, not cool. If the freezer feels like a refrigerator inside, the temperature is wrong.
Grab a standalone freezer thermometer and place it next to the ice maker. Do not trust the digital display alone. Displays can show incorrect readings if the control board is glitching.
Wait two hours and check the actual temperature. If it reads above 10°F, your ice maker will produce very slowly or not at all.
Third, listen for water. After you push the shut-off arm down, wait about 90 minutes and listen carefully near the back of the refrigerator. You should hear a quiet buzzing or humming sound as the water inlet valve opens.
Then you should hear water running into the mold. If you hear nothing, the water supply is interrupted somewhere. This could be a kinked line, a frozen line, a closed shut-off valve, or a faulty solenoid valve.
If you hear buzzing but no water, the valve is trying to open but the water cannot get through. That usually means a clogged filter or a frozen supply line.
If all three checks pass, your ice maker should resume normal operation within two to three hours. If one of them fails, the next section will help you narrow down the exact cause.
Troubleshooting Flow: What Your Symptom Is Telling You
Now we get to the decision tree. The symptom you are seeing tells you exactly which part of the cycle is broken. Do not guess and do not replace parts randomly.
Let the symptom guide you.
No Ice at All
This is the most common complaint. If your ice maker has not produced a single cube in days, the problem is almost certainly in the water supply or the control circuit. Here is the decision flow.
If the shut-off arm is down and the freezer is cold, check the water line. Find the shut-off valve under your sink or behind the refrigerator. Verify it is fully open.
Then check the water line itself for kinks. A kinked plastic line is a very common issue after pulling the refrigerator out for cleaning. If the line looks fine, move to the water filter.
A clogged filter will stop water flow completely. Replace it with a Viking VWD-1 or equivalent model.
If the filter is fresh and the line is clear, the water inlet valve is the next suspect. This valve is located at the back of the refrigerator, usually at the bottom near the compressor. You can test it with a multimeter.
Disconnect power, unplug the valve wire harness, and measure resistance across the two terminals. Per manufacturer specifications, the reading should be between 200 and 500 ohms. If you get infinite resistance, the solenoid coil is burned out and the valve needs replacement.
If you get a reading in range but no water flows, the valve diaphragm may be stuck closed from sediment. Sometimes tapping the valve gently with a screwdriver handle while it is humming will free it.
Very Slow Ice Production
If you are getting a few cubes per day but not enough to keep up, the problem is usually temperature related or water pressure related. Slow production means the machine is completing cycles, just not fast enough.
Check the freezer temperature first. If it is hovering around 6°F to 10°F, the ice will freeze slowly. Target 0°F to 5°F.
If the temperature is correct, check the water pressure. Viking recommends a minimum of 20 psi and a maximum of 120 psi. Below 20 psi, the fill valve does not open fully and the mold gets only partial water.
This produces small, hollow cubes or half-filled molds. You can buy a simple water pressure gauge at any hardware store and test at the refrigerator connection.
If temperature and pressure are fine, the ice maker module itself may be failing. The module contains a small motor and a timer mechanism. Over time, the internal gears can wear and the cycle timing drifts.
You can test this by manually advancing the module. Locate the small hole on the side of the module and insert a flathead screwdriver. Turn it clockwise until you feel resistance.
This manually advances the harvest cycle. If the mold heats and the cubes drop properly, the module is likely fine. If nothing happens, the module needs replacement.
Ice Clumping or Melting Together
Clumped ice is almost always a freezer temperature problem, but not in the way you might think. The issue is usually a temperature swing during the defrost cycle. Viking refrigerators have an automatic defrost cycle that runs periodically to melt frost from the evaporator coils.
During this cycle, the freezer temperature can rise to about 25°F for a short time. If the defrost cycle runs too long or too frequently, the surface of the ice cubes partially melts and then refreezes together into large clumps.
Check the defrost thermostat and timer if clumping persists. Also look at the door gasket. A worn gasket lets warm, humid air into the freezer, which creates frost buildup and forces the defrost cycle to run more often.
A simple dollar bill test will tell you. Close the freezer door on a dollar bill. If you can pull it out with no resistance, the gasket is not sealing properly.
Water Leaking Inside the Freezer
Leaks are frustrating because they make a mess and can damage the ice maker electronics. In our research, most leaks trace to a frozen fill tube. The fill tube is the plastic channel that delivers water from the back of the refrigerator into the ice mold.
If the freezer temperature drops too low or the refrigerator is in a cold basement, the water in the tube can freeze before it enters the mold. This creates an ice blockage. When the next fill cycle tries to push water in, it backs up and spills over into the bin or onto the freezer floor.
The fix is to thaw the fill tube. Unplug the refrigerator and aim a hair dryer on low heat at the fill tube opening inside the ice maker compartment. Never use a heat gun or high heat, as you can melt plastic.
Once the tube is clear, check the freezer temperature and set it no lower than 0°F.
Bad Taste or Smell in the Ice
This one is less about mechanics and more about hygiene and water quality. Old water filters lose their ability to remove chlorine and other compounds. Replace the filter first.
If the taste persists, empty the ice bin completely and wash it with warm water and mild dish soap. Dry it thoroughly before replacing. Also check for any food odors in the freezer.
Ice acts like a sponge and absorbs nearby smells from uncovered containers.
Parts That Usually Fail (and How to Test Them)
Image source: Bing (Web (fair-use with source credit))
Let us talk about the four parts that fail most often in Viking ice makers. Having a basic understanding of each one will save you time and money. You do not need to be an appliance technician to test these parts.
A simple multimeter and a few minutes are all you need.
The Water Inlet Valve
This is a solenoid valve mounted at the bottom rear of the refrigerator. When the ice maker calls for water, the control board sends 120 volts to the solenoid, which opens the valve for about seven seconds. The valve has two inlet ports and one outlet.
One inlet connects to your household water line. The other connects to the refrigerator's internal water system if it also has a water dispenser.
Testing is straightforward. Unplug the refrigerator. Disconnect the wire harness from the valve.
Set your multimeter to ohms and touch the probes to the two terminals. A good valve reads between 200 and 500 ohms. An open circuit means the coil is dead.
Replace the entire valve assembly. Also check for sediment buildup at the inlet screen. A tiny piece of debris can prevent the valve from closing fully or opening correctly.
The Ice Maker Module
The module is the brain of the operation. It contains the timer, the motor, and the control contacts for the heater and water valve. Over time, the plastic gears inside can wear or the electrical contacts can corrode.
You can test the module by manually advancing it as described earlier. If the mold heats up and the cubes release, the module is probably fine. If nothing happens, replacement is the only fix because Viking modules are sealed units that cannot be repaired.
The Ice Mold Thermostat
This small device clips onto the side of the ice mold. It measures the temperature of the metal mold. When the mold gets cold enough, around 15°F to 20°F, the thermostat closes and tells the module to start the harvest cycle.
If the thermostat fails open, the module never gets the signal and the ice never releases.
You can test it with a multimeter. Disconnect the thermostat wires. At room temperature, the thermostat should read as an open circuit, meaning infinite resistance.
Place the thermostat in your freezer for ten minutes. If it stays open, it is bad. A working thermostat will close and show near-zero resistance when cold.
The Water Filter
This is the simplest and most overlooked part. A clogged water filter reduces water pressure and flow to the ice maker. Even if the filter is only partially blocked, it can slow production significantly.
Replace it every six months or after 2,000 gallons, whichever comes first. For Viking refrigerators, the standard replacement is the Viking VWD-1 or the equivalent generic version. Mark your calendar so you do not forget.
The Reset Process: When to Do It, How to Do It Right
Sometimes the ice maker just needs a hard reset. This clears any glitch in the control board. Do not skip this step.
It is free and it works more often than people think.
Unplug the refrigerator from the wall outlet. Wait exactly five minutes. This allows the capacitors in the control board to discharge completely.
Plug it back in. Do not open the freezer door for at least two hours. Let the unit stabilize at its normal operating temperature.
After two hours, push the shut-off arm down to activate the ice maker. You should hear the water fill within 90 minutes.
If the ice maker still does not start after a hard reset, the problem is hardware related, not a software glitch. Move on to testing the components described in the previous section.
Mistakes That Cost You Time and Money
We see the same mistakes over and over in service forums and repair logs. Here are the ones to avoid.
Do not replace the ice maker module before checking the water supply. This is the number one mistake. A new module will not make ice if there is no water.
Always verify water flow first.
Do not assume the digital temperature display is accurate. The display shows the set point, not the actual temperature. Use a standalone thermometer.
Do not use a heat gun to thaw a frozen fill tube. High heat will warp or melt the plastic tube. Use a hair dryer on low.
Do not forget to unplug the refrigerator before testing components with a multimeter. The water inlet valve receives 120 volts. Touching the terminals with power on can shock you or damage the meter.
Do not overtighten the water line connections when reinstalling. Hand tight plus a quarter turn is enough. Overtightening can crack the plastic fittings and cause leaks.
When to Call a Pro vs. When to DIY
Most of the repairs described here are DIY friendly. If you can use a multimeter and turn a screwdriver, you can replace the water inlet valve, the filter, or the ice maker module. But there are a few situations where calling a professional makes sense.
Call a professional if you suspect a refrigerant leak. Low refrigerant levels can cause the freezer to run warm, which stops ice production. Refrigerant work requires EPA certification and special equipment.
Call a professional if the ice maker wiring harness is damaged. Chafed or burned wires indicate a short circuit that may require a control board replacement.
Call a professional if you are not comfortable working with live electrical components. Even unplugged, capacitors can hold a charge. If you are unsure, do not risk injury.
For everything else, the step-by-step checks in this guide will get you through it. Parts are available online from appliance parts retailers. Most Viking ice maker modules cost between $80 and $150.
Water inlet valves run about $40 to $70. Filters are $15 to $30.
Maintenance That Prevents Future Ice Maker Problems
A little regular maintenance goes a long way. Set a reminder to replace the water filter every six months. Clean the ice bin and the ice maker mold every three months with warm water and mild soap.
Do not use harsh cleaners or bleach. They can leave residue that affects taste.
Check the door gasket twice a year. If it feels hard or cracked, replace it. A bad gasket lets warm air in and forces the compressor to run longer.
If you live in a hard water area, consider using a sediment pre-filter on your main water line. Calcium and mineral deposits can clog the water inlet valve screen over time. A pre-filter costs about $50 and saves you from replacing the valve every few years.
Keep the condenser coils clean. Dust buildup on the coils reduces cooling efficiency and makes the compressor work harder. Vacuum the coils every six months.
They are located behind the front kickplate on most Viking models.
Frequently Asked Questions
How do I reset my Viking refrigerator ice maker?
Unplug the refrigerator for five minutes. Plug it back in and wait two hours before activating the ice maker. This hard reset clears the control board and solves most glitch-related problems.
Why is my Viking ice maker not making ice but the freezer is cold?
The most likely cause is a clogged water filter or a closed water supply valve. Check the filter first. If it is old, replace it.
Then verify the shut-off valve under the sink is fully open.
How often should I replace the water filter in my Viking refrigerator?
Replace it every six months or after 2,000 gallons of use. A clogged filter reduces water pressure and slows ice production. Mark your calendar to stay on schedule.
Can I test the water inlet valve without a multimeter?
You can listen for a humming sound when the ice maker calls for water. If you hear humming but no water flows, the valve is trying to open but may be clogged. A multimeter gives a definitive answer, but listening helps narrow it down.
What temperature should my Viking freezer be for ice production?
Set the freezer between 0°F and 5°F. Above 10°F, ice production slows dramatically or stops. Use a standalone thermometer to verify, as digital displays can be inaccurate.
Why does my ice taste like freezer food?
Ice absorbs odors from uncovered food in the freezer. Clean the ice bin with warm water and mild soap. Store food in sealed containers.
Replace the water filter if the taste persists.

Similar Posts