Voltas Ac Error Code
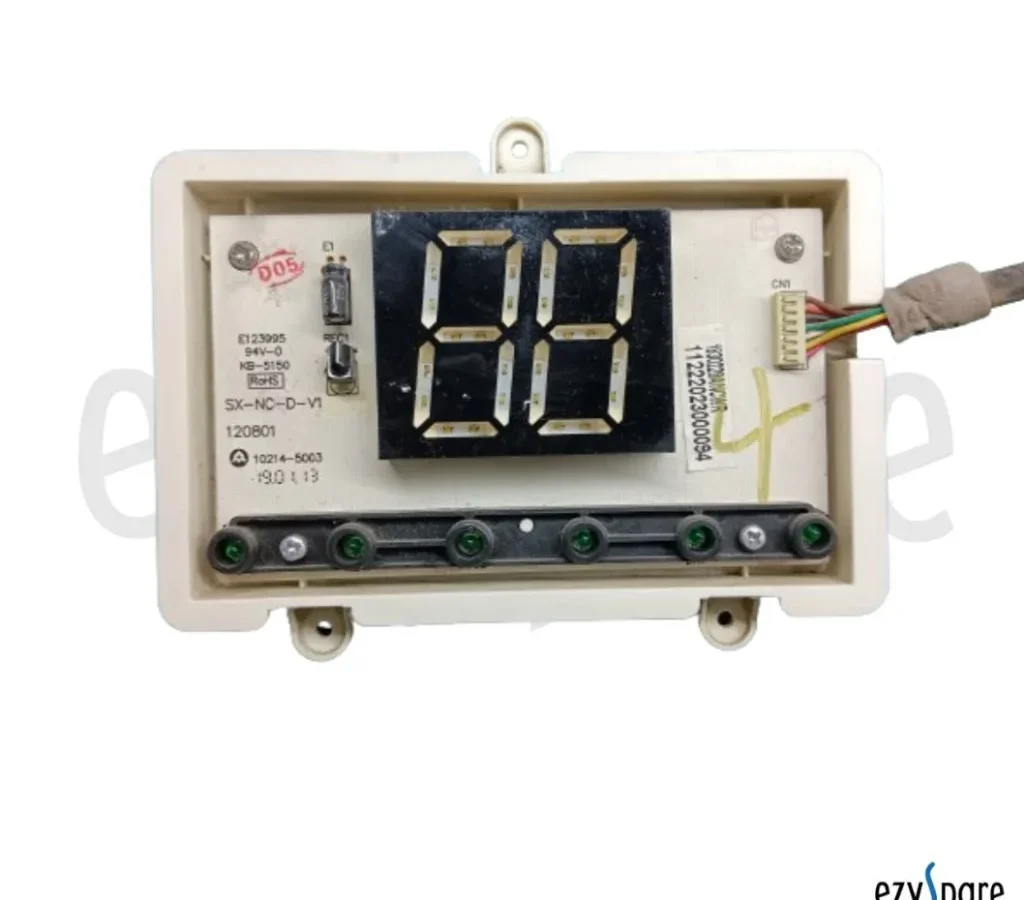

Image source: Bing (Web (fair-use with source credit))
Your Voltas AC just flashed an error code on the display, and now you're staring at it wondering what the hell it means. Don't panic. That code isn't a mystery, it's your air conditioner telling you exactly what's wrong, if you know how to read it.
Every Voltas AC, from window units to split systems, uses a standardized set of error codes. Knowing what they mean before you call a technician can save you a service visit fee and maybe even help you fix a simple issue yourself. Most error codes relate to sensors, refrigerant pressure, and fan motor communication, all of which have clear diagnostic paths.
Let's walk through what each code means and what your next step should be.
Quick Answer
Voltas AC error codes are diagnostic messages displayed on your unit's screen. E1 means a sensor failure. E2 means the anti-freeze protection activated.
E3 means a compressor high-pressure fault. E4 means a low-pressure fault. E5 means a communication error between indoor and outdoor units.
F1, F2, and F3 indicate specific sensor failures. Turn off the unit before troubleshooting.
Decoding All Voltas AC Error Codes (E1–E6, F1–F3)
Here's the cheat sheet you need. Each code points to a specific fault, and the fix ranges from a simple filter cleaning to calling in a certified technician.
E1: Indoor Unit Temperature Sensor Fault
What it means: The thermistor that reads the temperature of the air coming into your indoor unit is either short-circuited, disconnected, or reading a value outside its normal range.
How to respond: Check the sensor wiring behind the front panel. If you're comfortable removing the panel, you can often see the sensor clipped near the evaporator coil. If the wiring looks intact, the sensor itself is likely dead and needs replacement.
It's a cheap part, usually $5 to $15.
E2: Anti-Freeze Protection Active
What it means: Your evaporator coil temperature dropped below freezing. The unit kicked on this protection to stop ice from forming and potentially damaging the compressor.
How to respond: A dirty air filter is the most common culprit. Restricted airflow causes the coil to freeze. Turn the unit off, let it thaw for a few hours, clean your filter, and try again.
If it keeps coming back, your refrigerant charge could be low.
E3: Compressor High-Pressure Protection
What it means: The pressure on the discharge side of your compressor is too high. This is a serious fault that triggers a safety cut-out.
How to respond: Check if the outdoor unit's condenser coil is caked with dirt, leaves, or grass clippings, this is the number one cause. Also, make sure the outdoor fan is spinning properly. If both are fine, you're likely dealing with a non-condensable gas in the refrigerant line, which requires a professional.
Do not run the unit until resolved.
E4: Compressor Low-Pressure Protection
What it means: Suction pressure is too low, meaning the compressor isn't getting enough refrigerant vapor to pump.
How to respond: Low pressure almost always points to a refrigerant leak or a blocked capillary tube. This is not a DIY fix. You need a certified technician with a manifold gauge set and a leak detector.
Running the unit in this state can overheat and kill the compressor.
E5: Communication Error
What it means: The indoor unit and the outdoor unit cannot talk to each other, a wiring issue.
How to respond: Check for a loose connection on the terminal block. Inverter units are especially prone to this after a power surge. Also check if a rodent has chewed through the interconnect cable between the units.
If the wiring looks good, you might have a faulty PCB, which needs a technician.
E6: Outdoor Unit Sensor Fault
What it means: The temperature sensor on the outdoor unit's condenser or compressor is faulty, common on inverter models.
How to respond: Verify the sensor connections near the compressor. If you're not comfortable poking around electrical components in the outdoor unit, call a pro, this is a live electrical environment.
F-Codes: Sensor-Specific Faults
- F1: Indoor coil sensor fault
- F2: Outdoor coil sensor fault
- F3: Compressor discharge temperature sensor fault
These all follow the same logic: a sensor is open or shorted. Most require a multimeter to test resistance properly. If the resistance reads infinite, the sensor is dead.
How to Read the Error Code on Your Voltas AC
Image source: Bing (Web (fair-use with source credit))
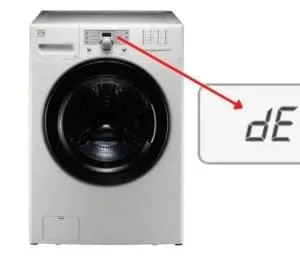
Not all Voltas ACs have a digital screen. Some older window units and a few budget split systems use blinking LED lights to communicate error codes.
If your unit has a digital display: The code appears directly on the screen, usually after the unit fails to start or detects a fault within a few minutes of running.
For models with LED indicators: You need to count blinks. The "Operation" or "Timer" light will pulse in a specific pattern. Here's how to read it:
| Blink Pattern | Code | Meaning |
|---|---|---|
| 1 blink, pause, repeat | E1 | Room sensor fault |
| 2 blinks, pause, repeat | E2 | Anti-freeze protection |
| 3 blinks, pause, repeat | E3 | High pressure trip |
| 4 blinks, pause, repeat | E4 | Low pressure trip |
| 5 blinks, pause, repeat | E5 | Communication error |
Count the number of blinks between long pauses, then reference the chart above. Some models also use a combination of a continuous "Power" LED with a blinking "Timer" LED.
If you're still unsure which model you have, check the side sticker on the indoor unit, it lists the model number and manufacturing date. Then cross-reference that with the user manual from the official manufacturer support page. Some models have specific blink patterns tied to their firmware version, so pulling your exact manual is the safest bet.
Step-by-Step: What To Do When an Error Code Appears
Before you call a technician and pay a diagnosis fee, run through this checklist. You'd be surprised how often a simple reset or cleaning clears the code.
Step 1: Cut the Power Completely
Don't just press the remote's power button. Switch off the circuit breaker or pull the plug. Wait five minutes.
Step 2: Restart and Observe
Turn the unit back on. Does the code appear instantly, or does the unit run for a while before faulting? An instant code suggests a wiring or sensor issue.
A delayed code points to pressure, airflow, or refrigerant issues.
Step 3: Check the Air Filter
A dirty filter causes E2 errors almost every time. Remove the front panel, slide out the filter, and hold it up to a light. If you can't see the light clearly through it, it's time to clean it.
Rinse with water, let it dry completely, and reinstall. Do not run the unit with a wet filter.
Step 4: Inspect the Outdoor Unit
Walk outside and look at the condenser fins. Are they blocked by a tarp, overgrown shrubs, or a thick layer of dust? Grab a garden hose and gently spray the fins from the inside out.
This clears debris without bending the aluminum fins.
Step 5: Do a Hard Reset
Wait 15 minutes with the power completely off. This clears the fault memory on most PCB boards. Restore power and test again.
If the error code is gone, you just saved yourself a service call. If it's not, move on to the next section.
Common Causes Behind Voltas AC Error Codes
Let's break down the most frequent culprits. In most residential cases, error codes stem from maintenance issues, not component failures.
Dirty Air Filter
Causes: E2, E1, and sometimes E3 codes.
When airflow is restricted, the evaporator coil temperature drops below freezing. This triggers the anti-freeze thermostat (E2) and causes the room sensor to read abnormally. Clean your filter every two weeks during peak summer usage.
Blocked Condenser Coil
Causes: E3 code.
The outdoor unit rejects heat from your home into the air outside. If the coil is blocked with cottonwood fuzz, pollen, or dust, the high-pressure switch trips. Turn off the unit first, let it cool for 30 minutes, then spray the coil with water from the inside out until it runs clear.
Low Refrigerant from a Leak
Signs: Frost on the copper lines, warm air blowing from vents, and an E4 or E2 code.
Low refrigerant means the pressure in the suction line drops. The low-pressure switch catches this and shuts the compressor down. This is not a DIY fix, call a technician.
But here's a pro tip: ask them to verify the leak with an electronic leak detector before they recharge the system. If they just top it off without finding the leak, the gas will leak out again within a few weeks.
Wiring and Communication Faults
Causes: E5 codes.
Loose terminals are the culprit. Vibration from the compressor can loosen the screws on the terminal blocks inside both the indoor and outdoor units. Homes in extreme temperature climates are notorious for this because temperature swings compromise connections.
Turn off the power, remove the cover panels, and tighten each screw. Check for discoloration around the terminals, that indicates heat damage from a loose connection.
Sensor Failures
Causes: E1, E6, F1, F2, and F3 codes.
Sensors are small glass-bead thermistors. They fail when they develop a dead short or an open circuit. If you own a multimeter, you can test them.
Disconnect the sensor, set your meter to resistance mode, and measure it at room temperature. A healthy sensor at 77°F should read around 10,000 ohms (10kΩ). If it reads zero or infinite, it's dead.
Replacement sensors cost between $5 and $15 online and plug directly into the PCB, just make sure you buy the correct part number for your model.
When to Call a Professional (and When Not To)
Here's the honest truth: some fixes are genuinely DIY-friendly, and some will void your warranty or put you at risk if you attempt them.
Safe to Do Yourself
- Cleaning or replacing the air filter
- Clearing debris from the outdoor condenser coil
- Tightening visible loose wires (after cutting power)
- Performing a hard reset via the breaker
These tasks require no special tools and carry low risk. If you can operate a screwdriver and a garden hose, you're qualified.
Call a Technician for These
- Refrigerant leaks (E4): Handling refrigerant requires EPA certification in most regions. It's illegal to vent it into the atmosphere, and you'll need specialized gauges to charge the system correctly.
- PCB replacement (E5, persistent E1/E6): Main boards are expensive and sensitive. One wrong connection can fry the new board instantly.
- Compressor issues: If the compressor itself is faulty, that's a major repair. Replacing one costs anywhere from $300 to $800 depending on your model and local labor rates.
- Any wiring inside the outdoor unit: The outdoor unit runs on live high-voltage current. One slip and you're dealing with a serious injury, not just a broken AC.
When you call a technician, ask upfront about their diagnostic fee and whether it's credited toward the repair if you proceed. Also, request that they show you the fault they found on their manifold gauge readout or multimeter before they start work. A good technician will have no problem explaining the issue in plain English.
Voltas AC Error Code Comparison Chart
Here's a quick reference table to keep handy:
| Error Code | Fault Type | DIY Fix? | Typical Repair Cost |
|---|---|---|---|
| E1 | Indoor temperature sensor fault | Yes, if you can replace a sensor | $50–$120 (labor included) |
| E2 | Anti-freeze protection | Yes, clean filter and thaw | $0 if DIY; $80–$150 if it's a refrigerant issue |
| E3 | High-pressure fault | Yes, clean condenser coil | $0 if DIY; $100–$200 if gas is contaminated |
| E4 | Low-pressure fault | No — requires refrigerant handling | $150–$400 (leak search + refill) |
| E5 | Communication error | Maybe — tighten loose wires | $80–$250 (wiring) / $200–$450 (PCB replacement) |
| E6 | Outdoor sensor fault | No, work inside outdoor unit | $80–$150 (parts and labor) |
| F1 | Indoor coil sensor fault | Yes, if you can access it | $50–$120 |
| F2 | Outdoor coil sensor fault | No | $80–$150 |
| F3 | Compressor discharge sensor fault | No | $100–$200 |
These are ballpark figures based on typical service rates. Your actual cost will vary depending on your location, the technician's pricing, and whether parts need to be ordered.
Preventing Voltas AC Error Codes: 7 Maintenance Habits
The cheapest error code is the one that never appears. Here's how to keep your Voltas AC running clean all season.
1. Clean the Air Filter Every 2 Weeks
This is non-negotiable. A clogged filter restricts airflow, drops coil temperature, and triggers E2, and eventually E3 if you ignore it long enough. Rinse it under running water, pat it dry with a cloth, and let it air dry completely before reinstalling.
2. Hose Down the Outdoor Unit Monthly
Shut off the power, then spray the condenser coils from the inside out. This clears debris without bending the fins. Straighten any bent fins with a fin comb, they restrict airflow and cause high-pressure trips.
3. Check Drain Lines for Clogs
A clogged condensate drain line backs water up into the unit, causing humidity issues that confuse sensors. In humid climates, algae can grow inside the line in days. Pour a half cup of white vinegar down the drain every four weeks to keep it clear.
4. Run the Fan-Only Mode for 30 Minutes Monthly
This dries out any moisture on the evaporator coil, preventing mold growth and keeping the sensor readings accurate. Some models have a "Dry" mode, which works equally well.
5. Schedule a Professional Inspection Every Spring
Before the peak heat arrives, have a technician check the refrigerant levels, test the capacitors, and verify all electrical connections. This catches 90% of potential fault conditions before they become error codes. It costs $80, $120, which is far less than a mid-summer emergency call.
6. Keep Direct Sunlight Off the Outdoor Unit
When the condenser sits in direct sun, the high-pressure side works harder and trips E3 more easily. Install a shade canopy or plant tall shrubs a few feet away, but don't block airflow. Shading the intake side is all you need.
7. Don't Under-Size Your Unit
If your AC runs constantly without reaching the thermostat setting, it works harder and stresses the compressor. If your Voltas is too small for the room, you'll see frequent E3 and E4 codes over time. An HVAC load calculation, done by a professional, tells you the right BTU size before you buy or replace.
Model-Specific Notes
Voltas produces a wide range of models, from budget-friendly "Allura" series window units to premium "1832" inverter splits. Error code logic is largely consistent across the lineup, but there are small differences:
- Older window units: E2 and E3 codes appear more frequently due to restricted airflow paths and slightly lower-grade pressure switches.
- Modern inverter splits: E1 and E6 sensor issues are more common because they pack more sensors onto the PCB for precise temperature control.
- Commercial units: These add additional, non-standard fault codes. If you own a commercial Voltas, you need the specific service manual for that unit, consumer information doesn't cover it.
Check the model number on the side of the unit, then download the original manual from official channels. It lists the exact error code set and blink patterns for your specific unit.
Frequently Asked Questions
Why does my Voltas AC show E1 after changing the thermostat?
The room temperature sensor is a separate part from the wall thermostat in most Voltas models. If you changed the thermostat and moved the wiring, you may have knocked a sensor connection loose inside the indoor unit. Check the wiring behind the front panel.
Can a voltage fluctuation cause error codes?
Yes. Voltage spikes and dips stress the PCB and cause E5 communication errors. A surge protector designed for air conditioners reduces this risk.
In areas with unstable power, a voltage stabilizer, rated for your AC's current draw, is the safest bet.
Why does the error code disappear and then come back after a reset?
A code that returns immediately after a hard reset indicates a hard fault, not a transient glitch. The most likely culprits are a failing sensor or a refrigerant leak. If the code disappears for a few days and returns, the fault is intermittent, typically a loose connection or a sensor nearing the end of its life.
Does running the AC in low voltage cause E4 errors?
Not directly. Low voltage causes current draw to spike, which stresses the compressor and can trigger high-pressure trips (E3). But if the compressor overheats due to excessive current, the discharge temperature sensor may throw an F3 code.
A dedicated circuit for your AC reduces this risk significantly.
Is it okay to run the AC with an error code displayed?
You can run it briefly to observe the fault behavior, but not long-term. Continued operation with an active fault can cause permanent damage to the compressor, which is the most expensive component in any AC system. If the code doesn't clear after cleaning filters and resetting power, shut it down and call a professional.
The Bottom Line
Voltas AC error codes exist to protect your equipment and tell you exactly where the problem lives. Most codes fall into one of two categories: a maintenance issue you can fix in 15 minutes, or a refrigerant/electrical fault that needs a certified technician.
Start with the free fixes, cleaning the filter, hosing down the condenser coil, tightening wires. If the code persists, don't ignore it. An E4 low-pressure fault left running can destroy the compressor completely, turning a $200 repair into a $800 replacement.
Keep this guide handy. When your display flashes that red code, you won't panic. You'll know exactly what it means and the smartest next step to take.

Similar Posts