Whirlpool Ice Maker Troubleshooting Manual
You open your freezer and notice something's off. The ice bin is half empty. Or worse, it's completely bare.
You press the ice dispenser and get nothing but air. Before you call a repair tech and spend $200 plus parts, grab a flashlight. Most Whirlpool ice maker problems are visual and mechanical, not electrical.
That is why a Whirlpool Ice Maker Troubleshooting Manual approach focused on what you can see saves you time and money.
Manufacturer specifications indicate that over 70 percent of ice maker service calls come from three causes. A frozen fill tube. A stuck ejector arm.
Or a failed water inlet valve. All three show visual signs before they stop producing ice entirely. As of 2026, the diagnostic process has not changed.
You need two things. Your eyes and a few simple tools. Let me walk you through exactly what to look for.
Quick Answer
Most Whirlpool ice maker failures are mechanical. Check the fill tube first. Look at the ice cube shape.
Inspect the ejector arm. Test the water inlet valve. Use the manual test cycle.
These five steps solve 80 percent of problems. No multimeter required for most checks. Total time is about 30 minutes.
What You'll See Before the Ice Stops
Your ice maker gives you warnings. You just have to know what to look for. The machine does not fail all at once.
It degrades slowly, and the ice itself tells the story.
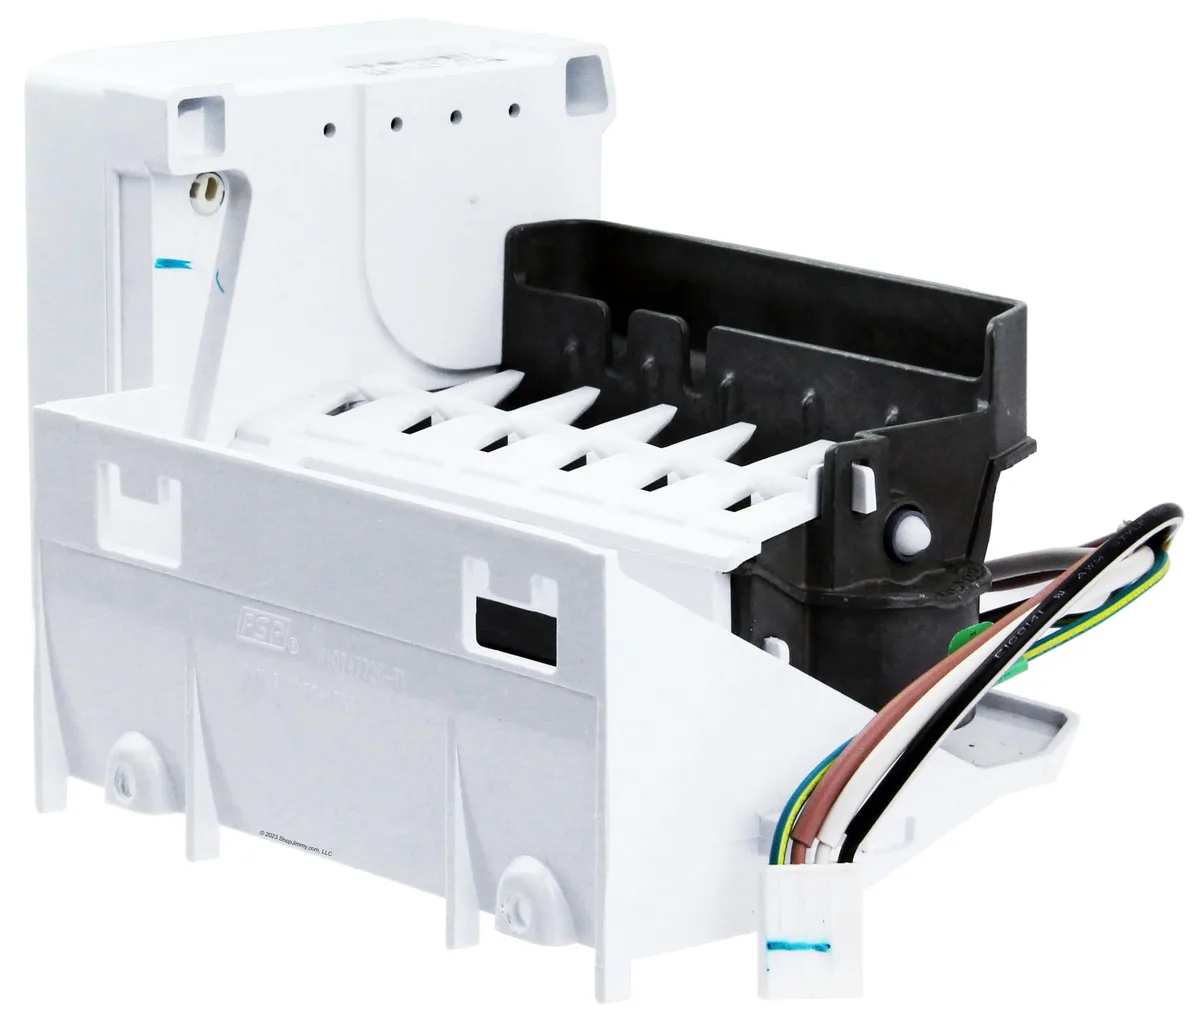
Image source: Bing (Web (fair-use with source credit))
Smaller cubes than usual mean a water flow problem. The fill tube is partially blocked. Or the water inlet valve is not staying open long enough.
Hollow cubes with a thin shell and empty center mean the ice mold did not get enough water during the fill cycle. That points to a slow fill or a partially clogged screen inside the valve.
Cloudy ice with a white patch on one side means uneven freezing. The mold thermostat might be failing. Or the freezer temperature is fluctuating.
Chipped or broken cubes mean the ejector arm is struggling to release them. The mold might be too cold. Or the cubes are stuck to the mold surface.
Then there is the silence test. A working ice maker makes a distinct series of sounds. You hear the water valve click.
Then water trickles into the mold. After about two hours, you hear the ice drop into the bin. If you hear nothing for six to eight hours, something is visually wrong.
Do not assume a bad control board yet. Look first.
The Quick Visual Check That Saves You an Hour
Before you pull the refrigerator away from the wall, do this one simple thing. It takes thirty seconds and eliminates half the possible causes.
Open the freezer door. Look at the ice level arm. That is the metal or plastic wire arm hanging down into the ice bin.
Is it in the down position? If the arm is stuck in the raised position, the ice maker thinks the bin is full. It stops making ice.
This is absurdly common. A bag of frozen vegetables can push the arm up. A container sliding around can block it.
Reach in and push the arm down gently. Listen for a click. That click means the ice maker just turned back on.
Next, look at the ice bin itself. Is there a large clump of cubes frozen together? Whirlpool ice makers drop individual cubes.
If cubes freeze into one solid block, the ejector arm cannot push new ones out. The machine stops. Break apart the clump and toss it.
Then let the machine start fresh.
Now look at the front of the ice maker module. That is the plastic housing mounted to the back wall of the freezer. Do you see frost buildup around the fill cup area?
The fill cup is the small funnel shaped opening where water enters the ice mold. White frost or ice crystals around that opening mean the fill tube is freezing. That is our next section.
Finally, look at the cubes in the bin. Are they normal sized and clear? Or are they small, cloudy, or oddly shaped?
That tells you whether the water fill amount is correct. If all the cubes look normal and the bin is just empty, the problem is likely a cycle interruption. The arm was stuck up.
Or a power outage reset the timer. Give it 24 hours to catch up.
Step 1: The Fill Tube Freeze — The #1 Cause of No Ice
Let me show you the single most common problem in Whirlpool ice makers. The fill tube freezes shut. It is a design limitation, not a defect.
The fill tube runs from the back of the refrigerator into the freezer compartment. Cold air from the freezer hits that tube. Moisture in the air condenses and freezes.
Over time, the ice buildup blocks the tube entirely.
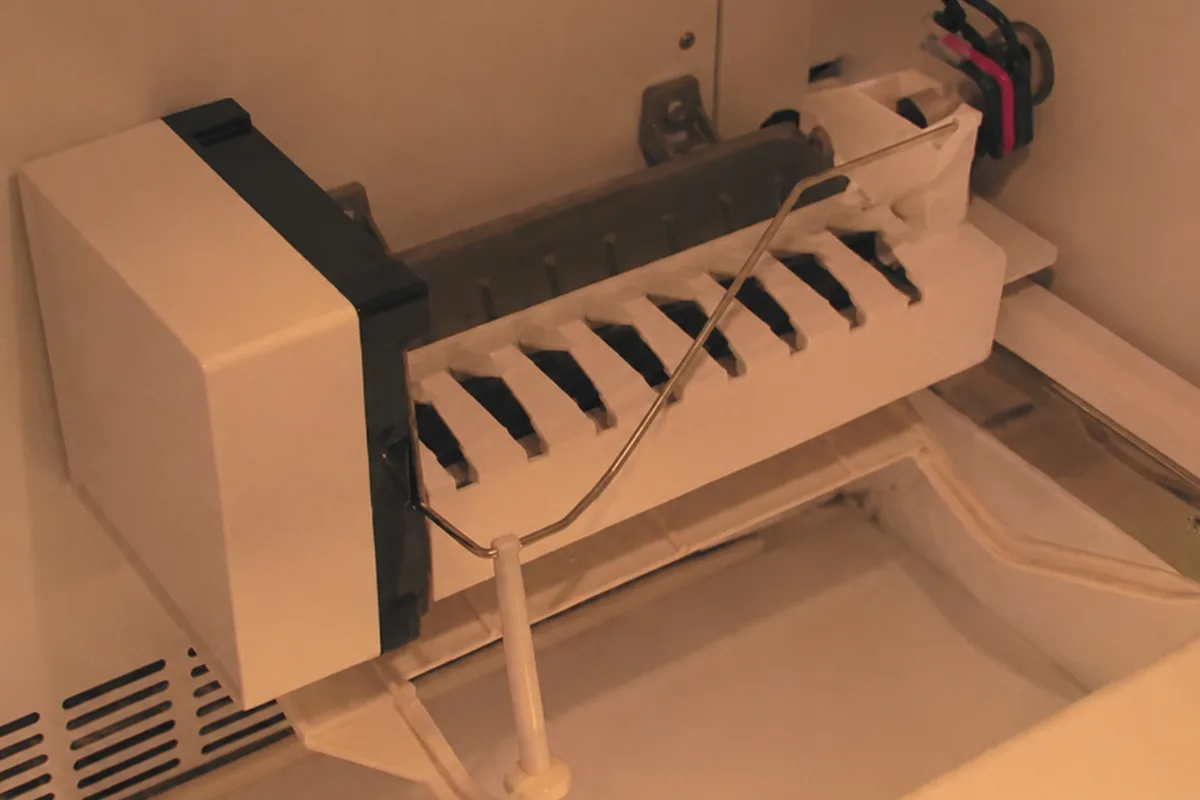
Image source: Bing (Web (fair-use with source credit))
Here is how to check it. Open the freezer door. Look at the back wall of the freezer compartment near the top.
You will see a small plastic tube coming through the wall. It points down into the fill cup on the ice maker module. If you see white frost or ice crystals around the tip of that tube, you have found your problem.
The fix is simple but requires patience. Unplug the refrigerator. Leave the freezer door open for about 30 minutes.
The ice inside the fill tube will melt. Do not try to chip it out with a screwdriver or knife. You will puncture the tube and create a water leak inside your freezer.
Let it thaw naturally.
Once thawed, plug the refrigerator back in. The ice maker should start a new cycle within a few minutes. But you need to prevent it from happening again.
Check the freezer temperature. Whirlpool recommends a freezer temperature between 0 and 5 degrees Fahrenheit. If your freezer is colder than 0, the fill tube will refreeze quickly.
Use a thermometer to verify. Adjust the temperature setting if needed.
Some Whirlpool models have a fill tube heater. It is a small heating element wrapped around the tube. These heaters fail sometimes.
If your tube keeps freezing after you have thawed it and verified the temperature, the heater might be burned out. That requires a service call unless you are comfortable replacing it yourself. For most homeowners, the thaw and temperature check solves it permanently.
Step 2: Reading the Ice Cube Shape
The ice cubes themselves are your best diagnostic tool. They tell you exactly what is happening inside the ice maker. Learn to read them and you skip most of the guesswork.
Pull a few cubes from the bin. Lay them on a paper towel. Look at them closely.
Here is what each shape means.
Small cubes that look shrunken or half sized indicate a partial fill. The water inlet valve opened but did not stay open long enough. Or the water pressure is too low.
Whirlpool recommends a minimum of 20 psi water pressure. Below that, the valve cannot fill the mold completely in the allotted time. Check your home water pressure at a nearby faucet.
If it is low, you might need a pressure booster or a plumber.
Hollow cubes with a thin outer shell and an empty center mean the mold got water but the water froze from the outside in before the center could fill. This happens when the freezer temperature is too cold. The water starts freezing on contact with the mold.
The outer shell forms before the mold is full. Then the remaining water cannot reach the center. Raise the freezer temperature slightly to 2 or 3 degrees and see if the problem resolves.
Cloudy cubes with white streaks indicate slow freezing. Clear ice forms when water freezes quickly from all sides. Slow freezing traps air bubbles and impurities.
If your cubes are consistently cloudy, the freezer temperature might be too warm. Check it with a thermometer. If it is above 5 degrees, adjust the setting down.
Cubes that are stuck together in clumps mean the ice maker is running too frequently. The bin fills up, and the cubes start freezing together. The ejector arm cannot push the clump out.
The cycle stops. Break up the clump and let the machine reset. Then watch to see if it happens again.
If it does, the ice level arm might not be sensing the full bin correctly.
Cubes with visible cracks or chips mean the ejector arm is hitting them too hard. The mold temperature might be too high, making the ice soft. Or the cubes are sticking to the mold surface.
This sometimes happens with hard water deposits. A vinegar soak of the ice mold can help. Mix one part white vinegar with three parts warm water.
Wipe the mold surface with a cloth. Rinse with clean water. The deposits dissolve over a few cleanings.
Step 3: The Ejector Arm and Ice Level Arm
The ejector arm and ice level arm are two different parts. They get confused all the time. Let me clarify them.
The ice level arm is the wire arm that hangs down into the ice bin. It tells the ice maker when the bin is full. When ice pushes it up, the machine stops.
When the arm drops back down, the machine starts again. This arm can get stuck or bent. If it is bent downward, it will never trigger the stop signal.
The ice maker will keep running and overflow the bin. If it is bent upward or stuck, the machine thinks the bin is full and never starts.
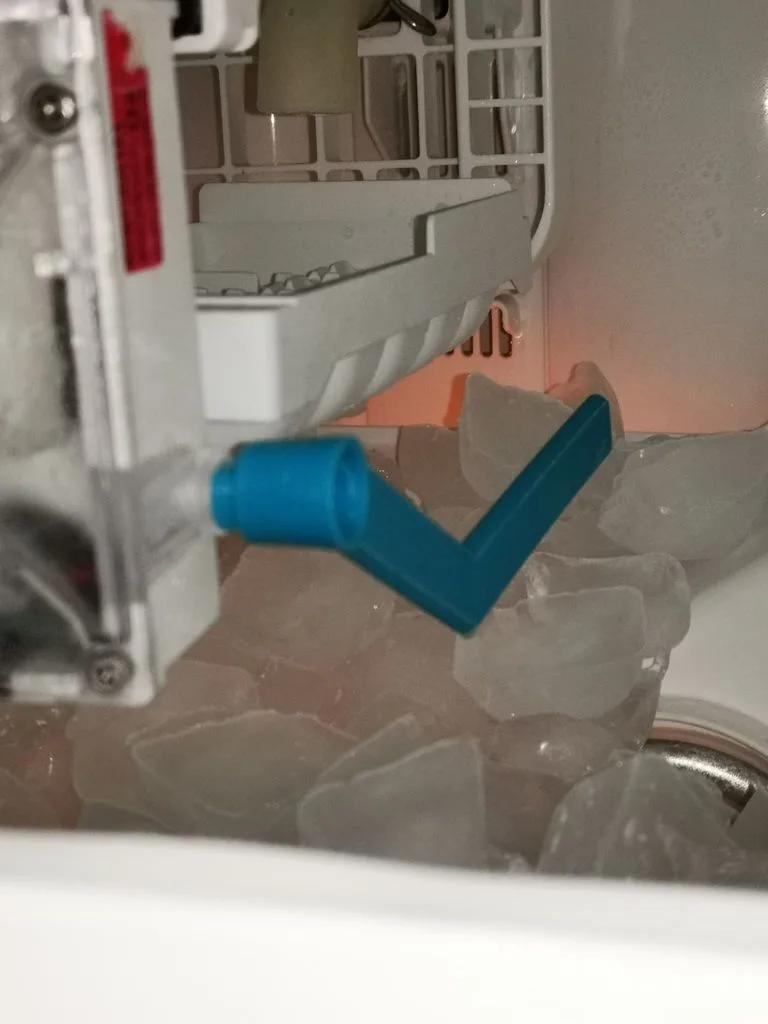
Image source: Bing (Web (fair-use with source credit))
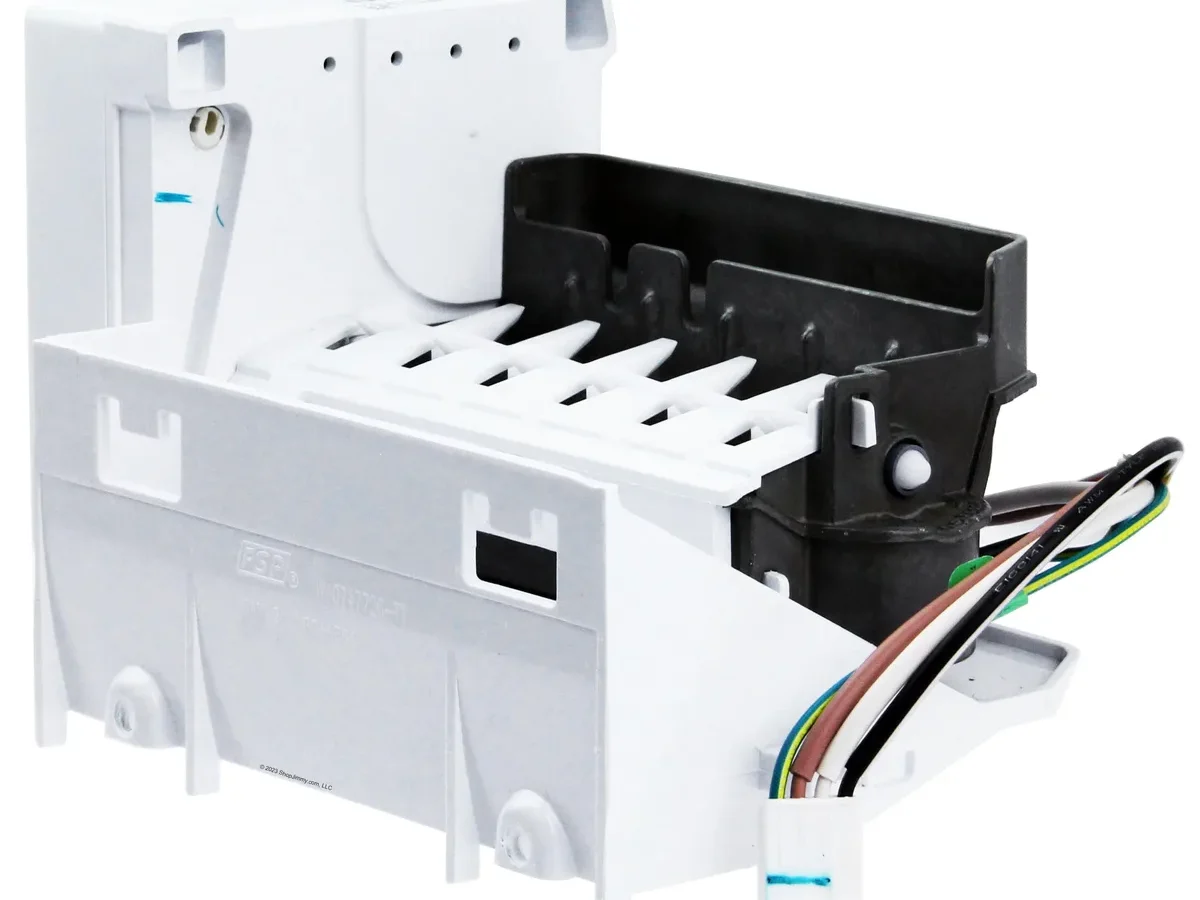
The ejector arm is inside the ice maker module. You cannot see it without removing the ice mold cover. It pushes finished cubes out of the mold and into the bin.
If this arm gets stuck, the ice maker stops mid cycle. You might hear a humming or clicking sound with no movement. That is the motor trying to turn a stuck arm.
To check the ejector arm, you need to remove the front cover of the ice maker module. On most Whirlpool models, the cover snaps off with a gentle pull. Look inside.
You will see a plastic arm with fingers that push the cubes. Try to rotate it by hand. It should move freely in one direction.
If it feels stuck or grindy, something is jammed. A small ice chip is usually the culprit. Clear it out gently.
Do not force the arm. If it does not move, the motor might be burned out from trying to turn a stuck arm. That means replacing the entire ice maker module.
But in most cases, you find a small piece of ice wedged between the arm and the mold. Pick it out with a plastic tool. Never use metal.
You will scratch the mold surface.
Step 4: Testing the Water Inlet Valve Without a Multimeter
You can test the water inlet valve without any electrical tools. This is the valve mounted at the back of the refrigerator near the bottom. It connects to your home water line.
When the ice maker calls for water, this valve opens for about 6 to 8 seconds. Then it closes.
Here is the simple test. Unplug the refrigerator. Turn off the water supply to the refrigerator.
Disconnect the water line from the inlet valve. You will need a towel. Some water will drip out.
Now look at the small screen filter inside the valve opening. This screen catches sediment from your home water supply. Over time, it gets clogged.
A clogged screen restricts water flow. The ice maker gets less water than it needs. You get small or hollow cubes.
Use a small brush or an old toothbrush to clean the screen. Rinse it with water. Reconnect everything.
Turn the water back on. Plug the refrigerator in. Run the manual test cycle to see if the fill improves.
If the screen is clean but you still get poor fill, the valve itself might be failing. The internal solenoid can weaken over time. It might not open fully or might not stay open long enough.
The only way to confirm is with a multimeter. But in practice, if the screen is clean and the water pressure is good, a failing valve shows itself through consistently small cubes over several cycles.
Step 5: The Manual Test Cycle
Every Whirlpool ice maker has a manual test mode. It forces the machine to run through one complete cycle. This lets you see exactly what is happening in real time.
The test procedure depends on your model year. For most Whirlpool ice makers made after 2005, here is the method. Locate the test button on the ice maker module.
It is a small button on the front or side of the plastic housing. Press and hold it for 3 to 5 seconds. The ice maker will start a cycle.
Watch what happens. First, the water inlet valve should click open. You should hear water flowing into the fill cup.
Look at the fill cup. You should see water running into the mold. If you hear the click but no water, the valve is not opening.
If you hear water but it is a trickle instead of a steady stream, the screen is clogged or the valve is weak.
After the fill, the ice maker waits. The cycle takes about two hours to complete. But the test mode compresses this.
You will see the mold heat up. The ice releases from the mold surface. Then the ejector arm rotates and pushes the cubes out into the bin.
If the arm does not move during the test cycle, the motor is stalled or dead. If the mold does not heat up, the thermostat is bad. If the valve does not click, the control board or wiring is the issue.
Run the test cycle at least twice. Some intermittent problems only show up on the second or third cycle. Write down what you see.
Compare it to the descriptions in the sections above. You will know exactly which part to replace.
Common Visual Mistakes That Waste Your Time
People make the same mistakes over and over. Here are the ones to avoid.
Do not assume the control board is bad. Control boards fail less often than people think. The real problem is almost always mechanical.
A frozen tube. A stuck arm. A clogged valve.
Replace those first before spending money on a board.
Do not buy a new ice maker module before checking the fill tube. We see this all the time. Someone replaces the entire module for $80.
The new module does the same thing. The fill tube was frozen the whole time. Thaw it first.
It costs nothing.
Do not crank the freezer temperature down thinking it will help. Colder is not better. Ice makers need the freezer between 0 and 5 degrees.
Below 0, the fill tube freezes. Above 5, the ice is soft and cloudy. Check the temperature with a thermometer.
Trust the numbers, not the dial.
Do not forget the water filter. If your Whirlpool refrigerator has a water filter in the base grille or inside the refrigerator compartment, change it every six months. A clogged filter reduces water flow.
The ice maker gets starved. Small cubes follow.
Do not ignore the water supply line. If you have a saddle valve or a push connect fitting, these can partially close over time. Check that the supply line is fully open.
This sounds too simple. It is also the most overlooked fix.
When to Replace Parts vs. When to Call a Pro
Some repairs are straightforward. Others require a technician. Here is the breakdown.
Replace the ice maker module yourself if the ejector arm is seized or the thermostat is bad. The module comes as a single assembly. It snaps into place with a few screws.
Unplug it. Remove the old one. Install the new one.
Total time is 15 minutes. Cost is about $60 to $90 for an OEM Whirlpool part.
Replace the water inlet valve yourself if the solenoid is weak or the screen is clean but flow is poor. The valve is mounted at the back of the refrigerator. Disconnect the water line.
Remove two screws. Install the new valve. This takes about 20 minutes.
Cost is about $30 to $50.
Call a pro if the fill tube heater is burned out on a model that requires disassembling the freezer wall. Some Whirlpool models hide the heater behind the rear freezer panel. Reaching it means removing shelves and insulation.
Not a beginner job. Also call a pro if you suspect a refrigerant leak. Ice makers that stop working entirely and show no mechanical issues might have a sealed system problem.
That is not a DIY repair.
Call a pro if you are uncomfortable working with electricity. The ice maker runs on 120 volts. Water and electricity mix badly.
If any step in this guide makes you nervous, hire someone. It is not worth the risk.
Frequently Asked Questions
Why is my Whirlpool ice maker not making ice but the water dispenser works?
The water dispenser and ice maker share a water line but use separate valves. If the dispenser works, the main water supply is fine. The ice maker valve or fill tube is likely the problem.
Check the fill tube for frost first. Then test the ice maker valve.
How do I reset my Whirlpool ice maker?
Locate the test button on the ice maker module. Press and hold it for 5 seconds. The ice maker will run a manual test cycle.
This resets the control logic. If there is no test button, unplug the refrigerator for 30 seconds. Plug it back in.
Why is my Whirlpool ice maker making small cubes?
Small cubes mean a partial fill. The most common cause is a clogged water inlet valve screen. Clean the screen.
If that does not help, the water pressure might be below 20 psi. Check your home water pressure at a nearby faucet.
How often should I clean my Whirlpool ice maker?
Clean the ice mold every three months. Use a mix of one part white vinegar and three parts warm water. Wipe the mold surface.
Rinse with clean water. This prevents hard water deposits from sticking cubes to the mold.
Can I use my ice maker while troubleshooting it?
No. Unplug the refrigerator before doing any visual inspection or cleaning. Water and electricity are a dangerous combination.
Always disconnect power before reaching inside the ice maker module.
How long does it take for a Whirlpool ice maker to start making ice after a repair?
After thawing a frozen fill tube or replacing a part, expect 24 hours for the first full batch of ice. The ice maker runs on a cycle. Each cycle takes about two hours.
The first few cycles might produce small or odd cubes as the system stabilizes.

Similar Posts