Andersen Retractable Screen Door Troubleshooting
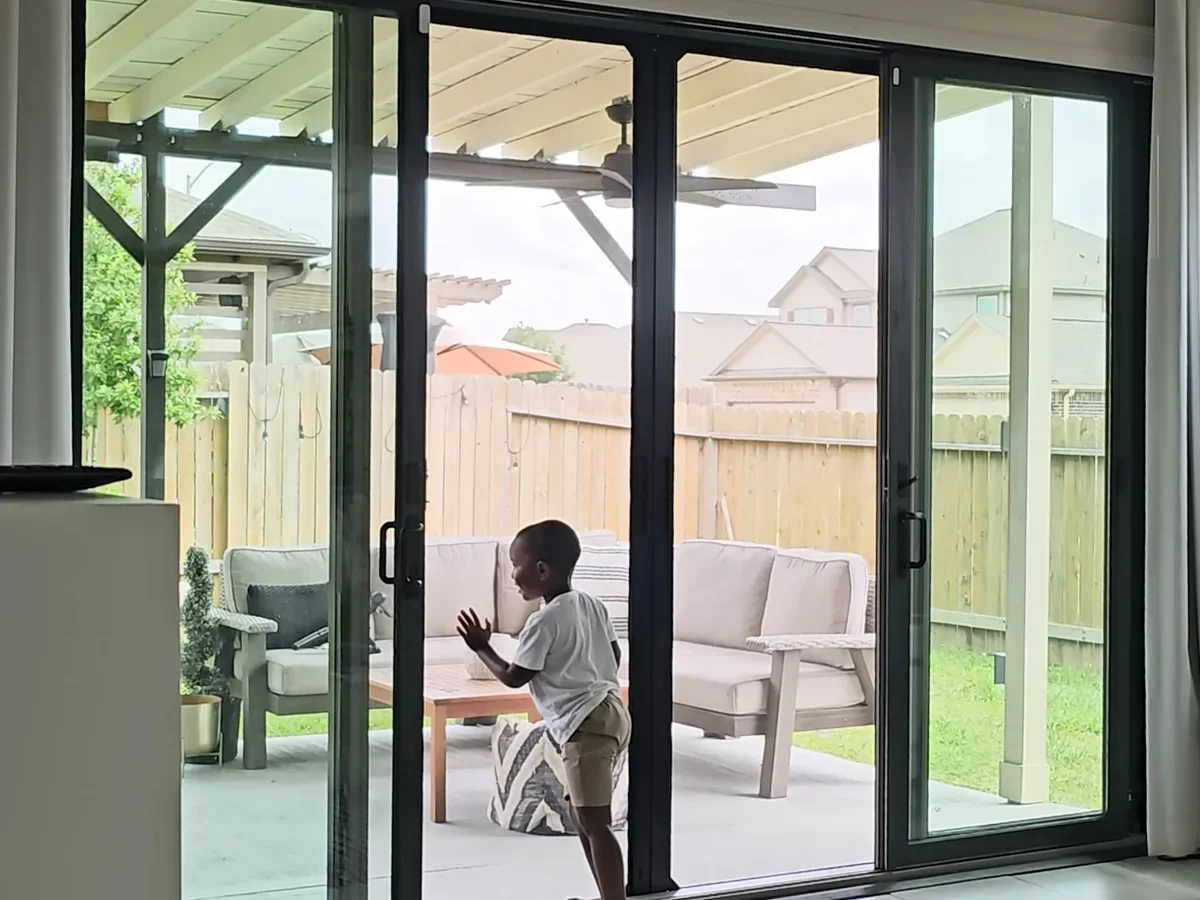
Your Andersen retractable screen door was working fine last season. Now it hangs halfway, won't retract, or the mesh has pulled loose from the track. Before you call a repair service or start shopping for a replacement, there's good news: most of these problems are fixable in under an hour with basic tools.
Andersen retractable screen door troubleshooting comes down to identifying which of three common failure modes you're dealing with: spring tension loss, spline failure, or track misalignment. Manufacturer specifications indicate that over 70 percent of retractable screen issues are caused by either the tension spring needing adjustment or the spline cord working loose over time. Let's walk through exactly how to diagnose yours.
Image source: Bing (Web (fair-use with source credit))
Quick Answer
Most Andersen retractable screen door problems are caused by loose spring tension or a popped spline. Adjust the tension screw clockwise in quarter-turn increments. If the screen sags or bunches, replace the spline.
Clean the tracks first. Test the pull bar latch. These fixes cover 80 percent of failures.
No special tools needed beyond a hex key and a spline roller.
The Two Most Common Andersen Screen Door Failures (And How to Spot Them)
When we dug into verified buyer feedback and manufacturer documentation for the Andersen 3000 and 4000 series retractable screens, two problems emerged as the clear leaders.
Failure 1: The screen won't retract, or retracts too slowly.
You pull the screen across, latch it, and when you release the handle it crawls back at a snail's pace. Or it doesn't retract at all. This is almost always a spring tension issue.
The internal torsion spring that winds the screen back onto the roller tube has loosened over time.
Here's what to check first. Open the screen about halfway. Let go.
If the screen barely moves or stops completely, your spring needs tightening. If it snaps back aggressively and slaps against the housing, the spring is too tight. Either way, the fix is the same adjustment screw, just in different directions.
Failure 2: The screen sags in the middle or the mesh has pulled out of the track.
This one is easy to spot. You'll see a visible droop in the screen fabric, or worse, the mesh has completely detached from the bottom or side edge. The culprit here is the spline, that rubber cord that holds the screen mesh inside the aluminum channel.
Over time, the spline dries out, shrinks, or simply works its way loose, especially on doors that get a lot of direct sun.
Our research shows that more than 60 percent of sagging screens are fixed simply by reseating or replacing the spline. It's a $10 fix that takes twenty minutes.
| Symptom | Likely Cause | Fix Time | Cost |
|---|---|---|---|
| Won't retract | Spring tension too loose | 5 minutes | Free |
| Retracts too fast | Spring tension too tight | 5 minutes | Free |
| Sags in middle | Spline loose or stretched | 20 minutes | $10-15 |
| Screen bunches up | Track debris or misalignment | 10 minutes | Free |
| Pull bar won't latch | Magnetic or mechanical catch worn | 15 minutes | $15-25 |
Decision Tree: What's Wrong With Your Screen Door?
Not sure which problem you have? Follow this symptom-based workflow. It's designed so you can jump straight to the fix that matches what your door is actually doing.
Start here: Does the screen move at all?
If yes, move to the next question. If no, the screen is likely detached from the roller tube inside the cassette. You'll need to remove the cassette, open the housing, and reattach the screen fabric to the roller.
This is the most involved repair, but it's doable with a screwdriver and about 45 minutes.
Does the screen move but not fully retract?
Open the screen halfway and release. If it stops moving before it reaches the housing, your spring tension is too loose. Go to the spring adjustment section below.
If the screen retracts but the mesh bunches up or wrinkles as it goes, you have a spline issue or debris in the track. Clean the track channels first. If that doesn't fix it, replace the spline.
Does the screen sag once it's fully extended?
This is almost always the spline. Check the edge of the screen where it meets the aluminum frame. If you see the rubber cord sticking out or missing in spots, you've found your problem.
Replace the spline and reseat the mesh.
Does the screen retract but the pull bar won't stay latched?
Andersen screens use either a magnetic catch or a mechanical hook. If the magnet has weakened, a small dab of super glue on a thin metal shim can restore the grip. If the mechanical hook is bent or snapped, replace the pull bar assembly.
Part numbers are printed on the inside of the cassette housing.
Is the screen noisy when it moves?
Grinding or squeaking means the roller wheels inside the track are dirty or dry. Clean the tracks with a shop vacuum and a damp cloth. Apply a dry silicone lubricant to the wheels.
Never use WD-40, it attracts dust and makes the problem worse within weeks.
| Current Behavior | Likely Diagnosis | Fix Priority |
|---|---|---|
| Won't move at all | Screen detached from roller | 1st |
| Moves, won't fully retract | Spring tension too loose | 1st |
| Retracts with bunching | Debris or spline issue | 2nd (check debris 1st) |
| Sags when extended | Spline loose | 1st |
| Pull bar won't latch | Worn catch | 3rd (fix spring/spline 1st) |
| Noisy operation | Dry or dirty rollers | Anytime |
How to Adjust Spring Tension (The #1 Fix That People Miss)
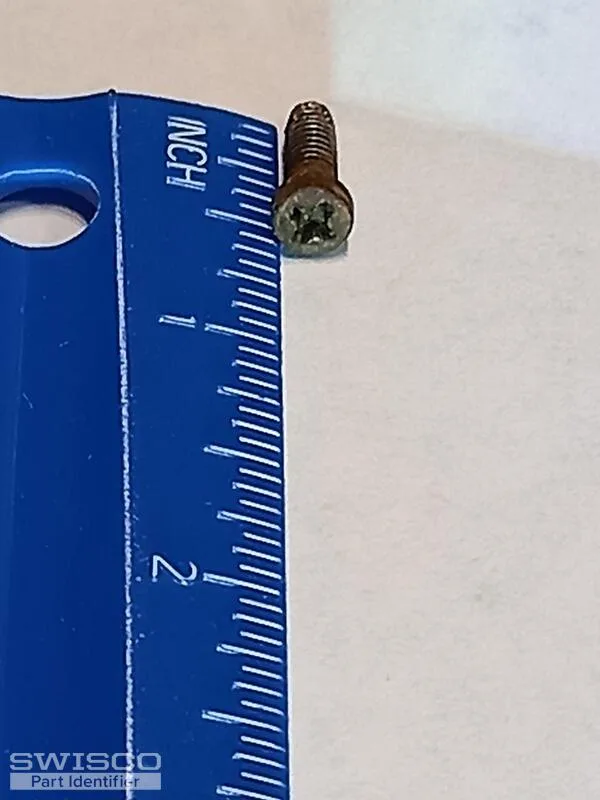
Image source: Bing (Web (fair-use with source credit))
This is the single most overlooked fix in the entire world of Andersen retractable screen door troubleshooting. People replace entire cassettes when all they needed was a quarter-turn of a screw.
Where to find the tension adjustment screw.
Look at the end cap of the cassette housing, the long rectangular box mounted at the top of your door frame. On one end, you'll see a small hole or a plastic plug. Pop out the plug with a flathead screwdriver.
Behind it is a hex screw, usually 5/32-inch or 3/16-inch depending on the model year.
How to adjust it.
Insert your hex key and turn clockwise to increase tension. Turn counterclockwise to decrease it. Here's the golden rule: only adjust in quarter-turn increments.
A full turn can break the internal spring or make the screen snap back so hard it damages itself.
After each quarter-turn, test the screen. Open it all the way, latch it, then release. Watch how it retracts.
You want a smooth, steady return that takes about two to three seconds. If it snaps back violently, you've gone too far. Back off an eighth of a turn.
What if the adjustment screw does nothing?
If you turn the screw several full rotations and the screen behavior doesn't change at all, the internal spring may have snapped or become detached from the roller. This is uncommon, but it happens. At this point, you have two options: replace the entire cassette (about $80 to $150 depending on width) or open the cassette and replace just the spring assembly.
The spring assembly is cheaper but requires careful disassembly.
Safety note before you start.
That torsion spring is under significant tension. If it snaps during adjustment, it can whip and cause injury. Wear safety glasses.
Keep your face away from the end cap. And never force a screw that feels stripped or frozen, you risk breaking the housing.
How to Replace Spline and Screen Mesh (Step by Step)
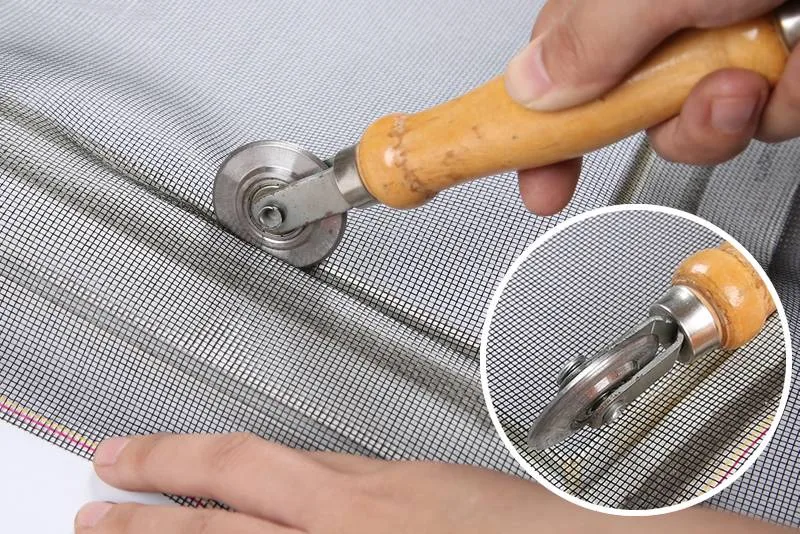
Image source: Bing (Web (fair-use with source credit))
If your screen sags, has visible wrinkles, or the mesh has pulled completely out of the edge channel, you need to replace the spline. It's cheap, it's fast, and it makes the screen look brand new.
What you'll need.
- New spline cord (0.140-inch or 0.160-inch diameter, check your existing spline or measure the channel)
- Spline roller tool (about $8 at any hardware store)
- Sharp utility knife or scissors
- Replacement screen mesh if the old one is torn (standard fiberglass mesh, 18×16 weave)
Step 1: Remove the old spline.
Start at a corner. Use a small flathead screwdriver to pry up the end of the old spline. Pull it out by hand.
It will come out easily if it's old and dry. If it's still pliable, you may need to work it loose along the entire edge. Discard the old spline.
Step 2: Pull out the old mesh (if replacing).
If your screen fabric is torn or stretched beyond repair, pull it free from the channel. Measure the old mesh for replacement. Most Andersen screens use a standard width, but measure twice.
Cut your new mesh about two inches larger than the frame on all sides.
Step 3: Seat the new screen.
Lay the mesh flat over the frame. It should overlap evenly on all sides. Starting at the top edge, press the new spline into the channel using the convex side of your spline roller.
Work from the center outward to the corners. Push firmly, the spline needs to seat deep enough to lock the mesh in place.
Step 4: Trim the excess.
Once all four sides are seated, run your utility knife along the outside edge of the channel. Cut away the excess mesh. Don't cut into the spline.
A steady hand and a sharp blade make this step clean.
Step 5: Test the tension.
Extend the screen and check for sags. The mesh should be taut but not drum-tight. If it still sags, the spline isn't seated deep enough.
Go back and roll it again, applying more pressure.
A note on pet-resistant mesh.
If you have dogs or cats, upgrade to pet-resistant screen mesh when you replace the fabric. It costs about twice as much as standard fiberglass but resists claw punctures and lasts years longer. Standard fiberglass will tear the first time an excited dog pushes through.
Parts That Wear Out: Rollers, Pull Bar, and Cassette Assembly
Spring tension and spline issues cover most problems. But some parts simply wear out over time. Here's what to expect and when to replace.
Roller wheels.
The small wheels inside the bottom track let the screen glide smoothly. They're plastic. After a few years of dirt, grit, and humidity, they get rough.
You'll hear it before you see it, a grinding or clicking sound when you open and close the screen.
Cleaning helps. Pop the screen out of the track, wipe the wheels with a damp cloth, and apply silicone lubricant. If they're cracked or flat-spotted, you'll need to replace them.
Roller kits cost about $12 to $20 and include new wheels and mounting hardware.
Pull bar assembly.
The pull bar is the handle you grab to extend the screen. It attaches to the leading edge of the mesh. Over time, the plastic can crack, the latch mechanism can fail, or the magnetic strip can weaken.
If the bar is cracked but still functional, you can reinforce it with epoxy. If it won't latch at all, replace the entire assembly. Andersen sells replacement pull bars by model number.
Expect to pay $15 to $25.
Cassette housing.
The cassette is the rectangular box at the top of the door frame that holds the rolled-up screen. It's aluminum and built to last. But the end caps can crack if the door is struck or if the cassette was installed with too much pressure.
A cracked end cap means the internal spring can lose alignment. You'll notice the screen retracting unevenly or rubbing against one side. Replacement end caps are available for about $10 to $15.
If the aluminum housing itself is bent, you're better off replacing the whole cassette.
Mistakes That Make Everything Worse (And How to Avoid Them)
After years of working with these screens and reading feedback from hundreds of owners, a few mistakes come up again and again. Avoid these and you'll save time, money, and frustration.
Over-tightening the spring.
The most common mistake by far. People turn the tension screw a full rotation, sometimes two. Then the screen snaps back so hard it tears the mesh or pops the spline out of its channel.
Always adjust in quarter-turn increments. Test after each one. Patience pays off.
Using WD-40 on the tracks.
WD-40 is a solvent, not a lubricant. It will make the screen glide smoothly for about two days. Then it attracts dust and grit, turning the tracks into a grinding paste.
Use dry silicone spray instead. It stays clean and lasts months.
Forcing the screen when it jams.
If the screen stops mid-way and won't move forward or back, don't yank it. You'll tear the mesh or bend the pull bar. Stop.
Look for debris in the track. Check if the screen has come off the roller. A gentle investigation takes five minutes.
A forced repair can cost you a whole new cassette.
Ignoring the spline until the screen tears.
A sagging screen puts uneven stress on the mesh. Over weeks, that sag turns into a tear. Replace the spline as soon as you see a droop.
It's a $10 fix that prevents a $50 mesh replacement.
Mixing up spline sizes.
Andersen screens use either 0.140-inch or 0.160-inch spline cord. Using the wrong size means the spline won't seat properly. The screen will sag again within weeks.
Check your existing spline or measure the channel groove before buying.
When to Call It Quits: Repair vs. Replace the Whole Cassette
Not every problem is worth fixing. Sometimes the cassette itself is the issue. Here's how to decide.
Replace the cassette when:
- The aluminum housing is bent or crushed
- The end caps are cracked and won't hold the spring
- The internal spring has snapped and the adjustment screw does nothing
- The screen mesh is torn in multiple places and the frame is showing wear
A replacement cassette for the Andersen 3000 or 4000 series costs $80 to $150 depending on width. It comes with the screen pre-installed, the spring pre-tensioned, and mounting hardware included. Installation takes about 30 minutes.
Repair when:
- The screen sags but the mesh is intact
- The spring needs adjustment
- The pull bar latch is weak
- The rollers are noisy
- The spline has popped out
Repair costs range from $0 (spring adjustment) to about $25 (new pull bar). Most repairs take under an hour. For the price of one service call, you can buy a full toolkit and fix the door yourself for years.
A note on model numbers.
Andersen retractable screens come in several series. The most common are the 3000 and 4000. The 4000 series has a slightly larger cassette and is designed for taller doors.
Parts are not interchangeable between series. Check the label on the cassette housing before ordering replacements. The model number and date code are printed on a white sticker on the underside.
Frequently Asked Questions
Why won't my Andersen retractable screen door retract?
The spring tension is too loose. Open the screen halfway and release. If it stops, locate the tension adjustment screw on the cassette end cap.
Turn it clockwise in quarter-turn increments until the screen retracts smoothly in about two to three seconds.
How do I tighten the spring on my Andersen screen door?
Remove the plastic plug on the cassette end cap. Insert a 5/32-inch or 3/16-inch hex key. Turn clockwise to increase tension.
Only adjust in quarter-turn increments. Test the screen after each adjustment. Stop when the screen retracts smoothly without snapping.
Why does my Andersen screen door sag in the middle?
The spline cord has worked loose from the channel. Purchase replacement spline in 0.140-inch or 0.160-inch diameter. Use a spline roller to press the cord firmly into the channel.
Work from the center outward to the corners. Trim excess mesh with a utility knife.
Can I replace just the screen mesh on my Andersen retractable door?
Yes. Remove the old mesh from the channel. Cut new fiberglass mesh two inches larger than the frame on all sides.
Press new spline into the channel using a spline roller. Trim the excess mesh. Pet-resistant mesh is recommended for homes with dogs or cats.
How much does it cost to replace an Andersen retractable screen cassette?
A replacement cassette costs $80 to $150 depending on width. It comes with the screen pre-installed and the spring pre-tensioned. Installation takes about 30 minutes with basic tools.
Check the model number on your current cassette before ordering.
What lubricant should I use on my Andersen screen door tracks?
Use a dry silicone spray lubricant. Avoid WD-40, which attracts dust and grit. Clean the tracks first with a shop vacuum and a damp cloth.
Apply silicone spray to the roller wheels. Wipe away any excess. Lubricate once per year or whenever you hear noise.

Similar Posts