Andersen Storm Door Handle Troubleshooting
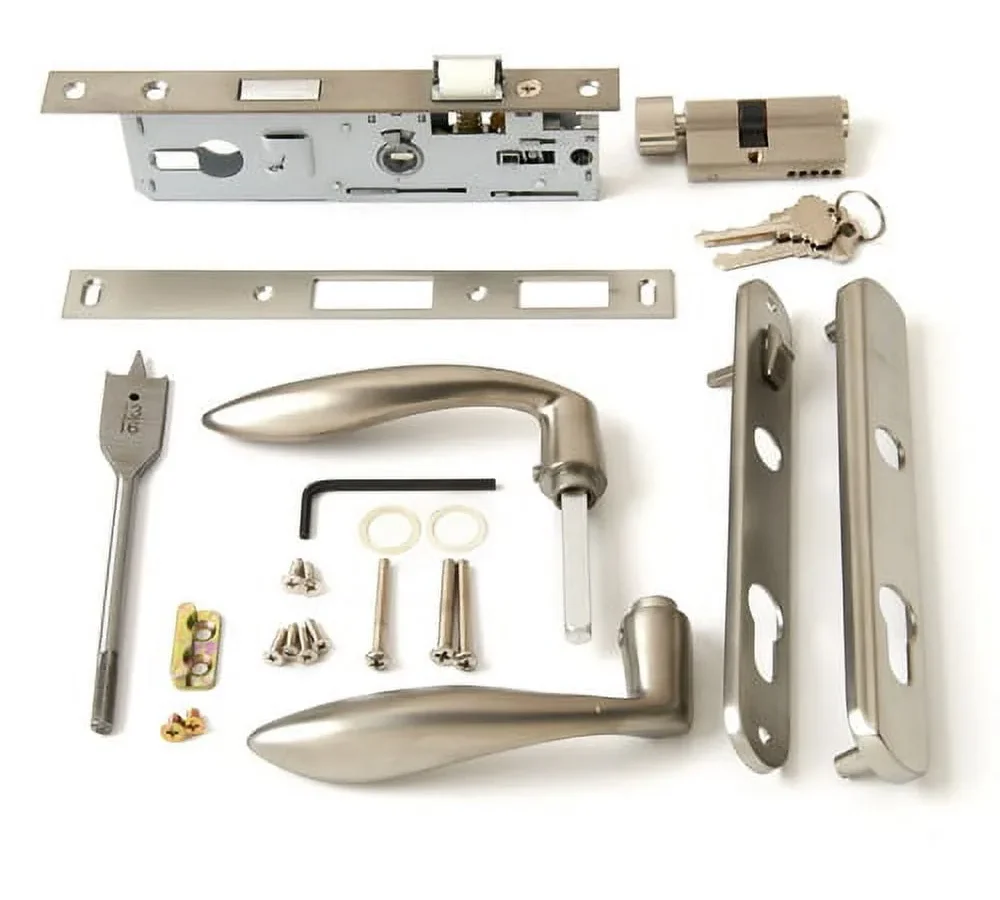
If your Andersen storm door handle suddenly feels loose, sticks halfway, or won't latch, you're not alone. Andersen storm door handle troubleshooting is one of the most common DIY searches for homeowners, and for good reason. These handles go through thousands of open-close cycles every year, exposed to rain, snow, and temperature swings that wear out internal springs and latch mechanisms.
The good news is that about 80% of handle issues come down to three root causes. A loose set screw. A dried-out latch mechanism.
Or a misaligned strike plate. According to Andersen's installation manuals, the handle assembly relies on a single 3/32-inch hex set screw to hold everything tight. When that screw works loose, the handle wobbles.
Let's walk through exactly what's wrong and how to fix it.
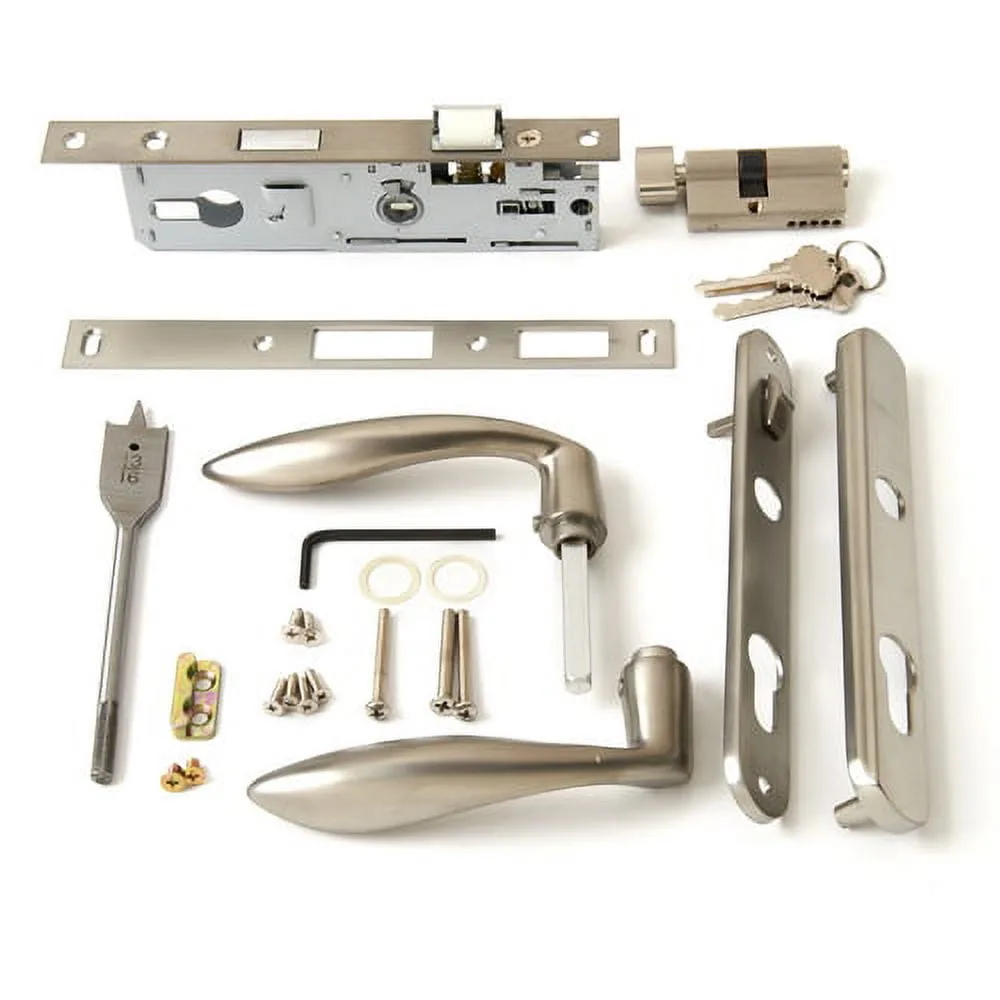
Image source: Bing (Web (fair-use with source credit))
Quick Answer
Andersen storm door handle troubleshooting starts with identifying your symptom. A loose handle usually means a loose set screw. A stuck push button means a broken return spring.
A key that won't turn means a frozen or misaligned lock cylinder. A latch that drags means the strike plate is off by a hair. Most fixes take under 30 minutes with basic hand tools.
The 5 Most Common Handle Problems (And Which One You Have)
Before you start taking things apart, you need to know what you're dealing with. Andersen has used several different handle designs over the years. The older 3000 and 4000 series doors use push-button handles made by Emco or Wright Products.
Newer models sometimes use a lever handle instead. Your fix depends on which generation you own.
Here are the five problems that cover about 9 out of 10 service calls. Read through each one and see which matches your situation.
Loose or wobbly handle. You grab the handle to open the door and it shifts around before engaging the latch. You might feel metal-on-metal play at the base. This is almost always a loose set screw.
Easy fix.
Stuck push button or lever. You press the button or push the lever down and it doesn't spring back. Or it stays pressed in and you have to pull it back by hand. The internal torsion spring has either snapped or popped out of its seat.
Latch won't catch. The door closes but the latch doesn't click into the strike plate. It bounces off or slides right past. This is rarely a handle problem.
It's almost always an alignment issue between the latch and the strike plate.
Key won't turn or feels gritty. You insert the key and it either won't go in all the way, or it goes in but turns hard, or it skips and doesn't engage the latch. This can be a frozen cylinder in winter or a worn-out lock mechanism.
Visible crack or break. You can see a crack in the handle body, the button, or the base where it mounts to the door. This is a replacement situation. No amount of tightening or lubricating fixes broken plastic or zinc die-cast.
Decision Tree: What's Wrong With Your Handle?
Let's narrow it down with a simple if-then flow. Start at the top and follow the branch that matches what you're seeing.
If the handle feels loose or wobbles: Go to Fix #1.
If the handle feels tight but the button sticks: Go to Fix #2.
If the door closes but the latch doesn't catch: Go to Fix #3.
If the key won't turn or feels rough: Go to Fix #4.
If you see a crack or the handle has visibly broken: Go to Fix #5.
This is the fastest way to the right fix without wasting time on things that aren't your problem. Each fix below assumes you've already matched your symptom using this tree.
Fix #1: A Handle That Feels Loose or Wobbly
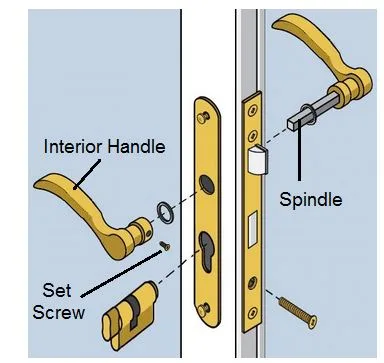
Image source: Bing (Web (fair-use with source credit))
This is the easiest fix on the list and the most common. The handle is held onto a metal spindle by a single set screw. That screw is usually a 3/32-inch hex head, though some newer models use a 5/64-inch.
Over time, vibration from opening and closing the door works that screw loose.
What you'll need:
- 3/32-inch hex key (Allen wrench)
- Possibly a 5/64-inch hex key if the 3/32 doesn't fit
The fix:
First, look at the base of the handle where it meets the door. You'll see a small circular cap on the bottom or the side. That cap covers the set screw.
Pry it off gently with a flathead screwdriver or a plastic trim tool. It's usually plastic and can crack if you're too rough.
Once the cap is off, you'll see the hex set screw. Insert your hex key and turn it clockwise to tighten. You don't need to crank it down like a lug nut.
Just snug it until the handle stops wobbling. Over-tightening can strip the threads or crack the handle hub.
Test the handle by pulling and pushing a few times. If it still wobbles, the screw might be stripped. Try a slightly longer set screw from a hardware store.
If the hole is wallowed out, you'll need a full handle replacement.
One pro tip: put a tiny drop of blue Loctite on the threads before you tighten. It keeps the screw from vibrating loose again for years.
Fix #2: A Handle or Button That's Stuck
A stuck push button or lever that won't spring back means the internal return spring has failed. On Andersen handles, this is usually a torsion spring that sits inside the handle hub. When you press the button, it compresses the spring.
When you release, the spring pushes the button back out. If that spring breaks or slips out of its groove, the button stays down.
What you'll need:
- Small flathead screwdriver
- Needle-nose pliers
- Replacement torsion spring if yours is broken
- Silicone spray lubricant
The fix starts with removal.
Remove the screw cap and set screw just like in Fix #1. Then pull the handle straight off the spindle. On some models, you'll need to remove a second screw inside the handle base that holds the button assembly together.
Once the handle is off, look at the spring mechanism. On Emco-style handles, the spring sits around the latch spindle inside the handle hub. On Wright-style handles, it's a small coil spring behind the push button.
If the spring has popped out of its seat, you can sometimes work it back into place with needle-nose pliers. Apply a light coat of silicone spray to the spring and the button channel before reassembling.
If the spring is broken, you'll need a replacement. Andersen sells spring kits for common handle models. You can also buy a universal storm door handle spring from any hardware store.
Match the spring diameter and coil count to your original.
Reassembly is the reverse of removal.
Slide the handle back onto the spindle. Make sure the flat side of the spindle aligns with the set screw hole. Tighten the set screw.
Replace the cap. Test the button. It should snap back crisply.
If the button still sticks after replacing the spring, the handle body itself may be warped or cracked internally. That means a full handle replacement is needed.
Fix #3: The Latch Won't Catch – But the Handle Works Fine
This one drives people crazy because the handle feels fine. The button presses smoothly. The latch moves freely.
But when you close the door, the latch just bounces off the strike plate or slides right past it. You end up having to slam the door or pull it shut manually.
Here's the thing: the handle is not the problem. The problem is alignment.
What's happening: Over time, the storm door can sag on its hinges. Even a 1/8-inch drop is enough to misalign the latch and strike plate. The latch misses the hole and hits the metal edge instead.
What you'll need:
- Phillips head screwdriver
- Small file or Dremel tool if adjustment doesn't work
- Pencil or marker
The fix starts with the strike plate.
Open the door and look at the strike plate on the door jamb. You'll see two or three screws holding it in place. Loosen them slightly.
Don't remove them completely. Just enough so the strike plate can shift.
Close the door gently and let the latch fall where it naturally wants to go. Open the door slowly and look at where the latch hit the strike plate. You'll probably see a faint mark on the metal.
If the latch was hitting low, shift the strike plate up. If it was hitting high, shift it down. If it was hitting to the side, shift the strike plate in the opposite direction.
Tighten the screws and test.
If shifting the strike plate isn't enough, the hole may need to be enlarged. Use a small round file to open the hole in the strike plate about 1/16 inch in the direction the latch is missing. This gives the latch more room to catch.
One more thing to check: the latch itself might be sticking in the retracted position. Spray a little silicone lubricant into the latch mechanism on the edge of the door. Work it in by pushing the latch in and out a few times.
Sometimes the latch just needs to move more freely.
Fix #4: The Key Won't Turn or Feels Grindy
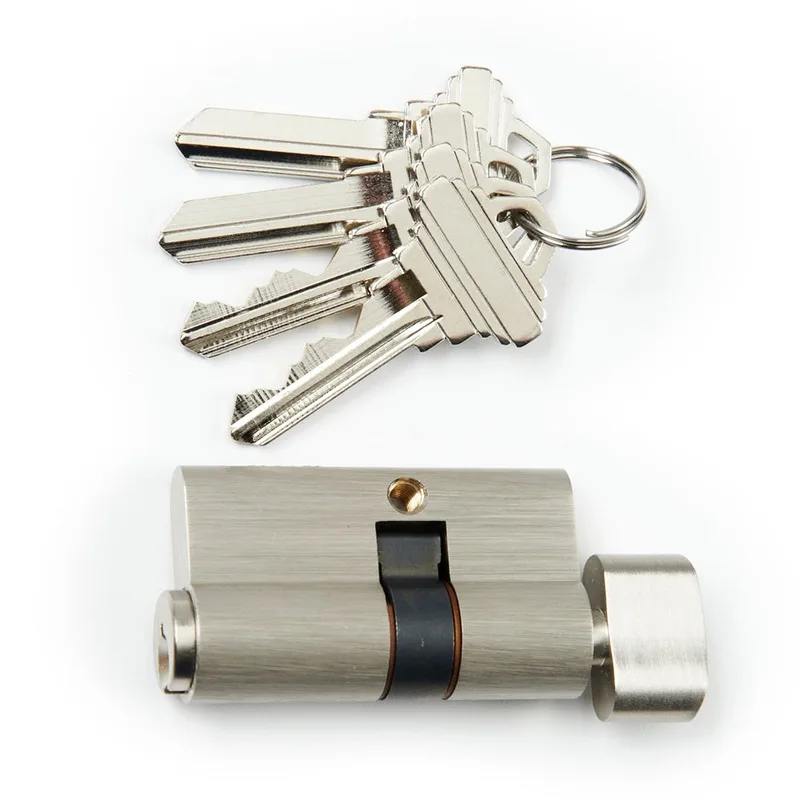
Image source: Bing (Web (fair-use with source credit))
A key that won't turn is frustrating. It usually happens in winter when moisture freezes inside the lock cylinder. It can also happen from dirt buildup or a worn-out key.
Let's figure out which one you're dealing with.
If it's winter and the door was exposed to rain or snow: the cylinder is probably frozen. Do not force the key. You can break it off in the lock.
Use a hair dryer on low heat to warm the cylinder for 60 to 90 seconds. Never use a propane torch or lighter. You'll damage the handle finish and the cylinder seals.
Once the cylinder is warm, try the key again. It should turn smoothly. After it works, spray silicone lubricant into the keyhole to prevent future freezing.
Graphite powder also works well for locks.
If it's not winter or the door was dry: the problem is likely dirt or wear. Start by spraying silicone lubricant into the keyhole. Insert and remove the key several times to work it in.
Wipe the key clean and try again.
If the key still turns hard, the lock cylinder may be worn out. Andersen storm door lock cylinders are replaceable without swapping the whole handle. You can buy a replacement cylinder from Andersen or a hardware store.
Match the cylinder length and cam style to your original.
One important note: never use WD-40 on a lock cylinder. It attracts dust and dirt, which makes the problem worse over time. Stick with silicone spray or graphite powder.
Fix #5: The Handle Looks Cracked or Broken (Parts and Replacement)
If you can see a visible crack in the handle body, the button, or the mounting base, it's time for a replacement. Plastic handles eventually get brittle from UV exposure and temperature swings. Zinc die-cast handles can crack from overtightening or impact.
The good news: you don't need to replace the whole storm door. Just the handle assembly.
What you need to know before buying:
Andersen does not use the same handle on every door. You need to identify your specific model. Look for a white sticker on the inside edge of the storm door frame.
It has the door model number and manufacture date.
If the sticker is missing, take a photo of your handle and measure the distance between the two screw holes on the mounting plate. Common sizes are 5-1/2 inches and 6 inches on center. Bring that photo and measurement to a hardware store or use it to order online.
Where to get a replacement:
- Andersen's website sells OEM handle kits for most models
- Local hardware stores carry universal storm door handles that fit Andersen doors
- Make sure the replacement matches your handle style (push button or lever)
Installation tips:
Remove the old handle by taking out the set screw and pulling it off the spindle. Remove the two mounting screws on the interior side of the door. The handle and latch assembly come out as one piece.
Install the new handle by sliding the latch into the edge of the door first. Line up the mounting holes and thread the screws through from the inside. Tighten them evenly.
Slide the exterior handle onto the spindle and tighten the set screw. Replace the screw cap.
Test the door several times before calling it done.
Mistakes That Cost You Time (Or a Locked Door)
Here are the most common mistakes people make when troubleshooting an Andersen storm door handle. Avoid these and you'll save yourself a lot of frustration.
Using WD-40. It's not a lubricant for locks or latches. It's a solvent that cleans and displaces water. It dries out and leaves a sticky residue that attracts dirt.
Use silicone spray or graphite powder instead.
Forcing a frozen key. If the key won't turn, stop. Forcing it can snap the key off inside the cylinder. Use a hair dryer first.
Always.
Overtightening the set screw. Snug is enough. Crank it too hard and you'll strip the threads or crack the handle hub. Hand-tight with a hex key is all it needs.
Buying the wrong replacement handle. Measure your screw hole spacing before ordering. A universal handle that doesn't line up is worthless. Know your door model or measure carefully.
Ignoring door sag. If the latch keeps missing the strike plate, the door may have sagged on its hinges. Tightening the hinge screws might fix it. If not, adjust the strike plate as shown in Fix #3.
Tool and Lube Cheat Sheet
| Tool or Supply | Where You Use It |
|---|---|
| 3/32-inch hex key | Tightening loose handle set screw |
| 5/64-inch hex key | Tightening set screw on newer models |
| Small flathead screwdriver | Prying off screw cap covers |
| Needle-nose pliers | Repositioning broken spring |
| Phillips head screwdriver | Adjusting strike plate screws |
| Small round file | Enlarging strike plate hole |
| Hair dryer | Thawing frozen lock cylinder |
| Silicone spray lubricant | Lubricating latch and lock cylinder |
| Graphite powder | Alternative lubricant for lock cylinder |
| Blue Loctite | Keeping set screw from vibrating loose |
When to Call Andersen Support (And What Info to Have Ready)
Most handle problems can be fixed with the steps above. But sometimes you need help from the manufacturer.
Call Andersen support if:
- Your door is still under warranty (10 years on hardware from the purchase date)
- You can't identify your door model number
- A replacement part you ordered doesn't fit
- The handle is broken on a door that's less than two years old
What to have ready before you call:
- The model number from the sticker on the door frame
- The manufacture date (usually on the same sticker)
- A photo of the handle showing the problem
- Your original purchase receipt if you have it
Andersen's customer service line is available during business hours. They can look up the correct part number for your specific door and tell you where to buy it or send it directly.
Frequently Asked Questions
How do I remove an Andersen storm door handle?
Remove the small screw cap on the bottom or side of the handle base. Loosen the set screw underneath with a 3/32-inch hex key. Pull the handle straight off the spindle.
Then remove the two mounting screws on the inside of the door to take off the full handle assembly.
Why is my Andersen storm door handle stuck in the locked position?
The lock cylinder may be frozen if it's cold outside. Use a hair dryer to warm the cylinder for 60 to 90 seconds. If it's not frozen, the internal lock mechanism may be worn out.
Try silicone lubricant first. If that doesn't work, replace the lock cylinder.
What lubricant should I use on an Andersen storm door handle?
Use silicone spray lubricant for the latch mechanism and lock cylinder. Graphite powder also works well for lock cylinders. Never use WD-40.
It attracts dust and dirt, which makes the problem worse over time.
How do I adjust the latch on an Andersen storm door?
The latch itself is not adjustable. You adjust the strike plate instead. Loosen the screws on the strike plate, shift it up, down, or sideways to align with the latch, and retighten.
If needed, enlarge the strike plate hole with a small file.
Can I replace just the handle on an Andersen storm door without replacing the whole door?
Yes. The handle assembly is a separate component. You can buy a replacement handle from Andersen or a universal storm door handle from a hardware store.
Make sure the screw hole spacing matches your existing handle.
Why does my Andersen storm door handle feel loose even after tightening?
The set screw threads may be stripped, or the handle hub itself may be cracked. Try a slightly longer set screw from a hardware store. If that doesn't work, the handle assembly needs to be replaced entirely.

Similar Posts