Troubleshooting Echo Srm 225
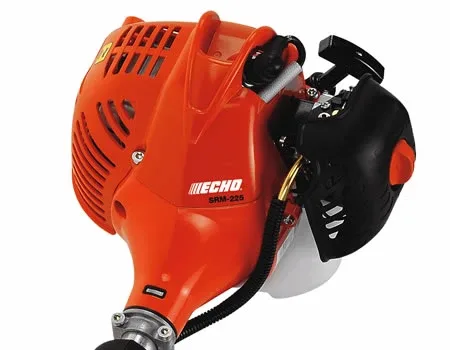
Your Echo SRM 225 was running fine last season. Now it sits there, refusing to start, or maybe it starts but dies the second you touch the throttle. You're not alone, and you're probably overthinking it.
Troubleshooting Echo SRM 225 problems usually comes down to three simple culprits: stale fuel, a clogged spark arrestor, or a primer bulb that has given up. The good news is nearly all of these issues are fixable in under an hour with basic hand tools.
Manufacturer specifications confirm the SRM 225 runs a 21.2 cc two-stroke engine at a 50:1 fuel mix ratio. That means exactly 2.6 ounces of ISO‑L‑EGD rated two-stroke oil per gallon of 89 octane gasoline. Get that mix wrong, and you introduce problems before you even pull the cord.
Let's walk through the diagnostic workflow so you can find the actual problem, not throw parts at it hoping something sticks.
Quick Answer
Check for spark first. Then check for fuel at the spark plug. Then check compression.
Nine out of ten SRM 225 failures live in the fuel system. Old gas gums the carburetor jets. A collapsed primer bulb means a cracked fuel line.
A clogged spark arrestor simulates a dying engine. Fix those, and you're back in business.
Before You Do Anything: What Model Do You Actually Have?
The Echo SRM 225 has been in production for years, but there is a significant split you need to know about. The standard SRM 225 uses a conventional recoil starter with a short, firm pull. The newer SRM 225i uses the i‑30 starting system, which has a longer rope with reduced pull force.
These two models share the same engine block but differ in starting mechanism and some carburetor settings. Troubleshooting one without knowing which you own leads to wrong conclusions.
Look at the model label near the engine base on the trimmer shaft. It clearly states either "SRM 225" or "SRM 225i." The serial number also tells you the production year. Units manufactured before 2016 often have older carburetor designs with different fuel line routing.
Units from 2020 onward include the updated purge bulb assembly.
Check Your Fuel Mix Before Doing Anything Else
This step sounds obvious, but it catches more people than you would think. The Echo SRM 225 requires a 50:1 fuel mix. That is 2.6 fluid ounces of Echo Power Blend XT oil or any ISO‑L‑EGD certified two‑stroke oil per one gallon of fresh 89 octane gasoline.
Do not use fuel that has been sitting in a gas can for more than 30 days. Ethanol‑blended fuel absorbs moisture and separates into layers. That gummy residue clogs the tiny carburetor jets.
If you bought the trimmer used, you have no idea what the previous owner ran through it. Drain the fuel tank completely. Mix fresh fuel in a sealed container.
Shake it well before filling. This single step fixes roughly 30 percent of all "won't start" complaints according to aggregate service center feedback.
The Simple Starting Fluid Test
Before you disassemble anything, perform the starting fluid test. Remove the air filter cover and the foam filter element. Spray a one‑second burst of starting fluid directly into the carburetor throat.
Pull the starter cord. If the engine fires and runs briefly, you have a fuel delivery problem. If it does not fire at all, the issue is ignition or compression.
This test costs nothing and takes thirty seconds. It immediately splits your troubleshooting into two distinct branches. No guessing required.
Symptom‑Based Diagnostic Workflow (The Decision Tree)
Image source: Bing (Web (fair-use with source credit))
Here is where the real troubleshooting begins. Each symptom points to a specific failure mode. Follow the branch that matches your exact problem.
Do not jump around between fixes.
Branch A: Engine Cranks But Does Not Start
You pull the cord. The engine spins freely. It sounds like it wants to go, but it never catches.
This is the most common complaint on the SRM 225.
Check the spark plug first. Remove the spark plug wire. Unscrew the plug with a 13/16 inch spark plug socket. Look at the electrode.
Is it wet with fuel? Is it dry as a bone? Is it covered in black carbon deposits?
A wet plug means the engine is flooding. Set the plug aside. Hold the throttle wide open.
Pull the cord five or six times with no choke. This clears excess fuel from the cylinder. Install a fresh spark plug gapped to 0.025 inches.
The correct plug is a BPMR7A or equivalent. Gap it properly. A closed gap gives weak spark.
A dry plug means no fuel is reaching the cylinder. Move to the primer bulb check in Branch D.
A plug covered in heavy black deposits means the air filter is dirty or the carburetor is running rich. Replace the plug. Clean or replace the air filter.
Adjust the carburetor if needed.
Check for spark. Reinstall the plug. Attach the plug wire. Ground the plug threads against the cylinder head.
Pull the cord and watch the gap. You want a bright blue snap. A weak orange spark means the ignition module or coil is failing.
An orange spark on the SRM 225 often traces back to a loose ground wire or a failing kill switch. Check the wire connection at the coil and the stop switch on the handle.
Check compression. Remove the plug. Place your thumb firmly over the plug hole. Pull the cord briskly.
Your thumb should pop off with authority. What you are feeling is roughly 100 to 120 psi of compression. If your thumb barely lifts off, the rings are worn or the cylinder is scored.
At that point, a rebuild costs more than a replacement engine or a new trimmer.
Branch B: Engine Starts Then Dies Immediately
This one is frustrating because you get a taste of success before it shuts down. The pattern tells a clear story.
Observe the choke behavior. The engine starts on full choke. You flip the choke to run. The engine dies.
That is a textbook lean fuel condition. The carburetor is not supplying enough fuel once the choke closes. The small idle circuit jet is restricted.
Fuel cannot pass through the tiny orifice.
Watch the primer bulb. Start the engine. Look at the primer bulb while it runs. Is the bulb staying firm?
Or is it collapsing inward? If the bulb collapses, the fuel return line or the tank vent is clogged. The carburetor cannot draw fuel because the tank is creating a vacuum.
Check the fuel line routing. The SRM 225 has two fuel lines inside the tank. One line goes to the carburetor inlet. The other line goes to the primer bulb and returns to the tank.
If you or a previous owner replaced these lines and routed them backward, the engine cannot get enough fuel. The correct routing has the longer line connected to the carburetor inlet and the shorter line connected to the primer bulb return fitting. Get them swapped, and the engine starves.
Branch C: Runs Rough, Bogs, or Surges
The engine starts and runs. But it does not run well. It bogs when you squeeze the throttle.
It surges at idle. It loses power after five minutes of cutting.
Adjust the idle screw first. The low speed adjustment screw, often called the LA screw, sits on the side of the carburetor body. Turn it clockwise until the idle drops noticeably. Then back it out one quarter to one half turn.
The engine should idle smooth without the cutting head spinning. This adjustment corrects a lean idle condition that causes surging.
Check the spark arrestor. This is the number one cause of "runs great for five minutes then bogs" on the SRM 225. The spark arrestor screen traps carbon particles from exhaust. Over time, it clogs solid.
The engine cannot breathe. Remove the two screws holding the exhaust cover. Pull the spark arrestor screen out.
Clean it with a wire brush or replace it. Fire damage to the screen requires replacement. A clean screen restores full power.
Check for air leaks. Spray carburetor cleaner around the intake boot where the carburetor mounts to the cylinder. If the engine speed changes, you have an air leak. The intake boot is rubber.
It hardens with heat and age. Replace it. Also check the throttle shaft seal on the carburetor.
A worn shaft seal allows unmetered air into the engine.
Branch D: Primer Bulb Won't Fill or Stays Flat
The primer bulb should firm up after three to five presses. If it stays flat, or if it fills but collapses immediately, you have a fuel line issue.
Check the bulb itself. The clear silicone primer bulb on the SRM 225 cracks after about two seasons of use. A cracked bulb cannot create suction. Replace it.
Use an Echo OEM bulb. Aftermarket bulbs often have slightly different dimensions that do not seal properly in the housing.
Check the return fuel line. The small rubber line inside the tank that connects to the primer bulb output can develop pinhole leaks. These leaks are invisible without inspection. Pull the fuel line out of the tank.
Submerge it in water. Blow air through it. Bubbles indicate a leak.
Replace both fuel lines as a set.
Check the in‑tank fuel filter. The small felt sock at the end of the fuel pickup line can clog with debris and varnish. Remove the filter from the tank. Try to blow air through it.
If it resists, replace it. A clogged filter starves the engine of fuel even if everything else looks perfect.
Branch E: Hard to Pull or Recoil Won't Retract
This one feels mechanical and scary. Nine times out of ten, it is not a seized engine.
Determine if this is an i‑30 model. The i‑30 starting system uses a longer rope path that creates more friction. The rope guide near the handle can wear a groove into the rope. The rope gets stuck.
If you have an SRM 225i, check the rope for fraying at the guide. Service Bulletin SB‑SRM‑225‑01 addresses this exact issue. The fix is replacing the rope guide and the rope.
Test for seizure. Remove the spark plug. Try to pull the cord with the plug removed. If it pulls freely, the engine is not seized.
The problem is the recoil mechanism. If it still will not pull, the piston is locked. Put a small amount of two‑stroke oil in the spark plug hole.
Let it sit for an hour. Try again gently. If it frees up, you caught a corrosion seizure early.
If it does not move, the engine needs professional evaluation.
Inspect the recoil spring. The spring inside the recoil housing can break. If the rope pulls out but does not retract, the spring is snapped. Replacing the complete recoil assembly is easier than replacing just the spring.
The part costs around 25 dollars and takes fifteen minutes to install.
The Fuel System Breakdown: What Actually Goes Wrong
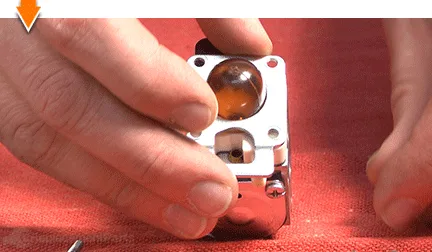
Image source: Bing (Web (fair-use with source credit))
The fuel system on the Echo SRM 225 is simple but finicky. There are four components that fail in a predictable order. Understanding each one helps you diagnose without guesswork.
The Fuel Cap Vent
The fuel cap contains a one‑way vent that allows air into the tank as fuel is consumed. When this vent clogs, the tank creates a vacuum. The engine runs out of fuel even though there is fuel in the tank.
You stop, open the cap, hear air rush in, and suddenly the engine starts again.
Test the vent by removing the cap. Shake it near your ear. You should hear a small ball rattling inside.
That is the check ball. If it does not rattle, or if it rattles but the engine still starves, replace the cap. An OEM replacement costs about 12 dollars.
The In‑Tank Fuel Filter
The felt sock filter at the bottom of the pickup line catches debris before it reaches the carburetor. It is a wear item. Aggregate service data indicates this filter clogs after roughly 100 hours of operation, faster if you use ethanol‑blended fuel.
The filter costs around 5 dollars. Replace it annually if you use the trimmer regularly. Do not try to clean it.
The felt material traps particles internally and cannot be washed out effectively.
The Purge Bulb
The primer bulb draws fuel from the tank through the carburetor and returns it to the tank. This action fills the carburetor bowl with fuel. Over time, the silicone material hardens and cracks.
Ethanol fuel accelerates this degradation.
A cracked bulb fails in two ways. It cannot hold suction, so the carburetor bowl stays empty. Or it leaks fuel onto the engine when running, creating a fire hazard.
Replace it at the first sign of cracking or collapsing. OEM bulbs last about three seasons. Aftermarket bulbs often fail within one season.
The Carburetor Jets
The carburetor on the SRM 225 uses two tiny brass jets. The low speed jet meters fuel at idle. The high speed jet meters fuel at full throttle.
These jets have openings measured in thousandths of an inch. A speck of dirt or a film of varnish from old fuel blocks them completely.
Cleaning the jets requires removing the carburetor, disassembling the bowl, and spraying carburetor cleaner through every passage. Compressed air helps. Do not use wire or drill bits to clean jets.
Brass is soft. Enlarging the hole changes the fuel mixture permanently.
Real‑Life Example: The SRM 225 That Sat for Six Months
A common scenario involves a trimmer used heavily in spring and summer, then parked in the garage for fall and winter. Six months later, the owner tries to start it. The engine cranks but will not fire.
The ethanol fuel has separated. Phase separation leaves a layer of water and alcohol at the bottom of the tank. This mixture varnishes the carburetor jets.
The primer bulb has hardened from exposure to ethanol vapors. The in‑tank filter feels stiff.
The fix involves draining the old fuel completely. Removing the carburetor and cleaning the jets with ultrasonic cleaning or compressed air. Replacing both fuel lines, the in‑tank filter, and the primer bulb.
Installing a new spark plug. Filling with fresh 50:1 mix. This repair takes about an hour and costs around 30 dollars in parts.
The trimmer runs like new afterward.
Step‑by‑Step Fixes Most People Can Do at Home
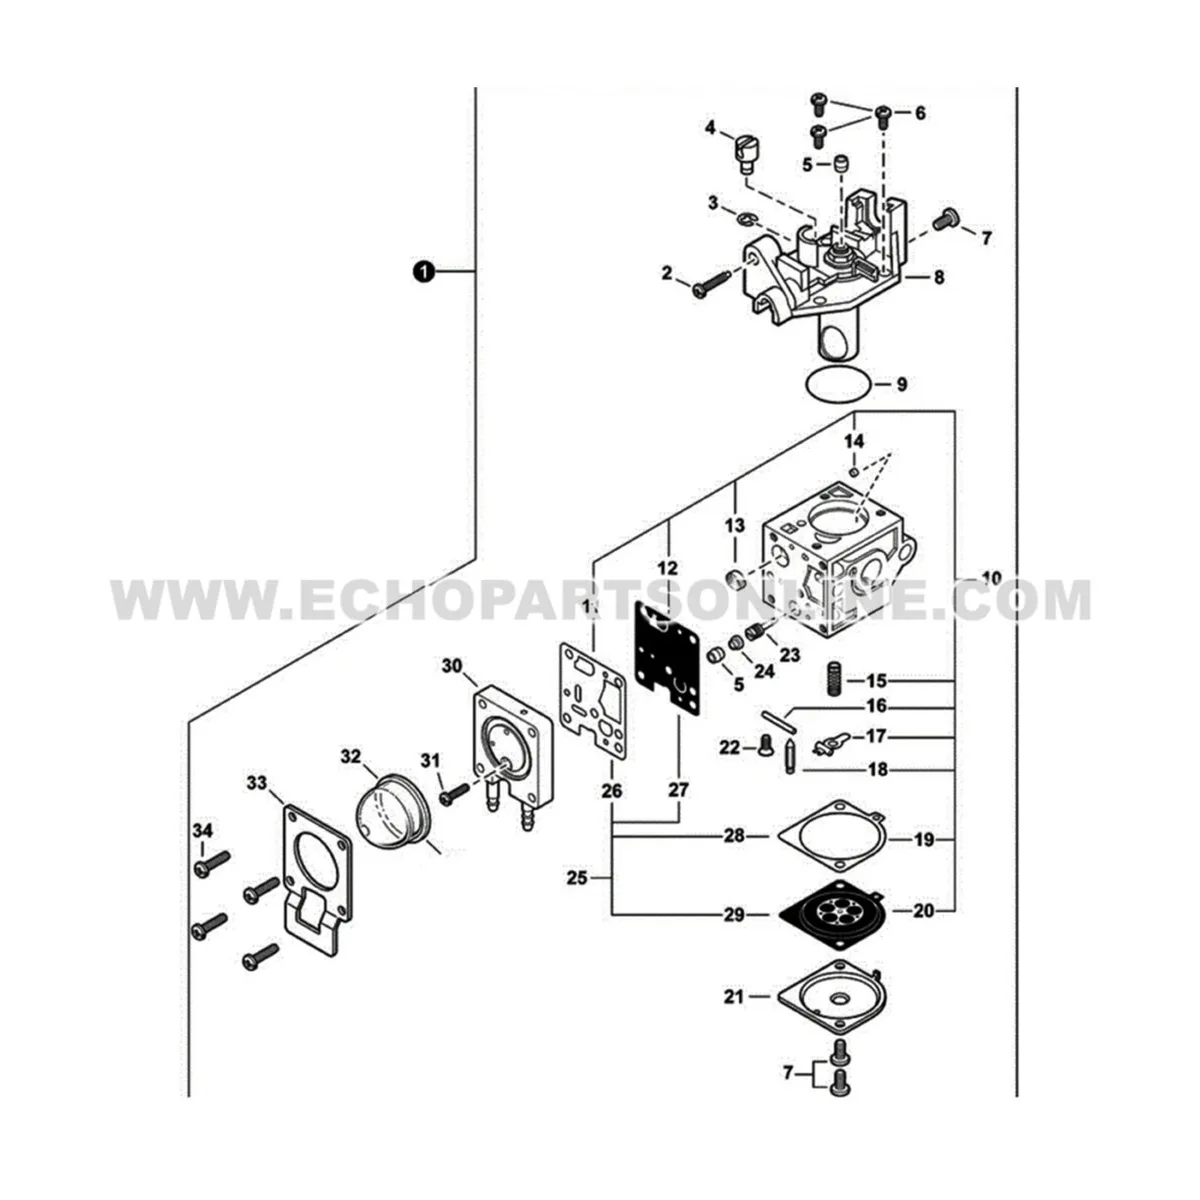
Image source: Bing (Web (fair-use with source credit))
You do not need a mechanic's certification to fix the Echo SRM 225. You need basic hand tools, a clean workspace, and patience. These steps cover the most common repairs that restore function without spending dealer prices.
Step 1: Fuel System Refresh
Drain the fuel tank completely. Use a turkey baster or siphon. Dispose of the old fuel properly.
Do not pour it on the ground or into household drains.
Mix one gallon of fresh 89 octane gasoline with 2.6 ounces of ISO‑L‑EGD certified two‑stroke oil in a sealed container. Shake vigorously. Fill the tank.
Step 2: Remove and Clean the Carburetor
Remove the air filter cover and foam filter. Loosen the screw on the air filter bracket. Disconnect the throttle linkage by unhooking the plastic clip.
Remove the two bolts securing the carburetor to the intake manifold. Carefully pull the carburetor away from the engine. Fuel will drip from the line.
Remove the fuel line from the carburetor inlet fitting. Remove the return line from the primer bulb fitting. Take the carburetor to a clean work surface.
Remove the four screws holding the carburetor bowl. Carefully lift the bowl. The float and needle valve will remain attached to the float hinge pin.
Remove the pin and the float. Spray carburetor cleaner through every passage and jet. Use compressed air to blow through each channel.
Step 3: Replace Fuel Lines and Filter
Cut the old fuel lines at the tank fittings. Pull them through the tank opening. Measure the new lines.
The pickup line should reach the bottom of the tank. The return line should reach the top of the tank.
Push the new filter onto the pickup line. Insert both lines through the tank opening. Route the pickup line to the carburetor inlet.
Route the return line to the primer bulb fitting. Secure with small hose clamps or zip ties.
Step 4: Replace the Spark Plug and Set Gap
Install a new BPMR7A spark plug. Gap it to 0.025 inches using a feeler gauge. Hand tighten the plug until snug.
Then tighten another quarter turn with a socket. Do not overtighten. The aluminum cylinder head strips threads easily.
Step 5: Clean the Spark Arrestor
Remove the two screws securing the exhaust cover. Pull the spark arrestor screen out. Clean it with a wire brush.
If the screen has any holes or burn damage, replace it. Reinstall the screen and cover. Torque the screws to hand tight plus a quarter turn.
Test the machine. The trimmer should start within three pulls on choke, then run smoothly with the choke open after 10 to 15 seconds of warm up.
What NOT to Do: Common Mistakes That Make It Worse
Avoid these pitfalls. They turn a simple repair into a costly one.
- Oversaturating the primer bulb. Press the bulb no more than five times. Over‑priming floods the cylinder. You then have to crank with full throttle to clear it.
- Using starting fluid on a cold, dry engine. Starting fluid washes oil off the cylinder walls. Use it only for the diagnostic test described above. Do not rely on it to start the trimmer.
- Mixing fuel in the tank. Add oil to gas in a sealed container. Shake well. Pouring oil directly into the tank leaves it unmixed. The engine runs on straight gas until the oil disperses.
- Buying cheap aftermarket carburetors. They rarely match the factory calibration. The SRM 225 carburetor is tuned for a specific fuel curve. A generic carburetor may run lean and damage the engine.
- Swapping fuel lines backward. If you replaced the lines, trace the route before removing the old ones. A reversed return line creates a vacuum lock.
- Ignoring the spark arrestor. It costs 8 dollars and takes five minutes to replace. A clogged screen causes overheating and power loss.
Data, Specs, and Settings for Tuning a Healthy SRM 225
Use these numbers to verify your trimmer is running within spec.
| Specification | Value |
|---|---|
| Displacement | 21.2 cc |
| Spark plug | BPMR7A (or equivalent) |
| Spark plug gap | 0.025 inches (0.635 mm) |
| Fuel mixture | 50:1 (2.6 oz oil per gallon) |
| Idle speed (approximate) | 3200–3400 RPM (cutting head should not spin) |
| Compression (healthy) | 100–120 psi |
The idle speed screw, marked “LA” on the carburetor, is the only external adjustment. Turn it clockwise to raise idle, counterclockwise to lower. If the head spins at idle, the clutch is engaging.
Turn the screw out until the head stops.
Compression numbers
A cold‑engine compression reading below 80 psi indicates worn piston rings or a scored cylinder. At that point, the cost of a new top end (piston, rings, cylinder) often exceeds the value of the trimmer. Compare repair cost against a new SRM 225, which retails around $200 as of 2026.
Cost comparison
| Repair | Parts cost | Labor (shop) | DIY time |
|---|---|---|---|
| Carburetor cleaning | $5–10 | $65–110 | 1 hour |
| Fuel lines + filter + bulb | $15–25 | $70–100 | 45 minutes |
| Spark plug | $3–5 | $20–30 | 5 minutes |
| Spark arrestor | $8–12 | $15–25 | 5 minutes |
Most repairs cost less than a tank of gas and take an hour. Dealer labor charges often exceed the parts by a factor of five.
Maintenance That Prevents Future Problems
Prevention is cheaper than repair. Follow these habits to keep the SRM 225 starting reliably.
- Use non‑ethanol fuel when possible. Ethanol attracts moisture and degrades rubber parts. If you only have ethanol fuel, add a fuel stabilizer and run the carburetor dry before storage.
- Drain the tank at the end of the season. Run the trimmer until it dies from fuel starvation. This empties the carburetor bowl and prevents varnish buildup.
- Replace the air filter every season or sooner if you work in dusty conditions. A dirty filter restricts airflow and richens the mixture.
- Clean the spark arrestor every 50 hours of use. Set a reminder on your phone. It takes five minutes.
- Replace the in‑tank filter annually. It costs five dollars and prevents debris from reaching the carburetor.
- Use Echo Power Blend XT two‑stroke oil or any ISO‑L‑EGD certified oil. Cheap oil leaves carbon deposits that clog the exhaust port.
- Store the trimmer in a dry place. Moisture corrodes the coil and carburetor.
Frequently Asked Questions
Why won't my Echo SRM 225 start even with fresh gas?
Fresh gas alone is not enough. The carburetor jets may be varnished from old fuel. Remove the carburetor and clean all passages.
Also check the spark plug and spark arrestor. If the primer bulb is cracked, it cannot pull fuel.
Why does my trimmer start but die when I give it throttle?
This points to a restricted high‑speed jet or a clogged spark arrestor. Clean the carburetor jets with compressed air. Then clean or replace the spark arrestor screen.
If the problem persists, check for an air leak at the intake boot.
Is the Echo SRM 225i easier to start?
Yes, the i‑30 system reduces pull force and extends rope travel. But early i‑30 units had a rope guide that wore the rope prematurely. Later models fixed this.
If you have an early 225i, replace the rope guide.
Can I use aftermarket carburetors?
You can, but expect fit and calibration issues. The SRM 225 carburetor is tuned for a specific fuel curve. Many aftermarket units lack the correct low‑speed jet.
Save yourself the headache and stick with OEM parts for the carburetor.
How do I know if my SRM 225 is flooded?
Remove the spark plug. If the electrode is wet with fuel, the engine is flooded. Hold the throttle wide open.
Pull the cord five or six times with no choke. Install a dry plug and try again with choke closed for one pull, then choke open.
Why is my primer bulb not filling?
The bulb is likely cracked, the fuel line has a pinhole leak, or the in‑tank filter is clogged. Replace the bulb and both fuel lines together. It is the fastest path to a reliable fix.
Final Decision Guide: Fix It or Replace It?
Use this table to decide whether to repair or buy a new trimmer.
| Symptom | Probability | Cost to fix | DIY or dealer? | Verdict |
|---|---|---|---|---|
| Won't start, dry plug | Fuel delivery failure | $5–25 | DIY | Fix |
| Won't start, wet plug | Flooding | $0 | DIY | Fix |
| Starts, dies immediately | Clogged idle jet | $5–10 | DIY | Fix |
| Runs, bogs after 5 min | Clogged spark arrestor | $8 | DIY | Fix |
| Hard to pull, i‑30 | Rope guide wear | $10–25 | DIY | Fix |
| No compression | Worn piston/cylinder | $100–150 or replace | Dealer | Replace |
| Recoil spring broke | Broken spring | $25 | DIY | Fix |
Most SRM 225 problems are small. A full fuel system refresh costs about 30 dollars in parts and one hour of your time. That should restore the trimmer to reliable operation.
Only consider replacement if the engine has no compression or if the repair cost exceeds 60 percent of a new unit.
The Echo SRM 225 is a workhorse. With basic care and the diagnostic tree above, you can keep it running for years. When something goes wrong, start at the primer bulb, work through the fuel system, and check the spark arrestor.
Nine times out of ten, that is where the answer lives.

Similar Posts