Atwood 8531 Furnace Troubleshooting
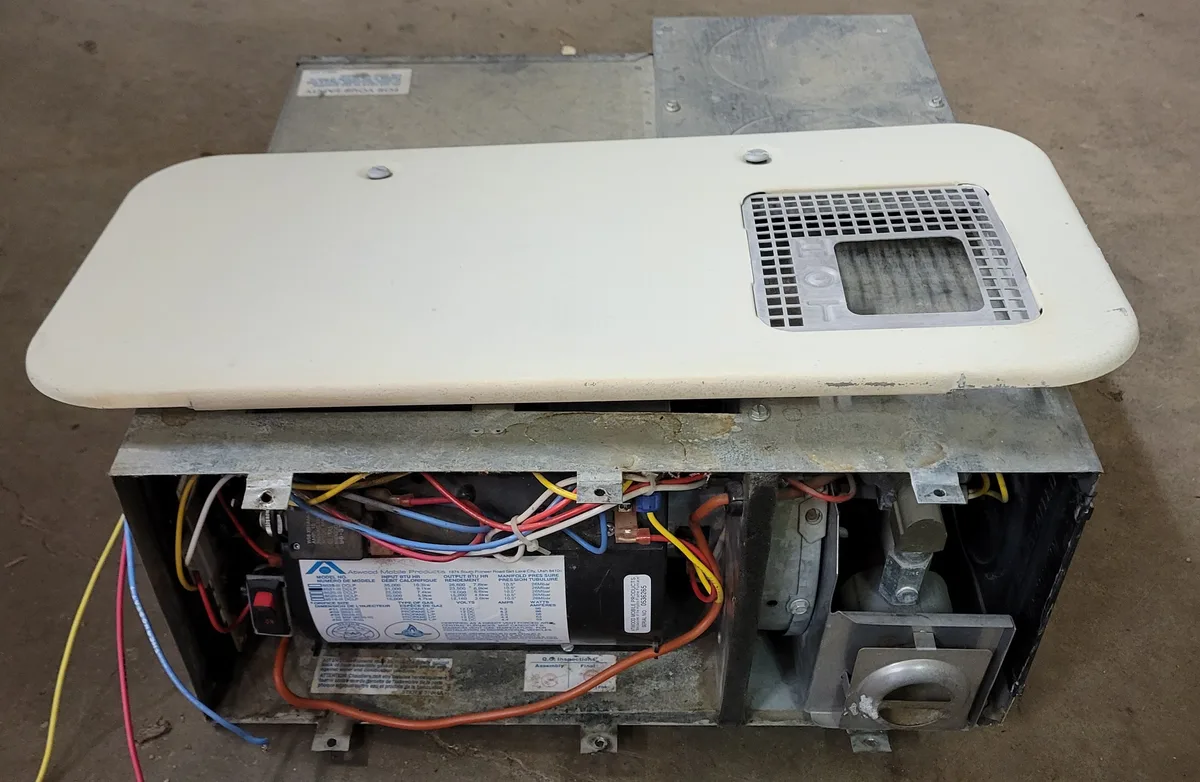
If your RV heater just clicked, whirred, and then went silent, you are not alone. Atwood 8531 Furnace Troubleshooting is a common search for a reason. This model is in thousands of RVs.
When it stops heating, the problem is usually one of a few predictable things. The good news is that many fixes are simple once you know what to look for.
Manufacturer specs indicate the 8531 requires at least 10.5 volts at the board to fire. The sail switch must close within seconds of the blower starting. Despite its solid design, age, corrosion, and low battery voltage cause most failures.
Let us walk through the diagnostics safely.
Image source: Bing (Web (fair-use with source credit))
Why Safety Has to Come First With This Furnace
This is an RV furnace that burns propane inside a sealed combustion chamber. When it works right, it is safe. When something goes wrong, you are dealing with a gas appliance inside a living space.
That is not the time to guess.
What Actually Goes Wrong: Gas Leaks, Carbon Monoxide, and Fire
Three things can turn a bad repair into a disaster. A cracked heat exchanger can let carbon monoxide into your RV. A loose gas line fitting can leak propane, which pools in the floor because it is heavier than air.
A blocked vent can cause the burner to produce soot and heat, eventually melting wires or igniting nearby materials.
These are rare events if you follow the manual, but they are real. RVIA safety standards and NFPA 1192 both require clearances and venting for a reason. If you ever smell propane, stop everything.
Turn off the gas at the tank. Vent the RV. Call a licensed technician.
The 30-Second Safety Check Before You Touch a Wire
Before you pull the furnace cover, do this. Turn off the propane at the tank. Disconnect the 12-volt power to the furnace by pulling the fuse or disconnecting the battery.
Wait 30 seconds for any residual gas to clear. Check that the exterior vent cover is free of nests, snow, or debris. That check alone prevents the most common mistakes.
Know Your Limits: The Difference Between a Repair and a Job for a Pro
You can test a sail switch, clean a burner tube, and replace a control board. Those are DIY-friendly jobs. But you should not open the gas valve, modify the propane line, or attempt to repair the sealed combustion chamber without the right training and tools.
If the problem involves the gas side, call a certified RV technician.
As of 2026, the industry standard for a qualified tech is someone who holds an RVIA certification or a state gas fitter license. Do not risk your family's safety to save a service call fee.
Quick Answer: The Most Common Reasons an 8531 Quits
The furnace needs three things to fire. 12 volts. Good propane flow. Proof of airflow.
If one is missing, it shuts down.
Low battery voltage is the number one cause. A 12-volt system that reads 12.3V at rest can drop below 10.5V under load. The control board then stops trying.
A stuck sail switch is the second most common issue. The switch must close to prove the blower is running.
Propane issues rank third. An empty tank or a tripped regulator blocks fuel.
Low Battery Voltage (The #1 Culprit)
RV batteries lose capacity over time. A single cold night can drain them faster than you expect. The 8531's control board needs a stable 10.5 to 14.5 volts.
If your battery shows 12.0V at rest, it might still drop below the threshold when the blower motor starts. The motor draws 8 to 10 amps on startup.
Check the voltage at the furnace terminals while the blower is running. If you see under 10.5V, charge the battery or replace it before you do anything else. Many people replace boards and switches only to find a weak battery was the real problem.
Sail Switch and Ignition Failure
The sail switch is a small plastic or metal arm that the blower airflow pushes. When it closes, it sends a signal to the control board saying "air is moving, safe to open gas valve." If the switch is stuck open from debris, corrosion, or a stiff mechanism, the board never calls for ignition.
A dirty ignitor or bad gap can also cause no spark. The gap should be about 0.125 inches for direct spark ignition models. Anything wider and the spark jumps somewhere else.
Thermostat and Propane Issues That Mimic Furnace Problems
A dead thermostat battery, a miswired thermostat, or a corroded wire connection can trick you into thinking the furnace itself is broken. Always verify the thermostat is actually calling for heat before digging into the furnace.
Propane regulators sometimes go into safety lockout after a high-flow event. This reduces pressure below the 11 to 14 inches water column the furnace needs. If your stove burner flames look weak, that is a clue your propane supply is the problem, not the furnace.
How the Atwood 8531 Works: The Sequence of Operation
Understanding the order of events makes troubleshooting logical. You can watch the furnace cycle and know exactly where it stops.
From Thermostat to Gas Valve: The Exact Order of Events
Here is the sequence, step by step.
- Thermostat calls for heat. It closes the circuit and sends 12V to the control board.
- Control board starts the blower motor. The fan spins up to prove airflow.
- Airflow pushes the sail switch closed. The board sees the switch close and knows air is moving.
- Control board starts sparking at the ignitor. At the same time, it opens the gas valve.
- Flame ignites. A flame sensor detects current through the flame and tells the board to stop sparking and keep the gas valve open.
- The board monitors flame and temperature. When the thermostat is satisfied, it closes the gas valve, stops the blower after a cool-down period, and waits for the next call.
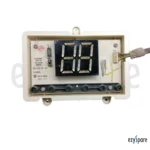
If any step fails, the board stops and flashes a diagnostic code. You can see the LED on the control board through a small window.
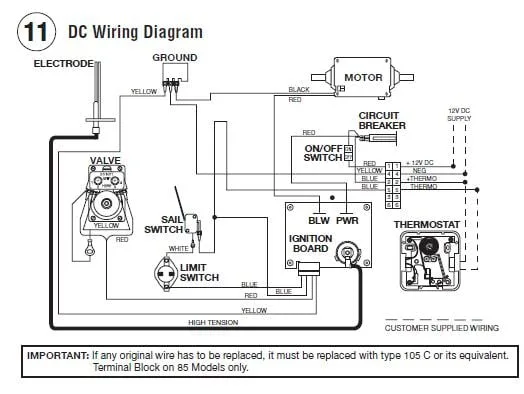
Image source: Bing (Web (fair-use with source credit))
The Sail Switch: Why Airflow Must Be Proven First
The sail switch is a safety device. It prevents the furnace from opening the gas valve if the blower is not running. Without it, unburned propane could accumulate in the combustion chamber and explode.
Never bypass the sail switch. It is there to save your RV and your life.
If the blower runs but the switch does not close, the board never moves to step 4. The furnace will try three times, then lock out. You will see a specific flash code for sail switch failure.
LED Blink Codes: What the Control Board Is Trying to Tell You
Atwood control boards use a small red or green LED. It blinks when the furnace encounters a fault. Count the blinks and compare them to the guide printed on the board cover or in your manual.
Typical codes are:
- 1 flash: normal operation or no fault.
- 2 flashes: sail switch stuck closed or open.
- 3 flashes: ignition failure (no flame sensed after gas valve opened).
- 4 flashes: high limit switch open (overheating).
If you see a flash code, write it down before you power off the furnace. It tells you exactly which system to test.
Before You Tear Anything Apart: 6 Pre-Diagnostic Checks
Skip these and you might replace good parts or miss the real problem. Do them in order.
Check Battery Voltage and Fuses
Measure voltage at the furnace's positive and negative terminals with a multimeter while the thermostat is calling for heat. If it is below 10.5V under load, charge or replace the battery. Also check the 15-amp fuse in the RV's power distribution panel or inline fuse holder.
A blown fuse is a sign of a short. Replace it only after inspecting wires for damage.
Confirm Propane Supply and Regulator Pressure
Turn on a stove burner. If the flame is weak or yellow, the propane tank may be empty or the regulator may be in lockout. Reset the regulator by turning off all gas, opening a burner, then slowly turning the tank valve back on.
If that does not fix it, have a professional test the pressure.
Inspect Ducts, Intake, and Exhaust Vents
A blocked return air grill or crushed duct can prevent the sail switch from closing. Go outside and check the exhaust vent for spider webs, wasp nests, or snow. Even a small obstruction can cause the furnace to overheat and trip the high limit switch.
Verify Thermostat Wiring, Batteries, and Settings
If you have a battery-powered digital thermostat, change the batteries first. Set the thermostat to heat, fan to auto, and raise the set point above room temperature. Listen for a click.
No click means no signal to the furnace. Check wire connections at the thermostat and at the furnace control board for corrosion or looseness.
Reset the Furnace Correctly
After a lockout, the control board needs a full power reset. Turn off the 12-volt power to the furnace. Remove the fuse or disconnect the battery.
Wait at least two minutes. Restore power and try again. That clears the fault memory and lets the board attempt a new cycle.
Rushing through a reset can keep it in lockout mode.
Rule Out a Malfunctioning CO Detector
Some newer RV CO detectors are wired into the furnace circuit. They interrupt power if they detect carbon monoxide. If your detector is beeping or showing an error code, it could be keeping the furnace from starting.
Test the detector by pressing the test button. If it is expired, most have a five to seven year lifespan, replace it before blaming the furnace.
The Step-by-Step Troubleshooting Flow: Match Your Symptom to the Fix
Now that you have done the checks, pinpoint the problem based on what the furnace does or does not do. Use the symptom that best matches your situation.
Symptom: Furnace Gets No Power (No Blower, No LED)
If the furnace is completely dead, no fan, no lights, no clicks, start at the power source.
Test for 12V at the furnace's main power input. If you see voltage but the board does not light up, the control board might be dead. Check the ground wire connection to the chassis.
A bad ground can mimic a dead board. If power and ground are good, the board is likely fried. Replacement boards are available and plug in directly.
Symptom: Blower Runs, but No Spark or Ignition
Hear the fan, but no clicking or sparking. The sail switch is the most likely suspect. Unplug the two-wire connector at the sail switch.
Use a multimeter to check continuity across the switch terminals. With the blower running, the switch should be closed with continuity. If it stays open, replace the sail switch.
If the sail switch clicks and shows continuity, the problem could be a bad ignitor, a poor ignitor gap, or a faulty control board. Test the ignitor by measuring resistance across its terminals. An open circuit means it is dead.
Symptom: Spark Fires, Flames Start, Then Dies
You see a flame. It stays lit for a few seconds. Then the furnace shuts down.
That means the flame sensor is not detecting the flame. Clean the flame rod with fine sandpaper or a scotch-brite pad. Check the wire connection from the rod to the control board.
A corroded connector can interrupt the tiny microamp signal that the board reads. If cleaning does not help, replace the flame sensor.
Symptom: Heat Cycles On and Off Too Quickly (Short Cycling)
The furnace runs for a minute or two, then shuts off, then restarts. This is often a high limit switch that is tripping. Check the exhaust vent for obstructions first.
Then check the air return for a blocked filter or crushed duct. If airflow is good, the high limit switch itself may be defective and needs replacement. Another cause is an overheated control board from poor ventilation.
Make sure nothing is piled on top of the furnace inside the RV cabinet.
Symptom: Furnace Runs but Blows Cold Air
The blower is running but no heat. The control board may have failed to open the gas valve, or the valve itself is stuck. Listen for a click from the gas valve when the furnace attempts ignition.
No click means the board is not sending 12V to the valve, or the valve coil is broken. Test the valve by measuring voltage at its solenoid during the ignition attempt. If you see 12V but no click, the valve is faulty.
If you see no voltage, the board is suspect. If the valve opens but no flame, check the ignitor gap and the burner tube for blockages.
Fixing the 8531's Classic Failure Points (With Part Numbers and Specs)
When the tests point to a specific component, the fix is often straightforward.
Testing and Replacing the Sail Switch
The sail switch is easy to test. Remove the two wires from the switch terminals. Set your multimeter to continuity mode.
With the blower running, you should see near-zero resistance across the terminals. If the meter stays open, the switch is stuck or broken.
Replacement switches are widely available. Look for the part number printed on the switch body. Atwood used several variants across the 8531's production run.
Match the exact number to avoid mounting or wire-length issues. The switch mounts with two screws on the blower housing. It takes about ten minutes to swap.
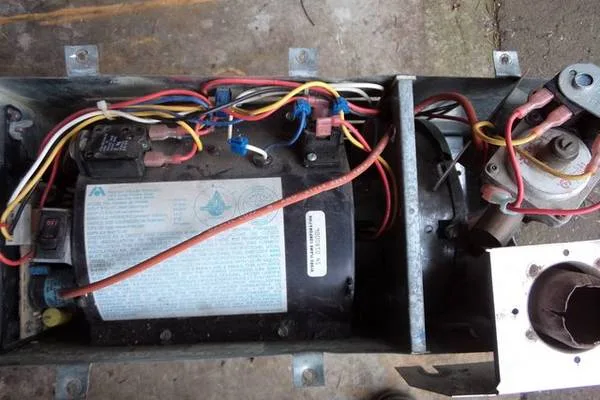
Image source: Bing (Web (fair-use with source credit))
Ignitor Gap, Cleaning, and Wiring
The ignitor creates the spark that lights the gas. Over time, carbon builds up on the electrode. The gap can also shift from vibration.
Pull the burner assembly to access it. Clean the electrode with fine sandpaper. Set the gap to 0.125 inches using a feeler gauge.
Check the ceramic insulator for cracks. A cracked insulator lets the spark jump to ground instead of across the gap. If you see any damage, replace the ignitor.
Burner Tube Cleaning (Soot, Spider Webs, and Debris)
Spiders love burner tubes. A tiny web can block gas flow and cause delayed ignition. Remove the burner tube from the furnace.
Inspect it under a bright light. Blow compressed air through the tube. Clean the orifice with a wire brush or a specialized orifice cleaner.
Never use a drill bit, since it can enlarge the opening.
Control Board Replacement: When It Is Actually the Right Call
Only replace the board after testing everything else. Confirm that voltage, ground, sail switch, ignitor, and gas valve all check out. Then the board is the likely culprit.
Atwood boards are plug-and-play. Power down the furnace, unplug the old board, and install the new one. Verify the board part number matches your model.
A mismatched board can cause false fault codes.
Mistakes That Cost RV Owners Time and Money
Replacing Parts Before You Test Them
The most expensive mistake is throwing parts at the furnace. Control boards cost more than a hundred dollars. Sail switches are cheaper but still add up.
Test before you replace. A five-dollar multimeter saves you from buying three parts you did not need.
Overlooking Ground Faults and Corroded Connectors
RV vibration loosens connections. Corrosion on spade terminals is a silent killer. The control board might get enough voltage to look fine at rest.
Under load, the connection drops voltage and the furnace shuts down. Pull every connector. Look for green or white corrosion.
Clean terminals with contact cleaner and tighten any loose spade connectors.
The "It Must Be the Board" Trap
When a furnace shows no obvious problem, people blame the board. But boards fail less often than maintenance issues. Many "dead" boards turn out to be a bad ground strap or a dirty flame sensor.
The board is the last resort, not the first suspect.
Blocking Airflow and Starving the Furnace
Owners pile storage in the furnace compartment. That blocks the return air. The sail switch will not close or the high limit trips.
Keep the compartment clear. Check that no duct is crushed. A folded duct can reduce airflow enough to kill the heat cycle.
When to Stop and Call a Licensed RV Technician
Gas Smell or Propane Leak: Don't Wait, Act Now
If you smell propane, stop troubleshooting immediately. Turn off the gas at the tank. Open all windows and vent the RV.
Extinguish any flames or pilot lights. Do not flip any electrical switches. Leave the vehicle and call a professional.
Propane leaks cause explosions. That is not an exaggeration.
Repeated Lockouts Without a Clear Fix
The furnace locks out after three failed ignition attempts. If you have cleared the fault code, checked the sail switch, cleaned the burner, and verified propane flow, it is time to call a tech. Repeated lockouts point to a deeper issue.
It might be a failing gas valve or a cracked heat exchanger.
Warranty, Insurance, and Code Considerations
RVIA certification and local gas codes exist to protect you. Some repairs can void your furnace warranty if not done by an approved tech. Insurance adjusters may require proof of professional repair after any gas-related issue.
Write down the technician's license number and keep the invoice.
How to Find a Qualified Tech (and Red Flags to Avoid)
Look for an RVIA-certified technician or a licensed gas fitter. Ask if they have worked on Atwood furnaces specifically. Avoid anyone who quotes a board replacement without testing.
A good tech will take 30 minutes to diagnose before quoting anything.
Seasonal Maintenance: Keep the 8531 Running for Years
The Pre-Season Inspection Checklist
Do this before your first cold night. Charge the battery fully and test voltage. Inspect the exterior vent cover for nests or debris.
Check all duct connections for gaps. Replace the furnace's air filter if your RV has one. Run the furnace for ten minutes to verify it heats properly.
Cleaning the Burner, Orifice, and Vent System
Once a year, pull the burner tube and clean it. Blow out the orifice. Brush the flame sensor.
Remove the blower wheel and clean the fins. Dust buildup on the wheel reduces airflow. Less airflow means the sail switch might stay open.
Winter Storage: What to Do So It Works in Spring
Before storage, run the furnace for 15 minutes to burn off moisture. Clean the compartment thoroughly. Mouse nests are a common spring surprise.
Seal any gaps where rodents can enter. Disconnect the battery or install a maintainer. In spring, set the thermostat to heat and run a full cycle before camping season begins.
Atwood 8531 Troubleshooting FAQs
Why won't my Atwood 8531 furnace ignite?
The most common cause is low battery voltage. The control board needs at least 10.5 volts under load. Charge the battery or plug into shore power.
Check the sail switch next. If it does not close, the furnace will not spark.
How do I reset my Atwood furnace?
Turn off the 12-volt power to the furnace. Remove the fuse or disconnect the battery. Wait two minutes.
Restore power and set the thermostat to call for heat. The fault memory clears and the furnace tries again.
What does two flashes on the furnace LED mean?
Two flashes indicate a sail switch error. The switch is stuck open or closed. Test it with a multimeter.
Replace it if it does not show continuity when the blower runs.
Can I bypass the sail switch?
No. Never bypass the sail switch. It proves airflow before the gas valve opens.
Bypassing it can cause unburned propane to accumulate. That creates an explosion risk.
How long does an Atwood 8531 last?
A well-maintained 8531 can last 20 years or more. Regular cleaning and checking the battery voltage make it last longer. Most failures come from neglect, not age.

Similar Posts