Frigidaire Dishwasher Error Codes
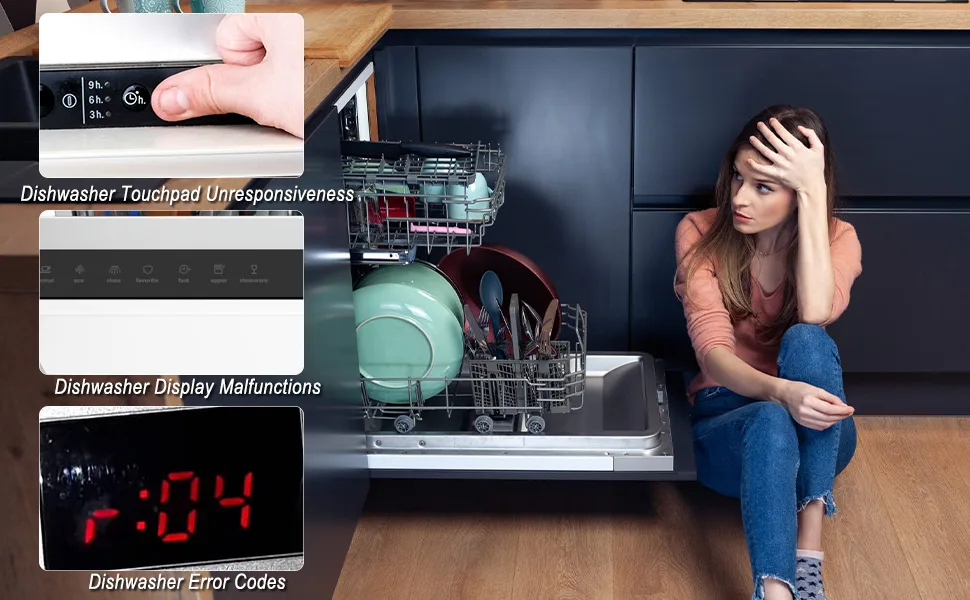
Image source: Bing (Web (fair-use with source credit))
You're staring at a blinking light on your Frigidaire dishwasher, and honestly, it might as well be Morse code. The good news is that Frigidaire Dishwasher Error Codes aren't random; they're a built-in diagnostic system designed to tell you exactly what's wrong. Once you know how to read them, you can usually skip the repairman and fix the issue yourself in under an hour.
These codes are standardized across most Frigidaire models. The most common triggers are simple things like a clogged filter, a stuck float switch, or a drain hose kink. Roughly 70% of error code complaints trace back to one of those three issues, not a catastrophic part failure.
Quick Answer
Frigidaire dishwasher error codes are alphanumeric diagnostic alerts that pinpoint specific failures in the wash or drain system. Most codes clear after a simple reset: unplug the unit for one minute, then plug it back in. If the code returns, you have a real mechanical issue.
Check the filter, drain hose, and float switch first, those cause the majority of problems.
Why Your Frigidaire Dishwasher Is Flashing a Code
Your dishwasher isn't trying to annoy you. That blinking sequence is a deliberate diagnostic feature. Frigidaire engineered these units with a self-diagnostic board that monitors every cycle from start to finish.
When something goes wrong, whether it's a water level issue or a heating problem, the control board records it and displays the corresponding error code.
The logic is straightforward. The control board acts like the dishwasher's brain. It sends signals to different components, then waits for a response.
If a component doesn't respond correctly, or the board detects an abnormal reading, it stops the cycle and displays a code.
What triggers these codes varies. Sometimes it's an actual broken part, like a failed drain pump or a stuck heating element. Other times, it's a simple environmental issue, like a kinked hose or a blocked air gap.
The unit also logs error codes in its memory, so a technician can retrieve history and spot recurring problems.
Most newer Frigidaire models use the same code family. The letters and numbers you'll see, like i30, i60, or i10, relate to specific components. The "i" typically stands for a particular sensor or system.
Before You Touch Anything: 4 Safety Essentials
This is a wet appliance connected to both water and electricity, so a few precautions are non-negotiable.
Unplug the dishwasher or switch off the breaker. You do not want the unit powering up while you have your hands inside the sump area. Wait at least one minute for the control board capacitors to drain before working.
Check the water supply valve. It's usually located under the kitchen sink. Make sure it's fully open. Sometimes, it gets knocked partially closed during cleaning, and that alone will trigger a fill error.
Have a towel and a shallow pan ready. There's always residual water in the tub and the sump. Even after a drain cycle, you'll likely spill a little when you open up the filter or inspect the drain pump.
Find your model number. You'll find it on a metal plate located on the side or edge of the dishwasher door. It's usually on the left or right side of the top edge when the door is open. Write it down now, you'll need it when ordering parts.
How to Read the Codes on Your Specific Model
Models With a Digital Display
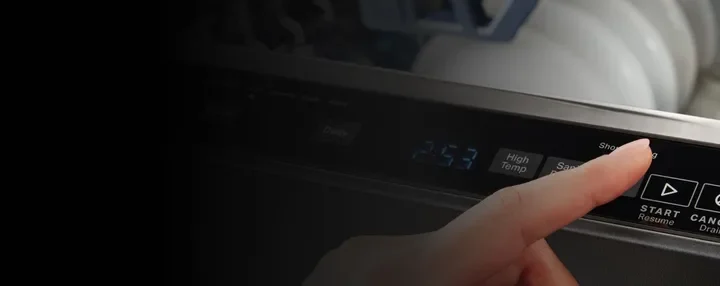
If your dishwasher has an LCD screen, the error code will appear as a text string like "i30" or "iA0". Some models cycle through the code multiple times before returning to a blank screen. Others hold the code until you press "Start/Cancel" or open the door.
Models Without a Display
Not all Frigidaire dishwashers have a digital screen. Some only have a row of button indicators. On these units, the error is shown via a blinking pattern on the "Start" or "Cancel" button.
The pattern corresponds to the number in the error code. For example, if the light blinks three times, pauses, then blinks zero times, that's an i30 code. You'll need to reference your manual for the exact light sequence, as it varies by model generation.
The Universal Reset Procedure
This works on most Frigidaire models produced in the last decade.
- Press the "Start/Cancel" button for about 10 seconds. This clears most active error states.
- If the code doesn't clear, unplug the dishwasher from the wall outlet.
- Wait a full 60 seconds. This drains residual charge from the control board.
- Plug the dishwasher back in.
- Press "Start/Cancel" again to resume or cancel the cycle, depending on what you want to do.
If the code disappears and stays gone, you're done. It was likely a temporary glitch. If it comes back, you'll need to dig deeper.
The Complete Frigidaire Dishwasher Error Code List
Here's where we get into the meat of things. Frigidaire uses a specific set of codes for their dishwashers, broken down by system so you can jump straight to the relevant troubleshooting area.
Water Fill and Level Codes (i10, i20, i30, i40)
These codes relate to how much water the dishwasher is pulling in and whether it reaches the correct level.
i10 / i20: Water fill or level sensing failure.
The dishwasher isn't getting enough water, or the level sensor isn't detecting it properly. Common causes include a shut-off valve that's partially closed, a kinked inlet hose, or a faulty water level sensor.
How to fix i10/i20:
First, check the water supply valve under the sink. Make sure it's fully open. Then inspect the inlet hose from the valve to the dishwasher.
Look for kinks, pinches, or bends. If the hose is clear, the next suspect is the water inlet valve itself, a solenoid-operated valve that opens to let water in. You can test it with a multimeter for continuity.
If the fill is fine but the code is still i20, the water level sensor (a pressure switch or transducer) may have failed. This requires partial disassembly. The sensor is usually located in the sump area.
i30: Drain or sump failure.
This is the one you'll see most often. It means the dishwasher isn't draining water out of the tub quickly enough, or the drain pump is stuck. It's frequently caused by a clogged filter, a blocked drain hose, or something stuck in the pump impeller.
How to fix i30:
Start with the filter. Pull it out and rinse it under hot running water. Use a soft brush for stuck-on debris.
If the filter is clean, check the drain hose. It runs from the dishwasher to the sink drain or garbage disposal. Look for kinks, clogs, or a sagging loop that's trapping water.
Disconnect the hose and flush it with water to clear blockages.
i40: Drain pump failure.
If your code reads i40, the control board has determined the drain pump itself isn't working. This is more serious than i30. It could be a wiring problem, a seized motor, or a pump that's burned out.
How to fix i40:
You'll need to access the drain pump, which is located under the dishwasher tub. This usually requires pulling the unit out from the counter. Once you have access, check the pump impeller for obstructions.
A coin or a piece of broken glass can jam it. If the impeller is free, test the pump motor with a multimeter for continuity. No continuity means the motor is dead and needs replacement.
The i30 vs. i40 Distinction
i30 means water isn't draining properly. i40 means the pump mechanism itself has failed. If your pump is humming but not moving water, that's i30. If it's silent and drawing no power, that's i40.
Heater and Drying Codes (i50, i60, i70, i90)
These codes monitor the heating element and the drying system.
i50: Heater failure.
The heating element isn't reaching the required temperature. This could be a blown heating element, a faulty thermistor, or a wiring issue. Hot water won't be generated, and your dishes won't dry properly.
How to fix i50:
The heating element sits at the bottom of the tub, underneath the lower spray arm. Visually inspect it for cracks, blisters, or burn marks. A multimeter continuity test will tell you if the element is intact.
If the element checks out, test the thermistor, a small sensor that measures water temperature.
i60 / i70: Heater temperature error.
The heater is either getting too hot or not heating at all. The control board is reading an abnormal temperature from the thermistor. If the thermistor is reading incorrectly, the board might shut the heater down as a safety precaution.
The issue could be the sensor itself, not the heater.
How to fix i60/i70:
Test the thermistor's resistance with a multimeter. At room temperature, it should read around 10.5 kilohms. If it reads significantly higher or lower, replace it.
The thermistor is usually located on the bottom of the tub or near the heater element. It's a low-cost part and a relatively simple swap.
i90: Drying fan failure.
This code is specific to models with a built-in drying fan. The fan isn't spinning, which results in damp dishes after a cycle.
How to fix i90:
Check for a blocked vent or lint buildup around the fan impeller. If the impeller spins freely but the fan motor isn't running, test for power at the motor terminals. A dead motor needs replacement.
Communication and Control Codes (iA0, iC0, iAE)
These codes point to issues with the control board, user interface, or wiring.
iA0: Communication error.
The control board isn't communicating properly with another component. This is often a loose wiring harness connection or a failing user interface. Check all connectors for tightness and corrosion.
How to fix iA0:
Disconnect every wiring harness in the unit and reconnect them firmly. Look for corroded or bent pins on the connectors. Sometimes, the harness itself has a broken wire where it flexes during door swings.
If the wiring is intact, you may need to replace the user interface module.
iC0: Cycle communication error.
Similar to iA0, but often specifically related to the user interface module. If the buttons aren't responding or the display is glitching, you might be looking at a control board replacement.
How to fix iC0:
First, try the reset. If that doesn't work, inspect the ribbon cables connecting the user interface to the control board. These cables can wear out at the hinge point.
A worn ribbon cable can cause intermittent communication failures.
iAE: Control board error.
The main control board has detected an internal fault. In most cases, this requires a new control board. It's not a DIY-friendly fix unless you're comfortable with electrical diagnostics.
How to fix iAE:
Test the incoming power supply to the board. Make sure you have 120V AC. If you do, inspect the board for burned components, capacitors and resistors are the usual culprits.
Blown capacitors have a visible bulge on top. If you see one, you can try replacing it if you're skilled with a soldering iron. Otherwise, replace the board.
Other Codes You Might Encounter
iA0: Communication error (covered above).
UC: Unbalanced load.
The dishwasher has detected that the dishes are blocking the spray arm, or the load is too heavy for the rack. Simply rearrange the dishes and close the door. The cycle will resume automatically.
EF: External fault.
This indicates a problem outside the dishwasher, usually a water supply issue. Check the shut-off valve and the inlet hose once more.
"Flashing" or "Er" on the display:
This typically means the control board has lost its programming or is experiencing a hard failure. Try the reset. If it persists, the board needs to be replaced.
Fast Comparison Table
| Error Code | System Affected | Most Likely Cause | Fix Difficulty |
|---|---|---|---|
| i10 | Water Fill | Shut-off valve closed or kinked hose | Easy |
| i20 | Water Level | Faulty water level sensor | Moderate |
| i30 | Drain | Clogged filter or blocked drain | Easy |
| i40 | Drain Pump | Failed drain pump motor | Hard |
| i50 | Heater | Blown heating element | Hard |
| i60 | Heater | Faulty thermistor | Moderate |
| i70 | Heater | Overheating, wiring issue | Moderate |
| i90 | Drying | Fan motor failure | Moderate |
| iA0 | Control | Loose connection or bad board | Hard |
| iC0 | Control | Failing user interface | Hard |
| iAE | Control | Internal board failure | Hard |
| UC | Wash | Unbalanced load | Easy |
Step-by-Step Troubleshooting by Code
Let's walk through the most common codes step by step. Each section covers the exact procedure, including the tools you'll need.
i30: The Most Common Drain Error
This code means the dishwasher isn't draining water. The cycle is stuck because the tub can't empty.
What you'll need: A towel, a shallow pan, a screwdriver, a multimeter.
Step 1: Remove the bottom rack and float switch.
The float switch is a small cylindrical device, usually in the front right corner of the tub. It triggers an error if the water level rises too high. Pull it out and clean off any lime scale or debris.
Check that the float moves freely.
Step 2: Clean the filter assembly.
Pull out the filter basket and rinse it under hot water. Use a soft brush on the fine mesh screen. Check inside the sump area for loose food debris.
Step 3: Check the drain hose.
Disconnect the drain hose from the sink drain or garbage disposal. Flush water through it to confirm it's clear. Inspect the hose for kinks or low spots where water can pool.
Step 4: Inspect the drain pump.
If the filter and hose are clear, the issue is the pump. Put the dishwasher back on its feet and access the pump from the bottom. Check the impeller for obstructions.
A coin or a piece of broken glass can jam it.
If the impeller is free, test the pump motor with a multimeter. You should see continuity. If it's a dead short (0 ohms) or an open loop (infinite resistance), the motor is bad.
Step 5: Test the drain pump relay on the control board.
You can test for power at the pump terminals during the drain cycle. With the dishwasher running, you should see 120V AC at the pump when the drain cycle is active. If you have power but the pump is silent, it's dead.
If you have no power, the control board is the problem.
i40: The Drain Pump Failure
This is different from i30. i40 means the drain pump itself isn't working, not just blocked. The pump motor has seized or burned out.
What you'll need: Screwdriver set, socket wrench, multimeter, replacement pump.
Step 1: Confirm power at the pump terminals.
During the drain cycle, you should measure 120V AC at the pump motor connections. If you have power but the pump doesn't run, the motor is dead. Replace the pump.
Step 2: Remove the pump.
If you're replacing it, disconnect the wiring harness and the hoses connected to the pump sump. You'll need a socket wrench to remove the mounting bolts. Follow your model's service manual for the exact torque specs, tightening to spec prevents plastic warping that causes leaks.
Step 3: Install the new pump.
Connect the hoses and wiring harness, then mount the pump into place. Hand-tighten the bolts first, then finish with your socket wrench to the specified torque. Reconnect the dishwasher to power and water.
Run a test cycle.
i10: The Water Fill Error
The dishwasher isn't getting enough water. This code is almost always fixed without ordering a part.
What you'll need: Adjustable wrench, towel.
Step 1: Check the water valve under the sink.
Turn it counterclockwise until it stops. Feel the inlet hose, if it's cold and firm, water is flowing.
Step 2: Inspect the inlet hose for kinks.
If the hose is twisted or pinched, straighten it out. A kink can reduce water pressure even when the valve is wide open. Pull the dishwasher out slightly to check the hose behind the unit.
Step 3: Clean the inlet valve screen.
The water inlet valve often has a small mesh screen where the water enters the dishwasher. Over time, hard water also builds up here and restricts flow. Remove the screen and clean it with a toothbrush.
Step 4: Test the inlet valve solenoid.
Use a multimeter to test the solenoid coil for continuity. You should get a reading between 1,000 and 2,000 ohms (1-2 kilohms). An infinite reading means an open coil, replace the valve assembly.
i60: The Heater Temperature Error
The control board is reading an abnormal temperature from the thermistor, either the water is too hot, or the thermistor is sending bad data.
What you'll need: Screwdriver, multimeter.
Step 1: Test the thermistor resistance at room temperature.
A good thermistor reads about 10.5 kilohms at 75°F (24°C). If your reading is far from that, replace the thermistor. This is a cheap part (<$25) and an easy swap.
Step 2: Test the heating element for continuity.
The heating element should read between 5 and 50 ohms. A visual inspection also helps, cracks or bubbles on the element body mean failure. If the element is shorted, the control board may have already shut it down, which triggers the i60.
Step 3: Check the wiring to the heater.
A corroded connector between the heating element and the control board can also cause an error. Look for green or white corrosion on the terminals. Clean it off and reseat the connector.
i90: The Drying Fan Failure
The drying fan isn't spinning, leaving you with damp dishes at the end of a cycle.
What you'll need: Screwdriver, multimeter.
Step 1: Check for foreign objects in the fan impeller.
A stray piece of packaging material or a foam coffee cup can block the blade. Reach into the vent opening and try to spin the fan with your finger. If it doesn't move easily, something is stuck.
Step 2: Test the fan motor.
The fan motor typically reads around 100 to 500 ohms across its terminals. An open circuit means a dead motor. Replace the fan assembly.
i70: The Heater Overheat
The heating element is getting too hot, and the control board shut it down to prevent the dishwasher from melting down. This almost always points to the thermistor.
How to fix i70:
Test the resistance across the thermistor. It should be around 10.5 kilohms at room temperature. If it has drifted significantly, it may not be reporting the temperature accurately.
Replace it. If the thermistor is fine, test the heater for continuity. The heating element can also develop a short that bypasses the thermistor and heats continuously.
iAE: The Control Board Failure
This is one of the most serious codes. It means the main control board has detected an internal fault.
How to fix iAE:
Unplug the dishwasher and wait 60 seconds, then plug it back in. Run a test cycle. If the code reappears, the board is toast.
Replacing a control board costs $150 out of pocket plus shipping. You'll need to match the exact part number printed on the board.
If you can see burned capacitors on the board, a skilled electronics person can sometimes fix it for under $10 in parts. That's a big if, though.
Frigidaire Dishwasher Error Codes: Model Variations and Wi-Fi Models
Not every Frigidaire dishwasher follows the exact same code list. Here's what to keep in mind.
Wi-Fi-Enabled and Smart Models
Newer Frigidaire models with Wi-Fi send error codes directly to your phone via the Smart HQ app. The app not only shows the code, but also offers visual troubleshooting guides with video links. While the codes themselves are the same, the app adds context and sometimes lets you run diagnostic cycles from your phone.
Model-Specific Variations
Some models have specialized features, additional sensors for turbidity or salt levels in hard water areas. These can trigger codes not listed in this guide.
Salt Level Codes: On models with a water softener built-in, you might see a code like "SA" meaning the salt level is low. Refilling the salt compartment clears the code.
Turbidity Sensor Codes: A code like "iT" indicates the turbidity sensor (which measures how dirty the wash water is) isn't reading properly. Cleaning the sensor lens clears most of these.
How to Confirm Your Model
Your model number is on the metal plate at the top edge of the door. Write it down, then search for the official service manual using that exact number. The manual will give you the specific wiring diagram and diagnostic flowchart for your unit.
Where Most People Go Wrong: 6 Common Mistakes to Avoid
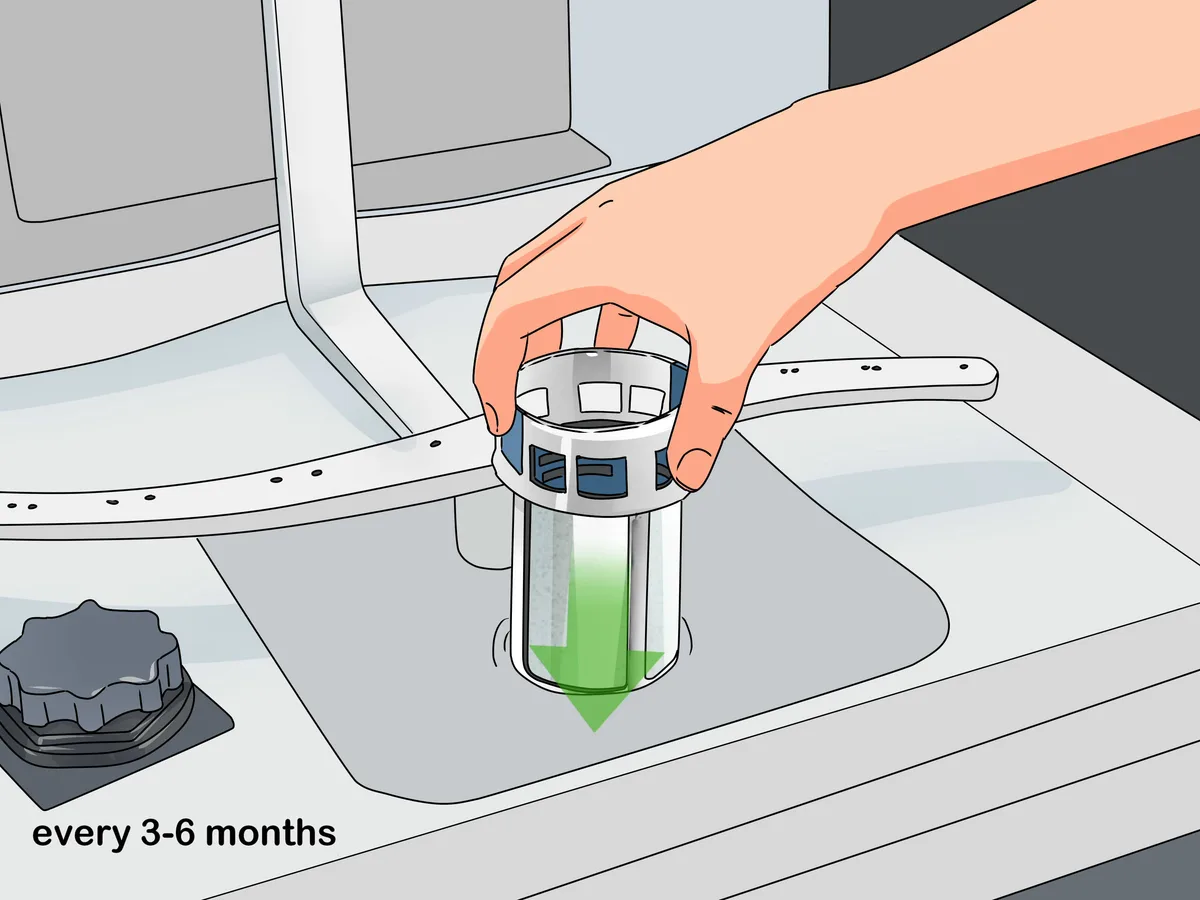
Image source: Bing (Web (fair-use with source credit))
Mistake 1: Skipping the Filter Cleanout
This is the number one cause of i30 drain errors. Frigidaire dishwashers have a self-cleaning filter, but "self-cleaning" is marketing speak. It still needs regular manual attention.
Over time, food particles, grease, and hard water scale build up in the filter assembly and block water flow.
Pull the filter assembly out at least once a month. Rinse it under hot running water to remove debris. For stuck-on grease, a soft brush works wonders.
Pay special attention to the fine mesh screen, which is the first to clog.
Mistake 2: Ignoring the Air Gap
If your model has an air gap on the countertop, it's a common liability. The air gap prevents drain water from backflowing into the dishwasher, but it can also get clogged. If the i30 code stubbornly returns after you've cleaned the filter, check the air gap.
Pop the little chrome cap off and check for food debris.
A clogged air gap causes the drain water to back up, which trips the drain sensor immediately. Clean it out with a pipe cleaner or a long narrow bottle brush.
Mistake 3: Overtightening the Drain Hose Clamp
Here's a weird one. When you reconnect the drain hose to the sink drain line, it's easy to overtighten the hose clamp. If the clamp is too tight, it collapses the hose, restricting water flow.
The drain pump then has to work harder, eventually overheating or tripping the error code.
The fix is simple: loosen that clamp slightly. The hose should be snug, but the clamp should not pinch the hose wall closed. You should be able to slightly compress the hose with your fingers without the clamp digging in.
Mistake 4: Using the Wrong Detergent
Frigidaire dishwashers require modern auto-dispensing detergent, usually labeled as "Auto" or "Tabs." Powdered or gel detergents without an enzyme-based formula can create excessive suds. Suds can confuse the water level sensor, causing fill errors and drainage issues.
Using too much detergent leaves residual film that builds up in the sump area. This buildup eventually interferes with the float switch, which monitors water level, triggering i20 errors.
Mistake 5: Replacing Parts Without Testing
People trace the error code, find a likely part, order it, and replace it without double-checking the wiring or the actual part's condition.
Take the drain pump, for example. The code says i40, so you order a new pump. But when you install it, the code stays.
Why? Because the original pump was fine. The wiring harness that connects it was loose, or the harness itself had a short.
Always test components with a multimeter before you replace them. The manufacturer specifications usually list the expected resistance values for each component. Comparing your reading against those specs saves you time and money.
Mistake 6: Forgetting to Reconnect Ground Wires
This one can actually cause i50 or i60 errors. When you're working inside the dishwasher, particularly on the heating element or the control board, it's easy to leave a ground wire disconnected. The unit won't power up without a proper ground, and the control board may throw a heater-related error.
Before you button everything back up, visually inspect every connector and ground terminal you touched. Make sure they're seated properly and not pinched. A tug test on each wire is a good habit to build.
When to DIY vs. When to Call a Pro
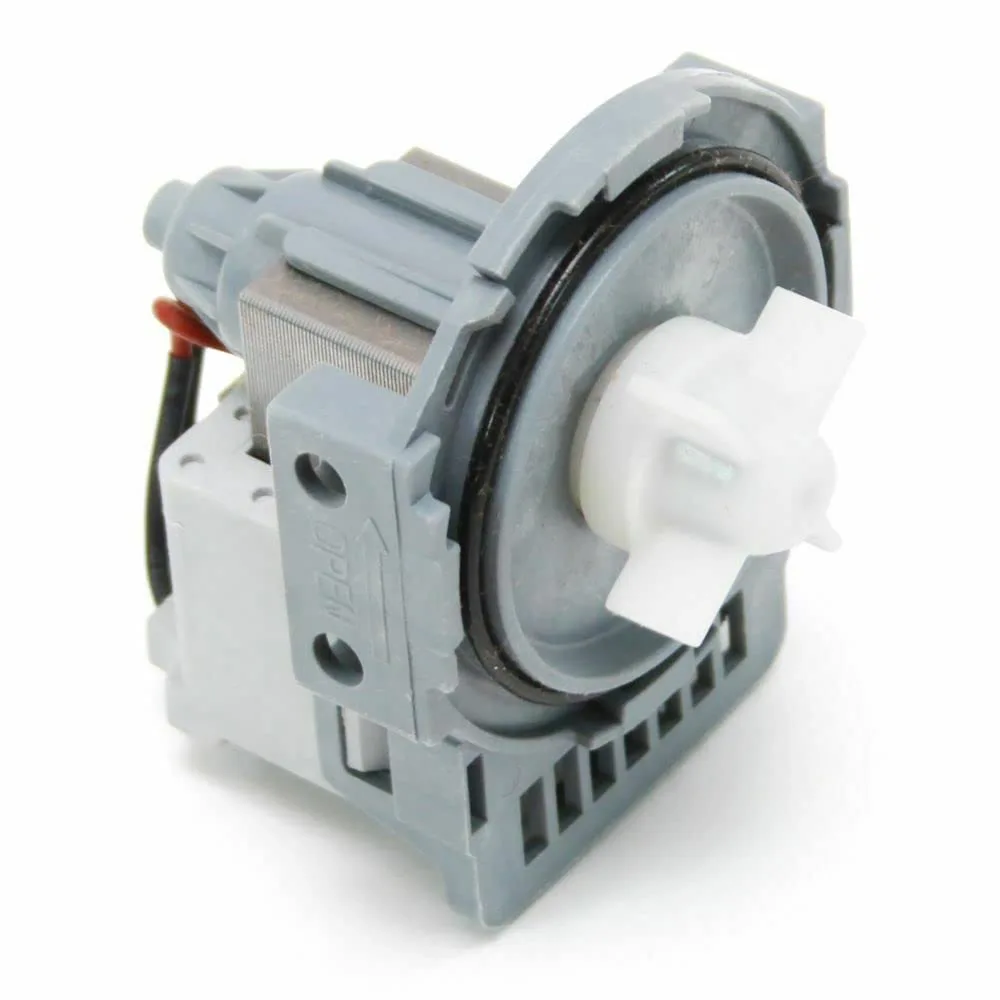
Image source: Bing (Web (fair-use with source credit))
Alright, you've narrowed down the code. The question now is whether you should tackle the repair yourself or hand it off to a professional. This isn't a pride thing; it's a pragmatism thing.
Some repairs genuinely need a pro.
The DIY-Friendly Zone
If the code is i30 (drain error) or i10 (water fill error), start with the basics. Clean the filter, check the inlet hose, look for kinks. Most of these are simple physical issues you can fix with basic tools and a little patience.
Here's a good rule of thumb: if the repair only involves unclogging, cleaning, or tightening something, you can probably handle it. Replacing a filter assembly, cleaning an air gap, and straightening a kinked hose are all safe DIY territory. No special skills needed, just a willingness to get a little dirty.
The Moderate Zone
This is where you need to be honest with yourself about your skill level. Replacing a thermistor (i60) or a drying fan motor (i90) is doable for a confident DIYer. These parts are usually accessible and don't require specialized electronics knowledge.
You'll need a screwdriver set, possibly a socket set, and a multimeter for testing. If you're comfortable reading a wiring diagram and using a multimeter safely, this zone is fair game. Take your time, snap photos before you remove parts, and double-check every connection.
The Pro-Only Zone
Some errors are just not worth the DIY gamble. Codes like iAE (control board failure) mean the main control board is fried. Replacing that board is often $200 to $400 in parts alone, and a miswiring can damage the new board instantly.
One wrong move and you've doubled your repair cost.
Similarly, i40 (drain pump failure) often requires significant disassembly. You're pulling the dishwasher out from under the counter, flipping it on its side, and accessing the pump from underneath. It's messy, it's heavy, and it's easy to damage the wiring harness when you're working in tight quarters.
Cost Comparison: DIY vs. Hiring a Pro
| Issue | DIY Cost (Part Only) | Pro Repair Cost (Parts + Labor) | DIY Worth It? |
|---|---|---|---|
| Clogged filter | $0 | $80 – $120 | Yes, always |
| Kinked inlet hose | $15 – $25 | $150 – $200 | Yes, easy fix |
| Faulty thermistor | $20 – $40 | $180 – $250 | Yes, if handy |
| Drying fan motor | $30 – $60 | $200 – $300 | Yes, if handy |
| Drain pump | $60 – $120 | $250 – $400 | Only if skilled |
| Control board | $150 – $250 | $350 – $500 | No, too risky |
A Word About Warranty Coverage
Before you spend a dime on any part, check your warranty status. Frigidaire dishwashers typically carry a one-year limited parts and labor warranty. If you're inside that window, opening up the unit yourself could void the warranty coverage.
Even if you don't cause damage, the manufacturer may refuse a claim if they see visible tampering.
Look up your model's warranty details online using the manufacturer's official documentation. If you're within the coverage period, call a certified technician. You'll pay a service call fee, but the parts and labor are covered.
That's a much better deal than buying a control board out of pocket.
Trust Your Gut
If the error code points to something you've never repaired before, and the parts are expensive, there's no shame in calling a pro. Appliance repair is a skill. It takes experience to know which grommets need replacing, which wires need routing, and which screws need a specific torque.
The time you save and the peace of mind you get from knowing the job is done right is often worth the service fee. A botched DIY repair frequently costs more in the long run than calling a technician on the first visit. Know your limits and stop before you make things worse.
Final Checklist Before You Call for Help
Before you pick up the phone, run through this list one more time:
- Did you reset the unit?
- Is the water supply valve fully open?
- Did you clean the filter and inspect the sump?
- Is the drain hose kinked or clogged?
- Is the air gap clear?
- Did you test the thermistor and heating element with a multimeter?
- Did you check all wiring connections for corrosion or damage?
If you've done all of this and the code is still flashing, it's time to bring in a professional. You've done your due diligence. Now let someone with the right experience and the right tools take it from here.
What to Tell the Technician
When you do call, give them the exact error code and the steps you've already taken. This saves the technician time and saves you money in diagnostic fees. By the time the pro arrives, you've already ruled out all the easy fixes.
Tell them:
- The exact error code (e.g., "i30")
- Whether it returns immediately after a reset
- What you've already cleaned or replaced
- Whether the unit makes any clicking, humming, or grinding noises
That single piece of information can cut the repair time in half. And that's real money back in your pocket.