Atwood Camper Water Heater Troubleshooting
Your RV water heater stopped working mid-shower, and now you're staring at a blinking red light wondering what went wrong. That's exactly why Atwood camper water heater troubleshooting matters, because nobody wants to cut a camping trip short over something that might be a simple fix. The good news is that most Atwood failures follow predictable patterns, and you can diagnose them in under fifteen minutes without any special tools.
Per Dometic's official service documentation (Dometic acquired Atwood years ago, but the product line remains separate), roughly 70% of Atwood water heater service calls involve just three components: the direct spark ignition (DSI) control board, the flame sensor, or the burner assembly. Understanding which one failed and why is the difference between a twenty-dollar fix and an unnecessary four-hundred-dollar replacement. Let's walk through it step by step.
Quick Answer
Atwood water heaters fail in two main ways: no ignition or flame dropout. Check the DSI board's diagnostic LED first. Count the flashes.
A single flash means ignition lockout. Three flashes mean flame sensor failure. Clean the flame sensor with fine sandpaper.
Replace the board if the LED doesn't light at all. Always shut off propane and 120V power before opening the exterior panel.
Image source: Bing (Web (fair-use with source credit))
Why Getting This Wrong Can Cost You
Atwood water heaters combine three dangerous things: propane gas, 120-volt electricity, and water. Getting the diagnosis wrong can cost you more than just a cold shower.
The real risk is misdiagnosis. A lot of RV owners read "no hot water" online and immediately buy a new control board. That's a sixty-to-one-hundred-dollar mistake if the actual problem was a dirty flame sensor.
Replace boards three times before checking the propane tank is empty. Don't be that person.
Understanding what you're working with is step one. Atwood water heaters in most North American RVs built after the early 2000s use a direct spark ignition system. There's no standing pilot flame.
When you flip the switch inside your camper, the control board sends 12 volts to the igniter electrode, which creates a spark. At the same time, it opens the gas valve for about seven seconds. If the flame sensor detects a flame within that window, the gas valve stays open and you get hot water.
If it doesn't, the board locks out and the red light starts flashing.
That flashing light is your best diagnostic tool. Every Atwood DSI board uses a sequence of flashes to tell you exactly what went wrong. One flash means the board tried to ignite but couldn't confirm a flame.
Three flashes means the flame lit and then went out shortly after. A continuous fast flash usually means a wiring issue or a dead board. The manual for your specific model (available on Dometic's website as of 2026) has the full code list.
Those two codes cover the vast majority of real-world failures.
The aluminum tank is a key detail. Unlike Suburban water heaters that use steel tanks with a glass lining, Atwood uses aluminum. This makes them lighter but also means they can't be anode rod tested in the same way.
The anode rod on an Atwood is a small rod located behind a plastic plug. A neglected anode rod can lead to internal tank corrosion that's invisible until you get a leak.
The Two Most Common Failures
When you flip your water heater switch and nothing happens, there are really only two failure modes you need to worry about. Everything else is a variation of these two problems.
Failure one: the spark never happens. You turn on the water heater. You hear nothing. No clicking, no sparking, no attempt to light.
The red light on the DSI board (visible through the small window on the exterior panel) doesn't flash at all. Or it flashes continuously without a pattern.
This almost always means the control board isn't getting power, or the board itself is dead. Check the 12-volt DC supply first. Use a multimeter on the two small wires going into the board.
If you're reading less than 10.5 volts, your battery is too low or you have a wiring problem. Atwood boards need a solid 12 volts to operate the gas valve. If voltage is fine and the board still doesn't light, the board is likely fried.
Failure two: the spark happens but the flame goes out. You hear clicking. You might even see the flame ignite through the exhaust port. But after three to five seconds the flame dies and the red light starts flashing.
This triple-flash pattern (three flashes, pause, three flashes) is the most common service call in the RV industry.
The culprit is almost always the flame sensor. Atwood uses a metal rod that sits in the flame path. When heated by the flame, it sends a small electrical signal back to the board, confirming combustion.
If that rod is dirty with soot, corroded, or bent out of position, the signal is weak or nonexistent. The board interprets this as a flame failure and shuts the gas valve. Cleaning the rod with fine sandpaper or steel wool fixes this nine times out of ten.
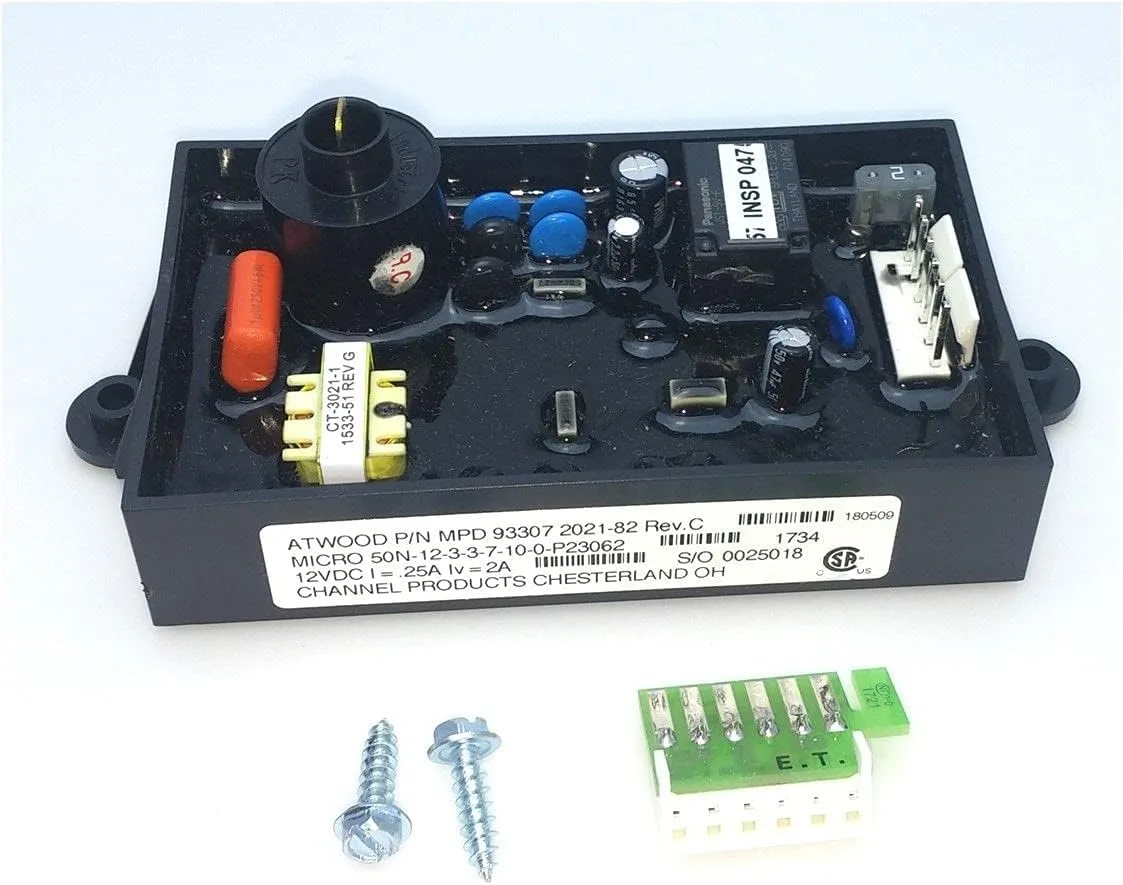
Image source: Bing (Web (fair-use with source credit))
One more thing to check before pulling anything apart. Make sure the propane tank actually has gas. It sounds obvious, but you'd be surprised how many people replace expensive components only to discover their tank was empty. Run a stove burner for a minute to confirm flow.
If the stove lights and burns strong, your propane supply is fine.
Diagnose Your Atwood Water Heater in 15 Minutes
You can diagnose any Atwood water heater with three tools: a multimeter, a small flathead screwdriver, and some fine-grit sandpaper or steel wool. Here's the exact process.
Step one: confirm power. Start at the interior switch. Turn the water heater to the "on" position. Listen for the board to click.
If you hear nothing at all, check the 12-volt fuse in your RV's power distribution panel. Atwood boards draw power through a dedicated fuse, usually a 5-amp or 10-amp blade fuse. Pull it, look for a broken filament, and replace if needed.
If the fuse is good, move to the board.
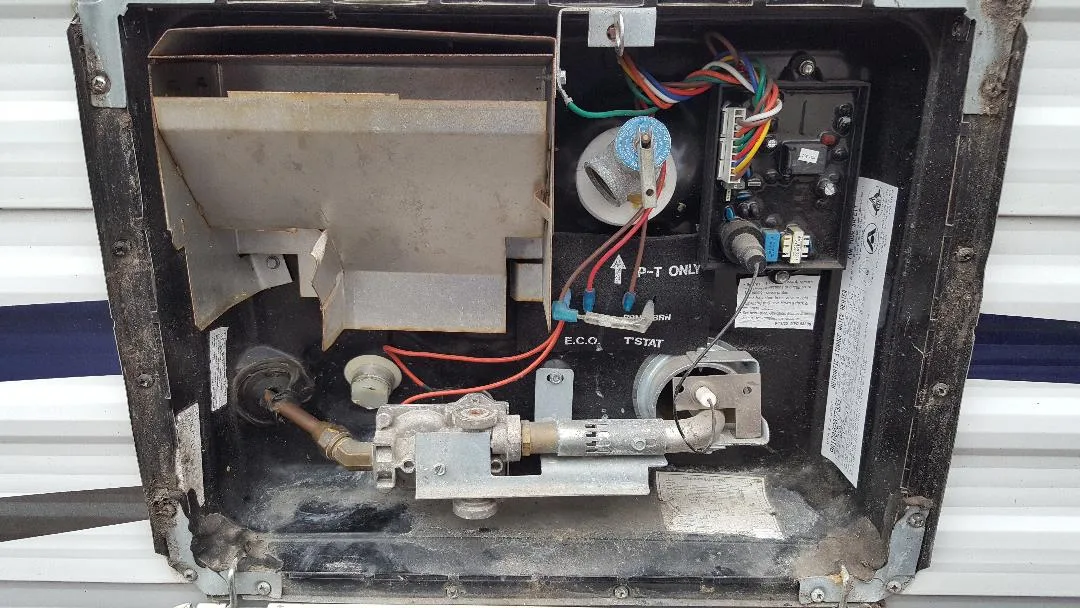
Step two: read the error code. Open the exterior water heater access panel. You'll see the control board mounted on the back wall with a small LED. Look at the flash pattern.
No light at all means the board isn't getting power. One flash means ignition lockout (no flame detected). Three flashes means flame sensor failure (flame lit briefly then went out).
A fast continuous flash typically points to a shorted wire or a dead board.
Step three: test the gas valve. If you're getting one flash, the board is trying to open the gas valve but no gas is flowing. With the power off, disconnect the two wires from the gas valve. Use your multimeter on the ohms setting.
A good valve coil should read between 30 and 60 ohms. An open circuit (infinite resistance) means the valve coil is burned out and needs replacement. Per NSF/ANSI 4 standards for gas appliance safety, a failed gas valve must be replaced, not repaired.
Step four: inspect and clean the flame sensor. This is the most common fix. The flame sensor is the metal rod with a single wire running to it. It sits directly in the path of the burner flame.
Over time, soot and combustion residue build up on the rod. Take your sandpaper or steel wool and gently scrub the entire length of the rod until it's shiny. Don't use a file or wire brush.
You don't want to remove metal, just the surface contamination. Reinstall and test.
Step five: check the igniter gap. While you're in there, look at the spark electrode. It should be positioned about 1/8 inch from the burner tube. Too far and the spark won't jump.
Too close and the flame will short out the electrode. Adjust by carefully bending the bracket. If the electrode is cracked or heavily corroded, replace it.
They cost about fifteen dollars.
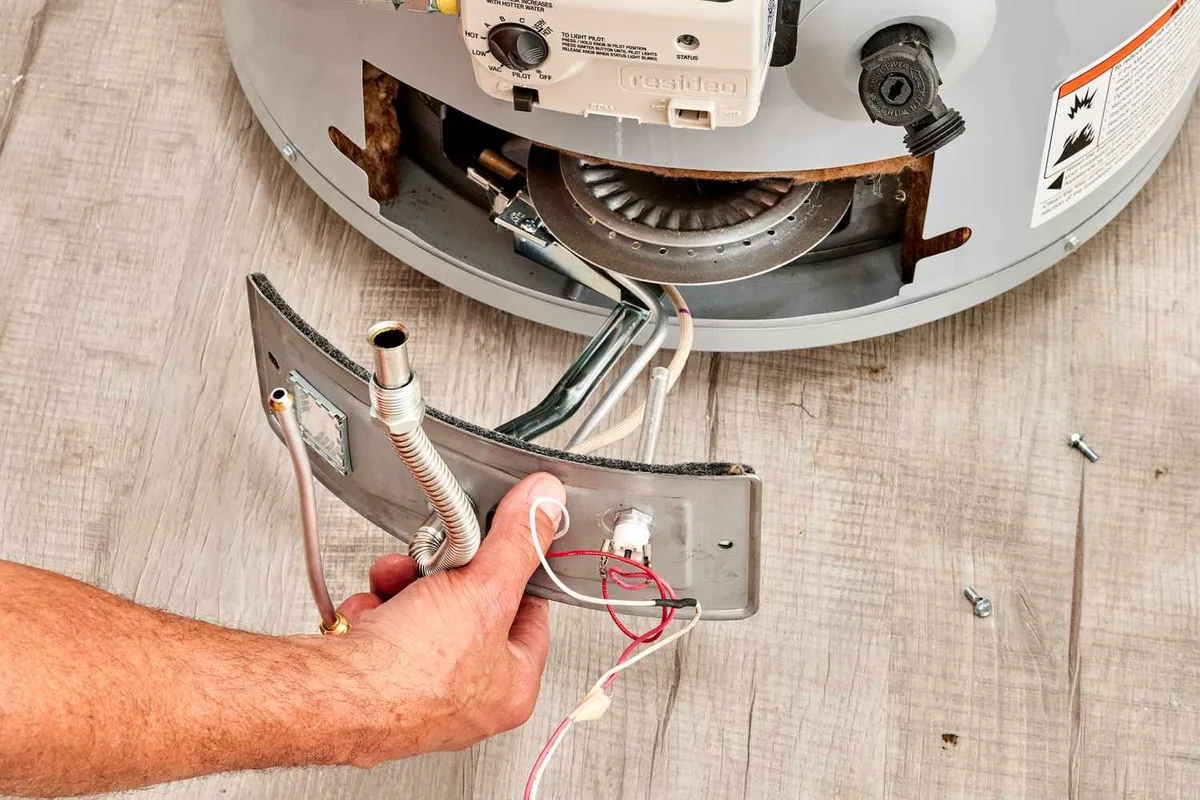
Image source: Bing (Web (fair-use with source credit))
Cleaning vs. Replacing: What Actually Works
Now that you've diagnosed the problem, you need to decide whether to clean or replace. This decision tree will save you money and frustration.
When cleaning works. A dirty flame sensor is the easiest fix and the most common cause of flame dropout. If your water heater lights for three to five seconds and then goes out, clean the sensor first. About 80% of the time, this alone resolves the issue.
Burner tube cleaning also falls into this category. If you see heavy soot buildup on the burner itself, use a small wire brush or compressed air to clear the ports. Soot indicates incomplete combustion, which can be caused by high altitude, low propane pressure, or a restricted exhaust flue.
When replacement is the better move. If the DSI board shows no LED at all and you've confirmed 12-volt power at the connector, the board is dead. Water intrusion is the leading cause of board failure on Atwoods. Check the gasket around the exterior panel.
If it's cracked or missing, water has been dripping onto the board. Replace the gasket at the same time.
The gas valve is a judgment call. If your multimeter shows an open coil, replace the valve. But also check for physical debris. Insects and spider webs can block the gas orifice.
Remove the burner tube assembly and blow compressed air through the orifice. If gas flows freely but the valve coil is dead, order a new valve. Dometic part numbers vary by model, so check your specific unit's data plate.
The control board equation. A new board runs sixty to one hundred dollars. A service call from an RV tech runs one hundred fifty to two hundred dollars just for diagnosis. If you've confirmed the board is bad (no LED, confirmed power), replace it yourself.
If you're unsure, the diagnostic steps above will tell you with certainty.
One exception to every rule. If your water heater is more than twelve years old and has never been serviced, consider replacing the entire unit. A full Atwood replacement (unit plus labor) runs about four hundred to eight hundred dollars depending on your RV's accessibility. Compare that to replacing a board now and then a gas valve next year.
Sometimes the smart move is to start fresh, especially if you plan to keep the RV for several more seasons.
When It's the Control Board (and When It's Not)
The control board is the brain of your Atwood water heater. It gets blamed for a lot of problems it didn't cause. Here's how to know for sure.
Signs the board is actually bad. No LED activity at all despite confirmed 12-volt power. The board looks physically damaged with burned traces, bulging capacitors, or corrosion on the solder joints. Water stains or rust on the board itself.
The LED flashes continuously with no pattern. Any of these point to a dead board.
Signs the board is fine. The LED flashes in a clear pattern (especially one flash or three flashes). You can hear the board click when power is applied. The board looks clean with no visible damage.
In these cases, the problem is almost certainly elsewhere. Don't replace the board until you've tested everything else.
Why boards fail. The number one killer of Atwood control boards is water. The exterior access panel sits flush against the RV sidewall. Over time, the rubber gasket dries out and cracks.
Rain and road spray find their way in. A small drip lands on the board and shorts out the circuits. Replacing the gasket is a five-dollar fix that prevents a hundred-dollar problem.
What about the wiring. Loose connections cause intermittent problems. Check the wire terminals on the board. They should be snug.
Push them in firmly. If a wire pulls out easily, the terminal is corroded. Cut off the corroded end and crimp on a new connector.
This matters because a loose ground wire can make the board behave like it's dead even when it's perfectly fine.
Safety First: What Not to Do
You're working with propane and electricity. Respect both of them.
Shut off the propane before opening the panel. Turn off the valve at the tank. Not the stove. Not the water heater switch.
The tank. This eliminates any risk of gas leaking while you're working.
Kill the 120-volt power. Flip the breaker in your RV's electrical panel that feeds the water heater. Even if you're only working on the low-voltage side, the heating element is live at 120 volts. Touching the wrong terminal can hurt you.
Never bypass safety devices. The high-limit thermostat and pressure relief valve are there for a reason. If the high-limit keeps tripping, find out why. Don't just bypass it.
A blocked exhaust flue or a failed thermostat can cause the tank to overheat and rupture.
Ventilation matters. If you're testing the water heater with the exterior panel open, make sure the area is well-ventilated. Carbon monoxide from the burner can build up quickly in an enclosed space. Run a carbon monoxide detector in your RV.
Test it before every trip. Per NFPA 720 standards, every RV should have a CO detector installed.
When to call a pro. If you smell gas and can't find the source. If the tank is leaking water. If you've gone through all the diagnostic steps and still can't get it to light.
Some problems require specialized tools and knowledge. There's no shame in calling a certified RV technician.
Frequently Asked Questions
Why does my Atwood water heater click but not light?
The board is trying to ignite but no gas is reaching the burner. Check that your propane tank has gas and the main valve is open. Then test the gas valve coil with a multimeter.
An open circuit means the valve needs replacement.
What does three flashes on my Atwood water heater mean?
Three flashes means flame sensor failure. The flame lit briefly but the sensor didn't confirm it. Clean the flame sensor rod with fine sandpaper until it's shiny.
This fixes the problem in most cases.
How do I reset my Atwood water heater?
Turn the interior switch off. Wait 30 seconds. Turn it back on.
This clears the board's lockout code. If the problem persists, the underlying issue (dirty sensor, bad valve, dead board) still needs to be addressed.
Can I replace an Atwood control board myself?
Yes. The board mounts with two screws and has plug-in wire connectors. Disconnect the battery and shore power first.
Note where each wire goes (take a photo). Install the new board and reconnect. Total time is about 20 minutes.
Why does my Atwood water heater work on electric but not propane?
This confirms the 120-volt heating element and thermostat are working. The propane side failure is likely the gas valve, flame sensor, or control board. Follow the diagnostic steps above to isolate which one.
How often should I service my Atwood water heater?
Once a year. Flush the tank to remove sediment. Check and clean the flame sensor.
Inspect the anode rod and replace if heavily corroded. Check the exterior panel gasket for cracks. This takes about an hour and prevents most common failures.

Similar Posts
































