Auto Chlor Dishwasher Troubleshooting
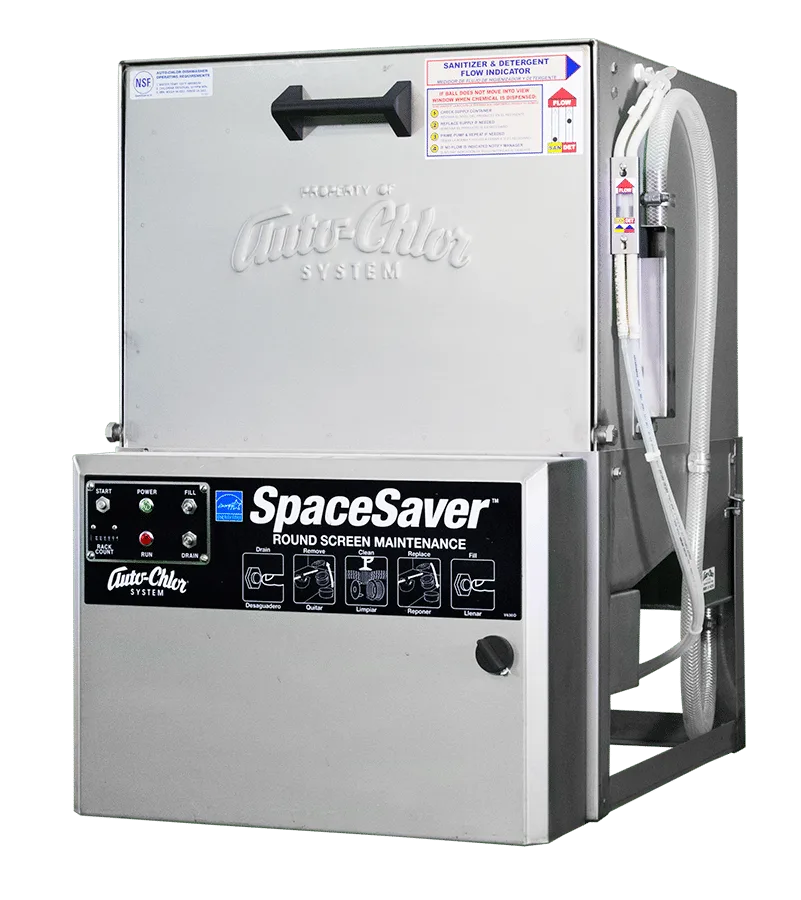
Your Auto Chlor dishwasher has stopped doing its job, and you're standing there with a rack of dirty glasses wondering what went wrong. That's exactly where this guide comes in. Auto Chlor Dishwasher Troubleshooting isn't about guessing or calling a repair tech every time something acts up.
Most of the common problems have straightforward causes you can check yourself in under ten minutes.
Manufacturer specifications indicate these machines are designed for continuous commercial operation, with cycle times as short as 60 to 90 seconds per load. That speed means they're also sensitive to small issues that slow them down or stop them cold. Per NSF/ANSI Standard 3 testing requirements, commercial dishwashers must reach a final rinse temperature of at least 180°F to sanitize properly.
When your machine starts leaving residue, making strange sounds, or refusing to start at all, the fix usually starts with one simple question: what exactly is it doing wrong?
Image source: Bing (Web (fair-use with source credit))
Quick Answer
Start by identifying your main symptom. Is the machine dead silent, humming but not spraying, or leaving standing water? Check the door latch first.
Most Auto Chlor machines won't run if the latch microswitch isn't closed. Listen for the wash pump. If you hear it running but no water moves, the spray arms are likely clogged.
Standing water means a blocked drain path. No heat usually points to a tripped high-limit thermostat or a failed heating element. Follow the symptom, not the guess.
Why Your Auto Chlor Dishwasher Needs Different Troubleshooting
Auto Chlor dishwashers aren't like the residential unit under your home kitchen counter. They're built for speed, heat, and chemical sanitation, and that changes how you approach a breakdown.
Commercial vs. Residential: Not the Same Machine
A residential dishwasher runs a cycle that takes an hour or more. Your Auto Chlor machine fires through a full wash and rinse in roughly a minute. That means every component works harder and faster.
The wash pump moves water at higher pressure. The heating element brings water up to 180°F or hotter. The chemical detergent dispenser meters liquid chlorine into the wash tank at precise concentrations.
These differences matter when something goes wrong. A residential machine that won't drain might have a bit of food stuck in the disposal. An Auto Chlor machine that won't drain usually has a jammed drain pump impeller or a clogged drain line.
The stakes are higher too. A residential machine with a dead heater means warm dishes. A commercial machine without proper heat means failed health code sanitization, and that's a real problem if an inspector shows up.
Why the Workflow Approach Works
Here's the key insight. The same symptom can have three different causes, and the wrong fix wastes time or makes things worse. A machine that won't spray water could have a clogged spray arm, a dead wash pump, a stuck float switch, or even an inlet valve that isn't letting enough water in.
You need to check these in a specific order. That's the workflow we're using here.
Identify the symptom. Run the quick checks that eliminate the most common causes first. Then narrow it down to the likely culprit.
We've organized this guide around that logic. Find your problem in the symptom map, follow the branching checks, and you'll hit the fix faster than if you start pulling parts at random.
The Quick Symptom Map: Find Your Problem in 10 Seconds
Before you take anything apart, identify what your machine is actually doing. Stand in front of it, start a cycle, and watch. Listen.
Note what happens and what doesn't.
| Symptom | Most Likely Cause | What to Check First |
|---|---|---|
| Dead silent, nothing happens | Door latch microswitch or power | Is the door fully closed and latched? |
| Humming but no spray | Clogged spray arms or jammed pump | Remove and rinse spray arms |
| Fills but stops | Float switch stuck in up position | Tap the float or check for debris |
| Standing water, won't drain | Drain pump impeller jammed or drain line blocked | Check sump screen then drain pump |
| Runs but dishes still dirty | Water not hot enough or low chemical concentration | Check temperature and detergent supply |
| Chemical residue or spotting | Rinse aid empty or water hardness | Check rinse aid dispenser and water softener |
| Water leaking from door | Door gasket worn or door misaligned | Inspect gasket for cracks or tears |
| Machine runs too long | Timer or control board issue | Observe cycle timing vs. spec |
Find your symptom in that table. If your machine is dead silent, go to the next section. If it hums but won't spray, skip ahead.
If it won't drain, jump to that section. We've designed this so you don't have to read the whole article. Find your problem, follow the branch.
Machine Won't Start: Power, Door Latch, and Control Board
Nothing happens when you close the door and hit start. No lights. No sounds.
No hum. This is the most common call we hear from kitchen managers, and it's almost always something simple.
Check the Door Latch First
Auto Chlor machines have a safety interlock built into the door latch. If the latch isn't fully engaged, the machine won't power up at all. This is by design.
You don't want the machine spraying 180°F chlorinated water with the door open.
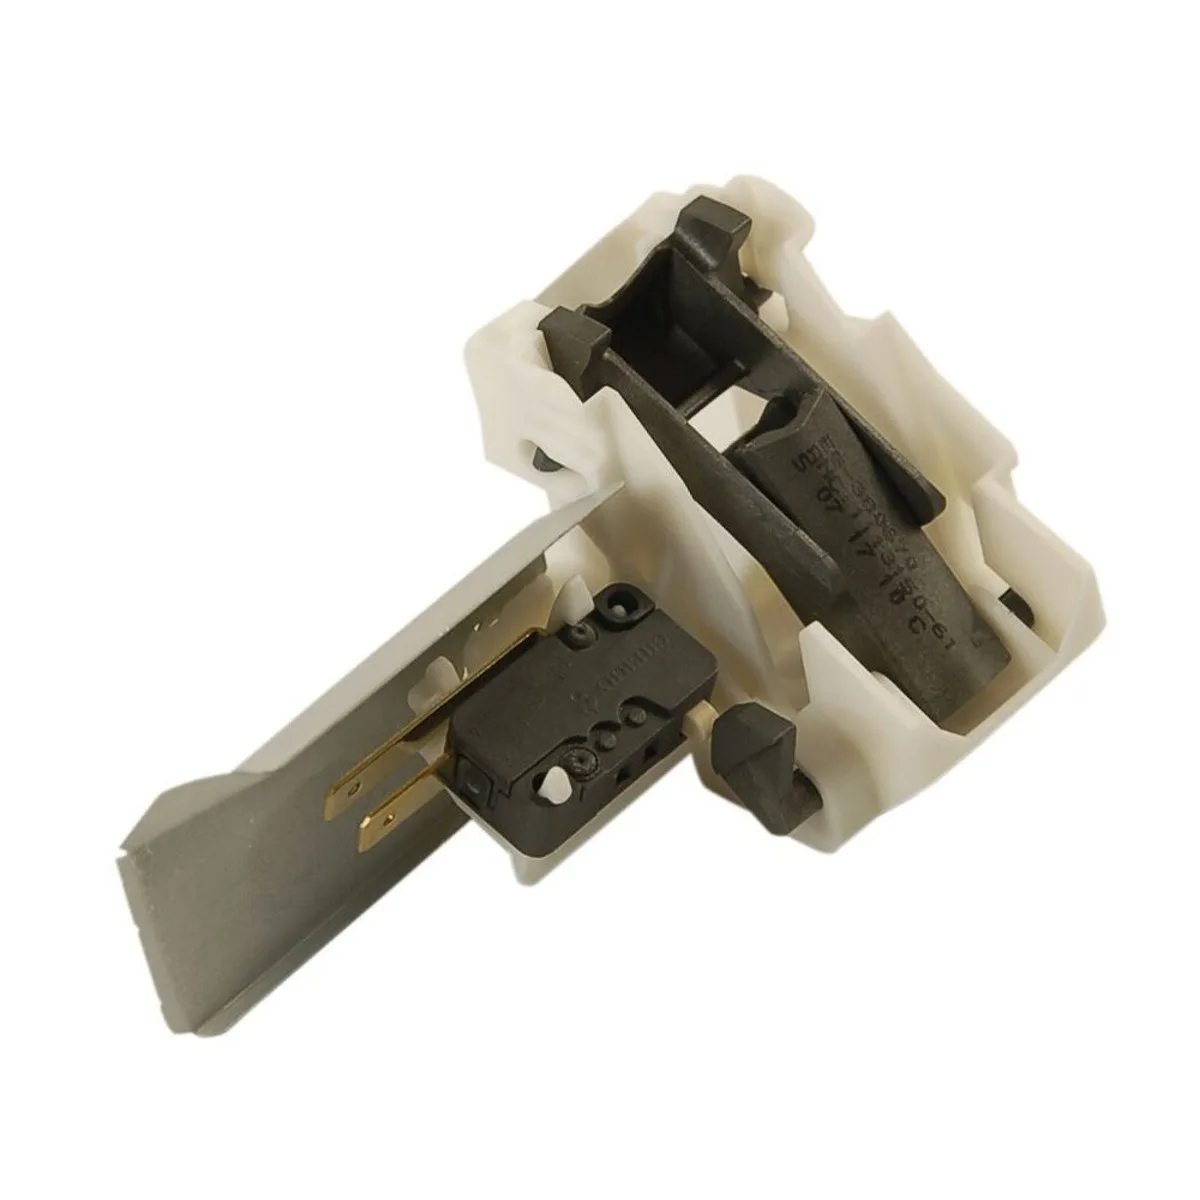
Image source: Bing (Web (fair-use with source credit))
Check that the door is pushing the latch plunger all the way in. Look at the latch mechanism itself. Over time, the plastic latch catch can wear down or crack.
If the door closes but doesn't push the plunger far enough, the machine stays dead. You'll see the plunger sticking out slightly instead of being fully depressed.
The microswitch is the small electrical switch behind the latch. When the plunger pushes it in, it completes the circuit and tells the control board it's safe to run. These switches fail.
They get corroded from steam and chemical exposure, and they eventually stop making contact. You can test the microswitch with a multimeter set to continuity. Disconnect power first.
Remove the switch, press the plunger, and check for continuity between the common and normally open terminals. If you get no continuity when the plunger is pressed, the switch is dead. Replace it.
Verify Power at the Machine
If the latch checks out, confirm the machine has power. This sounds basic, but we've seen kitchens where someone accidentally hit the breaker or unplugged the unit during cleaning. Check the circuit breaker in the panel.
Make sure it's not tripped. If it is, reset it and try again. If it trips again immediately, you have a short somewhere, and that needs an electrician.
Check the power cord where it enters the machine. On under-counter models, the cord plugs into a receptacle behind the machine. Pull the machine out slightly and verify the cord is fully seated.
A loose connection will cause intermittent power loss.
Test the Control Board
If you have power and the door latch is working, the problem may be the control board. On older Auto Chlor machines with mechanical timers, this is less common. On newer electronic models, control boards do fail.
Look for obvious signs. Burn marks, swollen capacitors, or a burnt smell. If the board looks damaged, replacement is the only fix.
On mechanical timer models, the timer motor itself can fail. You should hear a faint hum or ticking when the machine is on. If the timer is silent, the motor is likely dead.
These are usually replaceable without swapping the whole timer assembly.
Edge Case: Machine Runs Part of the Cycle Then Stops
This points to a safety device tripping mid-cycle. The high-limit thermostat is the most common culprit. It monitors the water temperature inside the wash tank.
If the temperature exceeds the safe limit, usually around 195°F, the thermostat opens and kills power to the heating element. The machine may continue running the wash pump but won't heat. If the water never gets hot enough to complete the sanitization cycle, the machine may stop early.
Check the high-limit thermostat. It's usually a small disc-shaped device mounted to the wash tank or near the heating element. Most have a manual reset button.
Press it firmly. If you hear a click, the thermostat had tripped. Run a test cycle and watch the temperature.
If it trips again, you have a real overheat condition, likely a stuck heating element relay or a failed thermostat that's opening at too low a temperature.
Machine Fills But Won't Wash: Pumps, Spray Arms, and Float Switches
Water flows into the wash tank but nothing happens after that. The pump might hum, or it might stay dead silent. Either way, the dishes sit there in a pool of cold water.
Check the Spray Arms First
This is the easiest check and the most common cause. Spray arms get clogged. It's that simple.
Food debris, broken glass, toothpicks, and mineral scale all block the small holes that spray water onto the dishes. When the holes are blocked, water can't exit, and pressure drops to zero.
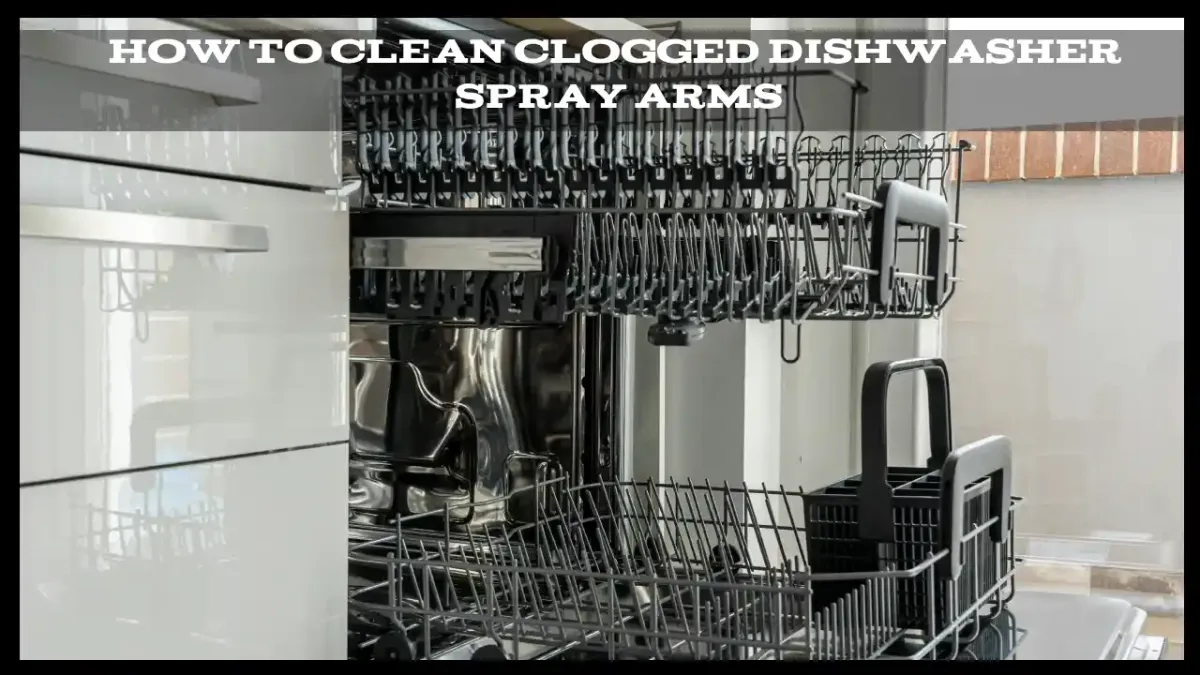
Image source: Bing (Web (fair-use with source credit))
Remove both spray arms. On most Auto Chlor models, they unscrew or unclip from the hub. Rinse them under hot running water.
Use a paperclip or a small wire to poke out any debris stuck in the holes. Pay special attention to the end holes and any holes that face upward. Those are the ones that clean the undersides of plates and glasses.
While the spray arms are off, check the hub where they mount. Debris can collect there too. Spin the hub by hand.
It should turn freely. If it feels stiff or grinds, the bearing is failing, and the entire hub assembly needs replacement.
Listen for the Wash Pump
Put your ear near the machine during a cycle. Do you hear the pump running? A running pump that moves no water almost always means a clogged spray arm or a blocked impeller.
But if you hear nothing at all, the pump isn't getting power.
Check the pump motor for signs of overheating. A motor that's tripped its internal thermal overload will be silent. Let the machine cool for 15 minutes and try again.
If it starts working, the motor was just overheated, and you need to figure out why. Usually it's because something is causing the pump to work too hard, like a partial blockage or low voltage.
If the pump stays silent after cooling, test for power at the motor terminals with a multimeter. You should see line voltage (120V or 208V depending on your model) when the machine calls for the wash cycle. If you have voltage and the motor doesn't run, the motor is bad.
If you have no voltage, the problem is upstream, likely in the control board or a relay.
Inspect the Float Switch
The float switch is a small plastic or metal float inside the wash tank. It rises with the water level and tells the control board when there's enough water to start the wash cycle. If the float gets stuck in the up position, the machine thinks the tank is full and tries to wash, even if there's no water.
If it gets stuck in the down position, the machine keeps filling indefinitely.
Open the door and look into the wash tank. Find the float. It's usually in a corner or near the sump.
Push it down gently with your finger. It should move freely and spring back up. If it's sticky, clean around it.
Debris, grease, and chemical residue all gum up the float mechanism. If the float is cracked or waterlogged, replace it.
A stuck float switch can also cause the machine to fill then immediately drain. The control board sees the float rise, starts the wash cycle, then sees the float drop from the water sloshing around, and triggers the drain. This creates a cycle that never actually washes anything.
Clear the Pump Impeller
If the pump is running but water barely moves, something is likely jammed in the impeller. The impeller is the spinning blade inside the pump that pushes water. A coin, a toothpick, a broken glass shard, or even a large piece of food can lodge between the impeller blades and stop it from turning.
On most Auto Chlor models, you can access the pump impeller through the sump screen. Remove the screen. Reach inside with a pair of needle-nose pliers (be careful, broken glass is sharp).
Feel around the impeller blades. You'll usually find the obstruction within a few seconds. Pull it out and reassemble.
If the impeller turns freely but the pump still won't move water, the pump seal may have failed. You'll usually see water leaking from the pump body in that case. Pump replacement is the fix.
It's not hard, but it does require draining the machine completely and disconnecting the plumbing.
Machine Won't Drain: Standing Water and Blockages
You open the door after a cycle and find an inch of murky water sitting in the bottom. The machine finished its cycle but never drained. This isn't just gross.
Standing water means the next load won't be clean, and bacteria can grow fast in a warm, wet tank.
Check the Sump Screen First
The sump screen is a metal or plastic grate at the bottom of the wash tank. It catches large debris before it reaches the drain pump. When that screen gets packed with food scraps, labels, or broken glass, water can't flow through.
Open the door and pull out the bottom rack. Look for the sump screen. On most Auto Chlor models, it's a rectangular or circular grid near the center.
Lift it out. Rinse it under hot water. Scrub off any caked-on debris with a brush.
If the screen has a gasket, check that it's still intact. A torn gasket lets debris bypass the screen entirely.
Inspect the Drain Pump Impeller
If the screen is clean but water still won't drain, the drain pump impeller is the next stop. The same type of obstruction that jams the wash pump can jam the drain pump. Coins, toothpicks, and glass shards are the usual suspects.
Access the drain pump. On under-counter Auto Chlor models, the drain pump is mounted near the bottom rear of the machine. You may need to remove a access panel.
Once you can see the pump, disconnect power. Remove the pump housing cover (usually held by a few screws or clips). Reach into the impeller cavity with needle-nose pliers.
Pull out any debris you find. Spin the impeller by hand. It should turn freely.
If it doesn't, you may need to replace the pump.
Check the Drain Hose
If the pump runs but water still won't leave, the drain hose might be kinked or clogged. Trace the hose from the pump to where it connects to the plumbing under your sink or floor drain. Look for sharp bends or crushed sections.
A kink can happen if someone pushed the machine back into place and the hose got pinched.
Disconnect the hose at both ends. Flush it with a garden hose or pour a bucket of water through it. If water flows freely, the hose is clear.
If not, there's a clog inside. You can try feeding a plumber's snake through the hose, but replacement is often easier.
Test the Drain Pump Electrical
If the drain pump doesn't run at all, check for power. With a multimeter set to AC voltage, probe the pump terminals during the drain cycle. You should see line voltage.
If you get voltage but the pump doesn't run, the motor is bad. If you get no voltage, the control board or timer isn't sending the signal. Check the door latch again.
Some machines require the door to be latched for the drain cycle to activate.
Water Not Hot Enough: Heating Element and Thermostat
Your machine runs through the cycle, but the dishes come out cool and wet. The sanitization temperature isn't being reached. Health departments in most jurisdictions require a final rinse temperature of at least 180°F.
If you're below that, you're not sanitizing.
Check the Heating Element Visually
The heating element is a metal rod or coil sitting in the wash tank. Over time, mineral scale builds up on it. That scale acts as an insulator.
The element gets hot, but the heat can't transfer to the water efficiently.
Open the door and look at the element. Do you see a thick white or gray crust? That's calcium and lime scale.
Remove the element according to your machine's service manual. Soak it in a descaling solution (commercial dishwasher descaler or a 50/50 mix of white vinegar and water works). Scrub off the loose scale with a stiff brush.
Rinse thoroughly before reinstalling.
If the element has a visible break, a blister, or a hole, it's dead. Replace it. You can test continuity with a multimeter.
Disconnect power, remove the wires from the element terminals, and set your meter to ohms. A good element will show a low resistance (usually 10 to 30 ohms depending on wattage). An open reading (infinite) means the element has failed.
Reset the High-Limit Thermostat
The high-limit thermostat is a safety device mounted near the element. If the element overheats, the thermostat trips and cuts power. This can happen if the water level is too low and the element isn't submerged.
Locate the high-limit thermostat. It's a small disc with two wires connected and often a red reset button. Press the button firmly.
You should hear a click. Run a test cycle and monitor the water temperature. If the thermostat trips again immediately, the element is likely overheating because of heavy scale buildup or a failed element that's drawing too much current.
Check the Temperature Sensor
Some newer Auto Chlor models have a temperature sensor that sends a signal to the control board. If the sensor is faulty, the board may not call for heat even when the water is cold. Test the sensor with a multimeter set to resistance.
Compare the reading to the specification in your service manual. If it's out of range, replace the sensor.
Verify Water Level
The heating element must be fully submerged to work properly. If the float switch is sticking or the inlet valve is restricting flow, the water level may be too low. Run a cycle and watch the water rise.
It should cover the element completely. If it doesn't, go back to the float switch and inlet valve checks from earlier sections.
Chemical Problems: Residue, Spots, and Dispenser Issues
The dishes come out with white residue, cloudy film, or water spots. The machine runs, the water gets hot, but the chemistry is off. Chemical problems are often misdiagnosed as mechanical failures.
Check the Detergent Dispenser
The detergent cup should open at the right time in the cycle. If it doesn't open at all, no chemical enters the wash tank. Open the door and look at the dispenser.
Is it spring-loaded or solenoid-operated? On older Auto Chlor machines, the dispenser uses a wax motor or a solenoid that pushes the door open when the water temperature reaches a certain point.
If the dispenser doesn't open, check for a stuck latch or a broken spring. On solenoid models, listen for a click during the cycle. If you hear nothing, test the solenoid for continuity.
If the solenoid is open, replace it.
Verify Chlorine Concentration
Too little chlorine means poor cleaning and no sanitization. Too much chlorine can etch glassware and create a strong smell. Most Auto Chlor machines use a metering pump or a Venturi system to draw detergent from a container.
Check the detergent line for kinks or air bubbles. Make sure the container isn't empty. The pickup tube should be submerged.
You can test chlorine concentration with test strips designed for commercial dishwashers. The target is 50 to 100 ppm of free chlorine in the wash tank. If you're low, increase the detergent feed rate.
If you're high, decrease it.
Rinse Aid and Water Hardness
Spots on glassware usually mean a rinse aid problem. Check the rinse aid dispenser. It's typically a separate reservoir with an adjustable dial.
Turn it up if you see spots. If the dispenser is empty, fill it.
Water hardness also plays a role. Hard water leaves mineral deposits. If you have hard water, you may need a water softener installed upstream of the dishwasher.
Some Auto Chlor models have a built-in softener. Check the softener salt level and regeneration schedule.
Foaming Issues
Excessive foam inside the wash tank can cause poor cleaning and overflow. Foam is usually caused by using the wrong detergent or by food soils that create suds. If you see foam, drain the machine completely.
Clean the tank with a degreaser. Rinse thoroughly. Use only chlorinated detergent designed for commercial dishwashers.
Never use residential dishwasher detergent.
Mistakes That Cost You Time or Break the Machine
A few common missteps turn a simple fix into a major repair. Avoid these.
Using the Wrong Detergent
Residential dishwasher detergent creates excessive foam in commercial machines. That foam can damage the pump seals and cause overflow. Always use commercial chlorinated detergent rated for your Auto Chlor model.
Ignoring the Sump Screen
Cleaning the sump screen should be a daily task. If it clogs, the pump works harder and can overheat. A clogged screen also lets debris reach the drain pump.
Add sump screen cleaning to your closing procedure.
Testing Without Water
Never run the machine dry. The wash pump and heating element can be destroyed in seconds without water. Always ensure the wash tank is full before starting a test cycle.
Overtightening Fittings
When reassembling spray arms or drain connections, tighten by hand plus a quarter turn with a tool. Overtightening cracks plastic fittings and strips threads.
Resetting a Tripped Thermostat Without Finding the Cause
If the high-limit thermostat trips, don't just push the reset button and walk away. Find out why it tripped. Low water level or scale buildup will make it trip again, and eventually the thermostat will fail.
Safety Must-Knows Before Touching Anything
Commercial dishwashers have serious hazards. Follow these rules.
Lock Out Power
Before you put your hands inside the machine, disconnect power at the breaker. Use a lockout tagout device if available. If you don't have one, put a piece of tape over the breaker and tell everyone in the kitchen not to touch it.
Wait for Cooling
The water inside the wash tank can be 180°F or hotter. The heating element stays hot for several minutes after power is off. Let the machine sit for at least 15 minutes before reaching inside.
Handle Chemicals Carefully
Chlorinated detergent is corrosive. Wear rubber gloves and safety glasses. If you spill detergent on your skin, rinse immediately with plenty of water.
The concentrated chemical can cause chemical burns.
Watch for Broken Glass
When working near the sump or drain pump, broken glass is common. Use needle-nose pliers, not your fingers. Dispose of glass in a puncture-proof container.
Never Bypass Safety Switches
The door latch microswitch and high-limit thermostat are there to prevent injury and fire. Do not bypass them with jumpers or tape. It's not worth the risk.
When to Fix It Yourself vs. When to Call a Pro
Most of the problems we've covered can be handled by kitchen staff with basic tools. But some situations need a technician.
Fix It Yourself If
- The spray arms are clogged
- The sump screen is dirty
- The float switch is stuck
- The door latch microswitch needs replacement
- The detergent dose needs adjustment
- The drain hose is kinked
Call a Pro If
- The circuit breaker trips immediately when you plug the machine in
- There is visible smoke or a burning smell
- You've cleared the spray arms and sump but the pump still won't run
- The control board shows burn damage
- The machine has a water leak you can't locate
- You need to replace the heating element or high-limit thermostat (possible DIY, but risk of electric shock is real if you're not comfortable with wiring)
Cost Considerations
A service call for a commercial dishwasher typically costs $150 to $300 just for the visit. Parts are extra. The most common replacement parts (microswitch, spray arm hub, pump impeller) cost $20 to $80.
You can save significantly by doing these yourself.
Frequently Asked Questions
Why won't my Auto Chlor dishwasher start at all?
The most common cause is a door latch issue. The microswitch inside the latch must be pressed fully for the machine to get power. Check that the door is closing completely and the latch plunger is moving freely.
How do I clean the spray arms on my Auto Chlor dishwasher?
Remove both spray arms by unscrewing or unclipping them from the hub. Rinse under hot water. Use a paperclip to clear any blocked holes.
Reinstall and spin by hand to confirm free movement.
What temperature should the water be in an Auto Chlor dishwasher?
The final rinse temperature must be at least 180°F to meet NSF/ANSI Standard 3 sanitization requirements. The wash tank temperature should be around 150°F to 160°F during the wash cycle.
How often should I clean the sump screen?
Clean the sump screen at least once per shift in a busy kitchen. A clogged screen restricts water flow and forces the pump to work harder. Daily cleaning prevents most drain and pump issues.
What chemical detergent should I use in my Auto Chlor dishwasher?
Use only chlorinated commercial dishwasher detergent. It is liquid, highly concentrated, and designed for use in metering systems. Residential dishwasher detergent will cause excessive foaming and poor results.
My dishwasher keeps tripping the high-limit thermostat. What should I do?
This indicates the water temperature is exceeding the safe limit, usually 195°F. The most common cause is heavy scale buildup on the heating element. Descale the element and reset the thermostat.
If it trips again, check the water level and the thermostat calibration.

Similar Posts