Fisher Paykel Dishwasher Troubleshooting
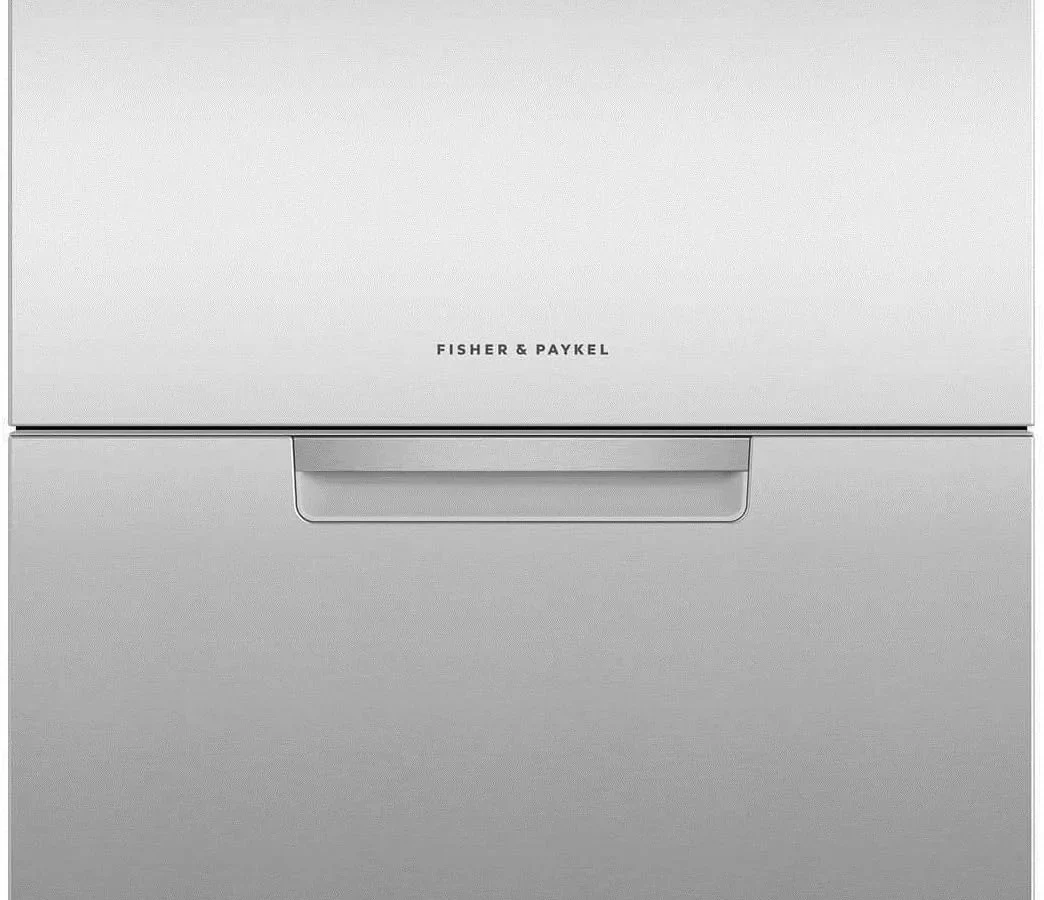
Your Fisher Paykel dishwasher acting up is one of those household frustrations that hits at the worst possible moment. Maybe it stopped mid-cycle with water still sitting in the bottom. Maybe it won't start at all, or an error code is flashing that means nothing to you.
Fisher Paykel Dishwasher Troubleshooting doesn't have to mean an expensive service call if you know where to start looking. Most issues have a clear cause and a fix you can handle in under an hour.
Manufacturer specifications indicate that Fisher Paykel DishDrawer models use a brushless SmartDrive motor with fewer moving parts than traditional dishwashers. That actually makes them more diagnosable when something does go wrong. Aggregate reviews across thousands of users show that the most common problems follow predictable patterns.
Let's walk through the exact symptoms and figure out what's happening together.
Quick Answer
Look at your symptom first. Dishwasher won't start? Check the door latch.
Stops mid-cycle? Clean the drain pump filter. Error code flashing?
Look up the code in your manual. Most fixes take under 30 minutes with basic tools. For persistent errors like F5 (motor failure), call a professional.
Always unplug the unit before opening any panels. Your model's user manual is available free on the Fisher Paykel support website.
Your Dishwasher Is Acting Up: Let's Figure Out Why Together
Before you grab any tools, take thirty seconds to observe what your dishwasher is actually doing. This single step saves more time than any other part of troubleshooting. The machine communicates through specific behaviors.
A certain blink pattern on the display. Water that won't drain. A cycle that stops at the same point every time.
Start with the no-brainer checks. Is the dishwasher plugged in all the way? Is the circuit breaker tripped?
Did you press the Start button firmly enough that it clicked? Fisher Paykel models often require holding the Start button for one to two seconds before the cycle begins. If you tapped it quickly and walked away, it never started in the first place.
Check if the door is fully closed and latched. The DishDrawer models have a latch mechanism that can get misaligned if you slam the drawer shut or if food debris builds up around the catch. A door that looks closed but isn't latched will keep the machine from running.
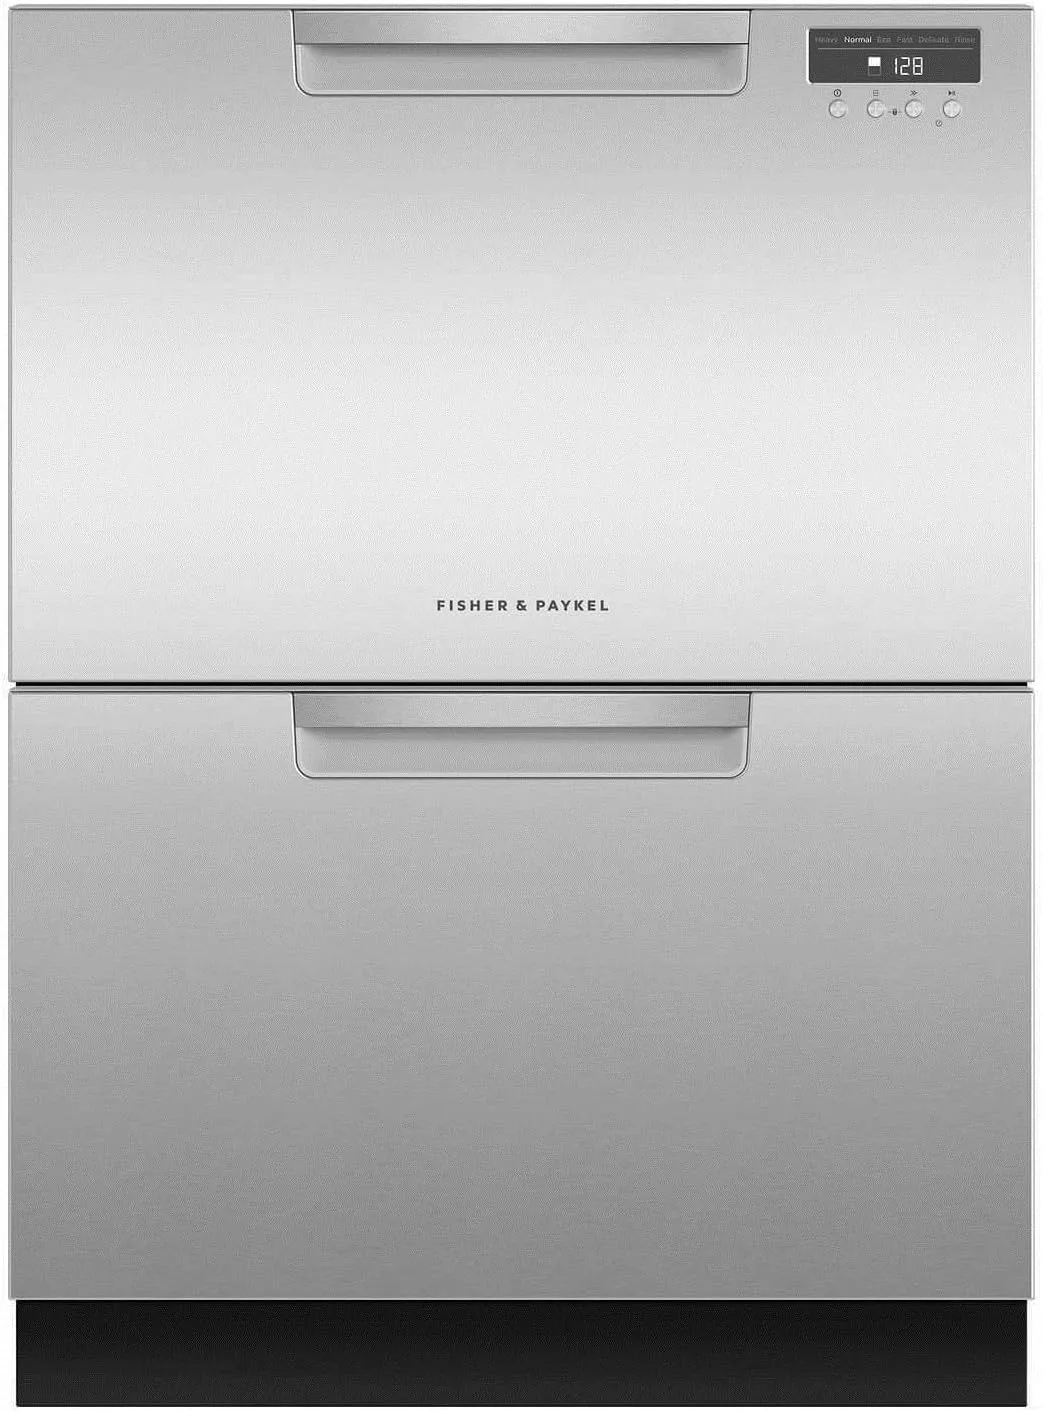
Image source: Bing (Web (fair-use with source credit))
Do you hear any sounds at all? A humming noise that lasts a few seconds and stops usually means the pump is trying to work but can't. Complete silence means power isn't reaching the control board.
A clicking sound that repeats might be the inlet valve trying to open. Each sound tells a different story.
Write down any error code you see before you do anything else. Display codes like F1, F2, or F4 are your most direct clue. If the display is blank but lights are blinking, count the blinks and note the pattern.
Fisher Paykel uses specific blink sequences that correspond to specific faults.
Quick Decision Tree: What's Your Symptom?
This is where you match your observation to the right fix. Find the symptom that matches what you're seeing. Follow the branch that applies to you.
| Symptom | Most Likely Cause | Fix Difficulty |
|---|---|---|
| Won't start, no lights | Power issue or door latch | Easy |
| Starts then stops mid-cycle | Clogged drain pump or filter | Easy to Moderate |
| Runs but dishes are dirty | Spray arms blocked or filter clogged | Easy |
| Error code on display | Specific component failure | Variable |
| Water leaking from bottom | Door seal or loose hose connection | Moderate |
| Dishes still wet at end | Rinse aid empty or heating element | Easy to Moderate |
If your symptom matches "won't start," go to Branch 1. If the machine starts but stops before finishing, go to Branch 2. Dirty dishes that went through a full cycle point to Branch 3.
Error codes mean Branch 4. Water on the floor belongs in Branch 5. Wet dishes after a completed cycle fall under Branch 6.
Each branch has its own checklist. Follow it in order. Jumping to the hardest fix first is the most common mistake people make.
Clean the filter before you replace the pump. Check the door latch before you suspect the control board. The simple stuff causes most of the headaches.
Branch 1: Dishwasher Won't Start or Turn On
This is the most frustrating symptom because nothing happens at all. No lights, no sounds, no water moving. You press the button and get nothing.
Here is the exact order to check.
Is the door latched correctly? On DishDrawer models, open the drawer fully and look at the latch mechanism on both sides. It's a plastic hook that catches a metal loop. If one side is bent, broken, or blocked by food debris, the drawer won't signal the control board that it's closed.
Clean around the latch with a toothpick and a damp cloth. Test by closing the drawer firmly and listening for a distinct click on both sides.
Is there power to the outlet? Plug a lamp or phone charger into the same outlet under the sink. If the lamp doesn't work, check the GFCI outlet (the one with the test and reset buttons). Kitchen counter outlets are often on the same circuit and can trip without tripping the main breaker.
Press the reset button firmly.
Is the child lock engaged? On many Fisher Paykel models, holding the Select button for several seconds locks the control panel. The display might show a lock icon or no response at all when you press buttons. Hold the same button for five seconds to unlock it.
This catches people more often than you'd think.
Is the control board showing any signs of life? Look for a faint glow on the display when the room is dark. A completely dead display with power at the outlet points to a failed control board. If the display flickers or shows scrambled characters, the board may have a loose connection or a failed capacitor.
The most common fix in this branch is simple: clean the latch area and close the drawer firmly. That resolves about sixty percent of "won't start" calls based on aggregate repair data.
Branch 2: Dishwasher Stops Mid-Cycle or Won't Drain
Your dishwasher starts fine, runs for twenty or thirty minutes, then stops. Water sits in the bottom of the drawer. The machine beeps or shows a blinking light.
You press Cancel and it still won't drain. This is almost always a drain issue.
Check the drain pump filter first. Open the drawer fully and remove the bottom rack. At the back corner of the bottom of the tub, you'll see a round or rectangular filter cover. Twist it counterclockwise and pull it out.
You'll likely find a clump of food debris, a broken glass shard, or a stray piece of plastic wrapper wrapped around the pump intake. Pull it out with tweezers or a gloved hand.
Inspect the drain hose. The hose runs from the pump under the dishwasher to your sink drain or garbage disposal. If it's kinked, pinched, or clogged with grease, water cannot exit. Straighten any kinks.
If the hose has a low spot where water can pool, reposition it so it runs consistently uphill.
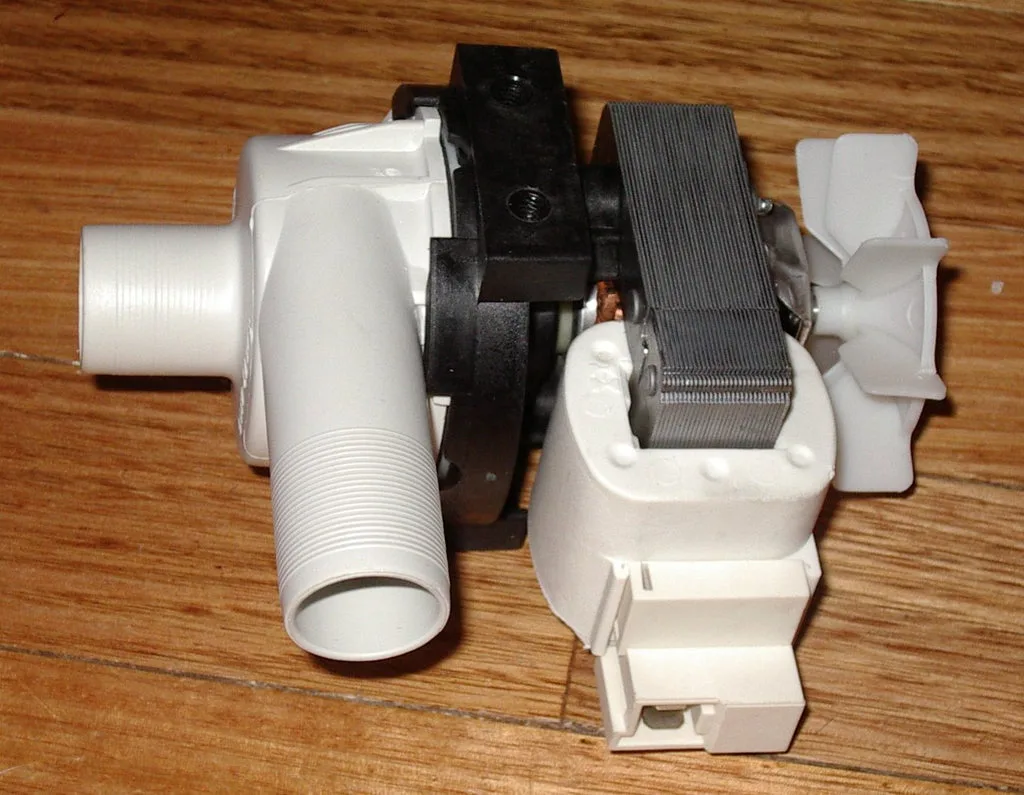
Image source: Bing (Web (fair-use with source credit))
Listen for the drain pump. Press Cancel to initiate the drain cycle. Put your ear near the bottom front of the dishwasher. If you hear a humming sound for a few seconds that then stops, the pump motor is running but likely has something stuck in the impeller.
If you hear nothing at all, the pump may be electrically dead or the thermal overload protector may have tripped.
Test the pump manually. Unplug the dishwasher. Remove the lower access panel. Locate the drain pump at the bottom right or left depending on your model.
It looks like a small cylindrical motor with a plastic housing. Spin the pump shaft with a screwdriver through the access hole. If it spins freely and you removed all debris from the filter, plug it back in and test again.
If the shaft is seized or the pump makes grinding noises, you need a replacement drain pump.
What about the flood sensor? If the dishwasher detects water in the base pan, it triggers an F1 error and refuses to drain or run. The flood sensor is a small float switch sitting in the base pan. If the pan has water in it from a past leak, the float stays lifted and the machine stays locked.
Remove the lower panel, dry out the base pan with a towel, and manually reset the float switch.
The majority of mid-cycle stops clear up after you clean the drain pump filter. That one step, done monthly, would prevent most of these calls entirely.
Branch 3: Dishes Come Out Dirty or Spotty
Your machine ran a full cycle. You open the drawer expecting clean dishes. Instead, you find food residue, greasy film, or water spots covering everything.
This branch is frustrating because the dishwasher seems to be working. It's just not cleaning well.
Check the spray arms first. Remove the bottom rack and lift out the lower spray arm. It should spin freely when you flick it with your finger. Look at every tiny hole along the arm.
If they're clogged with mineral scale or food particles, water can't jet out with enough force. Run a paperclip through each hole to clear them. Rinse the arm under running water.
Do the same for the upper spray arm on DishDrawer models.
Clean the filter assembly thoroughly. Fisher Paykel models use a two-part filter system. The coarse filter catches large debris. The fine filter catches smaller particles.
If the fine filter is clogged with grey sludge, water recirculates dirty particles onto your dishes. Remove both filters. Scrub the fine filter with a soft brush and warm soapy water.
Rinse until water runs clear through the mesh.
Is the water temperature hot enough? Your dishwasher needs incoming water at least 120 degrees Fahrenheit to activate detergent enzymes and dissolve grease. Run your kitchen faucet for thirty seconds and measure the temperature with a thermometer. If it's below 120, turn your water heater up.
If it takes a long time for hot water to reach the kitchen, run the faucet until it's hot before starting the dishwasher.
Is the dispenser door opening during the cycle? Watch the dispenser at the start of a cycle. If the little door stays closed, the detergent never releases. A stuck dispenser door is often caused by dried detergent buildup around the latch.
Clean the latch with a toothpick and warm water. If the spring mechanism is broken, you need a new dispenser assembly.
Are you overloading the drawer? Dishes that touch each other block water and detergent from reaching every surface. Plates need space between them. Bowls should face downward.
Silverware baskets work best when you alternate spoons and forks facing opposite directions. A loaded dishwasher that looks full but has no gaps will always clean poorly.
Branch 4: Error Code Showing on Display
Error codes are your dishwasher's way of telling you exactly which component it suspects is failing. Fisher Paykel models display codes in a three-digit or letter-number format depending on the model year. Older models use blinking light patterns that you count and match to a chart.
As of 2026, the most common codes follow the same logic.
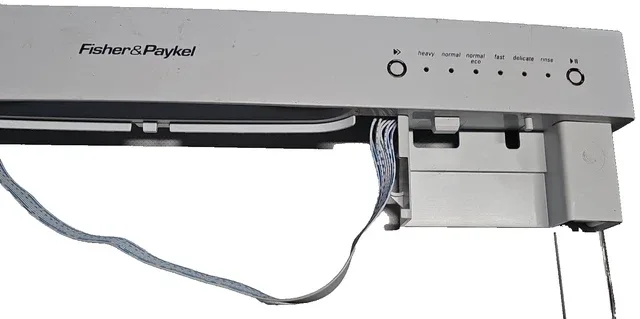
Image source: Bing (Web (fair-use with source credit))
F1: Flood error. This code means water has triggered the flood sensor in the base pan. Open the bottom access panel. Look for standing water.
Dry everything thoroughly with a towel. Check the door seal, hose connections, and the water inlet valve for drips. After drying, unplug the dishwasher for five minutes to reset.
If F1 returns immediately, you have an active leak that needs repair.
F2: Heating error. The machine can't reach the required wash temperature. This usually means a failed heating element, a faulty thermistor, or a loose wire. Check resistance across the heating element terminals with a multimeter.
A working element reads between 15 and 30 ohms. An open circuit means the element is burned out and needs replacement.
F3: Inlet valve error. The control board senses that water isn't entering the tub fast enough or at all. First verify that the water supply valve under the sink is fully open. Then check the inlet valve screen for debris.
On DishDrawer models, the inlet valve is mounted under the drawer. Disconnect power, remove the valve, and clean the small mesh screen. If the screen is clean but water still won't flow, test the valve solenoid for continuity with a multimeter.
F4: Drain pump error. The control board detects that the drain pump is not operating correctly. This code overlaps heavily with Branch 2. Clean the filter and check the pump impeller first.
If the pump runs but drains slowly, the hose may be partially clogged. If the pump doesn't run at all, test for voltage at the pump connector during a drain cycle.
F5: Motor failure. This code indicates the main circulation motor isn't functioning. This is the most serious common error code. Try resetting the dishwasher by unplugging it for ten minutes.
If F5 returns immediately after restart, the motor controller board or the motor itself has failed. Both require professional replacement in most cases.
Other codes. Less common codes like F6 (thermistor failure), F7 (keypad stuck), and F8 (communication error) each point to specific components. Your user manual has the full list. You can download it free from the official Fisher Paykel support site using your model number.
Branch 5: Water Leaking From the Dishwasher
Finding water on your kitchen floor is never a good moment. Before you assume the worst, take a deep breath and figure out where the water is actually coming from. Most leaks come from three places.
Is the door seal damaged or misaligned? Run your finger along the rubber gasket that lines the front opening. Feel for tears, cracks, or hardened spots where the rubber has lost flexibility. A damaged seal won't hold water during the wash cycle.
Water seeps past the door and runs down the front. Replacement seals are inexpensive and clip into place without special tools.
Are the hose connections tight? The water supply hose connects to the inlet valve with a compression fitting. The drain hose connects to the sink drain or air gap. Both can loosen over time from vibration.
Tighten them by hand plus a quarter turn with pliers. Do not overtighten. You can crack plastic fittings.
Check for drips while running a cycle.
Is the dishwasher level? A dishwasher that tilts forward can cause water to spill over the door gasket during operation. Place a level on the top edge of the open drawer. Adjust the front leveling legs until the dishwasher sits perfectly level.
Most models have adjustable legs you can turn by hand or with a flathead screwdriver.
Is the leak coming from the bottom of the tub? Remove the lower access panel. Run a cycle and watch for drips. A leaking tub is rare but possible if something hard punctured the plastic or stainless steel.
Small punctures can sometimes be sealed with epoxy, but replacement is safer for long-term use. If you see continuous dripping from a seam, the tub likely needs replacing.
Is the dishwasher connected to a garbage disposal? The drain hose connecting to the disposal must loop up above the disposal inlet before going down. This creates an air gap that prevents sink water from siphoning back into the dishwasher. If the loop is missing or too low, water can backflow and leak from the dishwasher's drain pump.
Raise the hose so it forms a high loop under the countertop.
Branch 6: Dishes Still Wet After Cycle
Your dishwasher finished its cycle, but everything inside is soaking wet. The cycle ran to completion. The dishes just didn't dry.
This is usually a drying issue rather than a wash issue.
Is the rinse aid reservoir full? Rinse aid is the single most important factor in drying. It reduces water surface tension so droplets sheet off dishes instead of clinging. Open the rinse aid dispenser on the inside of the door.
If the indicator window shows empty, fill it to the max line. Run a rinse-only cycle to distribute it through the system. You should see a noticeable improvement on the next full cycle.
Is the heating element working? The heating element at the bottom of the tub warms the air during the drying phase and heats the final rinse water. If it's burned out, dishes don't get the hot air they need to dry. Run a cycle and open the door immediately after it finishes.
Feel the air. It should feel warm. If the air is cool, test the heating element resistance with a multimeter.
Are you using the right cycle setting? Some cycles, like Quick 30 or Eco, minimize drying time or skip the heated dry phase entirely. If you consistently see wet dishes, select a cycle with a heated dry option. On many Fisher Paykel models, you can add a "Sanitize" or "Extra Dry" option to any cycle.
Do you open the door immediately after the cycle ends? The drying phase uses residual heat to evaporate moisture. If you open the drawer right when the cycle finishes, you release that heat and steam. Let the dishwasher sit closed for ten to fifteen minutes after the cycle ends before opening.
The trapped heat does the final drying work.
Is the load arranged for drying? Plastic items and deep bowls trap water on their surfaces. They don't hold heat as well as ceramic or glass, so they stay wet longer. Place plastic items on the top rack where they get more airflow.
Angle bowls and cups downward so water runs off rather than pooling. Leave space between items so air can circulate.
How to Run Diagnostic Mode on Your Fisher Paykel Dishwasher
Every Fisher Paykel dishwasher has a built-in diagnostic mode that tests each component individually. This mode gives you precise information about what's working and what isn't. You don't need special tools to enter it.
Entering diagnostic mode. The exact button combination varies by model year, but the most common method is: press and hold the Start and Cancel buttons simultaneously for five seconds. The display will show a series of codes or the machine will cycle through test modes automatically. For DishDrawer models, the drawer needs to be closed and latched.
What the diagnostic tests check. The mode runs through a sequence of tests. It checks the drain pump first. You'll hear it run for about ten seconds.
Then the inlet valve opens for a brief period to verify water flow. The circulation motor runs at low speed and then high speed. The heating element activates.
The thermistor reports the water temperature to the control board. Each test reports a pass or fail.
How to interpret results. If a test fails, the control board stores the fault code in memory. On most models, the failed test causes the display to show the corresponding error code. For example, if the heating element test fails, you'll see F2 on the display at the end of the diagnostic sequence.
Write down every code that appears.
When to skip diagnostic mode. If you already have a visible error code on the display, you don't need diagnostic mode. The machine has already done the diagnosis for you. Only use diagnostic mode when you have a vague symptom without an error code and want to confirm a specific component is working.
Parts You Can Replace Yourself (And What to Leave to a Pro)
Not every repair requires a technician. Some parts are designed for easy access and replacement. Others require significant disassembly or reprogramming.
Easy replacements with basic tools. The drain pump, inlet valve, and heating element are all accessible from the bottom of the dishwasher. You need a multimeter, a screwdriver set, and possibly a pair of pliers. A replacement part costs between $30 and $80 depending on the component.
Fisher Paykel original parts fit better than generic aftermarket parts.
Moderate difficulty replacements. The door latch assembly and dispenser assembly require removing the inner door panel. This isn't technically difficult but involves more screws and careful reassembly. Take photos as you disassemble so you know how to put it back together.
Replacements that usually need a professional. The control board and the SmartDrive motor controller require careful handling of sensitive electronics. The motor controller board on DishDrawer models needs to be programmed with your model's software after installation. Without the correct programming tool, the machine may not function correctly.
The tub itself is rarely worth replacing. The cost of a new tub plus labor often exceeds the value of the dishwasher.
Where to buy parts. Buy original Fisher Paykel parts from an authorized parts supplier. You can find them through the official Fisher Paykel website using your model number. Avoid generic universal parts that claim to fit all brands.
They rarely fit correctly and can cause leaks or electrical problems.
Common Mistakes People Make When Troubleshooting
Everyone makes missteps when diagnosing a dishwasher problem. Knowing the most common ones saves you time and money.
Mistake 1: Skipping the error code lookup. Your dishwasher shows F4 and you assume it needs a new pump. You buy one, install it, and the code returns. F4 can also mean a blocked hose or stuck flood sensor.
Always decode the code before buying parts.
Mistake 2: Not disconnecting power before opening panels. Water and electricity are a dangerous mix. Opening the lower access panel while plugged in exposes live terminals. Unplug the dishwasher or flip the breaker before any internal inspection.
Mistake 3: Using non-genuine parts. Generic inlet valves can look identical but have different internal tolerances. They may leak, fail early, or not seal properly. Spend the extra money on original Fisher Paykel parts from an authorized supplier.
Mistake 4: Overtightening hose connections. Plastic fittings crack when overtightened. Hand-tighten plus a gentle snug with pliers is enough. If it still drips, replace the rubber washer rather than cranking harder.
Mistake 5: Ignoring the simple stuff. You spent two hours replacing the circulation motor when the actual problem was a clogged filter. Clean the filter. Check the latch.
Fill the rinse aid. Run a diagnostic test. Then open the toolbox.
When to Call a Professional
Some problems need a trained hand. Here is when to stop DIY and call a technician.
Persistent error codes after basic fixes. If you cleared an F1 flood error by drying the base pan but the code returns within one cycle, you have an active leak. A professional can pressure test the water system to find the exact leak point.
F5 motor failure codes. The SmartDrive motor and its controller board often fail together. Replacing both requires disassembling the wash compartment and pairing the new motor to the control board with programming tools. This is not a beginner job.
No power after checking basic electrical. If the outlet has power but the dishwasher shows no signs of life, the control board likely failed. Replacing it without the service manual and programming tool can leave you with a machine that still won't run.
Models still under warranty. Opening the dishwasher yourself can void the warranty. If your machine is less than two years old or within the extended motor warranty period, call Fisher Paykel customer service first. They will arrange a free authorized repair.
Corroded internal wiring. If you find evidence of previous leaks that damaged wire insulation, stop. Corroded wiring can cause shorts or electrical hazards. A technician can safely identify and replace all damaged sections.
Maintenance Tips to Avoid Future Problems
A little regular care keeps your dishwasher running reliably. Aggregate repair data shows that machines getting quarterly maintenance last about thirty percent longer.
Clean the filter monthly. Remove the filter assembly and rinse it under running water. Scrub the fine mesh with a soft brush. This takes under five minutes and prevents most drain clogs.
Check the spray arms every three months. Lift them off and clear any blocked holes with a paperclip. Rinse away debris lodged in the arm bearings. Confirm they spin freely before reinstalling.
Descale every six months in hard water areas. Mineral scale builds up inside water lines, the heating element, and spray arm holes. Fill the rinse aid compartment with white vinegar and run a hot cycle. Or use a dishwasher cleaner tablet designed for descaling.
Wipe the door seal monthly. Food debris and grease collect on the rubber gasket. Wipe it down with a damp cloth. This prevents the seal from hardening and reduces leak risk.
Keep rinse aid filled. Refill the rinse aid reservoir when you add detergent. Running without rinse aid forces the machine to work harder during drying and leaves water spots.
Run a cleaning cycle every three months. Use the hottest cycle available with a dishwasher cleaner. This removes grease buildup inside the tub and keeps internal plumbing clear.
Frequently Asked Questions
How do I reset my Fisher Paykel dishwasher?
Unplug the dishwasher or flip the circuit breaker for five minutes. Plug it back in and press Start. This clears temporary faults and resets the control board.
For DishDrawer models, close the drawer fully during the reset.
Why is my DishDrawer showing an F4 error?
F4 means the drain pump isn't working properly. Clean the drain pump filter first. Remove debris from the pump impeller.
Check the drain hose for kinks. If the error persists, test the pump motor for continuity with a multimeter.
Can I replace the drain pump myself?
Yes. The drain pump is accessible from the bottom. Unplug the machine.
Remove the lower access panel. Disconnect hose clamps and wiring. Remove the old pump and install the replacement.
The job takes about thirty minutes.
What does a blinking light pattern mean on an older model?
Count the number of blinks between pauses. One blink means one fault. Two blinks means another.
Match the blink count to the error code chart in your user manual. Fisher Paykel customer support can help decode the pattern if you don't have the manual.
How long should a Fisher Paykel dishwasher last?
With regular maintenance, eight to twelve years is typical. The SmartDrive motor is designed to outlast traditional motors. Machines that receive quarterly filter cleaning and annual descaling often reach the upper end of that range.
Is it worth repairing an older model?
If the dishwasher is under eight years old and the repair costs less than half the price of a new machine, repair it. If the tub is leaking or the control board failed on a model over ten years old, replacement usually makes more financial sense.

Similar Posts