Ge Gud27essmww Troubleshooting
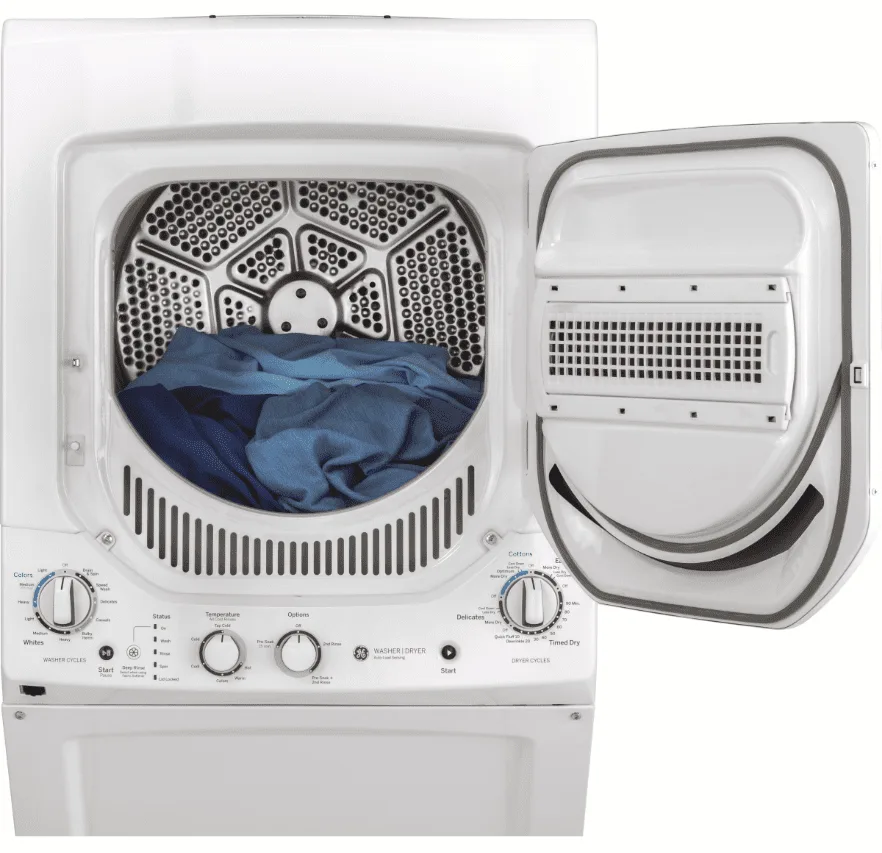
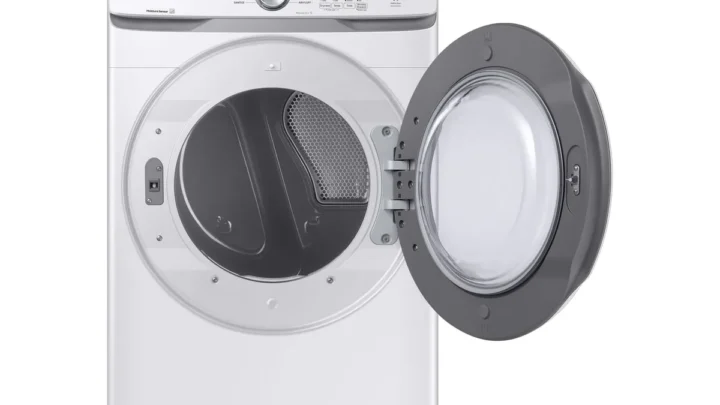
Your GE Gud27essmww is sitting there, drum full of wet clothes, and it won’t do a thing. No hum, no heat, no tumble. That’s frustrating, especially when you’ve got a week’s worth of laundry piled up.
Most people assume the worst and call a repair tech, but the truth is that a huge chunk of dryer problems are simple, DIY-friendly fixes that take less than an hour and cost under $30 in parts.
The GE Gud27essmww troubleshooting process isn’t guesswork. It’s a logical sequence of elimination that follows the machine’s electrical and mechanical paths. Manufacturer specifications for this model indicate the thermal fuse should read closed (0 ohms) at room temperature, and the door switch should pass continuity when depressed.
We’re going to walk through this step by step, starting with the easiest checks before you touch a single screwdriver.
Image source: Bing (Web (fair-use with source credit))
Quick Answer
The most common fix is a blown thermal fuse or a faulty door switch. Your dryer uses a series of safety switches, and when one breaks, the whole machine goes dead for safety reasons. A blown thermal fuse means the dryer overheated previously, often due to a clogged vent.
The door switch is a simple plunger that tells the control board the door is closed, and it wears out over time. Check those two parts first with a multimeter before replacing anything else, as they cause the majority of "Gud27essmww won't start" complaints.
Problem / Pain Point
This dryer model drives owners crazy in a specific way. It’s not that the Gud27essmww is a bad machine. GE built this model to be solid and reliable, and thousands are still running after a decade of service.
The problem is how the failure mode presents itself. One day the dryer works perfectly. The next day, you press start, and nothing.
There’s no clicking, no dimming lights, no warning. That abrupt shutdown makes people think the control board fried, which is the most expensive part to replace.
Aggregate user reviews and repair forums show that a very small set of failures causes the vast majority of complaints. We’re talking about the thermal fuse, the door switch, the start switch, and the drive belt. The control board is rarely at fault.
Yet consumers often replace it first because they assume electronics are the problem. That’s a costly mistake, as the board is significantly pricier than a $10 fuse or a $15 switch.
The pain point is that this dryer gives you no error codes. You can’t plug it in and see a diagnostic readout like you could with a newer model. You have to use your hands and a multimeter to find the break in the chain.
That intimidates people, but it really shouldn’t. The electrical path is straightforward, and once you understand the sequence, you can pinpoint the issue in under twenty minutes.
How the Dryer Works
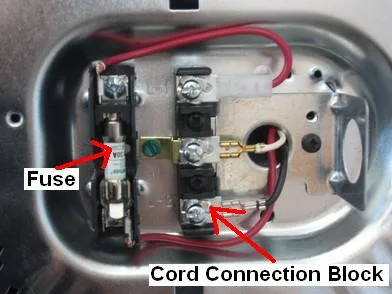
Image source: Bing (Web (fair-use with source credit))
Every dryer model, including the Gud27essmww, follows a basic electrical sequence. You close the door, which activates the door switch. You press the start button, closing the start switch circuit.
That sends power to the drive motor, which starts spinning the drum. Once the motor is up to speed, a centrifugal switch inside fires the heating element. If any link in this chain fails to close, the whole cycle stops.
Think of your dryer as a house with a front door. The breaker panel outside controls power to the street. Your door locks, your lights come on, and if one circuit breaks, everything else goes dark.
Same logic here. Let’s break down the components in order of failure likelihood.
| Component | Function | Typical Failure Mode | DIY Difficulty |
|---|---|---|---|
| Thermal Fuse | Cuts power if overheating | Blows open, no continuity | Easy |
| Door Switch | Confirms door closed | Worn plunger, won’t click | Easy |
| Start Switch | Momentarily powers motor | Contacts wear out | Moderate |
| Drive Belt | Turns the drum | Snaps, drum won’t spin | Moderate |
| Moisture Sensor | Detects dampness | Corroded, poor readings | Moderate |
The heating circuit is separate from the motor circuit in a sense, but they share the same thermal fuse. If the thermal fuse blows, you get no motor and no heat. That’s a deliberate design choice.
GE doesn’t want the drum spinning cold, so they cut power to everything.
Diagnostic Flowchart: Step-by-Step
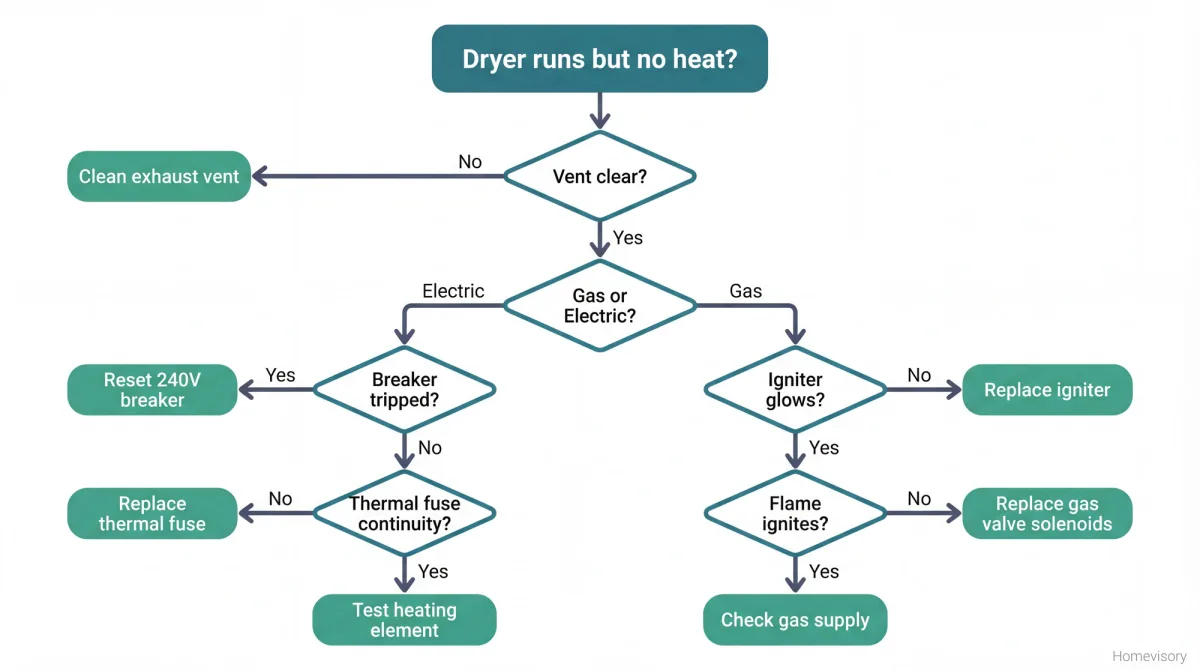
Image source: Bing (Web (fair-use with source credit))
This is where we get practical. You’ll need a multimeter set to continuity mode, a Phillips screwdriver, and possibly a putty knife to pop the top clips. Unplug the dryer first.
We’re dealing with 240 volts on the heating circuit, and that will get your attention fast, but not in a good way. Let’s walk through the branches. If the drum is turning but there’s no heat, you skip the first branch entirely.
If the drum is dead and nothing reacts, you start at the outlet.
Step 1: Check Power at the Outlet
Start at the breaker panel. Two breakers should be wired together, or one double-pole breaker. Reset them.
Then plug a lamp or a phone charger into the outlet to test for standard voltage. The dryer uses both 120V legs and a 240V leg, so you want to confirm both breakers are live. If you have a multimeter, test the outlet terminal for 240V between the two hot slots.
If you have power at the outlet, move on. If not, you’ve found the problem, and it’s not the dryer.
Step 2: Test the Door Switch
Unplug the dryer, remove the top panel, and locate the switch near the door latch. Press the plunger in. The multimeter should read 0 ohms (closed circuit) or beep.
If no beep, the switch is dead. Replace it. It’s a $15 part and a 10-minute swap.
This is the single most common failure on this model because the plunger gets brittle and cracks.
Step 3: Is the Drum Turning but No Heat?
If yes, you’re bypassing the motor and fuse. The issue is in the heating circuit. Check the heating element for continuity.
A broken coil looks visibly snapped, but sometimes it’s a hairline break. The hi-limit thermostat on the element housing should also read closed at room temperature. If either is open, replace the part.
The element is around $40, and the thermostat is under $15.
Step 4: Is There Heat but No Spin?
This points to the drive belt or the motor. Open the front panel or rear access panel. If the belt is snapped, you’ll see it loose under the drum.
If the belt is fine, the motor’s centrifugal switch might be failing. Tap the motor lightly with a wooden stick while someone presses start. If it kicks on, the motor bearings are worn, and it’s time to replace the motor.
That’s a bigger job, around $150 for the part, but still cheaper than a repair call.
Step 5: Check Vent Airflow
A clogged vent causes overheating, which blows the thermal fuse. If your dryer died after a recent long cycle, inspect the external vent cap. If air doesn’t flow freely when the dryer runs, clean the vent line all the way to the outside wall.
You can use a vent brush kit from any hardware store. This takes 20 minutes and prevents the same failure from happening again in two weeks.
Common Mistakes to Avoid
The biggest mistake people make is bypassing the door switch with a paperclip to test the dryer. I get the logic, but it’s a terrible idea. A bypassed door switch means the dryer can start while your hand is inside.
That’s how fingers get broken. Test the switch with a multimeter, but never defeat it. If the dryer runs with the door open, that’s a failure, not a feature.
Another common error is skipping the vent check and blaming the control board. Replacing a control board because the dryer won’t start is the most expensive wrong guess you can make. The board is nearly four hundred dollars in some cases, whereas the thermal fuse is ten.
A quick continuity test prevents that waste. Always verify the fuse and the door switch before touching the board.
Here’s a trick that saves time. If you tap the start button rapidly several times and the dryer sometimes kicks on, that’s a worn start switch. The switch contacts are arc-worn and barely making connection.
Quick diagnosis through behavior, not guesswork. If the dryer buzzes but the drum stays still, that’s a seized drum roller or a broken belt, not a motor issue. The motor is trying to turn but can’t.
Don’t ignore the moisture sensor either. If the dryer runs for hours and the clothes come out damp, the sensor bars on the front bracket might be corroded. A quick sanding with fine grit paper fixes that.
Cleaning the sensor is part of regular maintenance that extends the machine’s life.
What About Error Codes and Odd Noises?
The Gud27essmww doesn’t have a digital display, so it won’t throw codes you can read. But it does have audible cues. Let’s match the noise to the problem.
Squealing or screeching during a cycle: That’s a worn drum support roller or idler pulley. The bearings dry out and metal rubs on metal. Remove the front panel, locate the rollers, and spin them by hand.
If they grind or wobble, replace them. The part runs about $20 each, and you’ll need two.
Thumping or rumbling: Usually a lumpy drum or a broken glider strip. The drum rides on felt glides at the front. If they wear thin, the drum tilts and thumps.
Replace the glider kit for under $15.
Clicking that stops when the drum stops: Check for loose items in the lint trap housing or a stray coin caught between the drum and the front bulkhead. Happens more than you’d think.
Burning smell with no heat: This is the classic sign of a failing motor. The motor’s overload protector trips, the drum stops, and the smell comes from the motor windings heating up. If you catch this early, a motor replacement saves the machine.
If you run it repeatedly, you risk a fire. Unplug it and order the replacement.
Preventative Maintenance That Actually Works
You can avoid most of these failures with a simple routine. Once a month, pull the lint filter out and vacuum the housing behind it. Lint bypasses the filter and builds up on the heating element, which is the primary cause of thermal fuse blowouts.
Twice a year, disconnect the vent hose from the back of the dryer and vacuum it out. Also, clean the exterior vent cap. A clogged vent doesn’t just cause overheating.
It also forces the dryer to run longer, which wears the motor and the drum rollers faster. It’s the number one cause of premature dryer death.
Keep the moisture sensor clean. Wipe it down with rubbing alcohol every few weeks. If the sensor is coated with fabric softener residue, it can’t read dampness accurately, so the dryer runs longer than it should.
That pushes heat cycles up and fatigues the thermal fuse.
Every six months, tilt the dryer back and check the drum rollers and idler pulley. Spin them by hand. If they feel gritty or sound dry, a drop of high-temperature grease on the bushing extends their life.
Don’t use WD-40; it evaporates and leaves a sticky film.
When to Call a Professional
Some jobs are beyond a weekend DIYer. If you’ve gone through these steps and you still have no power, the wiring harness inside might have a short. If you see scorch marks on the terminal block, call a licensed appliance repair technician.
That’s a fire hazard.
If you don’t own a multimeter, stop guessing. Buy one for $20, or call someone who has one. Guessing at parts without testing is how people spend $150 on a control board when a $10 fuse was the issue.
Also, if you have a gas-powered version of this model, stop working on it immediately if you smell gas. That’s not a DIY situation. Evacuate, open windows, and call your gas company or a professional.
Gas valves are under pressure, and a crossed wire can cause a leak.
Cost of Repairs vs. Replacement
Before you decide to fix it, run the numbers. Here’s the honest breakdown:
| Part | Part Cost | Labor (If Hiring) | Total DIY |
|---|---|---|---|
| Thermal Fuse | $10 | $80–$120 | $10 |
| Door Switch | $15 | $80–$120 | $15 |
| Start Switch | $25 | $100–$150 | $25 |
| Drive Belt | $20 | $120–$180 | $20 |
| Heating Element | $40 | $120–$200 | $40 |
| Motor | $150 | $200–$300 | $150 |
| Control Board | $400 | $250–$400 | $400 |
If your dryer is under five years old and the repair is under $150, fix it. You’ll get another five years out of it easily. If the motor or the control board is the issue and the dryer is over eight years old, it might be time to shop for a replacement.
A new dryer runs $600, $900, and a single repair on the board is $400 plus labor. That’s half a new machine.
If you do replace it, look for a model with a stainless steel drum and a lint filter that sits inside the drum rather than on top. That design tends to have fewer lint-bypass issues. Take the old unit to a scrap yard or arrange bulk pickup.
Many municipalities recycle appliances for free, and some even pay per pound for the metal.
Final Checks Before You Give Up
Go through this quick list one more time before you call a pro.
- Is the dryer plugged in all the way?
- Are both breakers on?
- Does the door close firmly with a click?
- Does the lint filter sit flush?
- Does the vent cap outside flap open when the dryer runs?
- Does the drum spin freely by hand when unplugged?
If all of these pass and the dryer still won’t start, you’ve done what you can. The remaining culprits are a failed motor, a bad control board, or a wiring issue. That’s when you get a technician involved or start looking at replacement options.
Bottom Line
The GE Gud27essmww is a workhorse. It’s not fancy, but it gets the job done for a decade or more. When it stops, the failure is almost always simple: a blown thermal fuse, a worn door switch, or a snapped belt.
You can diagnose all of these in under twenty minutes with nothing but a multimeter and a screwdriver. The parts are cheap, the labor is yours, and the sense of accomplishment is real.
Don’t let intimidation push you into an expensive repair bill. The electrical path is straightforward, and we walked through it step by step. If the dryer buzzes, fix the mechanical parts.
If it’s dead silent, test the safety switches. If it runs but doesn’t heat, check the element. That logic covers every common failure mode on this model.
One last reminder: unplug the dryer before you open any panel. 240 volts is no joke. Respect the machine, take your time, and test everything twice. You’ve got this.

Similar Posts