Stinger Heigh10 Troubleshooting
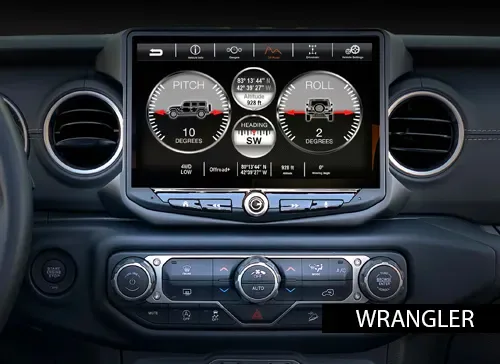
Image source: Bing (Web (fair-use with source credit))
Your Stinger Heigh10 screen is black, the unit won't boot, or CarPlay keeps dropping out mid-drive. You're not alone, and more importantly, you're probably not looking at a dead unit.
Most Heigh10 failures trace back to three predictable causes: power delivery problems, grounding issues, or the Maestro RR interface losing its configuration. Before you box it up for a warranty claim, let's walk through the likely culprits and fix them in order of probability.
Quick Answer
Start with a hard reset. Hold the reset button for 10 seconds. Check your fuse and ground connection next.
Verify the Maestro RR is seated properly, then reflash it if the screen stays black.
The First Three Things to Try
Every Heigh10 issue, whether it's a frozen screen, missing audio, or a unit that won't power on at all, benefits from this quick sequence first.
1. Perform a hard reset
The Heigh10 has a small pinhole reset button on the back or bottom of the chassis. Use a paperclip and hold it for 10 to 15 seconds. This forces the Android operating system to reboot cleanly, clearing any stuck processes or memory errors.
2. Check the inline fuse
The main power harness includes an inline blade fuse, typically rated at 15 amps. Pull it out and inspect the filament. A blown fuse is often caused by a short in the wiring or an accidental grounding of the power wire during installation.
3. Test your ground connection
The Heigh10 needs a true chassis ground, not just a wire tucked under a random bolt. Remove the ground ring terminal, sand the paint down to bare metal, and reattach it. A poor ground is the single most common cause of intermittent power issues and random reboots.
If those three steps don't resolve it, move to the diagnostic decision tree below.
Why Your Heigh10 Is Acting Up
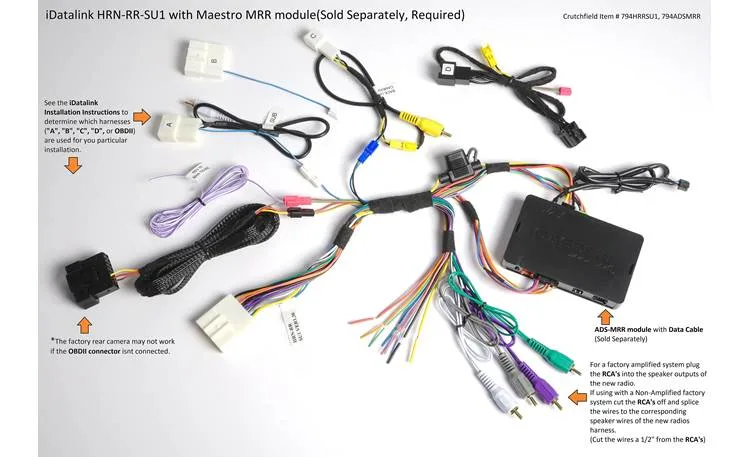
Image source: Bing (Web (fair-use with source credit))
Understanding what makes the Heigh10 tick helps you skip the guesswork. This unit is essentially an Android tablet built into a double-DIN chassis, paired with a Maestro RR interface module that translates your vehicle's digital data into signals the radio understands.
Power delivery is the #1 suspect
The Heigh10 draws significant current, especially with the screen at full brightness and the amplifier section active. It needs clean, stable 12V power. If you tapped into a circuit that's already loaded, or used a wire gauge that's too thin, you'll get voltage drop.
Low voltage causes boot loops, screen flicker, and random shutdowns.
The Maestro RR is the brains of the operation
The Maestro RR sits between the Heigh10 and your vehicle's CAN bus network. It translates digital signals for steering wheel controls, factory chimes, and vehicle diagnostics. If this module has stale firmware or is wired incorrectly, you'll lose those features, and in some cases, the radio won't fully boot.
CAN bus communication errors
Modern vehicles use a Controller Area Network, or CAN bus, to communicate between modules. The Heigh10 needs to speak this language through the Maestro RR. A loose connection, a damaged wire, or a misconfigured vehicle profile in the Maestro software will produce errors that manifest as missing features or a non-responsive unit.
Firmware bugs and corrupted updates
Like any Android device, the Heigh10 runs on firmware. Updates fix bugs but sometimes introduce new ones. A corrupted update file, or an update interrupted by a low battery, can leave the unit stuck at the boot logo or stuck in a reboot loop.
Decision Tree: Identify Your Symptom, Find Your Fix
Work through this based on what you actually see. Each branch leads to a specific set of fixes.
Branch A: Screen is black / unit has no power
If the screen is completely dark and the unit shows no sign of life, start with the power supply.
- Check the fuse first. A blown fuse means no power, period.
- Verify the yellow constant 12V wire (memory) and the red switched 12V wire (ignition) both have power. Use a multimeter.
- Confirm the ground is solid. Test continuity between the ground wire and the chassis.
- If power is present but the screen stays black, the unit may be in a deep sleep. Unplug the harness for 2 minutes, then reconnect.
Branch B: Unit powers on but gets stuck on the logo
This is a classic boot loop symptom. It usually points to a software issue.
- Perform a hard reset with the pinhole button.
- If that doesn't work, reflash the firmware using a USB drive.
- Check the Maestro RR connection. If the CAN bus handshake fails, the unit may stall during boot.
- Try unplugging the Maestro RR temporarily to see if the unit boots into a basic Android mode.
Branch C: Screen works but no audio
Audio issues are separate from power issues. They usually involve the amplifier turn-on signal or speaker wiring.
- Check the amp turn-on wire (usually blue/white). It needs 12V when the unit is on.
- Confirm the RCA outputs are connected to the correct amplifier inputs.
- Verify speaker wires aren't shorted. A shorted speaker channel can shut down the internal amp.
- If you're using the internal amp, check the fade and balance settings first. It's embarrassing how often that's the fix.
Branch D: CarPlay / Android Auto won't connect
Connection issues with smartphone projection are common after updates.
- Confirm the USB cable is a genuine Apple or high-quality USB-C cable. Cheap cables fail constantly.
- Check that the USB port on the radio is set to the correct mode in the settings.
- Restart both the radio and your phone.
- Update the Heigh10 firmware to the latest version. CarPlay compatibility is often fixed in software updates.
Branch E: Reverse camera shows a blank screen
A blank reverse camera screen usually means the camera is powered only when reversing, and the trigger wire isn't getting a signal.
- Verify the purple/white reverse trigger wire is connected to the vehicle's reverse light circuit.
- Check the camera's power source. It should come from the same reverse light circuit or a dedicated 12V source.
- Confirm the camera input is selected correctly in the Heigh10 settings.
Branch F: Steering wheel controls or factory chimes are missing
This points directly to the Maestro RR configuration.
- Reopen the Maestro software and confirm the correct vehicle is selected.
- Update the Maestro RR firmware to the latest version.
- Check the CAN bus wires on the Maestro harness. They must be connected to the correct wires in your vehicle, usually inside the OBD-II port area or the factory radio harness.
Step-by-Step Fixes for Each Symptom
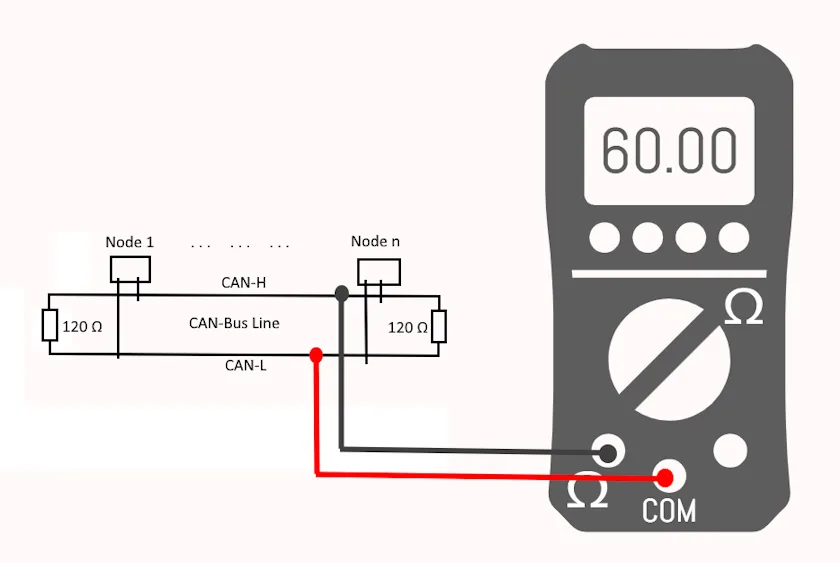
Image source: Bing (Web (fair-use with source credit))
Let's get hands-on. This section covers the actual procedures.
Perform a factory reset
A factory reset wipes all settings and returns the unit to its out-of-the-box state. This is step one for any software glitch.
- Go to Settings.
- Scroll to System or Backup & Reset.
- Select Factory Data Reset.
- Confirm the reset.
- Wait for the unit to reboot. This can take up to 3 minutes.
If the unit is stuck on the boot logo, use the pinhole reset instead. It forces a cold reboot, which is often enough to clear a stuck boot.
Reflash the firmware via USB
Firmware updates fix bugs, add features, and often resolve CarPlay or audio issues. Here's how to do it manually.
- Download the latest firmware file from the official Stinger support page. The file is a ZIP archive.
- Extract the ZIP to the root directory of a blank USB drive (FAT32 format). The update file must be on the top level, not inside a folder.
- Insert the USB drive into the Heigh10.
- Power on the unit. It should detect the update file automatically.
- Follow the on-screen prompts. Do not disconnect power during the update.
- Once complete, the unit will reboot. This takes 2 to 5 minutes.
A failed update usually means an incompatible file or an old USB format. Reformat the drive, re-download the file, and try again.
Reflash the Maestro RR firmware
The Maestro RR needs its own firmware, updated through the Maestro software on a Windows PC.
- Download the Maestro software from the official Maestro website.
- Connect the Maestro RR to your PC using the provided USB cable.
- Launch the software and log in.
- Select your vehicle's exact year, make, and model.
- Click Update Firmware and follow the prompts.
- Once done, unplug the Maestro RR and reconnect it to the Heigh10 harness.
If the Maestro RR isn't recognized by the software, check the USB cable. Some cables are charge-only and don't carry data.
Verify the CAN bus wiring
The CAN bus wires are typically two twisted wires, CAN High and CAN Low. On most vehicles, they're found in the OBD-II port or the factory radio harness.
| Wire | Typical Color | Location |
|---|---|---|
| CAN High | Orange/Green | OBD-II pin 6 |
| CAN Low | Orange/Brown | OBD-II pin 14 |
If your Heigh10 uses a Maestro RR, the CAN wires connect directly to the Maestro harness, not the radio. Confirm the colors match your vehicle. A reverse connection will prevent all data communication.
Check audio and amplifier wiring
For audio issues, focus on the signal path from the head unit to the speakers.
- Set the fade and balance to the center. A misaligned setting can make you think a channel is dead.
- Test the RCA outputs with a multimeter set to AC voltage. Play a tone and check for a reading. No signal means the internal DAC isn't outputting.
- If you have an external amp, measure the remote turn-on wire. It should read 12V when the unit is on.
- If the amp turns on but speakers are silent, test the speaker wires directly. A short to ground will trip most amplifiers into protection mode.
Common Mistakes People Make
Most Heigh10 problems aren't factory defects. They're install errors that show up days or weeks later. Here's what goes wrong most often.
Installing without disconnecting the battery
This is the number one cause of blown fuses and damaged circuits. When you disconnect the factory radio harness, you can easily short the power wire to ground. Always disconnect the negative battery terminal before touching any wiring.
It takes 30 seconds and saves you hours of troubleshooting.
Using the wrong ground location
The Heigh10 needs a solid chassis ground. That means bare metal, not painted or rusted metal. Many people use a nearby bolt that looks grounded but isn't.
Sand the area down to shiny metal and use a star washer to bite into the surface. A poor ground causes random reboots and screen flicker.
Ignoring the pre-install firmware update
Out-of-the-box units often ship with older firmware. That firmware predates the latest bug fixes. If you install an old unit without updating, you're inheriting known bugs.
Before you mount the radio in the dash, update both the Heigh10 firmware and the Maestro RR. This is a 20 minute investment that eliminates a whole class of issues.
Not matching harness pins to your vehicle's trim level
The Heigh10 uses a vehicle-specific T-harness. However, not all years and trims of the same model share the same pinout. An aftermarket sound system, a factory navigation package, or a premium audio upgrade changes the wiring.
Double-check the pinout diagram against your specific VIN before connecting anything. A mismatched pin can send 12V into a speaker wire and blow an amp channel.
Updating firmware with a bad USB drive or low battery
A firmware update fails when the power drops or the storage is corrupted. That leaves the unit in a bricked state. Always connect the Heigh10 to a stable 12V supply with the engine running.
Use a name-brand USB drive, not a promotional freebie from a conference. Format it to FAT32, not NTFS or exFAT. And don't unplug the drive mid-update.
When to Stop and Call Support
If you've worked through the decision tree, checked the power, reflashed both firmware files, and verified the CAN bus wiring, a few edge cases remain.
- You've measured 12V at both power wires and the ground reads 0 ohms to the chassis, but the unit is still dead. The internal power supply may be faulty.
- The Maestro RR software fails to recognize the module even with a known-good USB cable. The module's internal chip may be damaged.
- The unit boots and plays audio but the screen has visible dead pixels or lines. That's a panel defect, not a software issue.
In these cases, contact Stinger's tech support. Have your proof of purchase ready. The Heigh10 carries a limited warranty.
For 12-volt equipment, that's typically 1 year from the date of purchase.
Final Thoughts
The Stinger Heigh10 is a solid head unit when installed properly. The vast majority of problems are installation-related, not manufacturing defects. If you take your time with the wiring, update the firmware before installation, and use a solid ground point, you'll likely never need this guide.
But if you do run into trouble, work the problem systematically: power first, then ground, then firmware, then CAN bus. Jumping around randomly wastes time and can introduce new problems. Follow the branch that matches your symptom, fix the most likely cause first, and test after each step.
One last tip: keep the mounting screws on the radio chassis tight. A loose radio can vibrate and cause intermittent connections on the rear harness. That produces symptoms that come and go without warning, the worst kind to diagnose.

Similar Posts