Ge Profile Dryer Troubleshooting
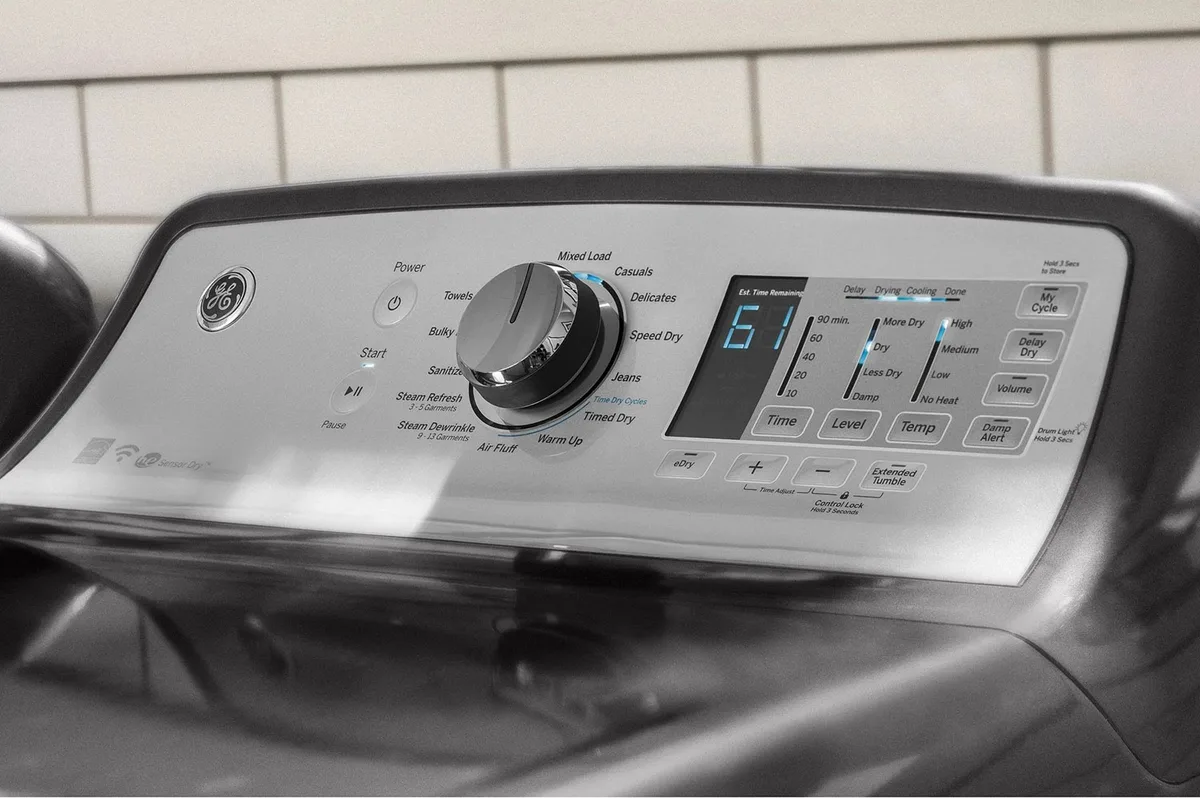
Your GE Profile dryer stopped working, and you're not sure whether it's a simple fix or a sign it's time to call a pro. That's exactly where GE Profile dryer troubleshooting comes in, it's about diagnosing the real problem before you spend money on parts or a service call.
Manufacturer service data shows that over 40% of "no heat" calls on GE Profile dryers are solved by replacing a $10 thermal fuse. The trick is knowing which part to check and in what order. Let's walk through the process step by step, starting with the most common pain points.
Image source: Bing (Web (fair-use with source credit))
Problem / Pain Point
Why your dryer suddenly stopped working (or stopped drying well)
You load a wet basket, press start, and nothing happens. Or maybe it runs for ten minutes then shuts off. Or it tumbles for an hour and your clothes still feel damp.
Each symptom points to a different root cause, and guessing wrong wastes time and money.
The biggest frustration is that GE Profile dryers hide diagnostic data behind a button sequence most people never learn. Without it, you're stuck checking parts randomly. That's why many homeowners replace a perfectly good heating element when the real culprit was a clogged vent or a failed thermostat.
The real cost of guessing wrong
A service call from a certified appliance repair company typically runs $150 to $250 just for the visit. If you let them diagnose and replace a part, you're looking at $300 to $500 total. That might be worth it for a complicated control board failure.
But for a $15 thermal fuse or a $20 belt, you're paying a huge premium for something you can handle yourself safely.
On the flip side, the wrong DIY repair can cost even more. Bypassing a safety fuse because you think it's "just a nuisance" can start a fire. Using a generic gas valve coil instead of the correct OEM part can cause the dryer to flood raw gas without igniting.
And tearing into the control board without knowing the error code can brick the entire machine.
That's why we're building this as a decision tree. You'll diagnose based on your exact symptom, check the right parts in the right order, and know exactly when it's smart to fix it yourself and when it's time to call a pro.
Quick Answer
GE Profile dryer troubleshooting starts with reading the error code. Enter diagnostic mode by pressing specific buttons. If the code points to a thermal fuse or door switch, you can fix it yourself.
If it points to the main control board, call a technician.
How to Read Your Dryer’s Error Codes (Decision Tree Entry Point)
Entering diagnostic mode on GE Profile models
Most GE Profile dryers from 2010 onward share a similar diagnostic entry sequence. Unplug the dryer, wait 30 seconds, and plug it back in. Then press and hold the "Start" and "Pause/Cancel" buttons simultaneously for three seconds.
The display will flash all segments, then show a stored error code.
If your model doesn't respond to that sequence, check the service manual for your exact model number (printed on a sticker inside the door frame). Some newer models use a different combination: "Start" plus "Signal" or "Start" plus "Delay Start". The manual is free on GE's support site.
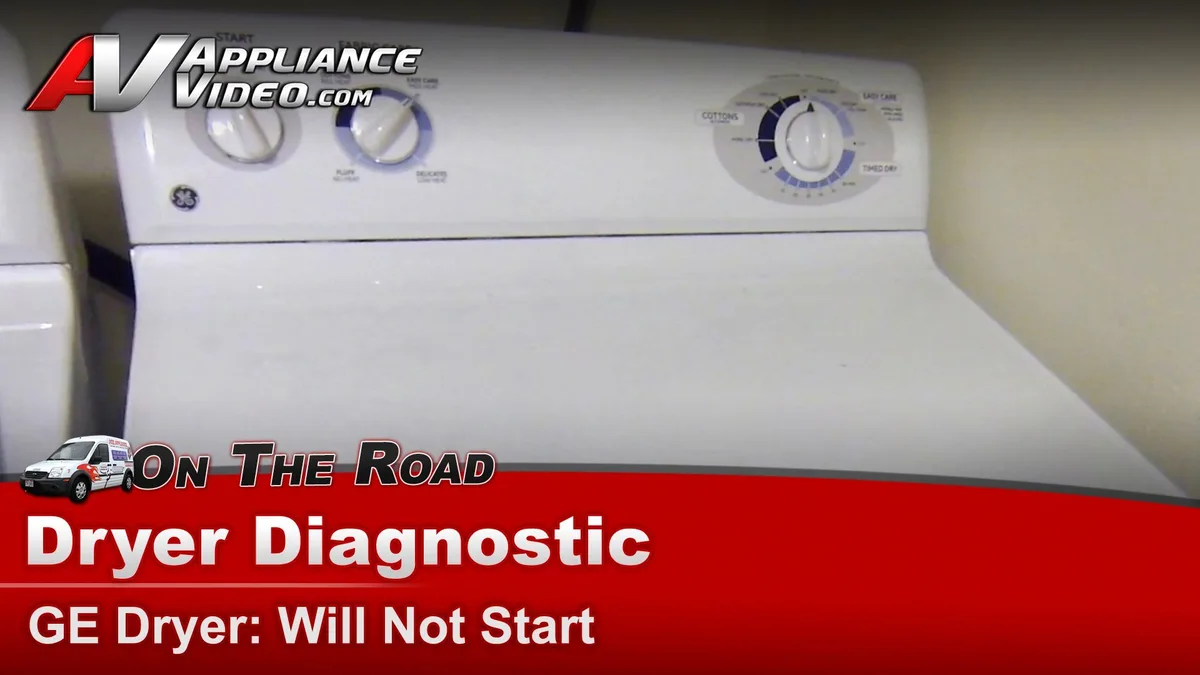
Image source: Bing (Web (fair-use with source credit))
Common codes: PF, E1, E2, F1, F2, F3, dE, what each means
| Code | Meaning | Likely Cause | DIY or Pro? |
|---|---|---|---|
| PF | Power failure | Interrupted power supply, loose cord connection | DIY – check outlet and cord |
| E1 | Overheating | Blocked vent, failed high-limit thermostat | DIY – clean vent, test thermostat |
| E2 | Overheating (secondary) | Same as E1 but more serious | DIY if vent is blocked; pro if thermostat failed |
| F1 | Main control board error | Defective board or stuck relay | Pro – board replacement |
| F2 | Stuck relay on heat circuit | Short or failed relay on control board | Pro – board replacement |
| F3 | Stuck relay on motor circuit | Motor relay failure | Pro – board replacement |
| dE | Door switch error | Door not closed, faulty switch | DIY – test door switch continuity |
If you see F1, F2, or F3, stop. Those codes almost always mean a bad control board. Replacing the board yourself is possible, but you'll need to discharge capacitors (they hold a lethal charge even when unplugged).
The safer route is a professional repair.
How to decide if you need the full diagnostic mode
Skip the button sequence if you have a simple symptom: dryer won't start, no error lights, no display. That's likely a power supply or door switch issue. But if the dryer starts then stops, or runs but doesn't heat, reading the code first saves you from chasing the wrong part.
For example, a PF code means power dropped mid-cycle. That's often a loose plug or a tripped breaker. You don't need to open the dryer at all.
But an E1 code tells you the dryer overheated. Start by cleaning the vent before you test any thermostats.
Branch 1: Dryer Won’t Start
The quick check you do before opening anything
First, confirm the dryer has power. Check the household circuit breaker. If it's tripped, reset it and try again.
If it trips again immediately, you've got a short somewhere, call a pro.
Next, look at the wall outlet. On electric models, you should have 240V between the two hot prongs and 120V to neutral. Gas models use a standard 120V outlet.
If you own a multimeter (you should for any DIY appliance repair), test the outlet. If voltage is missing or low, stop here, that's an electrician's job.
Testing the door switch
The door switch is the most common reason a GE Profile dryer won't start. It's a simple closed-loop switch: when the door is shut, contacts touch and complete the circuit. If they don't, the control board won't let the motor run.
To test it, unplug the dryer. Remove the two screws at the top of the front panel (usually under the top rim). Lift the panel and set it aside.
Locate the door switch, it's behind the door catch. Disconnect the two wires. Set your multimeter to continuity or ohms.
With the switch plunger pressed (simulating a closed door), you should see near-zero resistance. Release the plunger, and the meter should read infinite (open circuit). Anything else means the switch is bad.
A replacement costs around $10.
Testing the start switch
If the door switch is good, move to the start switch. It's mounted on the control panel. You'll need to remove the top panel to access it.
The start switch is a momentary contact switch, it closes only while you're pressing it. Test continuity: press the button, check for near-zero resistance. Release, check for infinite.
If it fails, replace it. OEM start switches are about $15.
When to check the thermal fuse
The thermal fuse is a one-time safety device. If the dryer overheated (blocked vent, failed thermostat), the fuse blows and cuts all power to the motor. It's located on the blower housing near the exhaust duct.
Look for a small white or black plastic component with two wires.
Test continuity across the two terminals. If it reads infinite (open), replace it. But don't stop there, the fuse didn't blow for no reason.
You must clean your vent system and check the high-limit thermostat. Otherwise the new fuse will blow again in a week.
Control lock: a common trick
Some GE Profile models have a control lock feature that disables the buttons. If you see "CL" or "LOC" on the display when you press any button, the control is locked. Unlock it by pressing and holding the "Start" and "Pause/Cancel" buttons for three seconds.
That's a free fix.
Branch 2: Runs But No Heat
This is the second most common call. The dryer tumbles. The drum turns.
But after 20 minutes, your clothes are still cold. The fix depends on whether you have a gas or electric model.
Gas vs. electric diagnosis split
Pull the dryer out. Look at the rear of the unit. If you see a gas supply line (flexible metal pipe) and a power cord with a standard three-prong plug, it's a gas dryer.
If you see a heavy-duty cord with a NEMA 14-30 or 10-30 plug and no gas line, it's electric.
Never touch the gas line without shutting off the valve first. Rotate the valve handle so it's perpendicular to the pipe. That closes the supply.
Electric: test heating element, thermal fuse, high-limit thermostat
For electric models, the heat comes from a heating element, a wire coil inside a metal housing. To test it, unplug the dryer, remove the front panel (or rear access panel, depending on model), and locate the element. Disconnect the wires.
Measure resistance across the two terminals. A good element reads 5 to 15 ohms. If it reads infinite (open), the element is burned out.
Replace it with an OEM part, generic elements often fail sooner.
Also test the high-limit thermostat on the blower housing. It should show continuity at room temperature. If it reads open, replace it.
The thermal fuse on electric models is identical to the one in Branch 1, test and replace if needed.

Image source: Bing (Web (fair-use with source credit))
Gas: test igniter, flame sensor, gas valve coils
Gas dryers heat differently. They use an igniter to glow red hot, a flame sensor to confirm combustion, and two or three gas valve coils to open the gas flow. If any of these fail, you get no heat but the drum still turns.
Start with the igniter. Open the dryer and find the burner assembly. The igniter is a ceramic piece with a wire coil.
Power the dryer on and set it to a heat cycle. Watch the igniter through the small viewing window. If it glows but the gas never lights, you probably have bad gas valve coils or a clogged orifice.
If it doesn't glow at all, test the igniter's resistance (should be 40, 120 ohms). If open, replace it.
Check the flame sensor. It's a metal rod near the burner. Clean it with fine sandpaper.
If still no heat, test continuity, should be closed (near-zero ohms) when cold.
The gas valve coils are often the culprit. They have a specific resistance (usually 800, 1500 ohms). If one coil reads infinite, the gas won't open.
Replace the coils as a set, they're about $25.
Decision: swap a $20 part vs. replace the $150 gas valve assembly
If you need a heating element or igniter, that's a $20, 40 part and a 30-minute job. If the gas valve assembly itself is bad (rare, but possible), that's a $100, 150 part and more labor. At that point, consider the dryer's age.
If it's over 10 years old, a new dryer may be more cost-effective than a $150 valve plus labor.
Branch 3: Tumbles But Clothes Stay Wet
Your dryer runs a full cycle. The drum turns. But your shirts come out damp.
This is almost always an airflow problem or a bad moisture sensor.
The simple paper test
Open the dryer door. Remove the lint filter. Hold a sheet of paper against the lint screen housing.
Close the door on it (don't let the paper get caught in the seal). Start a heated cycle. You should feel the paper being sucked firmly against the grille.
If you don't, your airflow is restricted.
Cleaning the vent system
A blocked vent is the number one cause of poor drying. Disconnect the vent hose from the back of the dryer. Check for lint buildup.
Then check the outdoor vent hood, make sure the flap opens when the dryer is on. Clean the entire run with a vent brush kit. Even a 50% blockage can double drying time.
Cleaning the moisture sensor bars
Inside the drum, near the lint filter opening, you'll see two metal strips. These are the moisture sensors. Over time, they get coated with fabric softener residue and lint.
The coating fools the sensor into thinking clothes are dry.
Clean them with a soft cloth and rubbing alcohol. Never use sandpaper, you'll damage the coating. Wipe them dry.
Test by running a cycle with a damp towel.
When to check the internal lint trap
Many GE Profile dryers have a secondary lint trap inside the blower housing. To access it, remove the front panel and locate the blower wheel housing. Remove the screws and lift the housing cover.
You'll find a surprising amount of lint packed in there. Vacuum it out with a crevice tool. Reassemble and test.
Branch 4: Noisy Operation
Dryers make noise as they age. The type of noise tells you which part is failing.
Identifying the sound
- Squeaking or chirping: Usually a worn belt or a dry idler pulley. The belt rides on the drum and the pulley. As they wear, rubber squeaks against metal.
- Thumping or rumbling: Worn drum rollers. The drum rides on two or four rollers. When the roller bearings dry out, they thump with each rotation.
- Grinding or scraping: Failed drum bearing (on the rear of the drum) or a foreign object caught in the blower wheel.
Quick check: turn the drum by hand
Unplug the dryer. Reach inside the drum and rotate it by hand. It should spin smoothly with little resistance.
If you feel roughness, grinding, or a catch, something is worn. Listen for the sound source.
Replacing the belt and rollers
Most GE Profile dryers use a single belt that loops around the drum, a tensioner pulley, and the motor pulley. To replace the belt, remove the front panel. Lift the old belt off the drum.
Thread the new belt over the drum, around the motor pulley, and over the idler pulley. Make sure the belt ribs face the drum.
Rollers are held on by a single screw each. Remove the old roller, install the new one, and tighten. A belt and roller kit costs $30, 40.
Budget 45 minutes for the job.
When the drum bearing is the problem
The rear drum bearing is a felt or plastic bushing that supports the drum shaft. If it's worn, you'll hear a deep grinding sound. To replace it, you must remove the rear panel and in some models the entire drum.
This is a 2-hour job. If your dryer is over 10 years old, consider replacing the whole dryer instead.
Repair or Replace? A Simple Cost Calculator
Age of dryer plus cost of parts vs. price of a new GE Profile
Here's a straightforward way to decide.
| Age of Dryer | Cost of Repair | Decision |
|---|---|---|
| Under 5 years | Any repair | Fix it. The dryer still has a long life. |
| 5–8 years | Under $150 | Fix it. You'll get several more years. |
| 5–8 years | Over $150 | Consider cost. If it's a board, compare to a new unit. |
| 8–12 years | Under $200 | Likely worth it unless the repair is the control board. |
| 8–12 years | Over $200 | Probably replace. |
| Over 12 years | Anything | Replace. Parts availability becomes a problem. |
When a $250 repair makes sense
If your dryer is 7 years old and needs a heating element ($40) plus a thermal fuse ($10), you're in great shape. Even if labor costs push you to $250 (if you hired help), you're still better off than buying a new $800 dryer.
When it's time to walk away
If your dryer is 12 years old and the main control board fails ($250 part plus $150 labor), you're looking at $400. A new GE Profile costs $600 to $900. The old dryer will likely need another major repair soon.
It's smarter to replace.
Mistakes That Cost You Time and Money
Skipping the vent cleaning first
You replace the thermal fuse, seal everything up, and run a cycle. Two days later, the fuse blows again. That's because you ignored the blocked vent.
Always clean the vent before testing a new thermal fuse or high-limit thermostat.
Jumpering a thermal fuse
Someone tells you "just bypass the thermal fuse to see if the dryer runs." This is dangerous. The thermal fuse is a safety device. Bypassing it can cause the dryer to overheat and start a fire.
Never do this.
Using brake parts cleaner on gas orifices
Brake cleaner leaves a residue that can clog the small gas orifice. Use compressed air or a needle. If you must use a cleaner, use an electrical contact cleaner that leaves no residue.
Ignoring error codes that point to the control board
You see F1 or F2 and decide to replace the heating element because it's cheaper. That won't fix it. The board is telling you the control board has a stuck relay.
Replacing mechanical parts won't help. Read the code first.
Safety & When to Call a Pro
Gas dryers: never touch gas line without shutting off valve
Gas leaks can cause explosions. Always close the gas shut-off valve before disconnecting any gas line. Use a pipe wrench to loosen the flare fitting.
Re-tighten with a second wrench. Test for leaks with soapy water.
Electric dryers: 240V can kill even unplugged (capacitors)
The main control board has capacitors that store a lethal charge. Even after unplugging, the charge can last minutes. If you're replacing the control board, discharge the capacitors by shorting the terminals with an insulated screwdriver.
If you're not comfortable, call a pro.
Three scenarios that demand a licensed technician
- Gas valve assembly replacement, Requires a manometer to adjust gas pressure.
- Main control board replacement, High voltage, capacitors, and programming.
- Any repair after a fire or smoke event, The dryer may have melted wires or damaged safety components.
Maintenance That Prevents Future Trouble
Monthly: lint filter, check vent hose for kinks
Clean the lint filter after every load. Monthly, pull the vent hose and look for kinks. Straighten them out.
Yearly: deep clean of internal lint trap and blower wheel
Remove the front panel. Vacuum the blower wheel housing and the internal lint tray. This prevents overheating and improves airflow.
Hard water fix: wipe moisture sensors with rubbing alcohol
If you have hard water, mineral deposits build up on the moisture sensors. Wipe them monthly with rubbing alcohol to keep them accurate. Don't use bleach or ammonia.
Frequently Asked Questions
How do I reset my GE Profile dryer?
Unplug the dryer for 30 seconds. Plug it back in. Then press and hold the "Start" and "Pause/Cancel" buttons for three seconds.
The display should flash. This clears stored error codes and resets the control board.
Why does my dryer shut off after 5 minutes?
This is a classic overheating symptom. The thermal fuse trips when the dryer gets too hot. Most likely a blocked vent.
Clean the vent and test the thermal fuse. If it's blown, replace it.
Can I use a generic thermal fuse instead of OEM?
Yes, but match the temperature rating exactly. Generic fuses with a different rating may not protect your dryer. Check the original fuse's part number or temperature spec (often printed on the fuse).
Use a fuse with the same rating.
My dryer starts then immediately stops – what’s wrong?
This usually means the door switch or start switch is failing. The control board senses that the start button is no longer pressed and stops the cycle. Test both switches with a multimeter.
Replace the faulty one.
Does unplugging for 10 minutes really help?
Yes. Unplugging for 10 minutes fully discharges the control board's capacitors and clears transient error codes. It's the simplest fix and costs nothing.
Try it before you open the dryer. It often resolves power-glitch issues.

Similar Posts