Rinnai Water Heater Troubleshooting
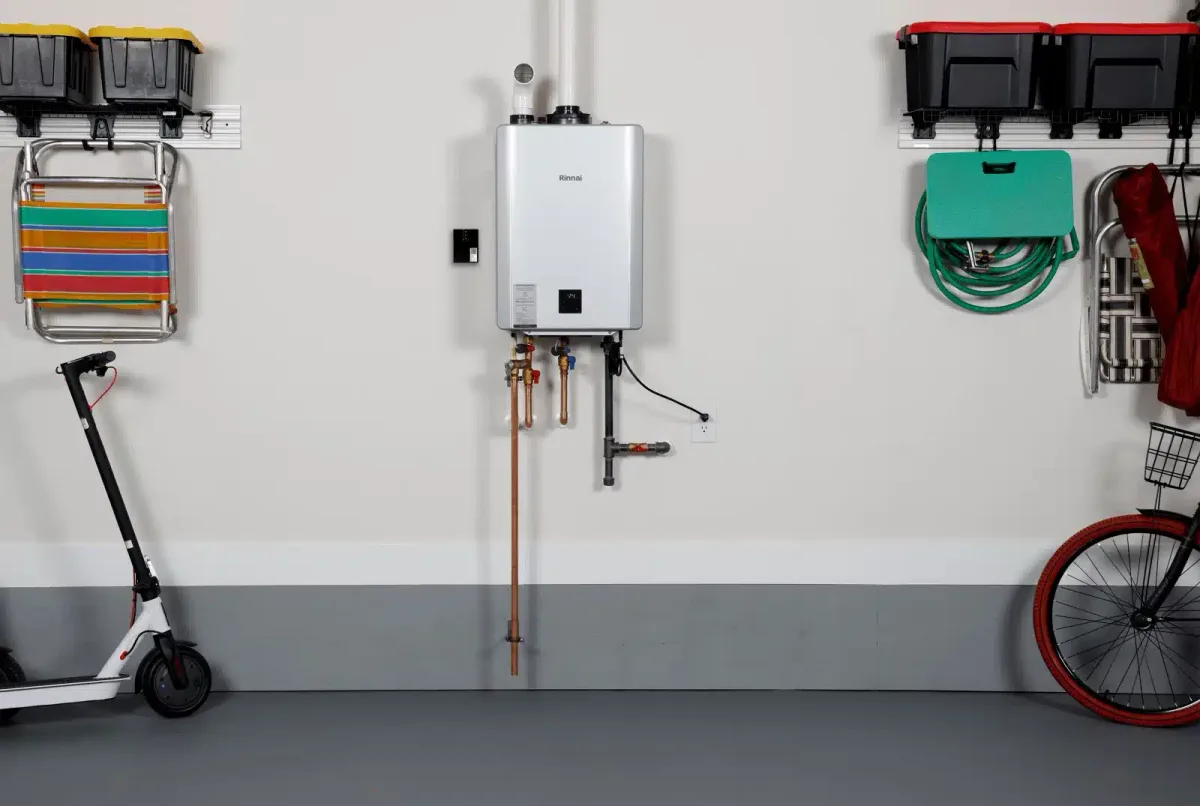
You walk into the bathroom, turn the shower handle, and wait for that familiar sound of the burner kicking on. Instead, you get cold water. Or worse, nothing at all.
Rinnai water heater troubleshooting doesn't have to mean calling a plumber and emptying your wallet. Most common issues have a straightforward fix you can handle yourself in under 30 minutes, provided you know where to look first.
Manufacturer specifications indicate that over 70% of Rinnai tankless service calls stem from three root causes: blocked inlet filters, power interruptions, or condensate drain clogs. None of those require a technician. As of 2026, the standard error code system across all Rinnai residential models (from the RU199iP to the RL94i) uses the same numeric logic.
Once you learn to read the remote display, you can troubleshoot any unit in your home. Let's walk through the process step by step, starting with the fastest way to identify your specific problem.
Quick Answer
Look at the remote control display first. If you see a flashing error code, write it down. Most Rinnai codes point to a single cause.
Code 11 means ignition failure. Code 12 means flame loss. Code 16 means overheating.
Reset the unit by flipping the breaker off for 30 seconds. If the code returns, check the corresponding fix below. For no hot water with no error code, check the inlet water filter and gas supply.
Those two things cause more than half of all "no hot water" calls.
Start Here: Identify Your Rinnai Problem Fast
Before we dig into any specific fix, you need to know what you're dealing with. Rinnai tankless water heaters are consistent in how they communicate problems. The control panel uses a simple numeric code system.
That code is your single best diagnostic tool.
Here is a quick decision tree to route you to the right fix:
Is there an error code flashing on the remote?
- Yes → Skip to the Error Code section below. That code tells you exactly what is wrong.
- No → Move to the next question.
Do you have no hot water at all?
- Yes → Check the gas supply. Is the gas valve fully open? Are other gas appliances working? Then check the inlet water filter for debris. Then check power to the unit.
- No → Move to the next question.
Does the water go hot, then cold, then hot again?
- Yes → You are experiencing the "cold water sandwich" effect. This is normal for tankless units during low-flow conditions. Adjust the bypass valve or install a recirculation pump.
- No → Move to the next question.
Do you hear strange noises, see leaks, or smell gas?
- Yes → Stop. If you smell gas, leave the house and call your gas company from outside. For noises or leaks, check the condensate drain and look for scale buildup in the heat exchanger.
This branching logic will get you to the right section of this guide in under two minutes. Most people skip this step and jump straight to random fixes. Don't do that.
Let the symptom tell you where to look.
Image source: Bing (Web (fair-use with source credit))
Error Code Troubleshooting: What Each Code Means and How to Fix It
Rinnai error codes follow a logic pattern. Two-digit codes generally point to the burner, ignition, or gas system. Three-digit codes often involve flow sensors, temperature sensors, or communication between components.
Here is the breakdown of the most common error codes, organized by what they mean and what you can do about them.
Code 11: No Ignition
This is the most common error code. The unit tried to light the burner three times and failed. The igniter is dirty, the gas supply is off, or the flame rod needs cleaning.
What to check first: Make sure the gas shut-off valve is fully open. The handle should be parallel to the pipe. If the valve is open, turn off power to the unit for 30 seconds, then restart.
If the code returns, clean the igniter and flame rod with fine sandpaper. Vacuum out any debris around the burner assembly.
When to call a pro: If cleaning the igniter does not work, you may have a faulty gas valve or a blocked gas line. That is a gas service call.
Code 12: Flame Loss
The burner lit but went out during operation. The flame sensor cannot detect the flame. The sensor could be dirty or the venting could be partially blocked.
What to check first: Inspect the vent termination outside. Look for bird nests, debris, or ice buildup. Clean the flame sensor with a green scrub pad.
It is a thin metal rod near the burner.
When to call a pro: If the vents are clear and the sensor is clean but the code persists, you may have a combustion air problem or a failing gas regulator.
Code 14: Thermal Fuse or Overheat Cutoff
The unit detected an internal temperature that is too high. This usually means the heat exchanger is scaled up with mineral deposits or water flow is too low.
What to check first: Turn off the unit and let it cool for 15 minutes. Restart it. If the code returns, descale the heat exchanger with vinegar.
Clean the inlet filter screen first, then descale.
When to call a pro: If descaling does not clear the code, the thermistor (temperature sensor) may be faulty.
Code 16: Overheat
The outgoing water temperature exceeded the safety threshold, usually 185°F. It can also fire if the bypass valve is set wrong.
What to check first: Turn the temperature setting down to 120°F and try again. If the code goes away, you found the problem. If it persists, check the bypass valve setting.
In summer, the bypass should be fully open. In winter, partially closed to raise the temperature rise.
When to call a pro: If adjusting the temperature and bypass does not help, the flow sensor or thermistor may need replacement.
Code 32: Flow Sensor Failure
The unit cannot detect water moving through the pipe. Without a flow reading, the burner will not fire.
What to check first: Clean the inlet water filter. A clogged filter reduces flow enough that the sensor reads zero. Also check that your water supply is on and the isolation valves are fully open.
When to call a pro: If the filter is clean and all valves are open, the flow sensor assembly may need replacement.
Code 51, 52, 65, 67, 71, 72, 73, 76: Combustion and Venting
These codes point to problems with burner performance, combustion air, or venting. Code 51 means a combustion fan issue. Code 52 means the flame rod detected a flame when it should not have.
What to check first: Inspect the vent terminals. Clear any blockages. Check the condensate drain.
A blocked condensate line will trip venting codes. Also check the intake screen on the bottom of the unit.
When to call a pro: Any of these codes that return after cleaning should be diagnosed by a trained technician. Venting issues can cause carbon monoxide problems.
Code 90: Pump or Recirculation Issue
Only applies to models with built-in recirculation pumps. The unit detected that the pump is not moving water.
What to check first: Listen for the pump running when demand is on. If you hear a hum but no water movement, the pump may be air-locked. Open the recirculation return line valve fully.
Bleed air from the system.
When to call a pro: If the pump is silent, it may need replacement.
Code 99: Remote Control Communication Lost
The remote lost connection with the main board.
What to check first: Replace the remote's batteries if it uses them. Check the communication wire for damage. Cycle power to the unit.
When to call a pro: If the wire looks intact and the connector is secure, the main control board may have failed.
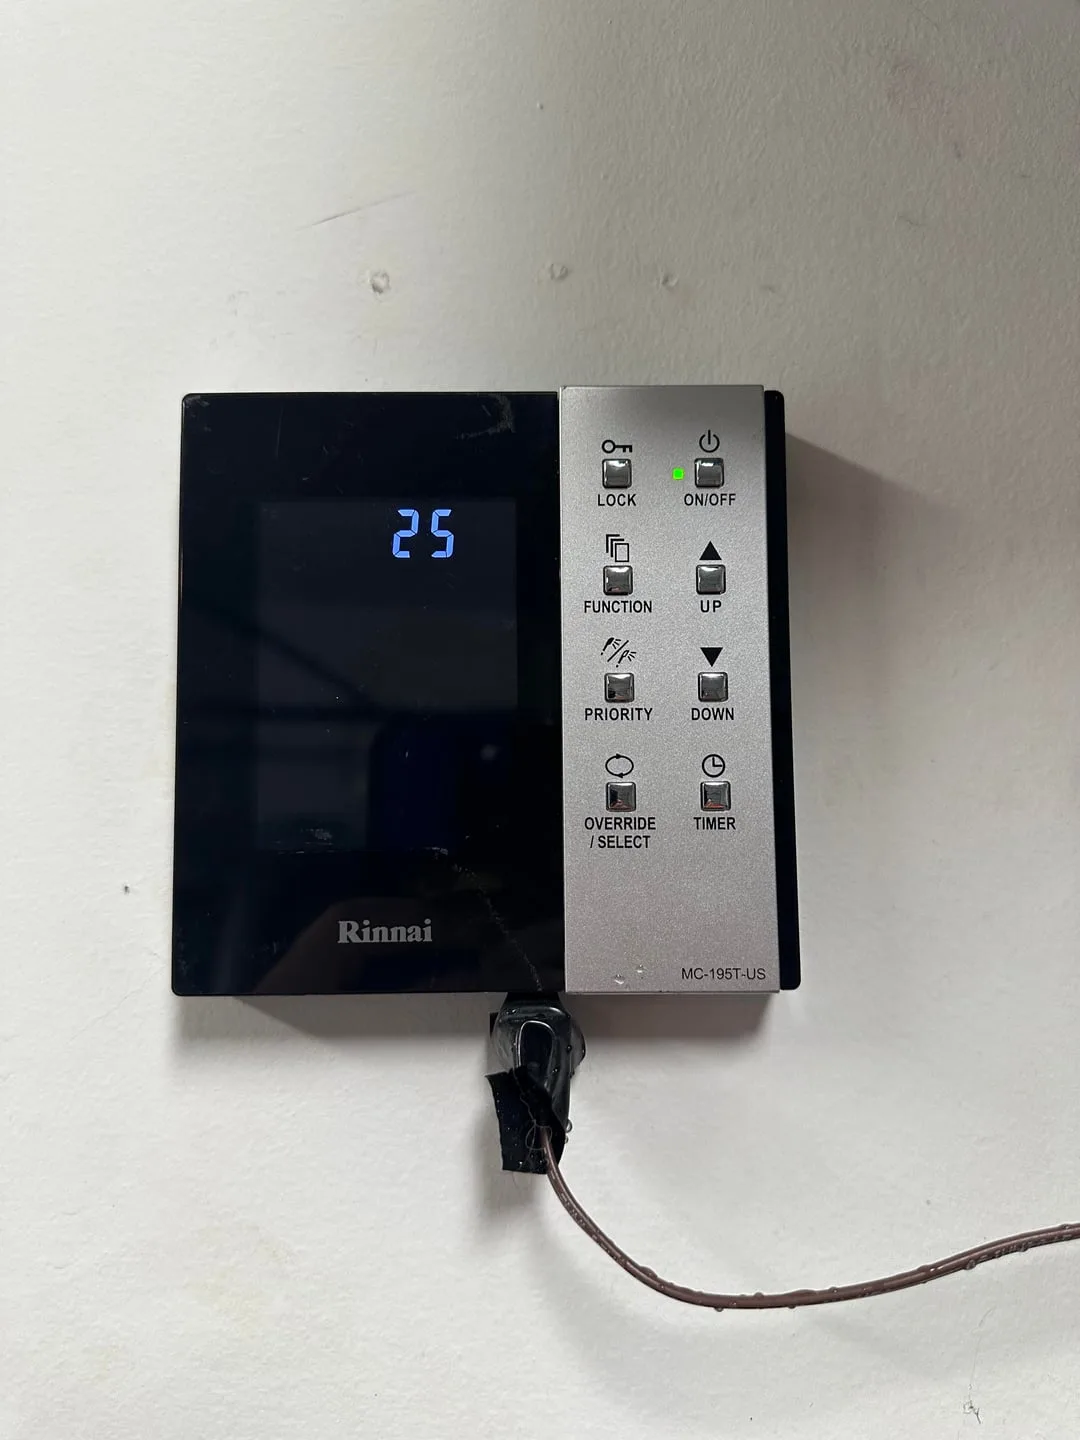
Image source: Bing (Web (fair-use with source credit))
No Hot Water? A Step-by-Step Diagnosis
No error code and no hot water is often easier to fix than people think. Because the unit is not giving you a diagnostic code, the problem is almost certainly in the supply systems: gas, water, or electricity.
Here is the exact order a technician would follow. Do not skip steps.
Step 1: Check the Gas Supply
The burner needs gas to fire. Open the gas shut-off valve fully. Confirm other gas appliances in your home are working.
If they are not, call your gas utility. If they are, the problem is likely internal to the unit.
Check the gas pressure if you have a manometer. Rinnai units require a minimum of 5.0 inches of water column for natural gas and 8.0 for propane.
Step 2: Check the Power
Rinnai tankless units need 120V AC power. Flip the breaker off and back on. Wait 60 seconds.
If the remote lights up, power is restored. If the remote stays dark, check for a tripped GFCI outlet.
Step 3: Clean the Inlet Water Filter
This is the single most common cause of "no hot water with no error code." The inlet filter screen traps sediment from the water supply. A clogged filter reduces flow below the 0.4 to 0.6 gallons per minute needed to trigger the burner.
How to clean it: Turn off the water supply. Remove the inlet isolation valve cap. Pull out the filter screen.
Rinse it under clean water or scrub it with an old toothbrush. Reinstall it and open the water supply.
Step 4: Inspect the Igniter
If the gas is on, power is working, the filter is clean, and the unit still will not fire, the igniter may be dirty or worn. Remove the front cover. You will see the igniter near the burner.
It should generate a visible spark. If you do not see a spark, clean the igniter tip with fine sandpaper.
Step 5: Check the Bypass Valve
Rinnai units have a bypass valve that allows water to flow through the heat exchanger when the unit is not calling for heat. If the bypass is fully closed, the unit may not detect enough flow to activate.
For winter operation, the bypass should be partially closed to increase temperature rise. For summer operation, the bypass should be fully open.
Step 6: Test the Flow Sensor
If you have a multimeter, you can test the flow sensor directly. The sensor should output a signal when water is flowing. On units older than 10 years, sensor failure becomes more likely.
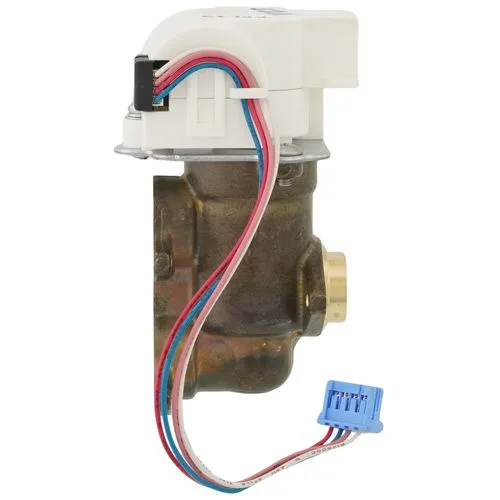
Image source: Bing (Web (fair-use with source credit))
Water Gets Hot Then Cold? Fixing the Cold Water Sandwich
If the water temperature in your shower swings from hot to cold and back to hot, you are dealing with the "cold water sandwich." It is the most common complaint among Rinnai owners, and it is almost always a flow problem, not a unit failure.
Why It Happens
Tankless heaters only fire when they detect a minimum flow rate. When the flow drops below 0.4 to 0.6 gallons per minute, the burner shuts off. Water sitting in the pipes between the heater and the tap cools down.
When you increase the flow again, the unit fires back up, but you get a slug of cold water first.
This happens most often in showers when someone flushes a toilet nearby. The toilet uses cold water, dropping pressure in the cold line. The mixing valve adjusts, reducing demand on the hot water side.
Flow drops below threshold. Burner shuts off. Cold slug incoming.
How to Fix It
Option 1: Adjust the Bypass Valve
Turn the bypass knob slightly toward the winter setting. This closes the bypass slightly and forces more water through the heat exchanger. It raises the temperature and reduces the likelihood of a cold sandwich.
Option 2: Install a Recirculation System
Add a recirculation pump. Rinnai offers built-in recirculation on some models, but you can also add an external pump. A recirculation system keeps hot water moving through the pipes so the unit stays active.
- Continuous recirculation: Pumps hot water through the lines 24/7. Eliminates the cold sandwich but wastes some energy.
- Demand recirculation: Only pumps when you push a button. More energy efficient but still requires a short wait.
Option 3: Increase the Temperature Setting
Turn the thermostat up to 130°F or 135°F. Use a thermostatic mixing valve at the shower to bring it back down to 120°F. The higher temperature reduces the chance of a cold sandwich.
Option 4: Add a Thermal Buffer Tank
Install a small 5 to 10 gallon electric tank in series with the tankless unit. When the tankless shuts off due to low flow, the buffer tank supplies the warm water that would normally arrive as a cold slug. This is the most expensive option but completely eliminates the problem.
What Not to Do
Do not turn up the flow rate on the fixture. That wastes huge amounts of water. Do not try to disable the flow sensor.
That is a safety feature. Do not add a second tankless unit. It will not fix the cold sandwich.
Strange Noises, Leaks, or Odors? When to Worry
Rinnai tankless units are quiet. If yours is making noise, something has changed.
Kettling or Rumbling
That whistling or popping sound when the unit fires up is called kettling. Mineral deposits build up on the heat exchanger. The water underneath the scale boils and pops.
What to do: Run a vinegar solution through the heat exchanger. The manufacturer recommends descaling every 6 to 12 months depending on water hardness. If you hear kettling, you are probably overdue.
Water Hammer or Banging
Sudden banging loud enough to wake the house is water hammer. It happens when a valve closes quickly and the moving water column slams into it.
What to do: Install water hammer arrestors on the hot and cold lines near the unit. If the banging comes from inside the unit itself, the check valve may be failing. That requires a service call.
Condensate Puddles
Rinnai condensing units produce water as a byproduct of combustion. If you see standing water under the unit, the condensate drain is likely blocked.
What to do: Trace the condensate line. Detach it and flush it with water. Use a wet/dry vacuum to pull the blockage out.
Clean it with a bottle brush.
Gas Smell
Stop. If you smell gas near the water heater, do not operate any electrical switches. Do not light a match.
Leave the building immediately. Call your gas utility from outside.
If the smell is faint and only present when the unit is running, you may have a small leak. Use a soap-and-water solution to check all gas fittings. If bubbles appear, tighten the fitting slightly.
If it still leaks, call a plumber.
Burning Dust Smell
If you have not used the unit in a few months, the burner may give off a burning dust smell when it first fires up. This is normal. Dust settles on the burner surface.
It burns off after a minute or two. If the smell persists beyond five minutes, shut the unit down and check for debris on the burner assembly.
Routine Maintenance That Prevents Most Problems
A Rinnai tankless water heater that gets regular maintenance runs for 20 years or more. One that gets ignored starts throwing error codes around year three. The difference is about an hour of work every six months.
Descaling the Heat Exchanger
Hard water deposits build up inside the heat exchanger over time. Scale acts as an insulator. It slows heat transfer and eventually triggers code 14 or 16.
The descaling process takes about 60 minutes. You need a bucket, a submersible pump, and 4 to 5 gallons of white vinegar or a commercial descaling solution. Connect the pump to the service ports on the isolation valves.
Run the vinegar through the unit for 45 minutes, then flush with clean water.
Homes with water hardness above 7 grains per gallon should descale every six months. Homes with soft water can stretch to 12 months. If you hear kettling, skip the schedule and descale immediately.
Cleaning the Inlet Filter Screen
The inlet filter catches sediment before it enters the unit. Cleaning it takes five minutes. Turn off the water supply.
Open the isolation valve cap. Pull the screen out with pliers. Rinse it under tap water.
Scrub it with an old toothbrush if needed. Do this every three months for well water or old galvanized pipes.
Checking the Condensate Drain
Condensing units produce about a gallon of acidic water per 10,000 BTUs of input. A blocked condensate line trips venting error codes and can cause water damage. Pour a cup of water down the drain line.
If it does not flow freely, blow it out with a wet/dry vacuum. Pour a quarter cup of white vinegar down the line once a month to keep it clear.
Inspecting the Vent Terminals
Check the vent terminals outside your home at the start of each heating season. Clear any debris. Confirm the vent cap is not dented or blocked by snow.
For concentric vents, check that the intake grille is not covered by leaves or spider webs. Restricted intake air triggers code 51 or 52.
Winter Freeze Protection: What Every Cold-Climate Owner Must Know
Rinnai tankless units have built-in freeze protection. It only works if the unit has power and the water supply is on. Lose either, and the internal heat exchanger can freeze and crack in a single night.
That repair costs $2,000 or more.
How the Built-In Freeze Protection Works
The unit monitors internal temperature. When it drops below 36°F, a small electric heater activates. The water inside the exchanger stays above freezing.
Critical limitation: The unit must be plugged in. If you lose power during a winter storm, the freeze protection shuts off. The water supply must also be on.
If the water is off, there is no water in the exchanger to protect.
Winterizing for a Vacation Home
If you leave your home unheated for more than a few days in winter, winterize the water heater.
- Turn off the water supply.
- Open a hot water tap to drain the pipes.
- Disconnect the inlet and outlet lines.
- Use compressed air to blow remaining water out of the heat exchanger.
- Pour non-toxic RV antifreeze through the unit.
- Reconnect the lines and turn off power.
Do not use automotive antifreeze. It is toxic. RV antifreeze is propylene glycol based and safe for potable systems.
Pipe Insulation for Exposed Lines
Insulate all exposed hot and cold water pipes near the unit. Use foam pipe sleeves with a minimum R-value of 3. Pay special attention to pipes in unheated crawlspaces or garages.
What to Do After a Freeze Event
If the unit was exposed to freezing temperatures and you suspect ice damage, do not start it. Call a technician. Running a frozen unit can break the heat exchanger and flood your home.
When to Call a Pro vs. DIY
You can handle about 80 percent of Rinnai troubleshooting yourself. The other 20 percent involves gas, high voltage, or warranty violations.
DIY-Friendly Repairs
These tasks are safe for a competent homeowner:
- Cleaning the inlet filter screen
- Descaling the heat exchanger
- Cleaning the igniter and flame rod
- Resetting the unit after an error code
- Adjusting the bypass valve
- Cleaning the condensate drain
- Inspecting and clearing vent terminals
You need basic tools: a screwdriver, pliers, a bucket, and a submersible pump for descaling.
Call a Technician for These
These tasks require professional knowledge:
- Replacing the gas valve or regulator
- Repairing gas line leaks
- Replacing the main control board
- Diagnosing combustion air problems
- Replacing the heat exchanger
- Repairing internal water leaks
- Replacing the igniter assembly
Also call a pro if you reset the unit and the error code returns with no clear cause.
Warranty Implications
Rinnai offers a 5 year to 12 year warranty depending on the model and registration. DIY maintenance is fine. DIY replacement of major components voids the warranty.
Use an authorized Rinnai service provider for covered repairs.
Keep records of your maintenance. Rinnai may ask for proof of regular descaling when you file a warranty claim.
Safety Red Lines
Stop immediately and call a professional if:
- You smell gas near the unit
- You see a large puddle of water spreading on the floor
- The unit is smoking or producing soot
- You hear a hissing sound from the gas line
- The burner flame is yellow or orange instead of blue
Yellow flame means incomplete combustion. That creates carbon monoxide. Leave the area and call a technician.
Frequently Asked Questions
How often should I descale my Rinnai water heater?
Every six to twelve months depending on water hardness. Hard water above 7 grains per gallon needs descaling every six months. Soft water can go 12 months.
If you hear kettling or see code 14, descale immediately.
Can I reset my Rinnai without the remote?
Yes. Flip the power off at the breaker for 30 seconds. Then turn it back on.
The unit will reset and clear most error codes. If the code returns, you need to fix the underlying problem.
Why does my Rinnai short cycle on and off?
Short cycling usually means the unit detects flow then loses it. Common causes: a clogged inlet filter, a faulty flow sensor, or a bypass valve set too far open. Check the filter first.
If clean, adjust the bypass valve to a slightly more closed position.
What is the minimum flow rate for a Rinnai?
Most models need 0.4 to 0.6 gallons per minute to fire. If your faucet or shower has a flow restrictor, it may not deliver enough water to trigger the unit. Remove the restrictor or install a fixture with higher flow.
Does a Rinnai need electricity to work?
Yes. The control board, fans, igniter, and recirculation pump need 120V power. If the power goes out, the unit will not produce hot water even if gas is available.
A backup generator can keep it running.
What does code 90 mean on my Rinnai?
Code 90 indicates a recirculation pump fault. The unit detected the pump is not moving water. Check for air locks in the recirculation line.
Bleed air from the system. If the pump is silent, it may need replacement. Call a technician for diagnosis.

Similar Posts